iOS访问相册以及拍照保存至相册的实现


iOS访问相册及拍照保存的实现实例


实现效果:
1、点击访问相册按钮,可以访问系统相册,选择以后返回在imageView中显示
2、点击拍照,访问摄像头,实现以后保存在相册中,返回在imageView中显示

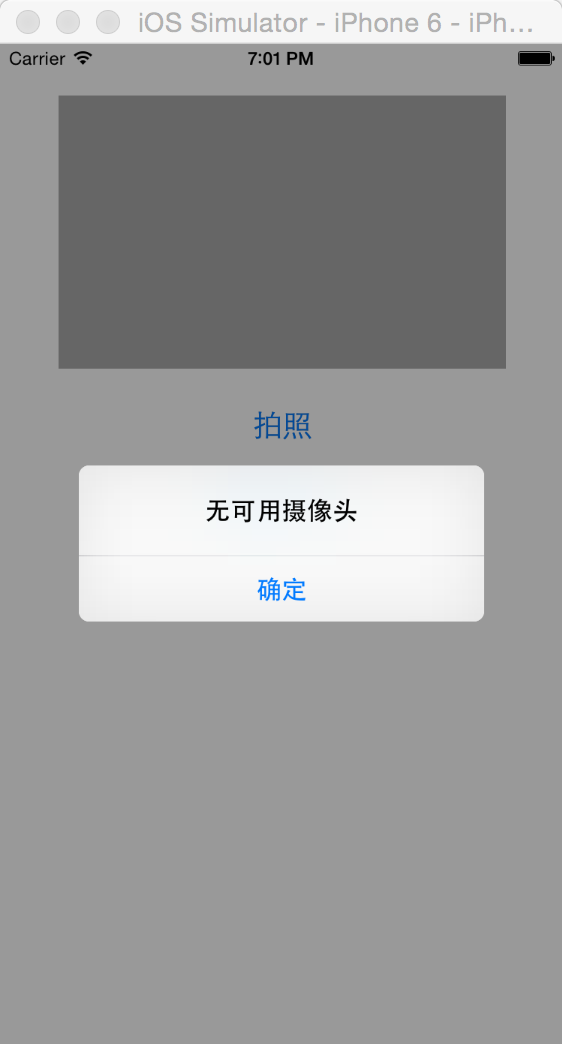
注意:拍照功能需要真机调试,模拟器无法实现
模拟器会有如下效果~弹出警告框
警告


工程下载:github工程下载链接


下面是程序:注意此例中两个button和UIimageView在storyboard中添加;

ViewController.h

@interface ViewController : UIViewController<UINavigationControllerDelegate,UIImagePickerControllerDelegate>

@property (weak, nonatomic) IBOutlet UIImageView *imageShow;

@end

ViewController.m

#pragma mark - 拍照并保存
- (IBAction)takePhotoAction:(id)sender {
    BOOL isCamera = [UIImagePickerController isCameraDeviceAvailable:UIImagePickerControllerCameraDeviceRear];
    if (!isCamera) { //若不可用,弹出警告框
        UIAlertView *alert = [[UIAlertView alloc] initWithTitle:@"无可用摄像头" message:nil delegate:self cancelButtonTitle:@"确定" otherButtonTitles:nil, nil];
        [alert show];
        return;
    }
    UIImagePickerController *imagePicker = [[UIImagePickerController alloc] init];
    imagePicker.sourceType = UIImagePickerControllerSourceTypeCamera;
    /**
     *      UIImagePickerControllerSourceTypePhotoLibrary  ->所有资源文件夹
            UIImagePickerControllerSourceTypeCamera        ->摄像头
            UIImagePickerControllerSourceTypeSavedPhotosAlbum ->内置相册
     */
    imagePicker.delegate = self;    //设置代理,遵循UINavigationControllerDelegate,UIImagePickerControllerDelegate协议
    [self presentViewController:imagePicker animated:YES completion:nil];
}
#pragma mark - 访问相册
- (IBAction)browseAlbum:(id)sender {
    UIImagePickerController *imagePicker = [[UIImagePickerController alloc] init];
    imagePicker.sourceType = UIImagePickerControllerSourceTypeSavedPhotosAlbum;
    imagePicker.delegate = self;
    [self presentViewController:imagePicker animated:YES completion:nil];
}
#pragma mark - 协议方法的实现
//协议方法,选择完毕以后,呈现在imageShow里面
- (void)imagePickerController:(UIImagePickerController *)picker didFinishPickingMediaWithInfo:(NSDictionary *)info {
    NSLog(@"%@",info);  //UIImagePickerControllerMediaType,UIImagePickerControllerOriginalImage,UIImagePickerControllerReferenceURL
    NSString *mediaType = info[@"UIImagePickerControllerMediaType"];
    if ([mediaType isEqualToString:@"public.image"]) {  //判断是否为图片

        UIImage *image = [info objectForKey:UIImagePickerControllerOriginalImage];
        self.imageShow.image = image;

        //通过判断picker的sourceType,如果是拍照则保存到相册去
        if (picker.sourceType == UIImagePickerControllerSourceTypeCamera) {
            UIImageWriteToSavedPhotosAlbum(image, self, @selector(image:didFinishSavingWithError:contextInfo:), nil);
        }
    }
//  else  当然可能是视频,这里不作讨论~方法是类似的~
    [picker dismissViewControllerAnimated:YES completion:nil];
}

//此方法就在UIImageWriteToSavedPhotosAlbum的上方
- (void)image:(UIImage *)image didFinishSavingWithError:(NSError *)error contextInfo:(void *)contextInfo {
    NSLog(@"已保存");
}
  • 0
    点赞
  • 0
    收藏
    觉得还不错? 一键收藏
  • 0
    评论
好的,以下是使用 AVFoundation 框架开发一个能拍照保存照片到相册iOS app demo 的步骤: 1. 创建一个新的 Xcode 项目,选择 Single View App 模板,并勾选 "Use SwiftUI" 选项。 2. 在 ContentView.swift 文件中,创建一个 preview 块,并添加一个 Button 视图。 3. 在 Button 的 action 中,调用一个名为 takePhoto 的函数。 4. 在 ContentView.swift 文件中,创建一个名为 CameraView 的自定义视图,并在其中导入 AVFoundation 框架。 5. 在 CameraView 中添加 AVCaptureSession、AVCapturePhotoOutput 和 AVCaptureVideoPreviewLayer 属性。 6. 在 CameraView 的 init 方法中,配置 AVCaptureSession,并将 AVCaptureVideoPreviewLayer 添加到视图上。 7. 实现 takePhoto 函数,在其中调用 AVCapturePhotoOutput 的 capturePhoto 方法,并在 completionHandler 中将照片保存相册中。 8. 在 ContentView 中,将 CameraView 添加为一个子视图,并设置其大小和位置。 9. 运行项目,在模拟器或真机上测试拍照保存照片的功能。 以下是示例代码: ```swift import SwiftUI import AVFoundation import Photos struct ContentView: View { var body: some View { VStack { CameraView() .frame(width: 300, height: 300) Button("Take Photo") { takePhoto() } } } func takePhoto() { // TODO: Call takePhoto function in CameraView } } struct CameraView: UIViewRepresentable { private let captureSession = AVCaptureSession() private let photoOutput = AVCapturePhotoOutput() private let videoPreviewLayer = AVCaptureVideoPreviewLayer() func makeUIView(context: Context) -> UIView { let view = UIView(frame: .zero) configureCaptureSession() videoPreviewLayer.frame = view.layer.bounds view.layer.addSublayer(videoPreviewLayer) captureSession.startRunning() return view } func updateUIView(_ uiView: UIView, context: Context) { videoPreviewLayer.frame = uiView.layer.bounds } func configureCaptureSession() { guard let device = AVCaptureDevice.default(for: .video), let input = try? AVCaptureDeviceInput(device: device) else { return } if captureSession.canAddInput(input) { captureSession.addInput(input) } if captureSession.canAddOutput(photoOutput) { captureSession.addOutput(photoOutput) } videoPreviewLayer.session = captureSession } func takePhoto() { let settings = AVCapturePhotoSettings() photoOutput.capturePhoto(with: settings, delegate: self) } } extension CameraView: AVCapturePhotoCaptureDelegate { func photoOutput(_ output: AVCapturePhotoOutput, didFinishProcessingPhoto photo: AVCapturePhoto, error: Error?) { guard let imageData = photo.fileDataRepresentation(), let image = UIImage(data: imageData) else { return } PHPhotoLibrary.shared().performChanges({ PHAssetChangeRequest.creationRequestForAsset(from: image) }) { (success, error) in if success { print("Photo saved to library") } else if let error = error { print("Error saving photo to library: \(error.localizedDescription)") } } } } ``` 注意:在运行项目之前,需要在 info.plist 文件中添加 "Privacy - Camera Usage Description" 和 "Privacy - Photo Library Additions Usage Description" 权限描述。
评论
添加红包

请填写红包祝福语或标题

红包个数最小为10个

红包金额最低5元

当前余额3.43前往充值 >
需支付:10.00
成就一亿技术人!
领取后你会自动成为博主和红包主的粉丝 规则
hope_wisdom
发出的红包
实付
使用余额支付
点击重新获取
扫码支付
钱包余额 0

抵扣说明:

1.余额是钱包充值的虚拟货币,按照1:1的比例进行支付金额的抵扣。
2.余额无法直接购买下载,可以购买VIP、付费专栏及课程。

余额充值