


一、概述
1. FragmentTabHost继承关系:
java.lang.Object
   ↳    android.view.View
       ↳    android.view.ViewGroup
           ↳    android.widget.FrameLayout
               ↳    android.widget.TabHost
                   ↳    android.support.v4.app.FragmentTabHost
可以看出是TabHost的一个子类;
2. FragmentTabHost实现效果:
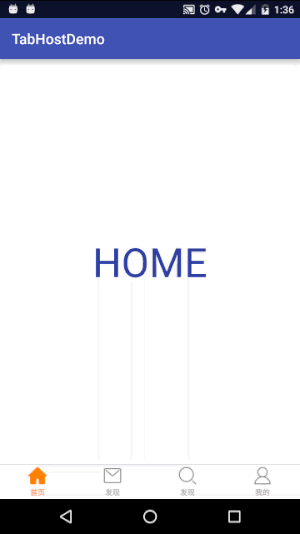
如图所示,简单实现微博主界面的效果,也是目前市面上大多数app首页效果;
二、基本用法
- 导入v4支持包(AndroidStudio在项目对应Module的build.gradle下配置):
dependencies {
    compile 'com.android.support:support-v4:23.4.0'
}- 在相应的布局xml文件中使用:
<android.support.v4.app.FragmentTabHost
        android:id="@android:id/tabhost"
        android:layout_width="match_parent"
        android:layout_height="match_parent">

        <TabWidget
            android:id="@android:id/tabs"
            android:layout_width="match_parent"
            android:layout_height="wrap_content"/>

        <FrameLayout
            android:id="@android:id/tabcontent"
            android:layout_width="match_parent"
            android:layout_height="match_parent"
            android:layout_marginBottom="@dimen/tab_height">

        </FrameLayout>

    </android.support.v4.app.FragmentTabHost>
注意点:
- 这里可以看出FragmentTabHost中需要两个元素:TabWidget和tabcontent;
- 并且FragmentTabHost的id必须设置为android:id/tabhost,TabWidget的id必须设置为:android:id/tabs,tabcontent的id必须设置为:android:id/tabcontent;
- 在代码中初始化FragmentTabHost:
这里我贴上我在Activity中初始化的代码,TabFragment中只有一个TextView通过传过去的参数设置内容:
private static final String[] TABS = {"HOME", "MESSAGE", "SEARCH", "PROFILE"};

@Override
protected void onCreate(Bundle savedInstanceState) {
      super.onCreate(savedInstanceState);
      setContentView(R.layout.activity_main);
      ButterKnife.bind(this);

      initView();
}

private void initView() {
      mTabHost.setup(this, getSupportFragmentManager(), android.R.id.tabcontent);
      mTabHost.getTabWidget().setVisibility(View.GONE);
      for (int i = 0; i < TABS.length; i++){
          Bundle args = new Bundle();
          args.putString(TabFragment.ARG_TEXT, TABS[i]);
       mTabHost.addTab(mTabHost.newTabSpec(TABS[i]).setIndicator(TABS[i]), TabFragment.class, args);
        }
    }
TabFragment代码如下:
public class TabFragment extends Fragment {

    public static final String ARG_TEXT = "arg_text";
    private String mText;

    private View mRootView;

    @BindView(R.id.text_show)
    TextView mTextView;

    @Nullable
    @Override
    public View onCreateView(LayoutInflater inflater, @Nullable ViewGroup container, @Nullable Bundle savedInstanceState) {
        if (mRootView == null){
            mRootView = inflater.inflate(R.layout.fragment_tab_home, null);
            initView(mRootView);
        }
        return mRootView;
    }

    private void initView(View rootView) {
        ButterKnife.bind(this, rootView);
        mText = getArguments().getString(ARG_TEXT);
        mTextView.setText(mText);
    }
}
注意点:
- 在FragmentTabHost inflate完成之后必须要调用mTabHost.setup(this, getSupportFragmentManager(), android.R.id.tabcontent);设置关联;
- 由于FragmentTabHost的tab在顶部,这里就隐藏掉其tab,然后在xml中自行定制自己的tab,放置在页面底部;
- 在对应位置添加对应的tab和Fragment:
mTabHost.addTab(mTabHost.newTabSpec(TABS[i]).setIndicator(TABS[i]), TabFragment.class, args);为每个tab添加点击事件:
这里很简单,只要根据你自己定义的底部tab设置点击监听即可:- 根据点击位置改变自己定义的底部tab的UI变更
- 根据点击位置可以关联FragmentTabHost,接口很简单,设置如下:
@OnClick(R.id.tab_home)
public void onTabHomeClicked(View view){
     chooseTab(0);
}

@OnClick(R.id.tab_message)
public void onTabMessageClicked(View view){
     chooseTab(1);
}

@OnClick(R.id.tab_search)
public void onTabSearchClicked(View view){
     chooseTab(2);
}

@OnClick(R.id.tab_profile)
public void onTabProfileClicked(View view){
     chooseTab(3);
}

 private void chooseTab(int position){
        int oldTab = mTabHost.getCurrentTab();
        if (oldTab == position){
            return;
        }

        mTabHost.setCurrentTab(position);
        int selectColor = getResources().getColor(R.color.font_tab_bar_selected);
        int unSelectColor = getResources().getColor(R.color.font_tab_bar_unselected);

        mTabHomeImage.setImageResource(position == 0 ? R.drawable.tabbar_home_highlighted : R.drawable.tabbar_home);
        mTabHomeText.setTextColor(position == 0 ? selectColor : unSelectColor);
        mTabMessageImage.setImageResource(position == 1 ? R.drawable.tabbar_message_center_highlighted : R.drawable.tabbar_message_center);
        mTabMessageText.setTextColor(position == 1 ? selectColor : unSelectColor);
        mTabSearchImage.setImageResource(position == 2 ? R.drawable.tabbar_search_highlighted : R.drawable.tabbar_search);
        mTabSearchText.setTextColor(position == 2 ? selectColor : unSelectColor);
        mTabProfileImage.setImageResource(position == 3 ? R.drawable.tabbar_profile_highlighted : R.drawable.tabbar_profile);
        mTabProfileText.setTextColor(position == 3 ? selectColor : unSelectColor);
 }
三、总结
FragmentTabHost可以轻松实现tab与Fragment之间的关联,如果tab在上方可以直接使用TabWidget实现,如果tab在下方可以隐藏TabWidget,通过自定义的tab布局,然后为每个tab添加点击监听,用FragmentTabHost.setCurrentTab(int position)即可实现跳转,每个tab点击时候的ui变更可以自己配置。
下一篇会写出微博中间按钮弹出popupwindow的方法;


 3809
3809

 被折叠的 条评论
为什么被折叠?
被折叠的 条评论
为什么被折叠?
 到【灌水乐园】发言


