


目录
一、Gateway 网关
是什么?
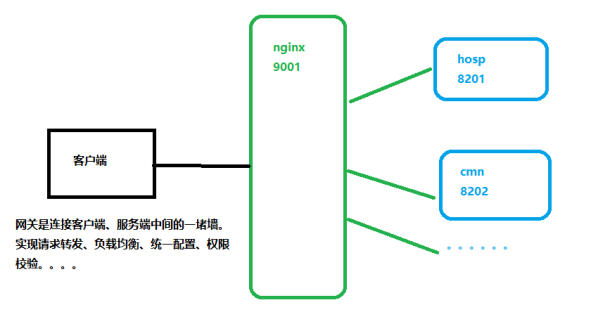
为什么不用Nginx?
Nginx 反向代理集群需要配置,容易出错
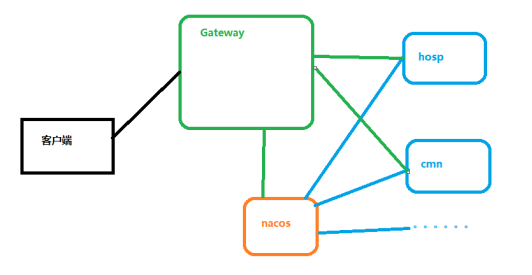
Gateway 作为一个应用,也需要向nacos进行注册,可以动态获取服务地址。通过服务名进行请求转发。相对更灵活
相关概念
(1)路由。路由是网关最基础的部分,路由信息有一个ID、一个目的URL、一组断言和一组Filter组成。如果断言路由为真,则说明请求的URL和配置匹配
(2)断言。Java8中的断言函数。Spring Cloud Gateway中的断言函数输入类型是Spring5.0框架中的ServerWebExchange。Spring Cloud Gateway中的断言函数允许开发者去定义匹配来自于http request中的任何信息,比如请求头和参数等。
(3)过滤器。(过滤器群)一个标准的Spring webFilter。Spring cloud gateway中的filter分为两种类型的Filter,分别是Gateway Filter和Global Filter。过滤器Filter将会对请求和响应进行修改处理
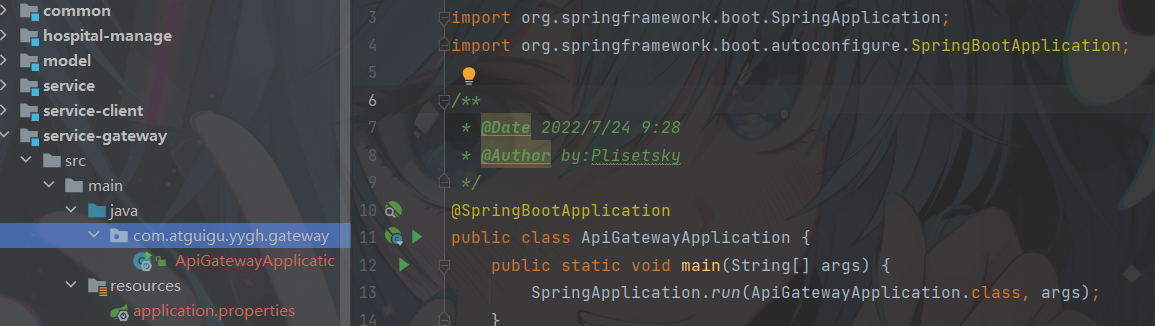
搭建
1. 创建新模块 service-gateway,引入依赖
    <dependencies>
        <dependency>
            <groupId>com.atguigu</groupId>
            <artifactId>common_utils</artifactId>
            <version>0.0.1-SNAPSHOT</version>
        </dependency>
        <dependency>
            <groupId>org.springframework.cloud</groupId>
            <artifactId>spring-cloud-starter-gateway</artifactId>
        </dependency>

        <!-- 服务注册 -->
        <dependency>
            <groupId>com.alibaba.cloud</groupId>
            <artifactId>spring-cloud-starter-alibaba-nacos-discovery</artifactId>
        </dependency>
    </dependencies>
2. 编写application.properties配置文件
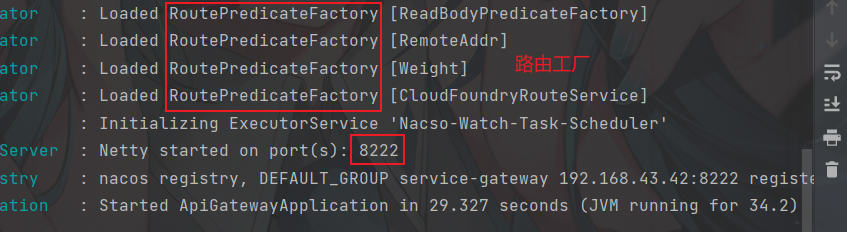
# 服务端口
server.port=8222
# 服务名
spring.application.name=service-gateway

# nacos服务地址
spring.cloud.nacos.discovery.server-addr=127.0.0.1:8848

#使用服务发现路由
spring.cloud.gateway.discovery.locator.enabled=true

#设置路由id
spring.cloud.gateway.routes[0].id=service-hosp
#设置路由的uri  lb:负载均衡
spring.cloud.gateway.routes[0].uri=lb://service-hosp
#设置路由断言,代理servicerId为auth-service的/auth/路径
spring.cloud.gateway.routes[0].predicates= Path=/*/hosp/**

#设置路由id
spring.cloud.gateway.routes[1].id=service-cmn
#设置路由的uri
spring.cloud.gateway.routes[1].uri=lb://service-cmn
#设置路由断言,代理servicerId为auth-service的/auth/路径
spring.cloud.gateway.routes[1].predicates= Path=/*/cmn/**
3. 创建主目录 启动类
4. 测试
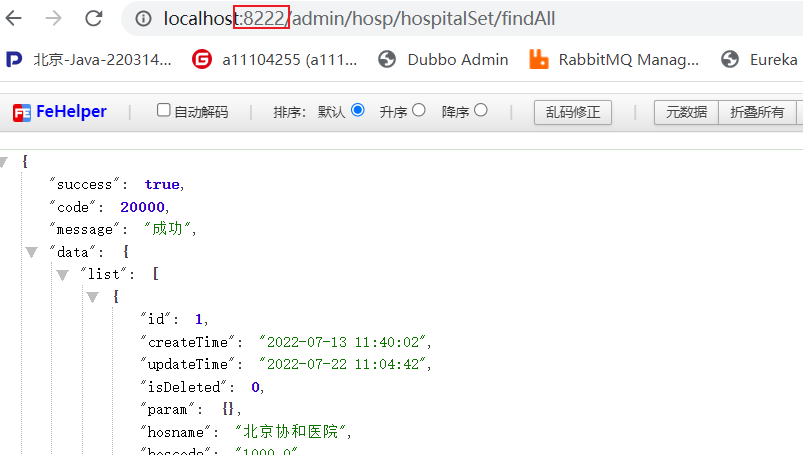
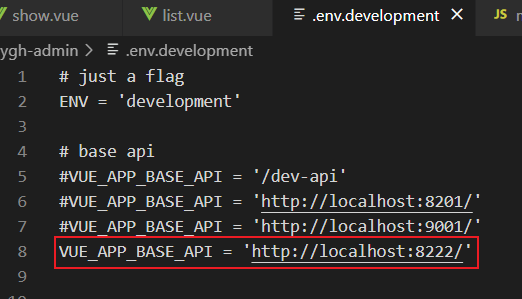
5. 改造前端工程
网关解决跨域问题
1. 添加配置类
@Configuration
public class CorsConfig {
    @Bean
    public CorsWebFilter corsFilter() {
        CorsConfiguration config = new CorsConfiguration();
        config.addAllowedMethod("*");
        config.addAllowedOrigin("*");
        config.addAllowedHeader("*");

        UrlBasedCorsConfigurationSource source = new UrlBasedCorsConfigurationSource(new PathPatternParser());
        source.registerCorsConfiguration("/**", config);

        return new CorsWebFilter(source);
    }
}
2. 测试 报错
原因:@CrossOrigin 注解没有去掉
解决:注释@CrossOrigin 注解
更多功能,详见课件
二、医院排班管理
一、需求分析
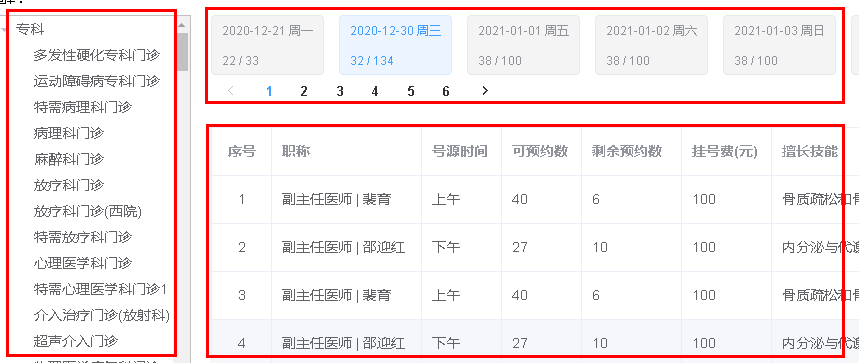
排班分成三部分显示:
(1)科室信息(大科室与小科室树形展示)
(2)根据医院、科室按排班日期统计号源信息、按日期分页、根据日期判断周几
(3)根据医院、科室、排班日期查询排班列表数据
2、实现方案
(1)使用el-tree组件展示,按要求封装大科室、小科室数据,需要将医院上传的科室数据封装成两层父子级数据;
(2)聚合所有排班数据,按日期分页展示,并统计号源数据展示;
(3)根据医院、科室、排班日期查询排班列表数据
虽然是一个页面展示所有内容,但是页面相对复杂,我们分步骤实现
第一,先实现左侧科室树形展示;
第二,其次排班日期分页展示
第三,最后根据排班日期获取排班详情数据
二、科室列表(接口)
1、后端接口实现
1. 需求分析
*参数:hoscode (mongodb 主键没有关联)
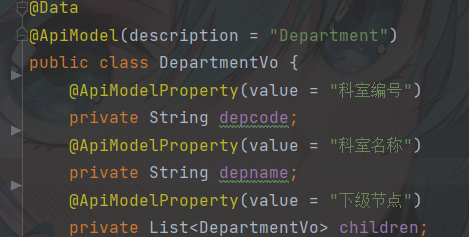
*返回值:List<DepartmentVo>
假设Mysql,如何实现?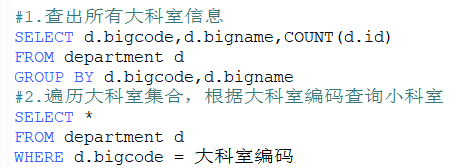
2. 创建 DepartmentController
@Api(description = "科室接口")
@RestController
@RequestMapping("/admin/hosp/department")
public class DepartmentController {
    @Autowired
    private DepartmentService departmentService;

    //根据医院编号,查询医院所有科室列表
    @ApiOperation(value = "查询医院所有科室列表")
    @GetMapping("getDeptList/{hoscode}")
    public R getDeptList(@PathVariable String hoscode) {
        List<DepartmentVo> list = departmentService.findDeptTree(hoscode);
        return R.ok().data("list",list);
    }

}
3. 实现 service方法
分组使用java代码实现,分组聚合查询比较复杂,效率较低
但如果数量太大(10w↑),有可能撑爆内存
    //根据医院编号,查询医院所有科室列表
    @Override
    public List<DepartmentVo> findDeptTree(String hoscode) {
        //1.创建返回集合对象
        List<DepartmentVo> departmentVoList = new ArrayList<>();
        //2.根据hoscode 查询所有科室信息
        List<Department> departmentList = departmentRepository.getByHoscode(hoscode);

        //3.实现 根据bigcode(大科室编码)进行分组,
        //  List<Department> => map k:bigcode v:List<Department>(小科室信息)
        Map<String,List<Department>> depListMap =
                departmentList.stream().collect(
                        Collectors.groupingBy(Department::getBigcode));

        //4.封装大科室信息
        for (Map.Entry<String, List<Department>> entry : depListMap.entrySet()) {
            //4.1创建大科室对象
            DepartmentVo bigDepVo = new DepartmentVo();
            bigDepVo.setDepcode(entry.getKey());
            bigDepVo.setDepname(entry.getValue().get(0).getBigname());

            //5.封装小科室信息
            //5.1创建封装小科室信息集合
            List<DepartmentVo> depVoList = new ArrayList<>();
            List<Department> depList = entry.getValue();
            //5.2遍历集合进行封装
            for (Department department : depList) {
                //小科室对象
                DepartmentVo depVo = new DepartmentVo();
                depVo.setDepcode(department.getDepcode());
                depVo.setDepname(department.getDepname());
                depVoList.add(depVo);
            }
            //6.把小科室集合存入大科室对象
            bigDepVo.setChildren(depVoList);

            //7.大科室对象存入返回集合
            departmentVoList.add(bigDepVo);
        }

        return departmentVoList;
    }
4. 测试
2、前端对接实现
1. 确认入口

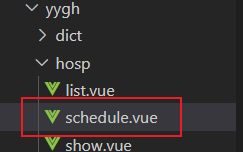
2. 创建隐藏路由,创建文件
      {
        path: 'hospital/schedule/:hoscode',
        name: '排班',
        component: () => import('@/views/yygh/hosp/schedule'),
        meta: { title: '排班', noCache: true },
        hidden: true
      }
3. 创建API接口方法
    //查看医院科室 (注意路径 department)
    getDeptByHoscode(hoscode) {
        return request({
            url: `/admin/hosp/department/getDeptList/${hoscode}`,
            method: 'get'
        })
    },
4. 添加页面元素
<template>
    <div class="app-container">
        <div style="margin-bottom: 10px;font-size: 10px;">选择:</div>
            <el-container style="height: 100%">
            <el-aside width="200px" style="border: 1px silver solid">
                <!-- 部门 -->
                <el-tree
                :data="data"
                :props="defaultProps"
                :default-expand-all="true"
                @node-click="handleNodeClick">
                </el-tree>
            </el-aside>
            <el-main style="padding: 0 0 0 20px;">
                <el-row style="width: 100%">
                <!-- 排班日期 分页 -->
                </el-row>
                <el-row style="margin-top: 20px;">
                <!-- 排班日期对应的排班医生 -->
                </el-row>
            </el-main>
        </el-container>
    </div>
</template>
5. 实现JS
<script>
    import hospApi from '@/api/yygh/hosp'
    export default {
        data() {
            return {
                data: [],
                defaultProps: {
                    children: 'children',
                    label: 'depname'
                },
                hoscode: null
            }
        },
        created() {
            this.hoscode = this.$route.params.hoscode
            this.fetchData()
        },
        methods: {
            fetchData(){
                hospApi.getDeptByHoscode(this.hoscode)
                .then(resopnse=>{
                    this.data = resopnse.data.list
                })
            }
        },
    }
</script>
<style>
.el-tree-node.is-current > .el-tree-node__content {
background-color: #409EFF !important;
color: white;
}
.el-checkbox__input.is-checked+.el-checkbox__label {
color: black;
}
</style>三、查看科室排班日期统计数据
1、后端接口实现
1. 需求分析
1. 根据医院编码、科室编码、当前页、每页记录数聚合查询
2. 根据工具判断排班日期是周几
2. 实现接口
1. service_hosp 添加日期工具依赖 joda-time
        <!--日期依赖工具-->
        <dependency>
            <groupId>joda-time</groupId>
            <artifactId>joda-time</artifactId>
        </dependency>
2. 分析接口
*参数:page、limit、hoscode、depcode
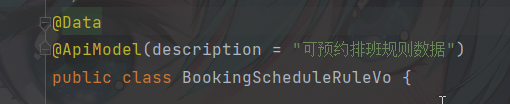
*返回值:map (total、BookingScheduleRuleVo)
3. 实现 controller
@Api(description = "排班接口")
@RestController
@RequestMapping("/admin/hosp/schedule")
public class ScheduleController {

    @Autowired
    private ScheduleService scheduleService;

    //根据医院编号 和 科室编号 ,查询排班规则数据
    @ApiOperation(value ="查询排班规则数据")
    @GetMapping("getScheduleRule/{page}/{limit}/{hoscode}/{depcode}")
    public R getScheduleRule(@PathVariable long page,
                             @PathVariable long limit,
                             @PathVariable String hoscode,
                             @PathVariable String depcode) {
        Map<String,Object> map
                = scheduleService.getRuleSchedule(page,limit,hoscode,depcode);
        return R.ok().data(map);
    }

}
4. 实现 service
//根据医院编号 和 科室编号 ,查询排班规则数据
@Override
public Map<String, Object> getRuleSchedule(long page, long limit, String hoscode, String depcode) {
//1.创建返回对象
Map<String, Object> map = new HashMap<>();
//2.带条件带分页聚合查询 (list)
//2.1创建筛查询条件对象
Criteria criteria = Criteria.where("hoscode")
.is(hoscode).and("depcode").is(depcode);
//2.2创建聚合查询对象
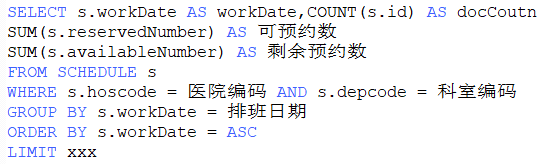
Aggregation agg = Aggregation.newAggregation(
//2.2.1设置查询条件
Aggregation.match(criteria),
//2.2.2设置聚合参数 + 聚合查询字段 (分组)
Aggregation.group("workDate")
.first("workDate").as("workDate")
.count().as("docCount")
.sum("reservedNumber").as("reservedNumber")
.sum("availableNumber").as("availableNumber"),
//2.2.3 根据date排序
Aggregation.sort(Sort.Direction.ASC,"workDate"),
//2.2.4 分页查询
Aggregation.skip((page-1)*limit),
Aggregation.limit(limit)
);
//2.3进行聚合查询 输入对象(查询对象 对象指定了哪个mongo表) 输出对象(保存到哪个类)
AggregationResults<BookingScheduleRuleVo> aggregate =
mongoTemplate.aggregate(agg, Schedule.class, BookingScheduleRuleVo.class);
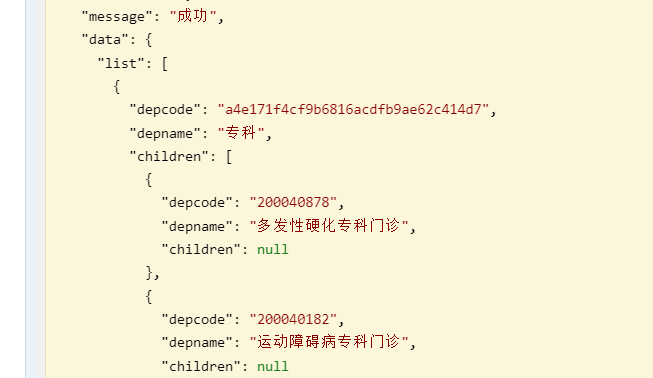
List<BookingScheduleRuleVo> bookingScheduleRuleVoList = aggregate.getMappedResults();
//3.带条件聚合查询 (total)
//3.1创建聚合查询对象
Aggregation aggTotal = Aggregation.newAggregation(
//3.2.1设置查询条件
Aggregation.match(criteria),
//3.2.2设置聚合参数 + 聚合查询字段 (分组)
Aggregation.group("workDate")
);
//3.2进行聚合查询
AggregationResults<BookingScheduleRuleVo> aggregateTotal =
mongoTemplate.aggregate(aggTotal, Schedule.class, BookingScheduleRuleVo.class);
List<BookingScheduleRuleVo> totalList = aggregateTotal.getMappedResults();
//3.3获取总数
int total = totalList.size();
//4.遍历数据,换算周几
for (BookingScheduleRuleVo bookingScheduleRuleVo : bookingScheduleRuleVoList) {
Date workDate = bookingScheduleRuleVo.getWorkDate();
String dayOfWeek = this.getDayOfWeek(new DateTime(workDate));
bookingScheduleRuleVo.setDayOfWeek(dayOfWeek);
}
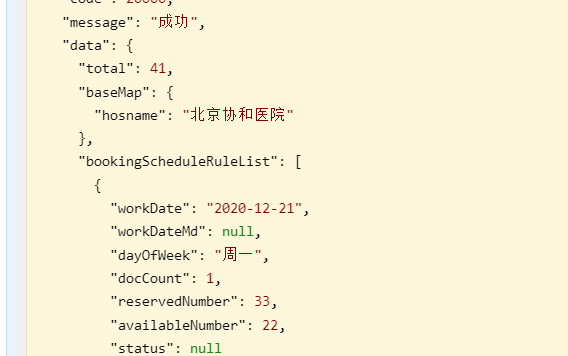
//5.封装数据返回
Map<String, Object> result = new HashMap<>();
result.put("bookingScheduleRuleList",bookingScheduleRuleVoList);
result.put("total",total);
//获取医院名称
String hosName = hospitalService.getHospName(hoscode);
//其他基础数据
Map<String, String> baseMap = new HashMap<>();
baseMap.put("hosname",hosName);
result.put("baseMap",baseMap);
return result;
}工具方法
    /**
     * 根据日期获取周几数据
     * @param dateTime
     * @return
     */
    private String getDayOfWeek(DateTime dateTime) {
        String dayOfWeek = "";
        switch (dateTime.getDayOfWeek()) {
            case DateTimeConstants.SUNDAY:
                dayOfWeek = "周日";
                break;
            case DateTimeConstants.MONDAY:
                dayOfWeek = "周一";
                break;
            case DateTimeConstants.TUESDAY:
                dayOfWeek = "周二";
                break;
            case DateTimeConstants.WEDNESDAY:
                dayOfWeek = "周三";
                break;
            case DateTimeConstants.THURSDAY:
                dayOfWeek = "周四";
                break;
            case DateTimeConstants.FRIDAY:
                dayOfWeek = "周五";
                break;
            case DateTimeConstants.SATURDAY:
                dayOfWeek = "周六";
            default:
                break;
        }
        return dayOfWeek;
} 
2、前端对接实现
1. 新建API schedule.js
import request from '@/utils/request'
//提取请求路径
const api_name = '/admin/hosp/schedule'

export default {
    //根据医院编号 和 科室编号 ,查询排班规则数据
    getScheduleDetail(hoscode, depcode, workDate) {
        return request({
            url: `${api_name}/getScheduleDetail/${hoscode}/${depcode}/${workDate}`,
            method: 'get'
        })
    }
}
2. 添加页面元素
        <!-- 排班日期 分页 -->
        <el-tag v-for="(item,index) in bookingScheduleList"
            :key="item.id"
            @click="selectDate(item.workDate, index)"
            :type="index == activeIndex ? '' : 'info'"
            style="height: 60px;margin-right: 5px;margin-right:15px;cursor:pointer;">
            {{ item.workDate }} {{ item.dayOfWeek }}<br />
            {{ item.availableNumber }} / {{ item.reservedNumber }}
        </el-tag>

        <!-- 分页 -->
        <el-pagination :current-page="page" :total="total" :page-size="limit" class="pagination"
            layout="prev, pager, next" @current-change="getPage">
        </el-pagination>
3. JS 新增方法
<script>
    import hospApi from '@/api/yygh/hosp'
    import scheduleApi from '@/api/yygh/schedule'

    export default {
        data() {
            return {
                data: [],  //科室集合
                defaultProps: {  //树的默认节点
                    children: 'children',
                    label: 'depname'
                },
                hoscode: null, //医院编码

                activeIndex: 0,  //选中索引
                depcode: null,  //科室编码
                depname: null,  //科室名称
                workDate: null,  //排班日期

                bookingScheduleList: [],  //号源统计
                baseMap: {},  //显示基础数据

                page: 1, // 当前页
                limit: 7, // 每页个数
                total: 0 // 总页码
            }
        },
        created() {
            this.hoscode = this.$route.params.hoscode
            this.fetchData()
        },
        methods: {
            //展示科室信息
            fetchData() {
                hospApi.getDeptByHoscode(this.hoscode).then(resopnse => {
                    this.data = resopnse.data.list

                    //默认选中第一个科室
                    if (this.data.length > 1) {
                        this.depcode = this.data[0].children[0].depcode
                        this.depname = this.data[0].children[0].depname
                        //分页查询
                        this.getPage()
                    }
                });
            },
            //分页查询
            getPage(page = 1) {
                this.page = page
                this.workDate = null
                this.activeIndex = 0
                this.getScheduleRuleList()
            },
            //根据医院编号 和 科室编号 ,查询排班规则统计数据
            getScheduleRuleList() {
                scheduleApi.getScheduleRule(this.page, this.limit, this.hoscode, this.depcode)
                    .then(response => {
                        this.bookingScheduleList = response.data.bookingScheduleRuleList
                        this.total = response.data.total
                        this.baseMap = response.data.baseMap
                        // 分页后workDate=null,默认选中第一个
                        if (this.workDate == null) {
                            this.workDate = this.bookingScheduleList[0].workDate
                            //查询排班集合数据
                        }
                    })
            },
            //点击科室 查询统计数据
            handleNodeClick(data) {
                //判断是否是大科室 小科室则跳过
                if (data.children) return

                this.depcode = data.depcode;
                this.depname = data.depname;
                this.getPage()

            },
            //点击日期触发方法
            selectDate(workDate, index){
                //查询排班集合
                this.workDate = workDate;
                this.activeIndex =index;
                //查询排班详情
            }
        },

    }
</script>
四、排班详情列表
根据参数查询排班记录集合
1、后端接口实现
1. 接口分析
*参数:hoscode、depcode、workDate
*返回值:List<Schedule>
2. 实现 controller
    //根据医院编号 、科室编号和工作日期,查询排班详细信息
    @ApiOperation(value = "查询排班详细信息")
    @GetMapping("getScheduleDetail/{hoscode}/{depcode}/{workDate}")
    public R getScheduleDetail( @PathVariable String hoscode,
                                @PathVariable String depcode,
                                @PathVariable String workDate) {
        List<Schedule> list = scheduleService.getScheduleDetail(hoscode,depcode,workDate);
        return R.ok().data("list",list);
    }
2. 实现 service
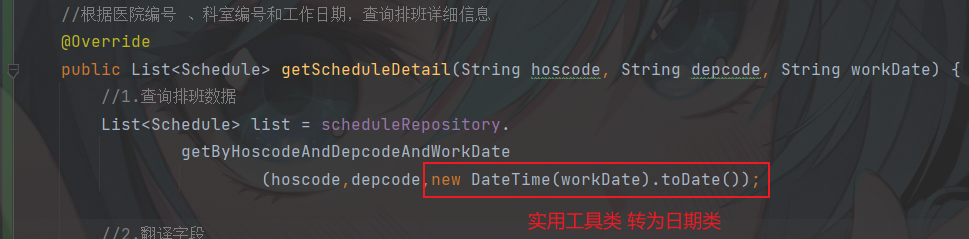
    //根据医院编号 、科室编号和工作日期,查询排班详细信息
    @Override
    public List<Schedule> getScheduleDetail(String hoscode, String depcode, String workDate) {
        //1.查询排班数据
        List<Schedule> list = scheduleRepository.
                getByHoscodeAndDepcodeAndWorkDate(hoscode,depcode,workDate);

        //2.翻译字段
        list.stream().forEach(item->{
            this.packageSchedule(item);
        });
        return list;
    }

    //封装排班详情其他值 医院名称、科室名称、日期对应星期(翻译字段)
    private void packageSchedule(Schedule schedule) {
        //设置医院名称
        schedule.getParam().put("hosname",hospitalService.getHospName(schedule.getHoscode()));
        //设置科室名称
        schedule.getParam().put("depname",
                departmentService.getDepName(schedule.getHoscode(),schedule.getDepcode()));
        //设置日期对应星期
        schedule.getParam().put("dayOfWeek",this.getDayOfWeek(new DateTime(schedule.getWorkDate())));
    }
3. 测试 没数据
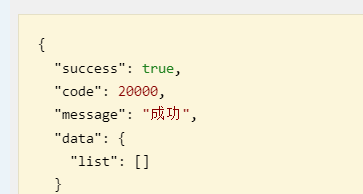
问题:

2、前端对接实现
1. 创建 API 方法
    //查询排班详情
    getScheduleDetail(hoscode, depcode, workDate) {
        return request({
            url: `${api_name}/getScheduleDetail/${hoscode}/${depcode}/${workDate}`,
            method: 'get'
        })
    }
2. 添加页面元素
<!-- 排班日期对应的排班医生 -->
    <el-table v-loading="listLoading" :data="scheduleList" border fit highlight-current-row>
        <el-table-column label="序号" width="60" align="center">
            <template slot-scope="scope">
                {{ scope.$index + 1 }}
            </template>
        </el-table-column>
        <el-table-column label="职称" width="150">
            <template slot-scope="scope">
                {{ scope.row.title }} | {{ scope.row.docname }}
            </template>
        </el-table-column>
        <el-table-column label="号源时间" width="80">
            <template slot-scope="scope">
                {{ scope.row.workTime == 0 ? "上午" : "下午" }}
            </template>
        </el-table-column>
        <el-table-column prop="reservedNumber" label="可预约数" width="80" />
        <el-table-column prop="availableNumber" label="剩余预约数" width="100" />
        <el-table-column prop="amount" label="挂号费(元)" width="90" />
        <el-table-column prop="skill" label="擅长技能" />
    </el-table>
3. 修改 JS方法
<script>
    import hospApi from '@/api/yygh/hosp'
    import scheduleApi from '@/api/yygh/schedule'

    export default {
        data() {
            return {
                data: [],  //科室集合
                defaultProps: {  //树的默认节点
                    children: 'children',
                    label: 'depname'
                },
                hoscode: null, //医院编码
                activeIndex: 0,  //选中索引
                depcode: null,  //科室编码
                depname: null,  //科室名称
                workDate: null,  //排班日期

                bookingScheduleList: [],  //号源统计
                baseMap: {},  //显示基础数据

                page: 1, // 当前页
                limit: 7, // 每页个数
                total: 0, // 总页码

                listLoading: true,  //加载状态
                scheduleList: []  //排班数据

            }
        },
        created() {
            this.hoscode = this.$route.params.hoscode
            this.fetchData()
        },
        methods: {
            //获取排班列表数据
            getScheduleList() {
                scheduleApi.getScheduleDetail(this.hoscode, this.depcode, this.workDate)
                    .then(response => {
                        this.scheduleList = response.data.list
                        this.listLoading = false
                        console.log(response.data.list);

                    })
            },

            //展示科室信息
            fetchData() {
                hospApi.getDeptByHoscode(this.hoscode).then(resopnse => {
                    this.data = resopnse.data.list

                    //默认选中第一个科室
                    if (this.data.length > 1) {
                        this.depcode = this.data[0].children[0].depcode
                        this.depname = this.data[0].children[0].depname
                        //分页查询
                        this.getPage()
                    }
                });
            },
            //分页查询
            getPage(page = 1) {
                this.page = page
                this.workDate = null
                this.activeIndex = 0
                this.scheduleList = []
                this.getScheduleRuleList()
            },
            //根据医院编号 和 科室编号 ,查询排班规则统计数据
            getScheduleRuleList() {
                scheduleApi.getScheduleRule(this.page, this.limit, this.hoscode, this.depcode)
                    .then(response => {
                        this.bookingScheduleList = response.data.bookingScheduleRuleList
                        this.total = response.data.total
                        this.baseMap = response.data.baseMap
                        // 分页后workDate=null,默认选中第一个
                        if (this.workDate == null) {
                            this.workDate = this.bookingScheduleList[0].workDate
                        }
                        //查询排班集合数据
                        this.getScheduleList()
                    })
            },
            //点击科室 查询统计数据
            handleNodeClick(data) {
                //判断是否是大科室 小科室则跳过
                if (data.children) return

                this.depcode = data.depcode;
                this.depname = data.depname;
                this.getPage()

            },
            //点击日期触发方法
            selectDate(workDate, index) {
                //查询排班集合
                this.workDate = workDate;
                this.activeIndex = index;
                //查询排班详情
                this.getScheduleList()
            }

        },

    }
</script>


 1426
1426


 被折叠的 条评论
为什么被折叠?
被折叠的 条评论
为什么被折叠?
 到【灌水乐园】发言


