


目录
一、后台用户管理
前面我们完成了用户登录、用户认证与就诊人,现在我们需要把这些信息在我们的平台管理系统中进行统一管理。
1、用户列表
1. 后端接口
1. 分析接口
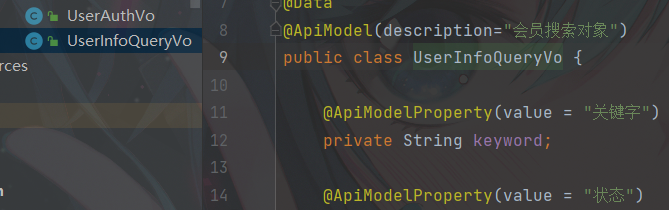
*参数:page、limit、UserInfoQueryVo
*返回值:Ipage (mysql 使用苞米豆,Ipage 接口只有苞米豆)
2. 添加分页插件

@Configuration
@EnableTransactionManagement
//@MapperScan("com.atguigu.yygh.user.mapper")  启动类已经加上了
public class UserConfig {
    //分页插件
    @Bean
    public PaginationInterceptor paginationInterceptor() {
        return new PaginationInterceptor();
    }
}
3. userController 实现
@Api(tags = "用户管理接口")
@RestController
@RequestMapping("/admin/user")
public class UserController {
@Autowired
private UserInfoService userInfoService;
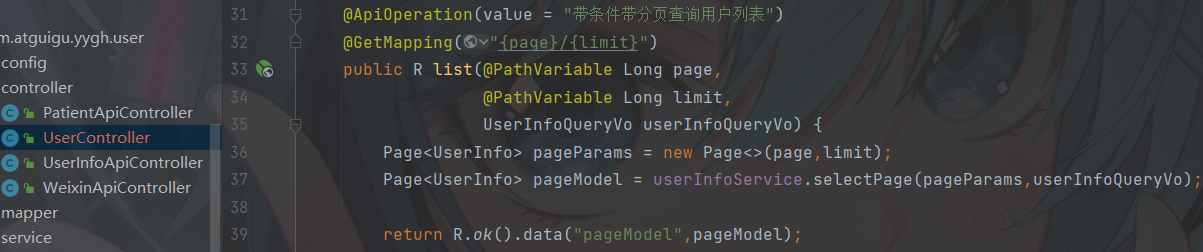
@ApiOperation(value = "带条件带分页查询用户列表")
@GetMapping("{page}/{limit}")
public R list(@PathVariable Long page,
@PathVariable Long limit,
UserInfoQueryVo userInfoQueryVo) {
Page<UserInfo> pageParams = new Page<>(page,limit);
Page<UserInfo> pageModel = userInfoService.selectPage(pageParams,userInfoQueryVo);
return R.ok().data("pageModel",pageModel);
}
}4. service 方法实现,修改翻译方法
//带条件带分页查询用户列表
@Override
public Page<UserInfo> selectPage(Page<UserInfo> pageParams, UserInfoQueryVo userInfoQueryVo) {
//1.取出查询条件
String name = userInfoQueryVo.getKeyword(); //用户名称
Integer status = userInfoQueryVo.getStatus();//用户状态
Integer authStatus = userInfoQueryVo.getAuthStatus(); //认证状态
String createTimeBegin = userInfoQueryVo.getCreateTimeBegin(); //开始时间
String createTimeEnd = userInfoQueryVo.getCreateTimeEnd(); //结束时间
//2.验空进行条件封装
QueryWrapper<UserInfo> wrapper = new QueryWrapper<>();
if(!StringUtils.isEmpty(name)) {
wrapper.like("name",name);
}
if(!StringUtils.isEmpty(status)) {
wrapper.eq("status",status);
}
if(!StringUtils.isEmpty(authStatus)) {
wrapper.eq("auth_status",authStatus);
}
if(!StringUtils.isEmpty(createTimeBegin)) {
wrapper.ge("create_time",createTimeBegin);
}
if(!StringUtils.isEmpty(createTimeEnd)) {
wrapper.le("create_time",createTimeEnd);
}
//3.分页查询
Page<UserInfo> pageModel = baseMapper.selectPage(pageParams, wrapper);
//4.翻译字段(状态值)
pageModel.getRecords().stream().forEach(item->{
//emoji 头像解析工具
item.setNickName(EmojiParser.parseToUnicode(item.getNickName()));
this.packUserInfo(item);
});
return pageModel;
}
//翻译相关字段
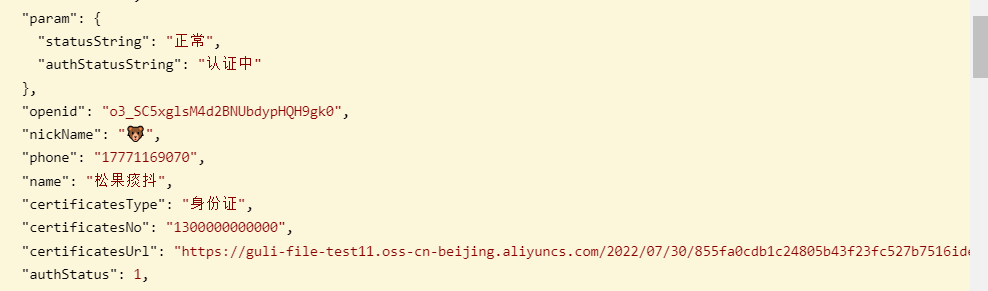
private UserInfo packUserInfo(UserInfo userInfo){
String statusNameByStatus = AuthStatusEnum.getStatusNameByStatus(userInfo.getAuthStatus());
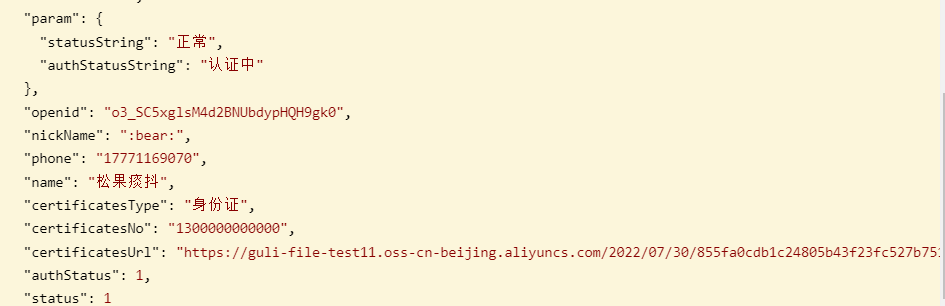
userInfo.getParam().put("authStatusString",statusNameByStatus);
String statusString = userInfo.getStatus().intValue()==0 ?"锁定" : "正常";
userInfo.getParam().put("statusString",statusString);
return userInfo;
}5. swagger 测试
2. 前端实现
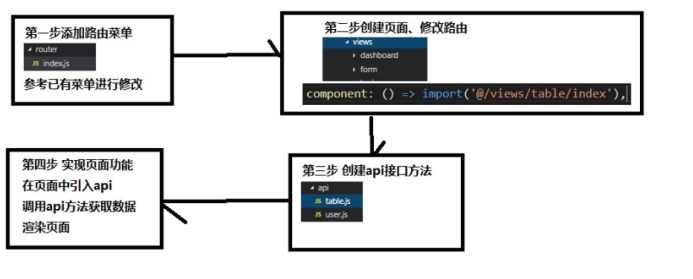
1. 回顾后台实现步骤
2. 添加路由 - 用户管理
在 src/router/index.js 文件添加路由
{
path: '/user',
component: Layout,
redirect: '/user/userInfo/list',
name: 'userInfo',
meta: { title: '用户管理', icon: 'table' },
alwaysShow: true,
children: [
{
path: 'userInfo/list',
name: '用户列表',
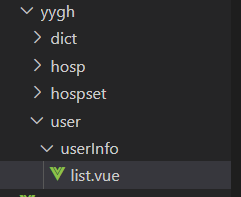
component: () => import('@/views/yygh/user/userInfo/list'),
meta: { title: '用户列表', icon: 'table' }
}
]
},3. 新建页面,添加页面元素
<template>
    <div class="app-container">
        <!--查询表单-->
        <el-form :inline="true" class="demo-form-inline">
            <el-form-item>
                <el-input v-model="searchObj.keyword" placeholder="姓名" />
            </el-form-item>

            <el-form-item label="创建时间">
                <el-date-picker v-model="searchObj.createTimeBegin" type="datetime" placeholder="选择开始时间"
                    value-format="yyyy-MM-dd HH:mm:ss" default-time="00:00:00" />
            </el-form-item>
            至
            <el-form-item>
                <el-date-picker v-model="searchObj.createTimeEnd" type="datetime" placeholder="选择截止时间"
                    value-format="yyyy-MM-dd HH:mm:ss" default-time="00:00:00" />
            </el-form-item>

            <el-button type="primary" icon="el-icon-search" @click="fetchData()">查询</el-button>
            <el-button type="default" @click="resetData()">清空</el-button>
        </el-form>

        <!-- 列表 -->
        <el-table v-loading="listLoading" :data="list" stripe style="width: 100%">

            <el-table-column label="序号" width="70" align="center">
                <template slot-scope="scope">
                    {{ (page - 1) * limit + scope.$index + 1 }}
                </template>
            </el-table-column>

            <el-table-column prop="phone" label="手机号" />
            <el-table-column prop="nickName" label="昵称" />
            <el-table-column prop="name" label="姓名" />
            <el-table-column label="状态" prop="param.statusString" />
            <el-table-column label="认证状态" prop="param.authStatusString" />
            <el-table-column prop="createTime" label="创建时间" />

            <el-table-column label="操作" width="200" align="center">
            </el-table-column>
        </el-table>

        <!-- 分页组件 -->
        <el-pagination :current-page="page" :total="total" :page-size="limit" :page-sizes="[5, 10, 20, 30, 40, 50, 100]"
            style="padding: 30px 0; text-align: center;" layout="sizes, prev, pager, next, jumper, ->, total, slot"
            @current-change="fetchData" @size-change="changeSize" />
    </div>
</template>
4. 新建API接口
创建/api/yygh/userinfo.js
import request from '@/utils/request'

const api_name = '/admin/user'

export default {

    getPageList(page, limit, searchObj) {
        return request({
            url: `${api_name}/${page}/${limit}`,
            method: 'get',
            params: searchObj
        })
    }
}
5. JS实现
<script>
    import userApi from '@/api/yygh/userinfo'
    export default {
        data() {
            return {
                listLoading: true, // 数据是否正在加载
                list: null, // banner列表
                total: 0, // 数据库中的总记录数
                page: 1, // 默认页码
                limit: 10, // 每页记录数
                searchObj: {} // 查询表单对象
            }
        },
        created() {
            this.fetchData()
        },
        methods: {
            //分页查询
            fetchData(page=1){
                this.page = page
                userApi.getPageList(this.page,this.limit,this.searchObj)
                .then(response=>{
                    this.list = response.data.pageModel.records
                    this.total = response.data.pageModel.total
                    this.listLoading = false
                })
            },
            //清空
            resetData(){
                this.searchObj = {}
                this.fetchData()
            },
            //切换每页记录数
            changeSize(size){
                this.limit = size
                this.fetchData()
            }
        }
    }
</script>
6. 测试

2、锁定与解锁
1、后端接口
1. 分析接口
*参数:id,status
*返回值:R.ok()
2. controller实现
    @ApiOperation(value = "用户锁定与解锁")
    @GetMapping("lock/{userId}/{status}")
    public R lock(
            @PathVariable("userId") Long userId,
            @PathVariable("status") Integer status){
        userInfoService.lock(userId, status);
        return R.ok();
    }
3. service实现
    //用户锁定与解锁
    @Override
    public void lock(Long userId, Integer status) {
        if(status.intValue() == 0 || status.intValue() == 1) {
            UserInfo userInfo = this.getById(userId);
            userInfo.setStatus(status);
            this.updateById(userInfo);
        }
    }
2、前端对接
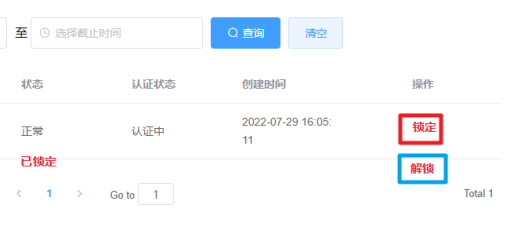
1. 确认入口
2. 添加API方法
    //用户锁定与解锁
    lock(id, status) {
        return request({
            url: `${api_name}/lock/${id}/${status}`,
            method: 'get'
        })
    }
3. 添加页面元素
    <el-table-column label="操作" width="200" align="center">
        <template slot-scope="scope">
            <el-button v-if="scope.row.status == 1" type="primary" size="mini" @click="lock(scope.row.id, 0)">锁定
            </el-button>
            <el-button v-if="scope.row.status == 0" type="danger" size="mini" @click="lock(scope.row.id, 1)">
                取消锁定</el-button>
        </template>
    </el-table-column>
4. 实现JS
    //用户锁定与解锁
    lock(id, status) {
        userApi.lock(id, status).then(response => {
            this.$message({
                type: "success",
                message: "操作成功!",
            });
            this.fetchData()
        })
    }
5. 测试

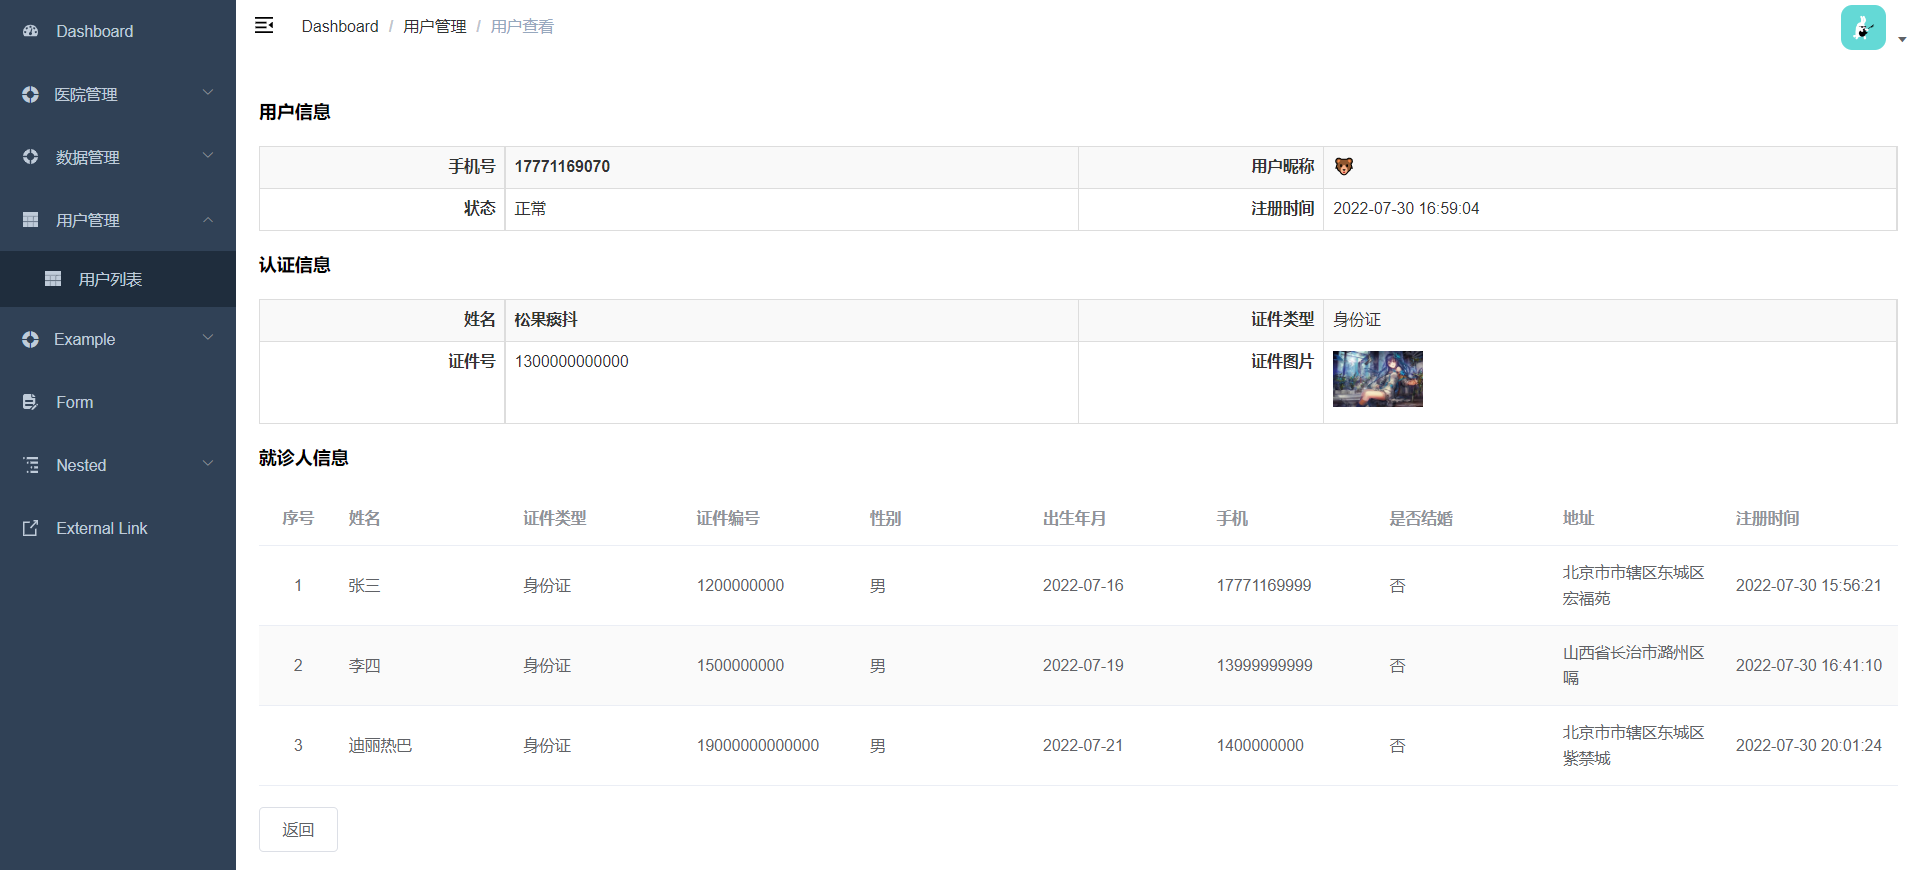
3、用户详情
详情展示用户信息、用户就诊人信息
1、后端接口
1. 分析接口
*参数:userId
*返回值:map (用户信息,就诊人信息集合)
2. controller实现
    @ApiOperation(value = "用户详情")
    @GetMapping("show/{userId}")
    public R show(@PathVariable Long userId) {
        Map<String,Object> map = userInfoService.show(userId);
        return R.ok().data(map);
    }
3. service实现
    //用户详情
    @Override
    public Map<String, Object> show(Long userId) {
        //1.根据用户id查询用户信息,翻译字段
        UserInfo userInfo = this.packUserInfo(baseMapper.selectById(userId));
        //emoji 头像解析工具
        userInfo.setNickName(EmojiParser.parseToUnicode(userInfo.getNickName()));
        //2.根据用户id查询就诊人信息
        List<Patient> patientList = patientService.findAllUserId(userId);

        //3.封装map返回
        HashMap<String, Object> map = new HashMap<>();
        map.put("userInfo",userInfo);
        map.put("patientList",patientList);
        return map;
    }
4. 测试
2、前端对接
1. 确认入口,添加页面元素
<router-link :to="'/user/userInfo/show/'+scope.row.id">
<el-button type="primary" size="mini">查看</el-button>
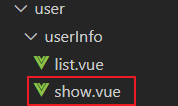
</router-link>2. 添加隐藏路由
      {
        path: 'userInfo/show/:id',
        name: '用户查看',
        component: () => import('@/views/yygh/user/userInfo/show'),
        meta: { title: '用户查看' },
        hidden: true
      }
3. 新建页面,添加页面元素
<template>
    <div class="app-container">
        <h4>用户信息</h4>
        <table class="table table-striped table-condenseda table-bordered" width="100%">
            <tbody>
                <tr>
                    <th width="15%">手机号</th>
                    <td width="35%"><b>{{ userInfo.phone }}</b></td>
                    <th width="15%">用户昵称</th>
                    <td width="35%">{{ userInfo.nickName }}</td>
                </tr>
                <tr>
                    <th>状态</th>
                    <td>{{ userInfo.status == 0 ? '锁定' : '正常' }}</td>
                    <th>注册时间</th>
                    <td>{{ userInfo.createTime }}</td>
                </tr>
            </tbody>
        </table>
        <h4>认证信息</h4>
        <table class="table table-striped table-condenseda table-bordered" width="100%">
            <tbody>
                <tr>
                    <th width="15%">姓名</th>
                    <td width="35%"><b>{{ userInfo.name }}</b></td>
                    <th width="15%">证件类型</th>
                    <td width="35%">{{ userInfo.certificatesType }}</td>
                </tr>
                <tr>
                    <th>证件号</th>
                    <td>{{ userInfo.certificatesNo }}</td>
                    <th>证件图片</th>
                    <td><img :src="userInfo.certificatesUrl" width="80px"></td>
                </tr>
            </tbody>
        </table>
        <h4>就诊人信息</h4>
        <el-table v-loading="listLoading" :data="patientList" stripe style="width: 100%">
            <el-table-column label="序号" width="70" align="center">
                <template slot-scope="scope">
                    {{ scope.$index + 1 }}
                </template>
            </el-table-column>

            <el-table-column prop="name" label="姓名" />
            <el-table-column prop="param.certificatesTypeString" label="证件类型" />
            <el-table-column prop="certificatesNo" label="证件编号" />
            <el-table-column label="性别">
                <template slot-scope="scope">
                    {{ scope.row.sex == 1 ? '男' : '女' }}
                </template>
            </el-table-column>
            <el-table-column prop="birthdate" label="出生年月" />
            <el-table-column prop="phone" label="手机" />
            <el-table-column label="是否结婚">
                <template slot-scope="scope">
                    {{ scope.row.isMarry == 1 ? '时' : '否' }}
                </template>
            </el-table-column>
            <el-table-column prop="param.fullAddress" label="地址" />
            <el-table-column prop="createTime" label="注册时间" />
        </el-table>
        <br>
        <el-row>
            <el-button @click="back">返回</el-button>
        </el-row>
    </div>
</template>
4. 添加API方法
    //用户详情
    show(id) {
        return request({
            url: `${api_name}/show/${id}`,
            method: 'get'
        })
    }
5. JS实现
<script>
    import userApi from '@/api/yygh/userinfo'
    export default {
        // 定义数据
        data() {
            return {
                //隐藏路由方式获取参数params,问号传参
                id: this.$route.params.id,
                userInfo: {}, // 会员信息
                patientList: [] // 就诊人列表
            }
        },
        // 当页面加载时获取数据
        created() {
            this.fetchDataById()
        },
        methods: {
            //根据id查询会员记录
            fetchDataById() {
                userApi.show(this.id).then(response => {
                    this.userInfo = response.data.userInfo
                    this.patientList = response.data.patientList
                })
            },
            //返回
            back() {
                window.history.back(-1)
            }
        }
    }
</script>
6. 测试
4、认证列表和审批功能
1、认证列表
用户认证列表接口与用户列表一致,只是默认加了一个认证状态搜索条件:authStatus
1. 确认用户认证列表接口
2. 添加路由菜单
      {
        path: 'userInfo/authList',
        name: '认证审批列表',
        component: () => import('@/views/yygh/user/userInfo/authList'),
        meta: { title: '认证审批列表', icon: 'table' }
      }
3. 创建页面、添加元素
<template>
    <div class="app-container">
        <!--查询表单-->
        <el-form :inline="true" class="demo-form-inline">
            <el-form-item>
                <el-input v-model="searchObj.keyword" placeholder="姓名/手机"/>
            </el-form-item>

            <el-form-item label="创建时间">
                <el-date-picker
                    v-model="searchObj.createTimeBegin"
                    type="datetime"
                    placeholder="选择开始时间"
                    value-format="yyyy-MM-dd HH:mm:ss"
                    default-time="00:00:00"
                    />
            </el-form-item>
            至
            <el-form-item>
                <el-date-picker
                    v-model="searchObj.createTimeEnd"
                    type="datetime"
                    placeholder="选择截止时间"
                    value-format="yyyy-MM-dd HH:mm:ss"
                    default-time="00:00:00"
                    />
            </el-form-item>

            <el-button type="primary" icon="el-icon-search" @click="fetchData()">查询</el-button>
            <el-button type="default" @click="resetData()">清空</el-button>
        </el-form>

        <!-- 列表 -->
        <el-table
        v-loading="listLoading"
        :data="list"
        stripe
            style="width: 100%">

            <el-table-column
            label="序号"
            width="70"
            align="center">
                <template slot-scope="scope">
                        {{ (page - 1) * limit + scope.$index + 1 }}
                </template>
            </el-table-column>

            <el-table-column prop="name" label="姓名"/>
            <el-table-column prop="certificatesType" label="证件类型"/>
            <el-table-column prop="certificatesNo" label="证件号"/>
            <el-table-column prop="createTime" label="创建时间"/>

            <el-table-column label="操作" width="250" align="center">
                <template slot-scope="scope">
                    <router-link :to="'/user/userInfo/show/'+scope.row.id">
                        <el-button type="primary" size="mini">查看</el-button>
                    </router-link>
                </template>
            </el-table-column>
        </el-table>

        <!-- 分页组件 -->
        <el-pagination
            :current-page="page"
            :total="total"
            :page-size="limit"
            :page-sizes="[5, 10, 20, 30, 40, 50, 100]"
            style="padding: 30px 0; text-align: center;"
            layout="sizes, prev, pager, next, jumper, ->, total, slot"
            @current-change="fetchData"
            @size-change="changeSize"
            />
    </div>
</template>
<script>
import userInfoApi from '@/api/yygh/userinfo'

export default {

// 定义数据
data() {
    return {
        listLoading: true, // 数据是否正在加载
        list: null, // banner列表
        total: 0, // 数据库中的总记录数
        page: 1, // 默认页码
        limit: 10, // 每页记录数
        searchObj: {
            authStatus: 1
        } // 查询表单对象
    }
},

// 当页面加载时获取数据
created() {
    this.fetchData()
},

methods: {
    // 调用api层获取数据库中的数据
    fetchData(page = 1) {
        console.log('翻页。。。' + page)
        // 异步获取远程数据(ajax)
        this.page = page
        userInfoApi.getPageList(this.page, this.limit, this.searchObj).then(
                response => {
            this.list = response.data.pageModel.records
            this.total = response.data.pageModel.total
            // 数据加载并绑定成功
            this.listLoading = false
        }
      )
    },

    // 当页码发生改变的时候
    changeSize(size) {
        console.log(size)
        this.limit = size
        this.fetchData(1)
    },

    // 重置查询表单
    resetData() {
        console.log('重置查询表单')
        this.searchObj = {}
        this.fetchData()
    }
  }
}
</script>
2、审批
1. controller
    @ApiOperation(value = "认证审批")
    @GetMapping("approval/{userId}/{authStatus}")
    public R approval(@PathVariable Long userId,@PathVariable Integer authStatus) {
        userInfoService.approval(userId,authStatus);
        return R.ok();
    }
2. service
//认证审批  2通过  -1不通过
@Override
public void approval(Long userId, Integer authStatus) {
    if(authStatus.intValue()==2 || authStatus.intValue()==-1) {
        UserInfo userInfo = baseMapper.selectById(userId);
        userInfo.setAuthStatus(authStatus);
        baseMapper.updateById(userInfo);
    }
}
3. API接口方法
    //认证审批
    approval(id, authStatus) {
        return request({
            url: `${api_name}/approval/${id}/${authStatus}`,
            method: 'get'
        })
    }
4. 添加页面元素 - 审批按钮
    <el-table-column label="操作" width="250" align="center">
        <template slot-scope="scope">
            <router-link :to="'/user/userInfo/show/'+scope.row.id">
                <el-button type="primary" size="mini">查看</el-button>
            </router-link>

            <el-button type="primary" size="mini" @click="approval(scope.row.id, 2)">通过</el-button>
            <el-button type="danger" size="mini" @click="approval(scope.row.id, -1)">不通过</el-button>
        </template>
    </el-table-column>
5. JS实现
            //用户审批
            approval(id, authStatus) {
                userInfoApi.approval(id, authStatus).then(response => {
                    this.$message({
                        type: "success",
                        message: "操作成功!",
                    });
                    this.fetchData()
                })
            }
6. 测试


 3160
3160


 被折叠的 条评论
为什么被折叠?
被折叠的 条评论
为什么被折叠?
 到【灌水乐园】发言


