


一、通过set方法注入属性
Book类
public class Book {
    private String bname;
    private String bauthor;

    public void setBname(String bname) {
        this.bname = bname;
    }

    public void setBauthor(String bauthor) {
        this.bauthor = bauthor;
    }

    @Override
    public String toString() {
        return "Book{" +
                "bname='" + bname + '\'' +
                ", bauthor='" + bauthor + '\'' +
                '}';
    }
}
XML配置文件
<?xml version="1.0" encoding="UTF-8"?>
<beans xmlns="http://www.springframework.org/schema/beans"
       xmlns:xsi="http://www.w3.org/2001/XMLSchema-instance"
       xsi:schemaLocation="http://www.springframework.org/schema/beans http://www.springframework.org/schema/beans/spring-beans.xsd">

    <bean id="book" class="com.atguigu.SpringIOC.Book">
        <property name="bname" value="西游记"></property>
        <property name="bauthor" value="PMH"></property>
    </bean>
</beans>
测试
public class Test1 {
    @org.junit.Test
    public void test(){
        //通过读取配置文件的方式创建对象
        ClassPathXmlApplicationContext context = new ClassPathXmlApplicationContext("bean.xml");
        Book book = context.getBean("book", Book.class);
        System.out.println(book.toString());
    }
}
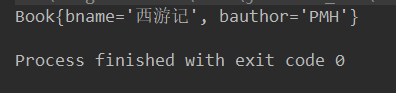
结果

二、通过构造器注入属性
注意问题:当bean中没有标签constructor-arg默认采用空参构造器创建对象,只有有标签constructor-arg才会使用对应构造器


以上bean对应下面的构造器

具体代码:
Book类
public class Book {
    private String bname;
    private String bauthor;

    public Book(String bname, String bauthor) {
        this.bname = bname;
        this.bauthor = bauthor;
    }

    @Override
    public String toString() {
        return "Book{" +
                "bname='" + bname + '\'' +
                ", bauthor='" + bauthor + '\'' +
                '}';
    }
}
XML配置文件
<?xml version="1.0" encoding="UTF-8"?>
<beans xmlns="http://www.springframework.org/schema/beans"
       xmlns:xsi="http://www.w3.org/2001/XMLSchema-instance"
       xsi:schemaLocation="http://www.springframework.org/schema/beans http://www.springframework.org/schema/beans/spring-beans.xsd">

    <bean id="book" class="com.atguigu.SpringIOC.Book">
        <constructor-arg name="bname" value="西游记"></constructor-arg>
        <constructor-arg name="bauthor" value="PMH"></constructor-arg>
    </bean>
</beans>
测试
public class Test1 {
    @org.junit.Test
    public void test(){
        //通过读取配置文件的方式创建对象
        ClassPathXmlApplicationContext context = new ClassPathXmlApplicationContext("bean.xml");
        Book book = context.getBean("book", Book.class);
        System.out.println(book.toString());
    }
}
结果:

三、通过p名称空间注入属性(本质还是使用set方法)
具体代码:
Book类
public class Book {
    private String bname;
    private String bauthor;

    public void setBname(String bname) {
        this.bname = bname;
    }

    public void setBauthor(String bauthor) {
        this.bauthor = bauthor;
    }

    @Override
    public String toString() {
        return "Book{" +
                "bname='" + bname + '\'' +
                ", bauthor='" + bauthor + '\'' +
                '}';
    }
}
新增了p名称空间,注意这边xsi:schemaLocation=“这边不需要新增,我当时加了反而多次一举”
<?xml version="1.0" encoding="UTF-8"?>
<beans xmlns="http://www.springframework.org/schema/beans"
       xmlns:xsi="http://www.w3.org/2001/XMLSchema-instance"
       xmlns:p="http://www.springframework.org/schema/p"
       xsi:schemaLocation="http://www.springframework.org/schema/beans http://www.springframework.org/schema/beans/spring-beans.xsd
       ">

    <bean id="book" class="com.atguigu.SpringIOC.Book" p:bname ="西游记" p:bauthor = "PMH">

    </bean>
</beans>
测试
public class Test1 {
    @org.junit.Test
    public void test(){
        //通过读取配置文件的方式创建对象
        ClassPathXmlApplicationContext context = new ClassPathXmlApplicationContext("bean.xml");
        Book book = context.getBean("book", Book.class);
        System.out.println(book.toString());
    }
}
测试结果


 425
425


 被折叠的 条评论
为什么被折叠?
被折叠的 条评论
为什么被折叠?
 到【灌水乐园】发言


