


首先看一下我们用到的示例代码
InputStream inputStream = new FileInputStream(new File("src/main/resources/mybatis-config.xml"));
// 1.加载配置文件创建configuration对象,创建SqlSessionFactory
SqlSessionFactory sqlSessionFactory = new SqlSessionFactoryBuilder().build(inputStream);
// 2.创建SqlSession
SqlSession sqlSession = sqlSessionFactory.openSession();
// 3.获取Mapper接口动态代理
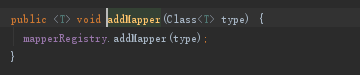
BaseTermMapper mapper = sqlSession.getMapper(BaseTermMapper.class);
// 4.动态代理回调sqlSession中的查询方法,sqlSession将查询方法转发给Executor,
// Executor基于JDBC访问数据库获取数据并通过反射将数据转换成POJO并返回
BaseTerm baseTerm = mapper.selectById(1);
System.out.println(baseTerm.getName());
sqlSession.close();
配置文件具体代码:
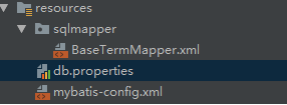
db.properties:
jdbc_driver=com.mysql.jdbc.Driver
jdbc_url=jdbc:mysql://xx
jdbc_username=root
jdbc_password=xxx
project_src =src/main/java
project_mapper_xml =src/main/sqlmapper
class_path=C:/Users/Administrator/.m2/repository/mysql/mysql-connector-java/5.1.47/mysql-connector-java-5.1.47.jar
mybatis-config.xml:
<?xml version="1.0" encoding="UTF-8" ?>
<!DOCTYPE configuration PUBLIC "-//mybatis.org//DTD Config 3.0//EN" "http://mybatis.org/dtd/mybatis-3-config.dtd">
<configuration>
 <properties resource="db.properties"/>
   <settings>
  <!-- 设置自动驼峰转换    -->
  <setting name="mapUnderscoreToCamelCase" value="true" />
  <!-- 开启懒加载 -->
   <!-- 当启用时,有延迟加载属性的对象在被调用时将会完全加载任意属性。否则,每种属性将会按需要加载。默认:true -->
   <setting name="aggressiveLazyLoading" value="false" />
 </settings>
 <!-- 别名定义 -->
 <typeAliases>
  <package name="com.kennor.mybatis.entity" />
 </typeAliases>
 <!--配置environment环境 -->
 <environments default="development">
  <!-- 环境配置1,每个SqlSessionFactory对应一个环境 -->
  <environment id="development">
   <transactionManager type="JDBC" />
   <dataSource type="POOLED">
    <property name="driver" value="${jdbc_driver}" />
    <property name="url" value="${jdbc_url}" />
    <property name="username" value="${jdbc_username}" />
    <property name="password" value="${jdbc_password}" />
   </dataSource>
  </environment>
 </environments>
 <!-- 映射文件,mapper的配置文件 -->
 <mappers>
  <!--直接映射到相应的mapper文件 -->
  <mapper resource="sqlmapper/BaseTermMapper.xml"/>
 </mappers>
</configuration>
BaseTermMapper.xml
<?xml version="1.0" encoding="UTF-8"?>
<!DOCTYPE mapper PUBLIC "-//mybatis.org//DTD Mapper 3.0//EN" "http://mybatis.org/dtd/mybatis-3-mapper.dtd">
<mapper namespace="com.kennor.test.BaseTermMapper" >
  <!--开启二级缓存 走源码调试用 生产环境不推荐开启-->
  <cache/>
  <resultMap id="BaseTermMap" type="com.kennor.test.BaseTerm">
    <id property="id" column="id"/>
    <result property="name" column="NAME"/>
    <result property="beginTime" column="begin_time"/>
    <result property="endTime" column="end_time"/>
  </resultMap>
  <select id="selectById" resultMap="BaseTermMap">
     select *
        from base_term
        where  id = #{id}
  </select>
</mapper>
1.加载配置文件创建configuration对象,创建SqlSessionFactory
Configuration : Mybatis启动初始化的核心就是将所有xml配置文件信息加载到Configuration对象中, Configuration是单例的,生命周期是应用级的;
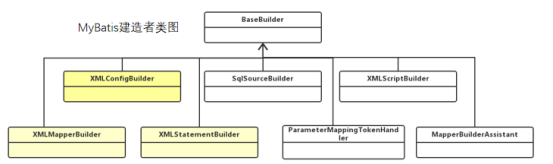
加载配置文件的核心类主要有:
XMLConfigBuilder: 主要负责解析mybatis-config.xml;
XMLMapperBuilder: 主要负责解析映射配置文件;
XMLStatementBuilder: 主要负责解析映射配置文件中的SQL节点;
对应的类图:
Mapper相关的关键类主要有:
MapperRegistry:mapper接口动态代理工厂类的注册中心。在MyBatis中,通过mapperProxy实现InvocationHandler接口,MapperProxyFactory用于生成动态代理的实例对象;
ResultMap:用于解析mapper.xml文件中的resultMap节点,使用ResultMapping来封装id,result等子元素;
MappedStatement:用于存储mapper.xml文件中的select、insert、update和delete节点,同时还包含了这些节点的很多重要属性;
SqlSource:mapper.xml文件中的sql语句会被解析成SqlSource对象,经过解析SqlSource包含的语句最终仅仅包含?占位符,可以直接提交给数据库执行;
具体源码如下:

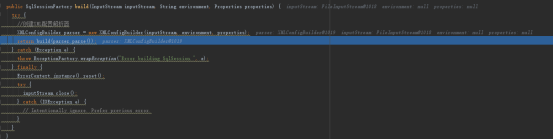
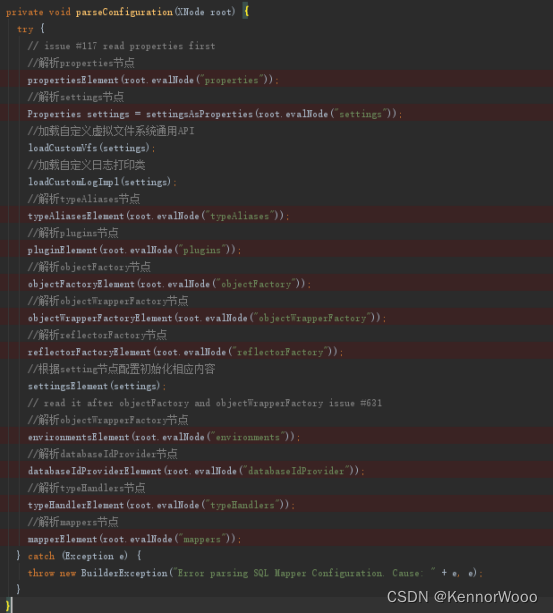
parser.paser()方法解析成功后会返回一个Configuration对象,此对象包含配置文件的信息,然后build方法通过Configuration创建SqlSessionFactory对象

接着parser.paser()的具体代码如下:
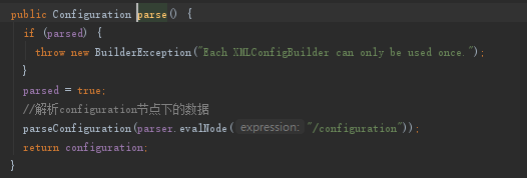
 解析数据库连接信息properties的具体代码如下:
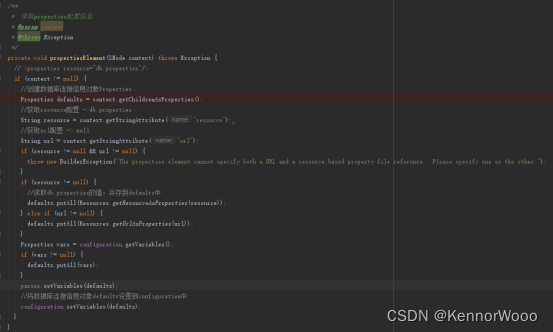
其他解析都是类似的将配置读取出来,然后设置到configuration对象中。
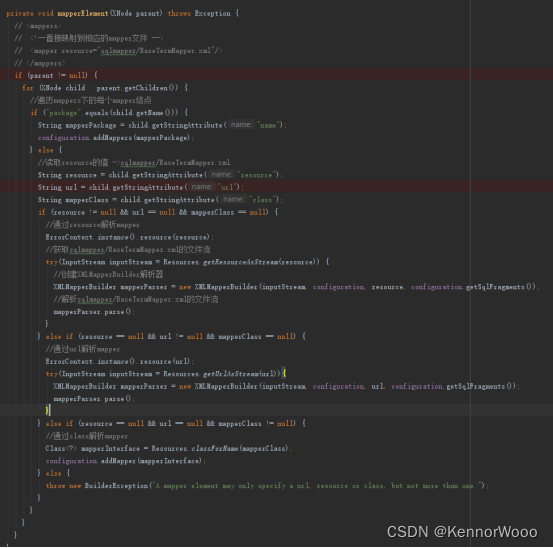
接着我们看一下映射文件mappers节点的解析流程

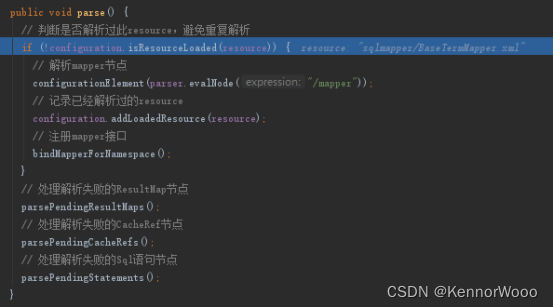
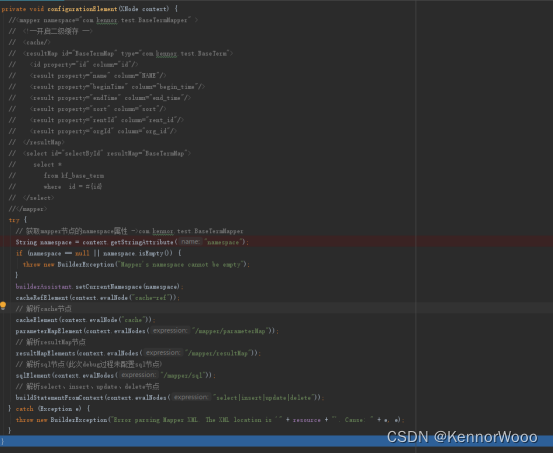
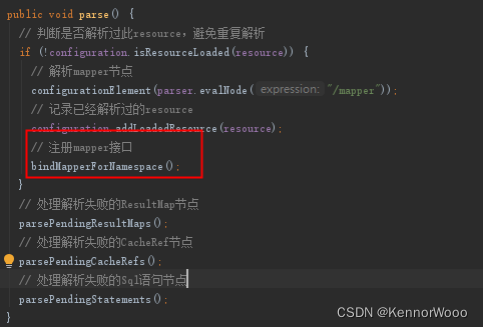
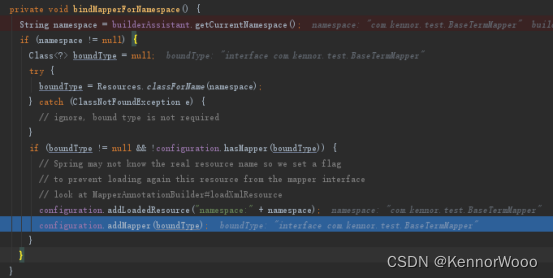
接着我们看一下mapperParser.parse()是如何解析mapper.xml文件的
解析mapper节点的具体代码如下:
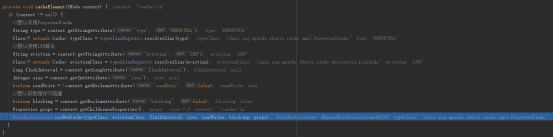
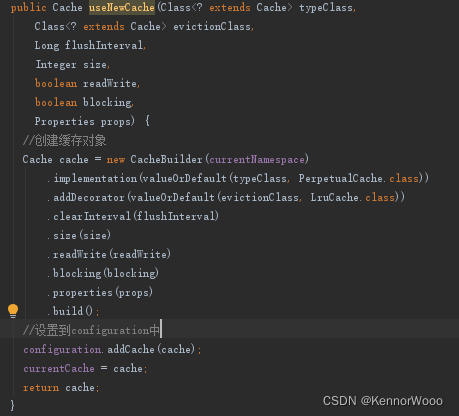
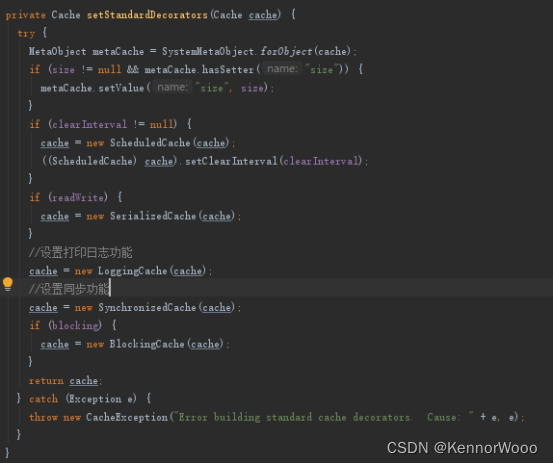
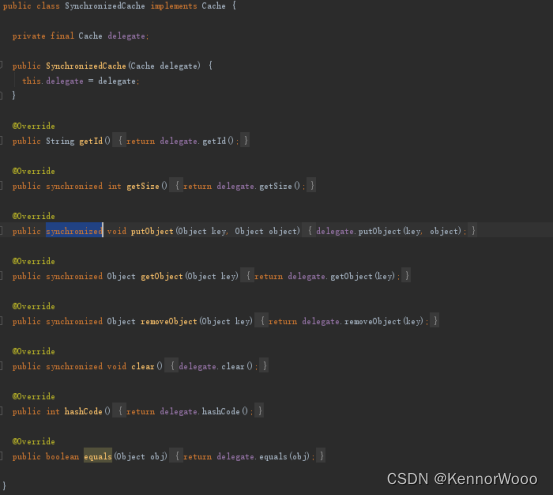
首先看一下解析缓存节点代码,如下:
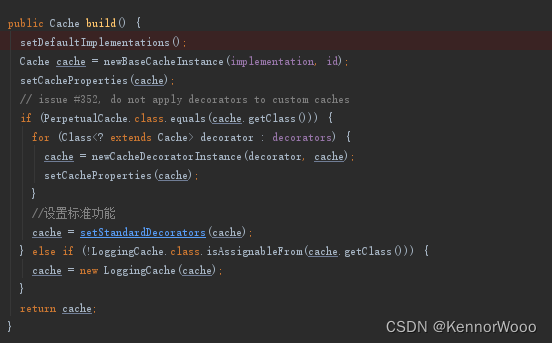
除了配置的缓存功能之外,CacheBuilder在build缓存对象的时候会为其附加上标准的功能,代码如下:

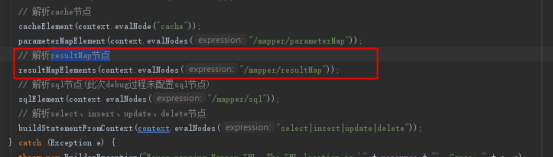
接着我们看一下resultMap节点的解析流程

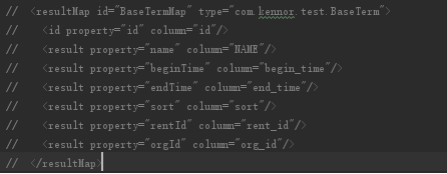
接着我们先看一下ResultMap的源码有什么字段

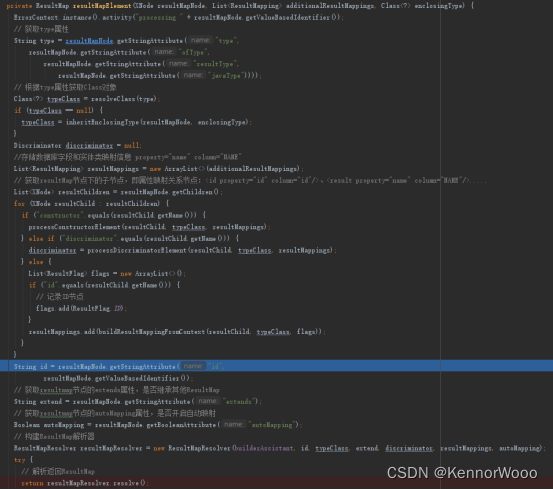
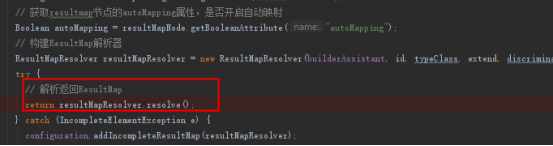
然后再看数据是如何解析保存到ResultMap中


public ResultMap build() {
  if (resultMap.id == null) {
    throw new IllegalArgumentException("ResultMaps must have an id");
  }
  resultMap.mappedColumns = new HashSet<>();
  resultMap.mappedProperties = new HashSet<>();
  resultMap.idResultMappings = new ArrayList<>();
  resultMap.constructorResultMappings = new ArrayList<>();
  resultMap.propertyResultMappings = new ArrayList<>();
  final List<String> constructorArgNames = new ArrayList<>();
  for (ResultMapping resultMapping : resultMap.resultMappings) {
    resultMap.hasNestedQueries = resultMap.hasNestedQueries || resultMapping.getNestedQueryId() != null;
    resultMap.hasNestedResultMaps = resultMap.hasNestedResultMaps || (resultMapping.getNestedResultMapId() != null && resultMapping.getResultSet() == null);
    // 获取column
    final String column = resultMapping.getColumn();
    if (column != null) {
      resultMap.mappedColumns.add(column.toUpperCase(Locale.ENGLISH));
    } else if (resultMapping.isCompositeResult()) {
      for (ResultMapping compositeResultMapping : resultMapping.getComposites()) {
        final String compositeColumn = compositeResultMapping.getColumn();
        if (compositeColumn != null) {
          // 将column转换成大写保存到mappedColumns中
          resultMap.mappedColumns.add(compositeColumn.toUpperCase(Locale.ENGLISH));
        }
      }
    }
    // 获取property
    final String property = resultMapping.getProperty();
    if (property != null) {
      // 将property保存到mappedProperties中
      resultMap.mappedProperties.add(property);
    }
    if (resultMapping.getFlags().contains(ResultFlag.CONSTRUCTOR)) {
      resultMap.constructorResultMappings.add(resultMapping);
      if (resultMapping.getProperty() != null) {
        constructorArgNames.add(resultMapping.getProperty());
      }
    } else {
      resultMap.propertyResultMappings.add(resultMapping);
    }
    if (resultMapping.getFlags().contains(ResultFlag.ID)) {
      // 保存ID的映射Mapping
      resultMap.idResultMappings.add(resultMapping);
    }
  }
  if (resultMap.idResultMappings.isEmpty()) {
    resultMap.idResultMappings.addAll(resultMap.resultMappings);
  }
  if (!constructorArgNames.isEmpty()) {
    final List<String> actualArgNames = argNamesOfMatchingConstructor(constructorArgNames);
    if (actualArgNames == null) {
      throw new BuilderException("Error in result map '" + resultMap.id
          + "'. Failed to find a constructor in '"
          + resultMap.getType().getName() + "' by arg names " + constructorArgNames
          + ". There might be more info in debug log.");
    }
    resultMap.constructorResultMappings.sort((o1, o2) -> {
      int paramIdx1 = actualArgNames.indexOf(o1.getProperty());
      int paramIdx2 = actualArgNames.indexOf(o2.getProperty());
      return paramIdx1 - paramIdx2;
    });
  }
  // lock down collections
  // 使用Collections.unmodifiableList方法实现对解析结果集合进行加锁,防止被改动
  resultMap.resultMappings = Collections.unmodifiableList(resultMap.resultMappings);
  resultMap.idResultMappings = Collections.unmodifiableList(resultMap.idResultMappings);
  resultMap.constructorResultMappings = Collections.unmodifiableList(resultMap.constructorResultMappings);
  resultMap.propertyResultMappings = Collections.unmodifiableList(resultMap.propertyResultMappings);
  resultMap.mappedColumns = Collections.unmodifiableSet(resultMap.mappedColumns);
  return resultMap;
}
自此,mapper.xml中的resultMap节点就已经解析完成并保存到configuration中。
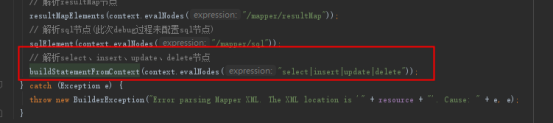
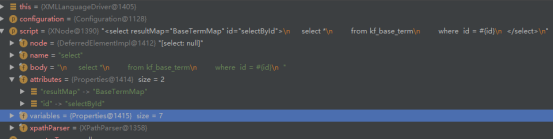
接着我们继续看一下select、insert、update、delete节点是如何解析的。
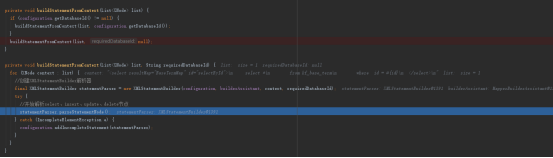
public void parseStatementNode() {
//id="selectById"
String id = context.getStringAttribute("id");
String databaseId = context.getStringAttribute("databaseId");
if (!databaseIdMatchesCurrent(id, databaseId, this.requiredDatabaseId)) {
return;
}
//获取节点名称 select、delete、update、insert
String nodeName = context.getNode().getNodeName();
SqlCommandType sqlCommandType = SqlCommandType.valueOf(nodeName.toUpperCase(Locale.ENGLISH));
boolean isSelect = sqlCommandType == SqlCommandType.SELECT;
boolean flushCache = context.getBooleanAttribute("flushCache", !isSelect);
boolean useCache = context.getBooleanAttribute("useCache", isSelect);
boolean resultOrdered = context.getBooleanAttribute("resultOrdered", false);
... ...
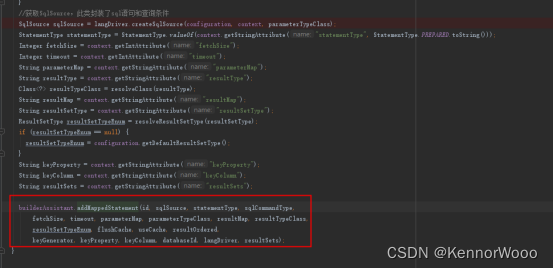
//获取SqlSource,此类封装了sql语句和查询条件
SqlSource sqlSource = langDriver.createSqlSource(configuration, context, parameterTypeClass);
... ...
//创建MappedStatement
builderAssistant.addMappedStatement(id, sqlSource, statementType, sqlCommandType,
fetchSize, timeout, parameterMap, parameterTypeClass, resultMap, resultTypeClass,
resultSetTypeEnum, flushCache, useCache, resultOrdered,
keyGenerator, keyProperty, keyColumn, databaseId, langDriver, resultSets);
}
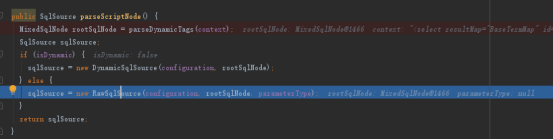
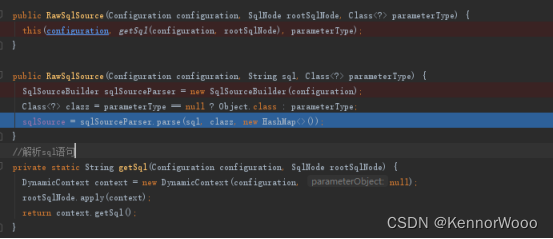
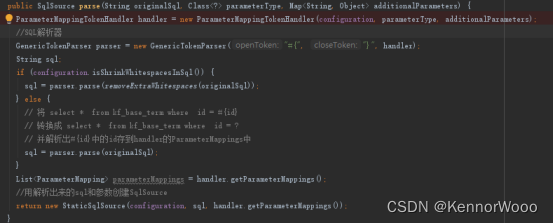
接着我们看一下SqlSource是如何创建的

接着继续看一下创建MappedStatement的流程
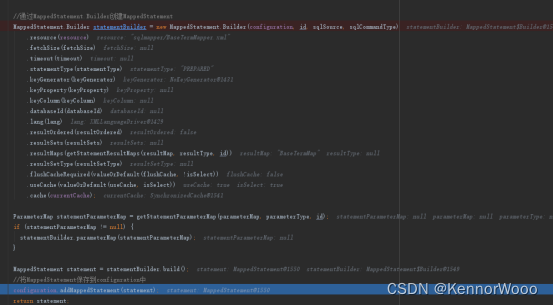

自此,可以看到配置文件中的关键信息都已经解析储存到configuration中,并且使用configuration创建了DefaultSqlSessionFactory。


 407
407


 被折叠的 条评论
为什么被折叠?
被折叠的 条评论
为什么被折叠?
 到【灌水乐园】发言


