


1.原理
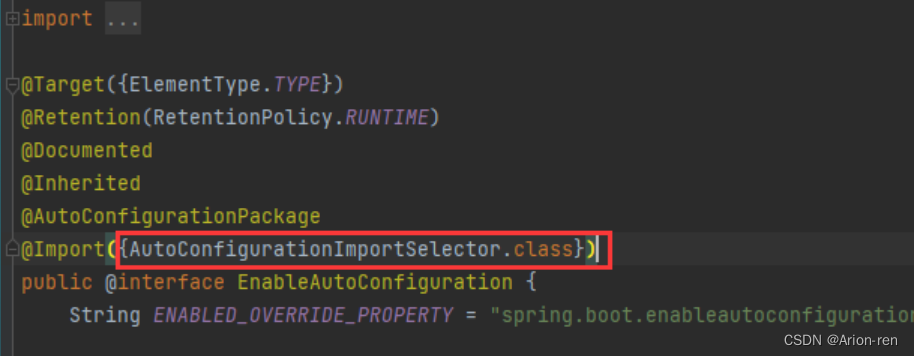
springboot通过@enableAutoConfiguration注解开启自动配置
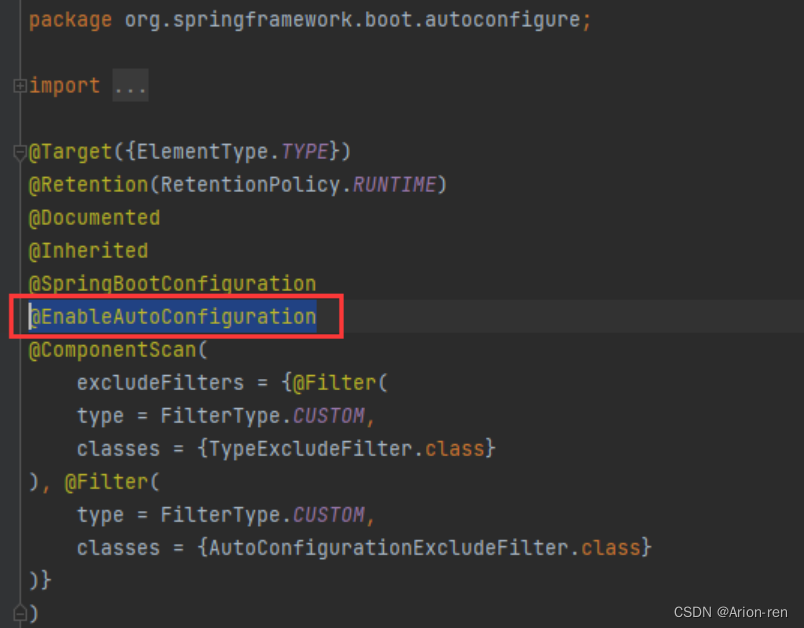
通过导入AutoConfigurationImprtSelector类实现加载配置文件,该类实现了ImportSelector接口,通过其中的selectImport方法可以获取到所有符合条件的类并加载到bean容器中。具体的是该方法下有一个getAutoConfigurationEntry()可以读取META-INF文件夹下的spring.factories,对该文件声明里面的配置信息进行加载,从而将bean加载到容器中。
2.自定义demostarter项目
 <repositories>
        <repository>
            <id>alimaven</id>
            <url>https://maven.aliyun.com/repository/public</url>
        </repository>
    </repositories>

    <pluginRepositories>
        <pluginRepository>
            <id>alimaven</id>
            <url>https://maven.aliyun.com/repository/public</url>
        </pluginRepository>
    </pluginRepositories>
需要在resources文件下新建META-INF文件夹,同时新建spring.factories文件

3。定义服务提供类,里面有具体的方法供我们调用
public class DemoService {


    private String demo;

    public DemoService(String demo) {
        this.demo = demo;
    }

    public String getService(){
        return demo;
    }
}
3.定义统一配置类
@Configuration
public class DemoConfig {

    @Value("${demo}")
    private String demo;

    @Bean
    public DemoService demoService(){
        return new DemoService(demo);
    }
}
4.在spring。factories中定义配置信息
org.springframework.boot.autoconfigure.EnableAutoConfiguration
=com.xzk.demostarter.DemoConfig
5.将项目打包到本地仓库中,之后其他项目就可以使用这个依赖
 <dependency>
         <groupId>com.xzk</groupId>
         <artifactId>demoStarter</artifactId>
         <version>0.0.1-SNAPSHOT</version>
 </dependency>
6.测试,新建一个新的项目,引入上述的依赖后就可以在ioc容器中直接拿实例。
@RestController
public class DemoController {

    private DemoService demoService;

    @GetMapping("demo")
    public ResponseEntity demo(){
        String service = demoService.getService();
        return new ResponseEntity(service, HttpStatus.OK);
    }

    public DemoController(DemoService demoService) {
        this.demoService = demoService;
    }
}


 162
162


 被折叠的 条评论
为什么被折叠?
被折叠的 条评论
为什么被折叠?
 到【灌水乐园】发言


