


1.问题描述:
通过前面我们知道如何去实现一个自定义的组合组件,但会不会感觉前面Gsp开启和关闭的设定都需要在java代码中实现有些繁琐呐,倘若属性更多一些,难免会有些不雅观。因此,我们通过自定义属性能够使我们的开发更合理,优雅。
2.什么是自定义属性
xml文件的TextView中有”text”,”textColor”,”textSize”等等属性,这些都是android中提供的属性,通过在布局文件中添加 xmlns:android=”http://schemas.android.com/apk/res/android”的命名空间(通常自动生成),我们就能够使用系统提供的属性,而这些属性存放于sdk\platforms\android-10\data\res\values\attrs.xml文件夹中。这里我们对其进行模范,在工程values文件加下新建attrs.xml文件夹,并添加相应的属性,最后在布局文件中添加其命名空间我们就能使用自定义好的属性了。
3.代码:
(对上一篇的代码稍加修改)
(1)写出实现效果界面的布局文件
(跟前一篇的一样)
<?xml version="1.0" encoding="utf-8"?>
<RelativeLayout xmlns:android="http://schemas.android.com/apk/res/android"
    android:layout_width="match_parent"
    android:layout_height="match_parent"
   >

    <RelativeLayout
        android:layout_width="match_parent"
        android:layout_height="match_parent"
        android:paddingLeft="10dp"
        android:paddingTop="5dp"
        >
      <TextView
           android:id="@+id/startGps"
           android:layout_width="wrap_content"
           android:layout_height="wrap_content"
           android:text="点击开启GPS"
           android:textColor="#000000"
           android:textSize="20dp"
          />
        <TextView
           android:id="@+id/GpsMode"
           android:layout_width="wrap_content"
           android:layout_height="wrap_content"
           android:text="GPS已打开"
           android:layout_below="@id/startGps"
           android:textSize="18dp"
           android:textColor="#938192"
          />

        <CheckBox
           android:id="@+id/check"
           android:layout_width="wrap_content"
           android:layout_height="wrap_content"
           android:layout_alignParentRight="true"
           android:gravity="center_vertical"
           android:paddingRight="10dp"
           android:text=""
           android:clickable="false"
           android:focusable="false"
           android:focusableInTouchMode="false"
           android:checked="true"
            />
    </RelativeLayout>
</RelativeLayout>
(2)在values文件夹下新建sttrs.xml文件:
<?xml version="1.0" encoding="utf-8"?>
<resources>

    <declare-styleable name="TextView">

    <attr name="letGps_on" format="string"  />
    <attr name="letGps_off" format="string"  />
    </declare-styleable>

</resources>
(3)自定义view,继承一个ViewGroup(这里继承RelativeLayout)
(跟前一篇的(2)对应,但代码有所改变)
package com.person.maomao;

import android.content.Context;
import android.util.AttributeSet;
import android.view.View;
import android.widget.CheckBox;
import android.widget.RelativeLayout;
import android.widget.TextView;

public class MyRelativeLayout extends RelativeLayout {

    private TextView startGps,GpsMode;
    private CheckBox checkBox;
    private String NAMESPACE="http://schemas.android.com/apk/res/com.person.maomao";
    private String title,letGps_on,letGps_off;

    //添加RelativeLayout的三个构造方法
    public MyRelativeLayout(Context context, AttributeSet attrs, int defStyle) {
        super(context, attrs, defStyle);
        InitView();
    }

    public MyRelativeLayout(Context context, AttributeSet attrs) {
        super(context, attrs);
        // 根据属性名称,获取属性的值
        letGps_on=attrs.getAttributeValue(NAMESPACE, "letGps_on");
        letGps_off=attrs.getAttributeValue(NAMESPACE, "letGps_off");

        InitView();
    }

    public MyRelativeLayout(Context context) {
        super(context);
        InitView();
    }


    //将布局文件example填充到MyRelativeLayout中
    public void InitView(){
        View.inflate(getContext(), R.layout.activity_example, this);
        startGps=(TextView) findViewById(R.id.startGps);
        GpsMode=(TextView) findViewById(R.id.GpsMode);
        checkBox=(CheckBox) findViewById(R.id.check);
    }

    //设置接口,用于改变格局中的某些组件的值

    public void  Checked(){
        if(checkBox.isChecked()){
            setCheck(false);
            setGpsMode(letGps_off);
        }else{
            setCheck(true);
            setGpsMode(letGps_on);
        }
    }

    public void setGpsMode(String string){
        GpsMode.setText(string);
    }

    public void setCheck(boolean b){
        checkBox.setChecked(b);
    }
}
(4)主页面的布局文件:
(跟前一篇的(3)对应,但代码有所改变)
尤其注意:在布局文件下添加了本工程的命名空间,以便能够找到自定义的属性。xmlns:maomao=”http://schemas.android.com/apk/res/com.person.maomao”
<RelativeLayout xmlns:android="http://schemas.android.com/apk/res/android"
    xmlns:maomao="http://schemas.android.com/apk/res/com.person.maomao"
    xmlns:tools="http://schemas.android.com/tools"
    android:layout_width="match_parent"
    android:layout_height="match_parent"
  >

    <com.person.maomao.MyRelativeLayout
        android:id="@+id/myRelativeLayout"
        android:layout_height="wrap_content"
        android:layout_width="match_parent"
        maomao:letGps_on="GPS已打开"
        maomao:letGps_off="GPS已关闭"
        />

</RelativeLayout>
(5)主页面java代码:
(跟前一篇的(4)对应,但代码有所改变)
import android.app.Activity;
import android.os.Bundle;
import android.view.View;
import android.view.View.OnClickListener;

public class MainActivity extends Activity {

    MyRelativeLayout  myRelativeLayout;
    @Override
    protected void onCreate(Bundle savedInstanceState) {
        super.onCreate(savedInstanceState);
        setContentView(R.layout.activity_main);
        myRelativeLayout=(MyRelativeLayout) findViewById(R.id.myRelativeLayout);
        myRelativeLayout.setOnClickListener(new OnClickListener() {

            @Override
            public void onClick(View v){
                // TODO Auto-generated method stub
                myRelativeLayout.Checked();
            }
        });
    }
}
(6)清单文件AndroidManifest.xml:
(跟前一篇的(5)对应)
  <application
        android:allowBackup="true"
        android:icon="@drawable/ic_launcher"
        android:label="@string/app_name"
        android:theme="@style/AppTheme" >
        <activity
            android:name=".MainActivity"
            android:label="@string/app_name" >
            <intent-filter>
             <action android:name="android.intent.action.MAIN" />

             <category android:name="android.intent.category.LAUNCHER" />
            </intent-filter>
        </activity>
    </application>
4.结果:
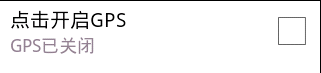
在自定义后,下图的界面只需要一个组件即可完成:

单击图中任意地方(也就是单击所自定义的组件),效果如下:
5.自定义组合组件总结:
- 编写组合控件的布局文件
- 自定义一个View, 继承ViewGroup,比如RelativeLayout,并在自定义的View中加载布局文件
- 自定义属性
6.备注:
有问题的地方还请各位多多包含,不吝赐教。


 2万+
2万+


 被折叠的 条评论
为什么被折叠?
被折叠的 条评论
为什么被折叠?
 到【灌水乐园】发言


