


Spring:二、Bean管理-XML方式
1 IOC
1 IoC思想基于IoC容器完成,IoC容器底层就是对象工厂。
2 spring提供IoC容器实现两种方式:(两个接口)
(1)BeanFactory:IoC容器基本实现,是spring内部的使用接口,不提供开发人员进行使用(加载配置文件时不会创建对象,在获取对象(使用)时才去创建对象)
(2)ApplicationContext:BeanFactory接口的子接口,提供更多强大的功能,一般由开发人员进行使用(加载配置文件时候就会把配置文件对象进行创建)
idea上点击ApplicationContext,按下ctrl+h:


小区别:ClassPathXmlApplicationContext在文件相应的路径下即可,不需要全部路径名;FileSystemXmlApplicationContext需要文件的全部路径
2 XML使用
2.1 默认使用无参构造方法
修改User类,使其只含有含参构造方法:
package com.xiaoxu.pojo;

import lombok.AllArgsConstructor;

@AllArgsConstructor
public class User {
    private String str;

    public String getStr() {
        return str;
    }

    public void setStr(String str) {
        this.str = str;
    }

    @Override
    public String toString() {
        return "User{" +
                "str='" + str + '\'' +
                '}';
    }
}
新建测试类Myuser:
import com.xiaoxu.pojo.User;
import org.springframework.context.ApplicationContext;
import org.springframework.context.support.ClassPathXmlApplicationContext;

public class Myuser {
    public static void main(String[] args) {
        ApplicationContext a=new ClassPathXmlApplicationContext("xiaoxu.xml");
        System.out.println(a);
        User u= (User)a.getBean("hello_spring");
        System.out.println(u);
    }
}
xiaoxu.xml:
<?xml version="1.0" encoding="UTF-8"?>
<beans xmlns="http://www.springframework.org/schema/beans"
       xmlns:xsi="http://www.w3.org/2001/XMLSchema-instance"
       xsi:schemaLocation="http://www.springframework.org/schema/beans
        https://www.springframework.org/schema/beans/spring-beans.xsd">

    <!--  使用Spring来创建对象,在Spring这些都称为Bean
    bean = 对象
    id = 变量名
    class(全限定类名) = new 的对象的
    property 给对象中属性设置一个值
    -->
    <bean id="hello_spring" class="com.xiaoxu.pojo.User">
        <property name="str" value="hello my spring!"/>
    </bean>
</beans>
执行报错:

上述代码,去掉User类的@AllArgsConstructor注解即可。当< bean >标签中没有任何构造方法相关的标签时(constructor-arg)默认是使用无参构造方法。
2.2 基于xml方式注入属性
(1)DI(Dependency Injection)依赖注入,即注入属性
第一种方式:使用set方法进行注入
1 类中添加属性和相应的set方法(使用property标签注入属性,如果实体类不存在该property的set方法,会抛错)

2 bean中添加property(property标签里需要添加name和value属性,name代表需要set的变量名称,value是赋值,多个变量赋值,多个property标签即可):

第二种方式:使用有参构造方法注入属性
lombok只添加@AllArgsConstructor装饰器时,只会含有有参构造方法,没有无参构造方法。
import lombok.AllArgsConstructor;
import lombok.Data;

@Data
@AllArgsConstructor
public class User {
    private String str;
    private int age;
}
xiaoxu.xml:
<?xml version="1.0" encoding="UTF-8"?>
<beans xmlns="http://www.springframework.org/schema/beans"
       xmlns:xsi="http://www.w3.org/2001/XMLSchema-instance"
       xsi:schemaLocation="http://www.springframework.org/schema/beans
        https://www.springframework.org/schema/beans/spring-beans.xsd">

    <!--  使用Spring来创建对象,在Spring这些都称为Bean
    bean = 对象
    id = 变量名
    class(全限定类名) = new 的对象的
    property 给对象中属性设置一个值
    -->
    <bean id="youcanUser" class="com.xiaoxu.pojo.User">
        <constructor-arg name="str" value="xiaoxu"></constructor-arg>
        <constructor-arg name="age" value="26"></constructor-arg>
    </bean>
</beans>
import com.xiaoxu.pojo.User;
import org.springframework.context.ApplicationContext;
import org.springframework.context.support.ClassPathXmlApplicationContext;

public class Myuser {
    public static void main(String[] args) {
        ApplicationContext a=new ClassPathXmlApplicationContext("xiaoxu.xml");
        User u=a.getBean("youcanUser",User.class);
        System.out.println(u);
    }
}
User(str=xiaoxu, age=26)
2.3 p命名空间
使用p名称标签,xml中提示URL找不到:

在idea的File -> settings中:


然后观察xml(可以识别了):

修改xiaoxu.xml如下,增加:xmlns:p=“http://www.springframework.org/schema/p”:
<?xml version="1.0" encoding="UTF-8"?>
<beans xmlns="http://www.springframework.org/schema/beans"
       xmlns:xsi="http://www.w3.org/2001/XMLSchema-instance"
       xmlns:p="http://www.springframework.org/schema/p"
       xsi:schemaLocation="http://www.springframework.org/schema/beans
        https://www.springframework.org/schema/beans/spring-beans.xsd">

<!--    <bean id="youcanUser" class="com.xiaoxu.pojo.User">-->
<!--        <constructor-arg name="str" value="xiaoxu"></constructor-arg>-->
<!--        <constructor-arg name="age" value="26"></constructor-arg>-->
<!--    </bean>-->

    <bean id="youcanUser" class="com.xiaoxu.pojo.User" p:str="小徐呀" p:age="28">
    </bean>
</beans>
因为是无参构造的bean,所以在User类中增加无参构造方法即可:
package com.xiaoxu.pojo;

import lombok.AllArgsConstructor;
import lombok.Data;
import lombok.NoArgsConstructor;

@Data
@AllArgsConstructor
@NoArgsConstructor
public class User {
    private String str;
    private int age;
}
调用:
import com.xiaoxu.pojo.User;
import org.springframework.context.ApplicationContext;
import org.springframework.context.support.ClassPathXmlApplicationContext;

public class Myuser {
    public static void main(String[] args) {
        ApplicationContext a=new ClassPathXmlApplicationContext("xiaoxu.xml");
        User u=a.getBean("youcanUser",User.class);
        System.out.println(u);
    }
}
User(str=小徐呀, age=28)
2.4 注入空值和特殊符号
2.4.1 注入空值null
User.java:
import lombok.AllArgsConstructor;
import lombok.Data;
import lombok.NoArgsConstructor;

@Data
@AllArgsConstructor
@NoArgsConstructor
public class User {
    private String str;
    private int age;
    private String address;
}
xiaoxu.xml:
<?xml version="1.0" encoding="UTF-8"?>
<beans xmlns="http://www.springframework.org/schema/beans"
       xmlns:xsi="http://www.w3.org/2001/XMLSchema-instance"
       xmlns:p="http://www.springframework.org/schema/p"
       xsi:schemaLocation="http://www.springframework.org/schema/beans
        https://www.springframework.org/schema/beans/spring-beans.xsd">

    <bean id="youcanUser" class="com.xiaoxu.pojo.User" p:str="小徐呀" p:age="28">
        <property name="address"><null/></property>
    </bean>
</beans>
Myuser.java:
import com.xiaoxu.pojo.User;
import org.springframework.context.ApplicationContext;
import org.springframework.context.support.ClassPathXmlApplicationContext;

public class Myuser {
    public static void main(String[] args) {
        ApplicationContext a=new ClassPathXmlApplicationContext("xiaoxu.xml");
        User u=a.getBean("youcanUser",User.class);
        System.out.println(u);
    }
}
2.4.2 注入特殊符号
修改上述xiaoxu.xml即可:
<?xml version="1.0" encoding="UTF-8"?>
<beans xmlns="http://www.springframework.org/schema/beans"
xmlns:xsi="http://www.w3.org/2001/XMLSchema-instance"
xmlns:p="http://www.springframework.org/schema/p"
xsi:schemaLocation="http://www.springframework.org/schema/beans
https://www.springframework.org/schema/beans/spring-beans.xsd">
<!-- 如果希望注入特殊符号,比如<>,因为会和标签的<>相矛盾(有点和python的jinja2模板语法类似,对于{%%}的规范要求很严格)
方式:1.对<>进行转义:><(gt:greater than:大于,>;lt:less than:小于,<。)
2.特殊符号内容写入CDATA(常用,即需要转义的符号,如大于小于,可写入xml的CDATA区)
格式:<![CDATA[需转义内容]]>(注意:需包裹在<property></property>内,
<![CDATA[需转义内容]]>再包裹在<value></value>中,不需要""双引号了)
-->
<bean id="youcanUser" class="com.xiaoxu.pojo.User" p:str="小徐呀" p:age="28">
<property name="address">
<value><![CDATA[<重庆>]]></value>
</property>
</bean>
</beans>
重新执行:
User(str=小徐呀, age=28, address=<重庆>)
2.5 注入属性-外部bean
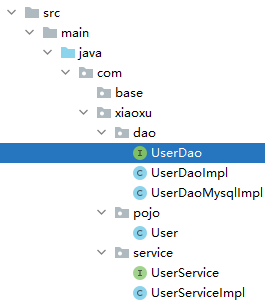
UserDao:
package com.xiaoxu.dao;

public interface UserDao {
    void getUser();
}
UserDaoImpl:
package com.xiaoxu.dao;

public class UserDaoImpl implements UserDao{
    public void getUser(){
        System.out.println("获取用户的数据");
    }
}
UserDaoMysqlImpl:
package com.xiaoxu.dao;

public class UserDaoMysqlImpl implements UserDao{
    @Override
    public void getUser(){
        System.out.println("Mysql获取用户数据!");
    }
}
UserService:
package com.xiaoxu.service;

public interface UserService {
    void getUser();
}
UserServiceImpl:
package com.xiaoxu.service;

import com.xiaoxu.dao.UserDao;

public class UserServiceImpl implements UserService{
    //服务层调用dao层
    private UserDao userDao;

    //利用set进行动态实现值的注入
    public void setUserDao(UserDao userDao) {
        this.userDao = userDao;
    }

    public void getUser(){
        userDao.getUser();
    }
}
myUser.xml:
<?xml version="1.0" encoding="UTF-8"?>
<beans xmlns="http://www.springframework.org/schema/beans"
       xmlns:xsi="http://www.w3.org/2001/XMLSchema-instance"
       xsi:schemaLocation="http://www.springframework.org/schema/beans
        https://www.springframework.org/schema/beans/spring-beans.xsd">

    <!--
        ref:引用spring容器中创建好的对象(可以理解为该对象的引用,使用id)
        value:具体的值,基本数据类型
    -->
    <bean id="daomysqlImpl" class="com.xiaoxu.dao.UserDaoMysqlImpl"/>
    <bean id="daoImpl" class="com.xiaoxu.dao.UserDaoImpl"/>

    <bean id="userServiceImpl" class="com.xiaoxu.service.UserServiceImpl">
        <property name="userDao" ref="daomysqlImpl"/>
    </bean>
</beans>
2.6 注入属性-级联赋值
(1)一对多关系:部门和员工,一个部门有多个员工,一个员工属于一个部门,部门是一,员工是多
(2)在实体类之间表示一对多关系,员工表示所属部门,使用对象类型属性进行表示
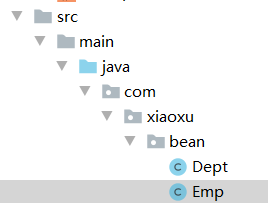
Dept类:
package com.xiaoxu.bean;

//部门类
public class Dept {
    private String dept;

    public void setDept(String dept) {
        this.dept = dept;
    }

    @Override
    public String toString() {
        return "Dept{" +
                "dept='" + dept + '\'' +
                '}';
    }
}
Emp类:
package com.xiaoxu.bean;

//员工类
public class Emp {
    private String ename;
    private String gender;
    //员工属于某个部门,使用对象形式表示
    private Dept dept;

    public void setDept(Dept dept) {
        this.dept = dept;
    }

    public void setEname(String ename) {
        this.ename = ename;
    }

    public void setGender(String gender) {
        this.gender = gender;
    }

    @Override
    public String toString() {
        return "Emp{" +
                "ename='" + ename + '\'' +
                ", gender='" + gender + '\'' +
                ", dept=" + dept +
                '}';
    }
}
(3)在spring配置文件中进行配置
配置前,先在idea配置一下xml的初始化模板:
<?xml version="1.0" encoding="UTF-8"?>
<beans xmlns="http://www.springframework.org/schema/beans"
       xmlns:xsi="http://www.w3.org/2001/XMLSchema-instance"
       xsi:schemaLocation="http://www.springframework.org/schema/beans
        https://www.springframework.org/schema/beans/spring-beans.xsd">

</beans>


beans1.xml:
<?xml version="1.0" encoding="UTF-8"?>
<beans xmlns="http://www.springframework.org/schema/beans"
       xmlns:xsi="http://www.w3.org/2001/XMLSchema-instance"
       xsi:schemaLocation="http://www.springframework.org/schema/beans
        https://www.springframework.org/schema/beans/spring-beans.xsd">
    <bean id="emp" class="com.xiaoxu.bean.Emp">
        <property name="ename" value="xiaoxu"/>
        <property name="gender" value="man"/>
        <!--  级联赋值  -->
        <property name="dept" ref="dept"/>
    </bean>
    <bean id="dept" class="com.xiaoxu.bean.Dept">
        <property name="dept" value="会计部"/>
    </bean>
</beans>
TestDept.java:
import com.xiaoxu.bean.Emp;
import org.junit.Test;
import org.springframework.context.ApplicationContext;
import org.springframework.context.support.ClassPathXmlApplicationContext;

/**
 * @author xiaoxu
 * @date 2021-11-14 22:53
 * SpringLearn:PACKAGE_NAME.TestDept
 */
public class TestDept {
    @Test
    public void testDep(){
        ApplicationContext context= new ClassPathXmlApplicationContext("beans1.xml");
        Emp e=context.getBean("emp", Emp.class);
        System.out.println(e);

    }
}
Emp{ename='xiaoxu', gender='man', dept=Dept{dept='会计部'}}
还可以换种写法:
Emp:

Dept:


public class TestDept {
    @Test
    public void testDep(){
        ApplicationContext context= new ClassPathXmlApplicationContext("beans1.xml");
        Emp e=context.getBean("emp", Emp.class);
        System.out.println(e);
    }
}
执行结果如下:
Emp{ename='xiaoxu', gender='man', dept=Dept{dname='技术部'}}
2.7 注入集合类型属性
2.7.1
若需要传递类似于 Java Collection 类型的值,例如 List、Set、Map 和 properties,可以使用 Spring 提供的集合配置标签:
| 标签 | 说明 |
|---|---|
| < list > | 用于注入 list 类型的值,允许重复 |
| < set > | 用于注入 set 类型的值,不允许重复 |
| < map > | 用于注入 key-value 的集合,其中 key-value 可以是任意类型 |
| < props > | 用于注入 key-value 的集合,其中 key-value 都是字符串类型 |
新建学生类,含有集合类型属性:
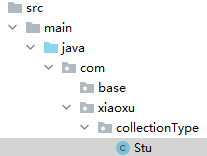
package com.xiaoxu.collectionType;

import lombok.Data;

import java.util.List;
import java.util.Map;
import java.util.Properties;
import java.util.Set;

@Data
public class Stu {
    //1.数组类型属性
    private String[] courses;
    //2.list集合类型属性
    private List<String> l;
    //3.map集合类型属性
    private Map<String,String> m;
    //4.set集合类型属性
    private Set<String> s;
    //5.properties
    private Properties p;
}

beans1.xml:
<?xml version="1.0" encoding="UTF-8"?>
<beans xmlns="http://www.springframework.org/schema/beans"
       xmlns:xsi="http://www.w3.org/2001/XMLSchema-instance"
       xsi:schemaLocation="http://www.springframework.org/schema/beans
        https://www.springframework.org/schema/beans/spring-beans.xsd">

        <bean id="stu" class="com.xiaoxu.collectionType.Stu">
            <!-- 1.数组类型属性注入,数组使用标签:property中使用array或者list都可以  -->
            <property name="courses">
                <array>
                    <value>java课程</value>
                    <value>python课程</value>
                </array>
            </property>

            <!-- 2.list类型属性注入   -->
            <property name="l">
                <list>
                    <value>小徐</value>
                    <value>小李</value>
                </list>
            </property>

            <!-- 3.map类型属性注入   -->
            <property name="m">
                <map>
                    <entry key="JAVA" value="java"/>
                    <entry key="PYTHON" value="python"/>
                </map>
            </property>

            <!-- 4.set类型属性注入   -->
            <property name="s">
                <set>
                    <value>Spring</value>
                    <value>Django</value>
                </set>
            </property>

            <!-- 5.Properties类型属性注入  -->
            <property name="p">
                <props>
                    <prop key="one">xyz</prop>
                    <prop key="two">abc</prop>
                </props>
            </property>
        </bean>
</beans>
测试类:
import com.xiaoxu.collectionType.Stu;
import org.junit.Test;
import org.springframework.context.ApplicationContext;
import org.springframework.context.support.ClassPathXmlApplicationContext;

import java.util.Arrays;

public class TestStu {
    @Test
    public void test_01(){
        ApplicationContext context=new ClassPathXmlApplicationContext("beans1.xml");
        Stu student=context.getBean("stu",Stu.class);
        System.out.println(Arrays.toString(student.getCourses()));
        System.out.println(student.getL());
        System.out.println(student.getM());
        System.out.println(student.getS());
        System.out.println(student.getP());
    }
}
执行结果:
[java课程, python课程]
[小徐, 小李]
{JAVA=java, PYTHON=python}
[Spring, Django]
{two=abc, one=xyz}
2.7.2 注入list集合类型,值是对象
新建课程类:
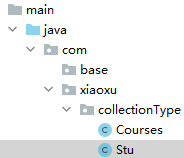
Courses (@Data会带上getter、setter、toString):
package com.xiaoxu.collectionType;

import lombok.Data;

//课程类
@Data
public class Courses {
    private String cname; //课程名称
}
修改beans1.xml:
<?xml version="1.0" encoding="UTF-8"?>
<beans xmlns="http://www.springframework.org/schema/beans"
       xmlns:xsi="http://www.w3.org/2001/XMLSchema-instance"
       xsi:schemaLocation="http://www.springframework.org/schema/beans
        https://www.springframework.org/schema/beans/spring-beans.xsd">

        <bean id="stu" class="com.xiaoxu.collectionType.Stu">
            <!-- 1.数组类型属性注入,数组使用标签:property中使用array或者list都可以  -->
            <property name="courses">
                <array>
                    <value>java课程</value>
                    <value>python课程</value>
                </array>
            </property>

            <!-- 2.list类型属性注入   -->
            <property name="l">
                <list>
                    <value>小徐</value>
                    <value>小李</value>
                </list>
            </property>

            <!-- 3.map类型属性注入   -->
            <property name="m">
                <map>
                    <entry key="JAVA" value="java"/>
                    <entry key="PYTHON" value="python"/>
                </map>
            </property>

            <!-- 4.set类型属性注入   -->
            <property name="s">
                <set>
                    <value>Spring</value>
                    <value>Django</value>
                </set>
            </property>

            <!-- 5.Properties类型属性注入  -->
            <property name="p">
                <props>
                    <prop key="one">xyz</prop>
                    <prop key="two">abc</prop>
                </props>
            </property>

            <!--  6 注入list集合类型,值是对象     -->
            <property name="coursesList">
                <list>
                    <ref bean="course1"/>
                    <ref bean="course2"/>
                </list>
            </property>
        </bean>
        <!-- 创建多个course对象   -->
        <bean id="course1" class="com.xiaoxu.collectionType.Courses">
            <property name="cname" value="Spring5框架"/>
        </bean>
        <bean id="course2" class="com.xiaoxu.collectionType.Courses">
            <property name="cname" value="SpringBoot框架"/>
        </bean>
</beans>
执行测试类:
@Test
public void test_01(){
    ApplicationContext context=new ClassPathXmlApplicationContext("beans1.xml");
    Stu student=context.getBean("stu",Stu.class);
    System.out.println(Arrays.toString(student.getCourses()));
    System.out.println(student.getL());
    System.out.println(student.getM());
    System.out.println(student.getS());
    System.out.println(student.getP());
    System.out.println(student.getCoursesList());
}
[java课程, python课程]
[小徐, 小李]
{JAVA=java, PYTHON=python}
[Spring, Django]
{two=abc, one=xyz}
[Courses(cname=Spring5框架), Courses(cname=SpringBoot框架)]
2.7.3 把集合注入部分提取出来
新建Book类:
package com.xiaoxu.collectionType;

import lombok.Data;

import java.util.List;

@Data
public class Book {
    private List<String> book_list;
}
(1)在spring配置文件中引入名称空间(util)
<?xml version="1.0" encoding="UTF-8"?>
<beans xmlns="http://www.springframework.org/schema/beans"
       xmlns:xsi="http://www.w3.org/2001/XMLSchema-instance"
       xmlns:util="http://www.springframework.org/schema/util"
       xsi:schemaLocation="http://www.springframework.org/schema/beans
        https://www.springframework.org/schema/beans/spring-beans.xsd
        http://www.springframework.org/schema/util
        https://www.springframework.org/schema/util/spring-util.xsd">

</beans>

beans2.xml:
<?xml version="1.0" encoding="UTF-8"?>
<beans xmlns="http://www.springframework.org/schema/beans"
       xmlns:xsi="http://www.w3.org/2001/XMLSchema-instance"
       xmlns:util="http://www.springframework.org/schema/util"
       xsi:schemaLocation="http://www.springframework.org/schema/beans
        https://www.springframework.org/schema/beans/spring-beans.xsd
        http://www.springframework.org/schema/util
        https://www.springframework.org/schema/util/spring-util.xsd">

        <!-- 1 提取list集合类型属性注入
             如果List中的泛型是其他类的对象,那么就可以在list标签中使用: <ref bean="XX_bean_id"/>-->
        <util:list id="b_list">
            <value>java从入门到放弃</value>
            <value>python从入门到成功</value>
        </util:list>
        <!-- 2 提取list集合类型属性注入使用  -->
        <bean id="book" class="com.xiaoxu.collectionType.Book">
            <property name="book_list" ref="b_list"/>
        </bean>
</beans>
测试方法:
@Test
public void test_02(){
    ApplicationContext context=new ClassPathXmlApplicationContext("beans2.xml");
    Book b=context.getBean("book",Book.class);
    System.out.println(b.getBook_list());
}
[java从入门到放弃, python从入门到成功]
2.8 工厂bean
spring有两种类型bean,一种普通bean,另外一种工厂bean(FactoryBean)
(1)普通bean:在配置文件中定义bean类型就是返回类型
(2)工厂bean:在配置文件定义bean类型可以和返回类型不一样:一、创建类,让这个类作为工厂bean,实现接口FactoryBean;二、实现接口里面的方法,在实现的方法中定义返回的bean类型

MyBean:
package com.xiaoxu.factorybean;

import com.xiaoxu.collectionType.Courses;
import org.springframework.beans.factory.FactoryBean;

public class MyBean implements FactoryBean<Courses> {
    //定义返回bean
    @Override
    public Courses getObject() throws Exception {
        Courses c=new Courses();
        c.setCname("java入门");
        return c;
    }

    @Override
    public Class<?> getObjectType() {
        return null;
    }

    @Override
    public boolean isSingleton() {
        return FactoryBean.super.isSingleton();
    }
}
MyBean.xml:
<?xml version="1.0" encoding="UTF-8"?>
<beans xmlns="http://www.springframework.org/schema/beans"
       xmlns:xsi="http://www.w3.org/2001/XMLSchema-instance"
       xsi:schemaLocation="http://www.springframework.org/schema/beans
        https://www.springframework.org/schema/beans/spring-beans.xsd">

        <bean id="mybean" class="com.xiaoxu.factorybean.MyBean">

        </bean>

</beans>
测试类:
import com.xiaoxu.collectionType.Courses;
import com.xiaoxu.factorybean.MyBean;
import org.junit.Test;
import org.springframework.context.ApplicationContext;
import org.springframework.context.support.ClassPathXmlApplicationContext;

public class TestMyBean {
    @Test
    public void test_01(){
        ApplicationContext context=new ClassPathXmlApplicationContext("MyBean.xml");
        Courses my=context.getBean("mybean", Courses.class);
        System.out.println(my);
    }
}
Courses(cname=java入门)
2. 9 xml中bean默认是单例对象(Bean的作用域)
单个bean标签创建的对象,是同一个内存地址:
import com.xiaoxu.pojo.User;
import org.springframework.context.ApplicationContext;
import org.springframework.context.support.ClassPathXmlApplicationContext;

public class Myuser {
    public static void main(String[] args) {
        ApplicationContext a=new ClassPathXmlApplicationContext("xiaoxu.xml");
        System.out.println(a);
        User u= (User)a.getBean("hello_spring");
        System.out.println(u);
        User u1=a.getBean("hello_spring",User.class);
        System.out.println(u1);
        System.out.println(u==u1);
    }
}
org.springframework.context.support.ClassPathXmlApplicationContext@b1bc7ed, started on Wed Nov 10 14:01:41 CST 2021
User{str='hello my spring!'}
User{str='hello my spring!'}
true
bean的作用域可以通过scope属性进行控制:
Spring 5 支持以下 6 种作用域。
1)singleton
默认值,单例模式,表示在 Spring 容器中只有一个 Bean 实例,Bean 以单例的方式存在。
2)prototype
原型模式,表示每次通过 Spring 容器获取 Bean 时,容器都会创建一个 Bean 实例。
3)request
每次 HTTP 请求,容器都会创建一个 Bean 实例。该作用域只在当前 HTTP Request 内有效。
4)session
同一个 HTTP Session 共享一个 Bean 实例,不同的 Session 使用不同的 Bean 实例。该作用域仅在当前 HTTP Session 内有效。
5)application
同一个 Web 应用共享一个 Bean 实例,该作用域在当前 ServletContext 内有效。
类似于 singleton,不同的是,singleton 表示每个 IoC 容器中仅有一个 Bean 实例,而同一个 Web 应用中可能会有多个 IoC 容器,但一个 Web 应用只会有一个 ServletContext,也可以说 application 才是 Web 应用中货真价实的单例模式。
6)websocket
websocket 的作用域是 WebSocket ,即在整个 WebSocket 中有效。
request、session、application、websocket 和 global Session 作用域只能在 Web 环境下使用,如果使用 ClassPathXmlApplicationContext 加载这些作用域中的任意一个的 Bean,就会抛出以下异常。
java.lang.IllegalStateException: No Scope registered for scope name 'xxx'
singleton
singleton 是 Spring 容器默认的作用域。当 Bean 的作用域为 singleton 时,Spring 容器中只会存在一个共享的 Bean 实例。该 Bean 实例将存储在高速缓存中,并且所有对 Bean 的请求,只要 id 与该 Bean 定义相匹配,都会返回该缓存对象。
通常情况下,这种单例模式对于无会话状态的 Bean(如 DAO 层、Service 层)来说,是最理想的选择。
prototype
对于 prototype 作用域的 Bean,Spring 容器会在每次请求该 Bean 时都创建一个新的 Bean 实例。prototype 作用域适用于需要保持会话状态的 Bean(如 Struts2 的 Action 类)。
修改beans2.xml,scope=“prototype”:
<?xml version="1.0" encoding="UTF-8"?>
<beans xmlns="http://www.springframework.org/schema/beans"
       xmlns:xsi="http://www.w3.org/2001/XMLSchema-instance"
       xmlns:util="http://www.springframework.org/schema/util"
       xsi:schemaLocation="http://www.springframework.org/schema/beans
        https://www.springframework.org/schema/beans/spring-beans.xsd
        http://www.springframework.org/schema/util
        https://www.springframework.org/schema/util/spring-util.xsd">

        <!-- 1 提取list集合类型属性注入
             如果List中的泛型是其他类的对象,那么就可以在list标签中使用: <ref bean="XX_bean_id"/>-->
        <util:list id="b_list">
            <value>java从入门到放弃</value>
            <value>python从入门到成功</value>
        </util:list>
        <!-- 2 提取list集合类型属性注入使用  -->
        <bean id="book" class="com.xiaoxu.collectionType.Book" scope="prototype">
            <property name="book_list" ref="b_list"/>
        </bean>
</beans>
@Test
public void test_02(){
    ApplicationContext context=new ClassPathXmlApplicationContext("beans2.xml");
    Book b=context.getBean("book",Book.class);
    Book b2=context.getBean("book",Book.class);
    System.out.println(b==b2);
}
false
说明scope="prototype"时,多次创建的对象内存地址不是同一个了。
(1)singleton是单实例,加载spring配置文件时就会创建单实例对象
(2)prototype是多实例,不是在加载spring配置文件时候创建对象,在调用getBean方法时创建多实例对象(懒加载)
2.10 Bean的生命周期
在传统的 Java 应用中,Bean 的生命周期很简单,使用关键字 new 实例化 Bean,当不需要该 Bean 时,由 Java 自动进行垃圾回收。
Spring 中 Bean 的生命周期较复杂,可以表示为:Bean 的定义 -> Bean 的初始化 -> Bean 的使用 -> Bean 的销毁。
Spring 根据 Bean 的作用域来选择管理方式。对于 singleton 作用域的 Bean,Spring 能够精确地知道该 Bean 何时被创建,何时初始化完成,以及何时被销毁;而对于 prototype 作用域的 Bean,Spring 只负责创建,当容器创建了 Bean 的实例后,Bean 的实例就交给客户端代码管理,Spring 容器将不再跟踪其生命周期。
(1)生命周期:从对象创建到对象销毁的过程
(2)bean生命周期:1、通过构造器创建bean实例(无参数构造)2、为bean的属性设置值和对其他bean引用(调用set方法)3、调用bean的初始化方法(需要进行配置初始化的方法) 4、bean可以使用(获取到了对象)5、当容器关闭时,调用bean的销毁方法(需要进行配置销毁的方法)

ordes:
package com.xiaoxu.bean;

public class ordes {
    public ordes(){
        System.out.println("第一步执行了order无参构造创建bean实例...");
    }
    private String oname;

    public void setOname(String oname) {
        this.oname = oname;
        System.out.println("第二步执行了set方法");
    }

    //创建执行的初始化方法,需要去xml中配置
    public void initMethod_xiaoxu(){
        System.out.println("第三步执行了初始化方法");
    }

    //创建执行的销毁的方法
    public void destroyMethod(){
        System.out.println("第五步手动来销毁..");
    }
}
beans3.xml:
<?xml version="1.0" encoding="UTF-8"?>
<beans xmlns="http://www.springframework.org/schema/beans"
       xmlns:xsi="http://www.w3.org/2001/XMLSchema-instance"
       xsi:schemaLocation="http://www.springframework.org/schema/beans
        https://www.springframework.org/schema/beans/spring-beans.xsd">

        <bean id="order" class="com.xiaoxu.bean.ordes" init-method="initMethod_xiaoxu" destroy-method="destroyMethod">
            <property name="oname" value="苹果"/>
        </bean>
</beans>
测试类:
import com.xiaoxu.bean.ordes;
import org.junit.Test;
import org.springframework.context.ApplicationContext;
import org.springframework.context.support.ClassPathXmlApplicationContext;

public class MyTest {
    @Test
    public void test_01(){
//        ApplicationContext context = new ClassPathXmlApplicationContext("beans3.xml");
        ClassPathXmlApplicationContext context = new ClassPathXmlApplicationContext("beans3.xml");
        ordes  o = context.getBean("order",ordes.class);
        System.out.println("第四步获取创建bean实例");
        System.out.println(o);

        //手动让bean实例销毁
        context.close();
    }
}
第一步执行了order无参构造创建bean实例...
第二步执行了set方法
第三步执行了初始化方法
第四步获取创建bean实例
com.xiaoxu.bean.ordes@706a04ae
第五步手动来销毁..
加上bean的后置处理器,在第三步之前和之后添加,bean的生命周期有7步:
(3)之前:把bean实例传递bean后置处理器的方法 (3)之后:把bean实例传递bean后置处理器的方法
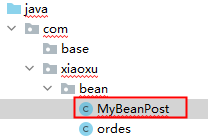

MyBeanPost:
package com.xiaoxu.bean;

import org.springframework.beans.BeansException;
import org.springframework.beans.factory.config.BeanPostProcessor;
import org.springframework.lang.Nullable;

public class MyBeanPost implements BeanPostProcessor {
    @Override
    public Object postProcessBeforeInitialization(Object bean, String beanName) throws BeansException {
        System.out.println("在初始化之前执行的方法");
        return bean;
    }

    @Override
    public Object postProcessAfterInitialization(Object bean, String beanName) throws BeansException {
        System.out.println("在初始化之后执行的方法");
        return bean;
    }
}
beans3.xml:
<?xml version="1.0" encoding="UTF-8"?>
<beans xmlns="http://www.springframework.org/schema/beans"
       xmlns:xsi="http://www.w3.org/2001/XMLSchema-instance"
       xsi:schemaLocation="http://www.springframework.org/schema/beans
        https://www.springframework.org/schema/beans/spring-beans.xsd">

        <bean id="order" class="com.xiaoxu.bean.ordes" init-method="initMethod_xiaoxu" destroy-method="destroyMethod">
            <property name="oname" value="苹果"/>
        </bean>

        <!-- 配置后置处理器
         这样在最外面加,如果有多个bean,都会执行这个后置处理器-->
        <bean id="beanPost" class="com.xiaoxu.bean.MyBeanPost"/>
</beans>
执行测试类:
第一步执行了order无参构造创建bean实例...
第二步执行了set方法
在初始化之前执行的方法
第三步执行了初始化方法
在初始化之后执行的方法
第四步获取创建bean实例
com.xiaoxu.bean.ordes@47db50c5
第五步手动来销毁..
2.11 xml自动装配
Emp:
package com.xiaoxu.pojo;

import lombok.Data;

@Data
public class Emp {
    private Dept de;
}
Dept:
package com.xiaoxu.pojo;

import lombok.Data;

@Data
public class Dept {
    private String dname;
}
beans4.xml:
<?xml version="1.0" encoding="UTF-8"?>
<beans xmlns="http://www.springframework.org/schema/beans"
       xmlns:xsi="http://www.w3.org/2001/XMLSchema-instance"
       xsi:schemaLocation="http://www.springframework.org/schema/beans
        https://www.springframework.org/schema/beans/spring-beans.xsd">
        <!--  实现自动注入
           bean标签属性  autowire,配置自动装配
           autowire常用有两个值:byName根据属性名称注入:注入值bean的id的值,要和类属性名称一样
           byType根据属性类型注入-->
        <bean id="emp" class="com.xiaoxu.pojo.Emp" autowire="byName">
<!--            <property name="de" ref="dept"/>-->
        </bean>
        <bean id="de" class="com.xiaoxu.pojo.Dept">
            <property name="dname" value="技术部"/>
        </bean>
</beans>
测试类:
import com.xiaoxu.pojo.Emp;
import org.junit.Test;
import org.springframework.context.ApplicationContext;
import org.springframework.context.support.ClassPathXmlApplicationContext;

public class Mytest2 {
    @Test
    public void test_01(){
        ApplicationContext context=new ClassPathXmlApplicationContext("beans4.xml");
        Emp e=context.getBean("emp", Emp.class);
        System.out.println(e);
    }
}
Emp(de=Dept(dname=技术部))
根据类型自动注入:
修改xml重新执行:
<?xml version="1.0" encoding="UTF-8"?>
<beans xmlns="http://www.springframework.org/schema/beans"
       xmlns:xsi="http://www.w3.org/2001/XMLSchema-instance"
       xsi:schemaLocation="http://www.springframework.org/schema/beans
        https://www.springframework.org/schema/beans/spring-beans.xsd">
        <!--  实现自动注入
           bean标签属性  autowire,配置自动装配
           autowire常用有两个值:byName根据属性名称注入:注入值bean的id的值,要和类属性名称一样
           byType根据属性类型注入-->
        <bean id="emp" class="com.xiaoxu.pojo.Emp" autowire="byType">
<!--            <property name="de" ref="dept"/>-->
        </bean>
        <bean id="dep" class="com.xiaoxu.pojo.Dept">
            <property name="dname" value="技术部"/>
        </bean>
</beans>
Emp(de=Dept(dname=技术部))
注意,byType,相同类型的bean不能定义多个。

2.12 IoC操作Bean管理(外部属性文件)
(1)直接配置数据库信息:配置德鲁伊连接池
(2)引入德鲁伊连接池依赖jar包
查询maven依赖:https://search.maven.org/

<dependency>
  <groupId>com.alibaba</groupId>
  <artifactId>druid</artifactId>
  <version>1.2.8</version>
</dependency>
beans.xml:
url的value,端口号后面是数据库名称;
username和password是数据库的账户和密码。
<?xml version="1.0" encoding="UTF-8"?>
<beans xmlns="http://www.springframework.org/schema/beans"
       xmlns:xsi="http://www.w3.org/2001/XMLSchema-instance"
       xsi:schemaLocation="http://www.springframework.org/schema/beans
        https://www.springframework.org/schema/beans/spring-beans.xsd">
        <!-- 直接配置连接池   -->
        <bean id="dataSource" class="com.alibaba.druid.pool.DruidDataSource">
            <property name="driverClassName" value="com.mysql.jdbc.Driver"/>
            <property name="url" value="jdbc:mysql://localhost:3306/mybook"/>
            <property name="username" value="root"/>
            <property name="password" value=""/>
        </bean>
</beans>
(2)引入外部属性文件配置数据库连接池
1 新建xx_jdbc.properties文件
同样在resource目录下,新建xx_jdbc.properties文件:
注意:左边前缀需要加上,否则可能会造成字段的冲突。
prop.driverClass=com.mysql.jdbc.Driver
prop.url=jdbc:mysql://localhost:3306/mybook
prop.userName=root
prop.password=
2 把外部properties属性文件引入到spring配置文件中:引入context名称空间
<?xml version="1.0" encoding="UTF-8"?>
<beans xmlns="http://www.springframework.org/schema/beans"
       xmlns:xsi="http://www.w3.org/2001/XMLSchema-instance"
       xmlns:context="http://www.springframework.org/schema/context"
       xsi:schemaLocation="http://www.springframework.org/schema/beans
        https://www.springframework.org/schema/beans/spring-beans.xsd
        http://www.springframework.org/schema/context
        https://www.springframework.org/schema/context/spring-context.xsd">

        <!-- 直接配置连接池   -->
<!--        <bean id="dataSource" class="com.alibaba.druid.pool.DruidDataSource">-->
<!--            <property name="driverClassName" value="com.mysql.jdbc.Driver"/>-->
<!--            <property name="url" value="jdbc:mysql://localhost:3306/mybook"/>-->
<!--            <property name="username" value="root"/>-->
<!--            <property name="password" value=""/>-->
<!--        </bean>-->

        <!--  引入外部属性文件  -->
        <!--  classpath:对应项目的src目录(包含了main和test下目录,自然就包含了resource目录)  -->
        <context:property-placeholder location="classpath:deluyi_beans.xml"/>
        <!--  配置连接池  ${}是spring的表达式-->
        <bean id="dataSource" class="com.alibaba.druid.pool.DruidDataSource">
            <property name="driverClassName" value="${prop.driverClass}"/>
            <property name="url" value="${prop.url}"/>
            <property name="username" value="${prop.userName}"/>
            <property name="password" value="${prop.password}"/>
        </bean>
</beans>


 1386
1386


 被折叠的 条评论
为什么被折叠?
被折叠的 条评论
为什么被折叠?
 到【灌水乐园】发言


