springboot 使用ResponseBodyAdvice 拦截获取controller的response body内容

项目中经常需要记录各种日志,尤其是web请求的请求信息和响应内容信息。请求信息我们可以通过拦截器很容易获取到,但是在拦截器中想要获取controller response body内容就不太容易了。

springmvc3 以后支持 实现 ResponseBodyAdvice 来获取web请求的response body

只要实现 ResponseBodyAdvice 接口类就行,如下:

import org.springframework.core.MethodParameter;
import org.springframework.http.MediaType;
import org.springframework.http.server.ServerHttpRequest;
import org.springframework.http.server.ServerHttpResponse;
import org.springframework.web.bind.annotation.ControllerAdvice;
import org.springframework.web.servlet.mvc.method.annotation.ResponseBodyAdvice;


/**
 * @author:
 **/
@ControllerAdvice
public class MyResponseBodyAdvice implements ResponseBodyAdvice {
    @Override
    public boolean supports(MethodParameter methodParameter, Class aClass) {
        //这个地方如果返回false ,不会执行 beforeBodyWrite 方法
        return true;
    }

    @Override
    public Object beforeBodyWrite(Object o, MethodParameter methodParameter, MediaType mediaType, Class aClass, ServerHttpRequest serverHttpRequest, ServerHttpResponse serverHttpResponse) {
        System.out.println( "response body : " + o );
        //返回body内容,可以在这里做修改,然后返回给前端
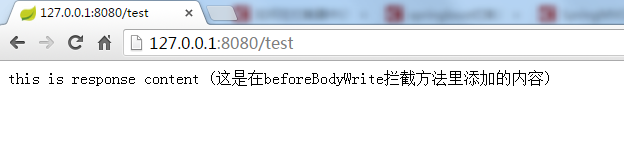
        return o + " (这是在beforeBodyWrite拦截方法里添加的内容)";
    }
}

测试类

import org.springframework.web.bind.annotation.RequestMapping;
import org.springframework.web.bind.annotation.RestController;

/**
 * @author:
 **/
@RestController
public class TestController {
    @RequestMapping("/test")
    public String test(){
        return "this is response content";
    }
}

注意

  • spingmvc 版本要3以上
  • 不要少了实现类上面的注解 @ControllerAdvice
  • supports方法的需要返回true
  • beforeBodyWrite需要返回body内容,如果返回null,前端是拿不到body内容的

测试结果
浏览器输入 http://127.0.0.1:8080/test
在这里插入图片描述
控制台输出如下:

2019-12-07 21:39:03.097  INFO 316628 --- [nio-8080-exec-1] o.a.c.c.C.[Tomcat].[localhost].[/]       : Initializing Spring DispatcherServlet 'dispatcherServlet'
2019-12-07 21:39:03.097  INFO 316628 --- [nio-8080-exec-1] o.s.web.servlet.DispatcherServlet        : Initializing Servlet 'dispatcherServlet'
2019-12-07 21:39:03.100  INFO 316628 --- [nio-8080-exec-1] o.s.web.servlet.DispatcherServlet        : Completed initialization in 3 ms
response body : this is response content

demo源码

链接:https://pan.baidu.com/s/198fE2vgippaQ4-CwuYS2Mw
提取码:j4ax

  • 2
    点赞
  • 5
    收藏
    觉得还不错? 一键收藏
  • 1
    评论
你可以按照以下步骤搭建一个Spring Boot项目并编写登录接口: 1. 打开IDE,创建一个新的Spring Boot项目。 2. 在pom.xml文件中添加Spring Security和Thymeleaf依赖。 3. 创建一个登录页面,使用Thymeleaf模板引擎渲染页面。 4. 创建一个控制器类,处理登录请求并返回登录页面。 5. 创建一个拦截器类,拦截所有请求并检查用户是否已登录。 6. 在Spring Security配置文件中配置登录认证和授权规则。 7. 运行项目,访问登录页面并输入正确的用户名和密码即可登录。 以下是一个简单的示例代码: 1. pom.xml文件中添加依赖: ``` <dependency> <groupId>org.springframework.boot</groupId> <artifactId>spring-boot-starter-security</artifactId> </dependency> <dependency> <groupId>org.springframework.boot</groupId> <artifactId>spring-boot-starter-thymeleaf</artifactId> </dependency> ``` 2. 创建一个登录页面: ``` <!DOCTYPE html> <html xmlns:th="http://www.thymeleaf.org"> <head> <meta charset="UTF-8"> <title>Login Page</title> </head> <body> <h1>Login Page</h1> <form th:action="@{/login}" method="post"> <div> <label for="username">Username:</label> <input type="text" id="username" name="username" /> </div> <div> <label for="password">Password:</label> <input type="password" id="password" name="password" /> </div> <div> <button type="submit">Login</button> </div> </form> </body> </html> ``` 3. 创建一个控制器类: ``` @Controller public class LoginController { @GetMapping("/login") public String login() { return "login"; } } ``` 4. 创建一个拦截器类: ``` public class LoginInterceptor implements HandlerInterceptor { @Override public boolean preHandle(HttpServletRequest request, HttpServletResponse response, Object handler) throws Exception { HttpSession session = request.getSession(); if (session.getAttribute("user") == null) { response.sendRedirect("/login"); return false; } return true; } } ``` 5. 在Spring Security配置文件中配置登录认证和授权规则: ``` @Configuration @EnableWebSecurity public class SecurityConfig extends WebSecurityConfigurerAdapter { @Autowired public void configureGlobal(AuthenticationManagerBuilder auth) throws Exception { auth.inMemoryAuthentication() .withUser("user").password("{noop}password").roles("USER"); } @Override protected void configure(HttpSecurity http) throws Exception { http.authorizeRequests() .antMatchers("/login").permitAll() .anyRequest().authenticated() .and() .formLogin() .loginPage("/login") .defaultSuccessUrl("/") .permitAll() .and() .logout() .permitAll(); } } ``` 6. 运行项目,访问登录页面并输入正确的用户名和密码即可登录。 注意:以上代码仅供参考,实际项目中需要根据具体需求进行修改和完善。

“相关推荐”对你有帮助么?

  • 非常没帮助
  • 没帮助
  • 一般
  • 有帮助
  • 非常有帮助
提交
评论 1
添加红包

请填写红包祝福语或标题

红包个数最小为10个

红包金额最低5元

当前余额3.43前往充值 >
需支付:10.00
成就一亿技术人!
领取后你会自动成为博主和红包主的粉丝 规则
hope_wisdom
发出的红包
实付
使用余额支付
点击重新获取
扫码支付
钱包余额 0

抵扣说明:

1.余额是钱包充值的虚拟货币,按照1:1的比例进行支付金额的抵扣。
2.余额无法直接购买下载,可以购买VIP、付费专栏及课程。

余额充值