


 本文详细介绍了Android中EditText组件的使用方法,包括基本配置、输入格式控制、软键盘设置、错误提示等功能,并提供了自定义EditText的实例。
一、EditText简介
EditText是一个非常重要的组件,常用来作为用户输入的文本框组件
EditText是TextView的子类,可以看做是一个带有可编辑文本的TextView,所以TextView的方法和特性同样存在于EditText中,具体的TextView的介绍可以参考上一节“安卓开发学习之012 TextView高级应用”
二、基本使用
1. 限制最大输入字符个数
android:maxLength="10"
2. 显示提示文字
android:hint="hint!"
3. 文本颜色
android:textColor="#0f0"
4. 提示文本颜色
android:textColorHint="#f0f"
5. 选中文本颜色
android:textColorHighlight="#00f"
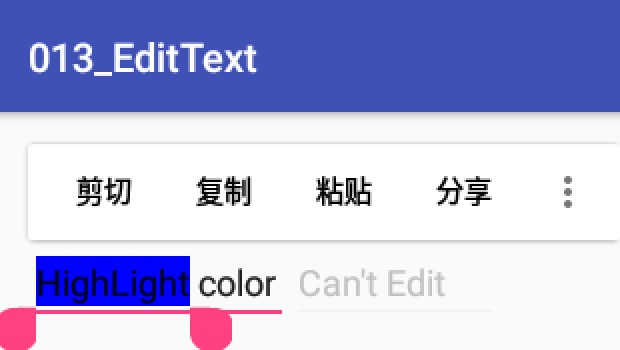
6. 不可编辑 类似TextView
android:enabled="false"
7. 最大显示行数
android:maxLines="3"
三、输入特殊格式的字符
1.密码文本框
通过配置EditText的android:password=”true”就可以实现这一密码输入功能
或者使用android:inputType=”textPassword”
2.电话号码文本框
手机中发短信打电话是必不可少的,所以用于专门输入电话号码的文本框也是大有用途,有了他我们对是否是电话号码的校验就容易的多了(因为字符是正确的,只要校验格式 ).通过设置android:phoneNumber=”true”就可以把EditText变成只接受电话号码输入的文本框,连软键盘都已经变成拨号专用软键盘了,所以不用再担心输入其他字符了
3.数字文本框
有时候我们只想输入数字,不想输入字母,EditText为我们提供了android:numeric来控制输入的数字类型,一共有三种分别为integer(正整数)、signed(带符号整数)和decimal(浮点数)
4.用户自定义输入
android:digits="1234567890xyzXYZ"
这样用户只能输入上述指定的字符了
四、为文本指定特定的软键盘类型
前面我们通过指定为电话号码特定格式,然后键盘类型变成了拨号专用的键盘,这个是自动变的,其实我们也可以通 过android:inputType来设置文本的类型,让输入法选择合适的软键盘的
android:inputType有很多类型
none
text
textCapCharacters
textCapWords
textCapSentences
textAutoCorrect
textAutoComplete
textMultiLine
textImeMultiLine
textNoSuggestions
textUri
textEmailAddress
textEmailSubject
textShortMessage
textLongMessage
textPersonName
textPostalAddress
textPassword
textVisiblePassword
textWebEditText
textFilter
textPhonetic
textWebEmailAddress
textWebPassword
number
numberSigned
numberDecimal
numberPassword
phone
datetime
date
time
五、Enter键图标的设置
软键盘的Enter键默认显示的是“完成”文本,我们知道按Enter建表示前置工作已经准备完毕了,要去什么什么啦。比如,在一个搜索中,我们输入要搜索的文本,然后按Enter表示要去搜索了,但是默认的Enter键显示的是“完成”文本,看着不太合适,不符合搜索的语义,如果能显示“搜索”两个字或者显示一个表示搜索的图标多好。事实证明我们的想法是合理的,Android也为我们提供的这样的功能。通过设置android:imeOptions来改变默认的“完成”文本。这里举几个常用的常量值:
actionUnspecified 未指定,对应常量EditorInfo.IME_ACTION_UNSPECIFIED.效果:
actionNone 没有动作,对应常量EditorInfo.IME_ACTION_NONE 效果:
actionGo 去往,对应常量EditorInfo.IME_ACTION_GO 效果:
actionSearch 搜索,对应常量EditorInfo.IME_ACTION_SEARCH 效果:
actionSend 发送,对应常量EditorInfo.IME_ACTION_SEND 效果:
actionNext 下一个,对应常量EditorInfo.IME_ACTION_NEXT 效果:
actionDone 完成,对应常量EditorInfo.IME_ACTION_DONE 效果:

 <!-- 改变enter键样式。要加android:singleLine="true" 否则样式不会变-->
        <EditText
            android:layout_width="wrap_content"
            android:layout_height="wrap_content"
            android:text="send"
            android:singleLine="true"
            android:imeOptions="actionSend"
            />
六、EditText的设置/获取选中文本
 EditText editText1= (EditText)findViewById(R.id.editText01);
 Editable editable1= editText1.getText();
 //选中从第二个到末尾的文本
 Selection.setSelection(editable1, 1, editable1.length());
 int start= editText1.getSelectionStart();
 int end= editText1.getSelectionEnd();
 //获取选中文字
System.out.println("selected text = " + editable1.subSequence(start, end));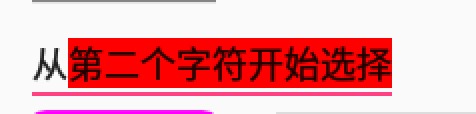
七、样式及背景设置
主要是设置android:background属性
  <!-- shape使用-->
        <EditText

            android:layout_width="100dp"
            android:layout_height="wrap_content"
            android:text="shape"
            android:layout_alignParentLeft="true"
            android:background="@drawable/bg_border"
            />
        <!-- 背景图片-->
        <EditText
            android:layout_width="100dp"
            android:layout_height="wrap_content"
            android:layout_marginRight="0dp"
            android:text="picture"
            android:layout_centerVertical="true"
            android:layout_alignParentRight="true"
            android:background="@mipmap/main_input_over"
            />
        <!-- 显示系统默认边框-->
        <EditText

            android:layout_width="200dp"
            android:layout_height="wrap_content"
            android:layout_marginRight="0dp"
            android:text="system"
            android:layout_centerInParent="true"
            android:background="@android:drawable/edit_text"
            />

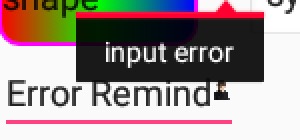
八、错误提示
用户输入信息错误时 使用
EditText.setError(“”)设置错误信息
代码如下:
final EditText editText2 = (EditText) findViewById(R.id.editText02);
        editText2.setOnEditorActionListener(new TextView.OnEditorActionListener() {
            @Override
            public boolean onEditorAction(TextView v, int actionId, KeyEvent event) {
                System.out.println("keyEvent=" + event.getAction() + ",actionID=" + actionId);
                if (event.getAction() == KeyEvent.ACTION_UP && (actionId == EditorInfo
                        .IME_ACTION_DONE || actionId == EditorInfo.IME_ACTION_UNSPECIFIED) &&
                        !TextUtils.equals(editText2.getText(), "123")) {
                    Drawable drawable = getResources().getDrawable(R.mipmap.yxs);
                    drawable.setBounds(0, 0, 10, 10);
                    editText2.setError("input error", drawable);
                }
                return true;
            }

        });

        editText2.addTextChangedListener(new TextWatcher() {
            @Override
            public void beforeTextChanged(CharSequence s, int start, int count, int after) {
                //清除错误提示
                editText2.setError(null);
            }

            @Override
            public void onTextChanged(CharSequence s, int start, int before, int count) {

            }

            @Override
            public void afterTextChanged(Editable s) {

            }
        });
效果图如下:
九、光标设置
利用android:textCursorDrawable替换系统默认光标
android:cursorVisible=”“设置光标是否可见
    <!-- 光标颜色-->
    <EditText
        android:layout_width="wrap_content"
        android:layout_height="wrap_content"
        android:text="cursor_color"
        android:textCursorDrawable="@drawable/color_cursor"/>
十、自定义带删除按钮的EditText
java代码
package com.antex.edittext;

import android.content.Context;
import android.graphics.BitmapFactory;
import android.graphics.Rect;
import android.graphics.drawable.Drawable;
import android.text.Editable;
import android.text.TextWatcher;
import android.util.AttributeSet;
import android.view.MotionEvent;
import android.widget.EditText;

/**
 * 带删除按钮的EditText
 * Created by xiaosanyu on 15/10/29.
 */
public class EditTextWithDel extends EditText {
    private final static String TAG = "EditTextWithDel";
    private Drawable imgInable;
    private Drawable imgAble;
    private Context mContext;
    private int imgAble_width;

    public EditTextWithDel(Context context) {
        super(context);
        mContext = context;
        init();
    }

    public EditTextWithDel(Context context, AttributeSet attrs, int defStyle) {
        super(context, attrs, defStyle);
        mContext = context;
        init();
    }

    public EditTextWithDel(Context context, AttributeSet attrs) {
        super(context, attrs);
        mContext = context;
        init();
    }

    private void init() {
        imgInable = mContext.getResources().getDrawable(R.mipmap.delete_gray);
        imgAble = mContext.getResources().getDrawable(R.mipmap.delete);
        imgAble_width = BitmapFactory.decodeResource(this.getResources(), R.mipmap.delete)
                .getWidth();
        addTextChangedListener(new TextWatcher() {
            @Override
            public void onTextChanged(CharSequence s, int start, int before, int count) {
            }

            @Override
            public void beforeTextChanged(CharSequence s, int start, int count, int after) {
            }

            @Override
            public void afterTextChanged(Editable s) {
                setDrawable();
            }
        });
        setDrawable();
    }

    //设置删除图片
    private void setDrawable() {
        if (length() < 1) setCompoundDrawablesWithIntrinsicBounds(null, null, imgInable, null);
        else setCompoundDrawablesWithIntrinsicBounds(null, null, imgAble, null);
    }

    // 处理删除事件
    @Override
    public boolean onTouchEvent(MotionEvent event) {
        if (imgAble != null && event.getAction() == MotionEvent.ACTION_UP) {
            int eventX = (int) event.getRawX();
            int eventY = (int) event.getRawY();
//            Log.e(TAG, "eventX = " + eventX + "; eventY = " + eventY);
            Rect rect = new Rect();
            getGlobalVisibleRect(rect);

            rect.left = rect.right - imgAble_width;
            if (rect.contains(eventX, eventY)) setText("");
        }
        return super.onTouchEvent(event);
    }

    @Override
    protected void finalize() throws Throwable {
        super.finalize();
    }

}
使用方法
<com.antex.edittext.EditTextWithDel
        android:layout_width="wrap_content"
        android:layout_height="wrap_content"
        android:text="EditTextWithDel"/>
效果图:

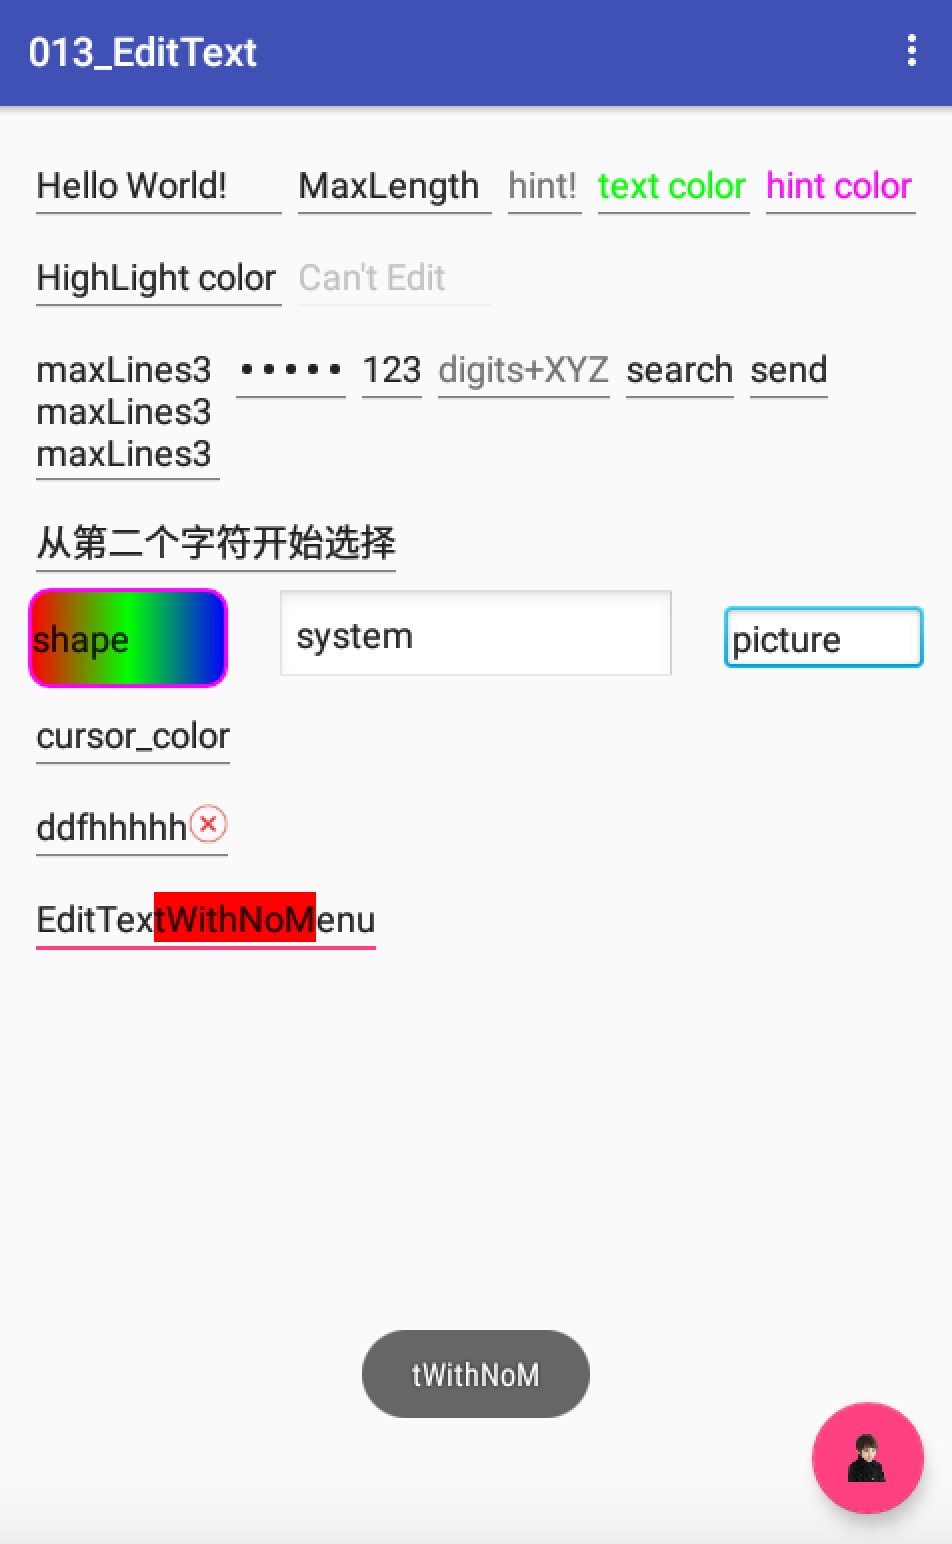
十一、自定义无弹出菜单EditText
Java 代码
package com.antex.edittext;

import android.content.Context;
import android.text.Layout;
import android.text.Selection;
import android.util.AttributeSet;
import android.view.ContextMenu;
import android.view.MotionEvent;
import android.widget.EditText;
import android.widget.Toast;

/**
 * 选择文字时不弹出默认系统菜单
 * Created by xiaosanyu on 15/10/30.
 */
public class EditTextWithNoMenu extends EditText {
    private int off; //字符串的偏移值
    private Context mContext;

    public EditTextWithNoMenu(Context context) {
        super(context);
        mContext=context;
        initialize();
    }

    public EditTextWithNoMenu(Context context, AttributeSet attrs, int defStyle) {
        super(context, attrs, defStyle);
        mContext=context;
        initialize();
    }

    public EditTextWithNoMenu(Context context, AttributeSet attrs) {
        super(context, attrs);
        mContext=context;
        initialize();
    }

    private void initialize() {
//        setGravity(Gravity.TOP);
//        setBackgroundColor(Color.WHITE);
    }

    @Override
    protected void onCreateContextMenu(ContextMenu menu) {
        //不做任何处理,为了阻止长按的时候弹出上下文菜单
    }

    @Override
    public boolean getDefaultEditable() {
        return true;
    }

    @Override
    public boolean onTouchEvent(MotionEvent event) {
        int action = event.getAction();
        Layout layout = getLayout();
        int line = 0;
        switch (action) {
            case MotionEvent.ACTION_DOWN:
                line = layout.getLineForVertical(getScrollY() + (int) event.getY());
                off = layout.getOffsetForHorizontal(line, (int) event.getX());
                Selection.setSelection(getEditableText(), off);
                break;
            case MotionEvent.ACTION_MOVE:
            case MotionEvent.ACTION_UP:
                line = layout.getLineForVertical(getScrollY() + (int) event.getY());
                int curOff = layout.getOffsetForHorizontal(line, (int) event.getX());
                Selection.setSelection(getEditableText(), off, curOff);
                if(action==MotionEvent.ACTION_UP && curOff>off)
                Toast.makeText(mContext, getEditableText().subSequence(off, curOff).toString(), Toast
                        .LENGTH_SHORT).show();
                return true;
//                break;
        }
        return super.onTouchEvent(event);
//        return true;
    }
}
使用方法
 <com.antex.edittext.EditTextWithNoMenu
        android:layout_width="wrap_content"
        android:layout_height="wrap_content"
        android:text="EditTextWithNoMenu"
        android:cursorVisible="true"
        android:textCursorDrawable="@drawable/color_cursor"
        android:textColorHighlight="#f00"/>
效果图
开发工具:Android Studio1.4
SDK: Android 6.0
API 23
代码下载:EditText.zip
备忘:带放大镜功能的EditText 放在以后View章节中实现


 被折叠的 条评论
为什么被折叠?
被折叠的 条评论
为什么被折叠?
 到【灌水乐园】发言


