


用户组
-
组信息文件:
/etc/group查看用户组文件
cat /etc/group
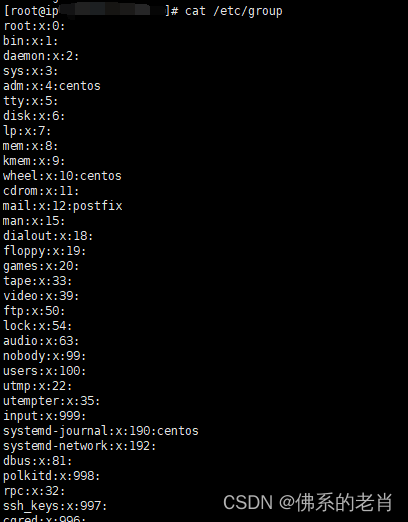
----- --- ----- ----1 2 3 4可以将每组数据分为四段,每段内容分表表示:
1.组名 2.密码标志位 3.组ID(0-超级用户组,1-499表示系统用户组,500开始表示普通用户组) 4.组内用户(附加组用户) -
新建用户组:
groupadd [参数] 组名或者groupadd 组名 [参数]-g,指定组ID (如果不指定则由系统自动分配)例1:创建一个组,系统自动分配ID
[root@centos-linux vsftpd]# groupadd g1 [root@centos-linux vsftpd]# [root@centos-linux vsftpd]# tail -3 /etc/group my:x:1000:my cgred:x:995: g1:x:1001:例2:创建一个组,指定ID[root@centos-linux vsftpd]# groupadd -g 1100 h2 [root@centos-linux vsftpd]# [root@centos-linux vsftpd]# [root@centos-linux vsftpd]# tail -3 /etc/group cgred:x:995: g1:x:1001: h2:x:1100: -
编辑用户组:
groupmod [参数] 组名或groupmod 组名[参数]-g指定组ID-n修改组名例1:将用户组g1的id 改为1102,组名改为g3
[root@centos-linux vsftpd]# tail -3 /etc/group cgred:x:995: g1:x:1001: h2:x:1100: [root@centos-linux vsftpd]# groupmod g1 -g 1102 -n g3 [root@centos-linux vsftpd]# [root@centos-linux vsftpd]# tail -3 /etc/group cgred:x:995: h2:x:1100: g3:x:1102: -
删除用户组 :
groupdel 组名如果组内存在用户时不能删除
例:删除用户组 g3
[root@centos-linux vsftpd]# tail -3 /etc/group
cgred:x:995:
h2:x:1100:
g3:x:1102:
[root@centos-linux vsftpd]# groupdel g3
[root@centos-linux vsftpd]#
[root@centos-linux vsftpd]# tail -3 /etc/group
my:x:1000:my
cgred:x:995:
h2:x:1100:
用户
-
用户信息文件:
/etc/passwd[root@centos-linux vsftpd]# cat /etc/passwd root:x:0:0:root:/root:/bin/bash bin:x:1:1:bin:/bin:/sbin/nologin root :x :0 :0 :root :/root :/bin/bash ---- --- --- --- ----- ------- ----------- 1 2 3 4 5 6 71-用户名 2-密码标识位 3-用户ID(0,超级用户,1-499 系统用户,≥500普通用户) 4.用户主归属组ID 5-备注信息 6-用户家目录 7-默认 bash -
新增用户:
useradd [参数] 用户名/useradd 用户名 [参数]-u,指定用户ID-g, 指定用的主属组-G,指定用户的附加组-c, 指定备注信息例1 :不加参数,创建用户user1
[root@centos-linux ~]# useradd user1
		[root@centos-linux ~]#
		[root@centos-linux ~]# ls /home
		lost+found  my  user1
		[root@centos-linux ~]# tail -5 /etc/passwd
		sshd:x:74:74:Privilege-separated SSH:/var/empty/sshd:/sbin/nologin
		postfix:x:89:89::/var/spool/postfix:/sbin/nologin
		chrony:x:998:996::/var/lib/chrony:/sbin/nologin
		my:x:1000:1000:鱼 木:/home/my:/bin/bash
		user1:x:1001:1001::/home/user1:/bin/bash
		[root@centos-linux ~]#
		[root@centos-linux ~]# tail -5 /etc/group
		chrony:x:996:
		my:x:1000:my
		cgred:x:995:
		h2:x:1100:
		user1:x:1001:
		[root@centos-linux ~]#
例2:新建用户user2,指定id为1005,主属组为user1,附加组为h2,备注下信息“测试用户”
[root@centos-linux ~]# useradd user2 -u 1005 -g user1 -G h2 -c 测试用户 [root@centos-linux ~]# [root@centos-linux ~]# ls /home lost+found my user1 user2 [root@centos-linux ~]# [root@centos-linux ~]# tail -5 /etc/passwd postfix:x:89:89::/var/spool/postfix:/sbin/nologin chrony:x:998:996::/var/lib/chrony:/sbin/nologin my:x:1000:1000:鱼 木:/home/my:/bin/bash user1:x:1001:1001::/home/user1:/bin/bash user2:x:1005:1001:测试用户:/home/user2:/bin/bash -
设置密码:
passwd [用户名]超级用户可以为系统所有用户(包括自己)设置密码
普通用户只能为自己设置密码
-
用户切换:
su 用户名
sudo 命令, 以管理员权限执行命令 -
编辑用户:
usermod 用户名 [参数]/usermod [参数] 用户名-u, 指定用户ID-g, 指定用户的主属组-G,指定用户的附加组-c, 指定备注信息-l, 修改用户名例:将用户user2的名字改为user5,id改为1110,主属组改为g3,附加组改为g2
[root@centos-linux ~]# tail -1 /etc/passwd user2:x:1005:1001:测试用户:/home/user2:/bin/bash [root@centos-linux ~]# [root@centos-linux ~]# usermod user2 -l user5 -g g3 -G g2 -u 1110 [root@centos-linux ~]# [root@centos-linux ~]# tail -1 /etc/passwd user5:x:1110:1103:测试用户:/home/user2:/bin/bash [root@centos-linux ~]# -
删除用户:
userdel 用户名 [r]-r,在删除用户时将其家目录一起删除 -
其他命令
groups 用户名,显示用户所属组(包括主属性组合附加组)id 用户名,显示用户id ,所属组id(包括主属组和附加组)gpasswd [参数] 用户名 组名,管理组中的用户(操作的是用户的附加组-a,将用户添加到指定的组中-d,将用户从指定的组中删除例:
[root@centos-linux ~]# groups u1
u1 : g1 g2
[root@centos-linux ~]# id u1
uid=1001(u1) gid=1101(g1) 组=1101(g1),1102(g2)
[root@centos-linux ~]#
[root@centos-linux ~]#
[root@centos-linux ~]# gpasswd -a u1 g3
正在将用户“u1”加入到“g3”组中
[root@centos-linux ~]#
[root@centos-linux ~]#
[root@centos-linux ~]# id u1
uid=1001(u1) gid=1101(g1) 组=1101(g1),1102(g2),1103(g3)
[root@centos-linux ~]#
[root@centos-linux ~]#
[root@centos-linux ~]# gpasswd -a u1 h2
正在将用户“u1”加入到“h2”组中
[root@centos-linux ~]#
[root@centos-linux ~]#
[root@centos-linux ~]# id u1
uid=1001(u1) gid=1101(g1) 组=1101(g1),1100(h2),1102(g2),1103(g3)
[root@centos-linux ~]#
[root@centos-linux ~]# gpasswd -d u1 h2
正在将用户“u1”从“h2”组中删除
[root@centos-linux ~]#
[root@centos-linux ~]# id u1
uid=1001(u1) gid=1101(g1) 组=1101(g1),1102(g2),1103(g3)
修改对象所有者
语法:chown [参数] 用户名 对象名
参数: -R ,递归修改目录所有者(将目录本身以及目录下的所有内容同时修改)
[root@centos-linux work]#
[root@centos-linux work]# ll ./d1
总用量 8
-rw-r--r--. 1 root root  101 8月  11 16:56 f2.log
-rw-r--r--. 1 root root 1149 8月  11 16:58 f3.txt
-rw-r--r--. 1 root root    0 8月  11 17:02 f4.txt
-rw-r--r--. 1 root root    0 8月  11 17:02 f5.txt
[root@centos-linux work]#
[root@centos-linux work]#
[root@centos-linux work]# chown -R u2 ./d1
[root@centos-linux work]#
[root@centos-linux work]# ll
总用量 300
-rw-r--r--. 1 root root  55463 8月  12 12:00 c069b8480cc85496dc5e6be5b9183098.jpg
-rw-r--r--. 1 root root  55463 8月  12 12:03 c069b8480cc85496dc5e6be5b9183098.jpg.1
drwxr-xr-x. 2 u2   root   4096 8月  12 11:26 d1
drwxr-xr-x. 2 root root   4096 8月  12 10:50 d2
drwxr-xr-x. 2 root root   4096 8月  12 10:44 f11
drwxr-xr-x. 2 root root   4096 8月  12 10:45 f2
-rw-r--r--. 1 u1   root 175944 10月 15 2020 vsftpd-3.0.2-28.el7.x86_64.rpm
[root@centos-linux work]# ll ./d1
总用量 8
-rw-r--r--. 1 u2 root  101 8月  11 16:56 f2.log
-rw-r--r--. 1 u2 root 1149 8月  11 16:58 f3.txt
-rw-r--r--. 1 u2 root    0 8月  11 17:02 f4.txt
-rw-r--r--. 1 u2 root    0 8月  11 17:02 f5.txt
[root@centos-linux work]#
修改对象所有组
语法:chgrp [参数] 组名 对象名
参数: -R ,递归修改目录所属组(将目录本身以及目录下的所有内容同时修改)
[root@centos-linux work]# chgrp g2 ./vsftpd-3.0.2-28.el7.x86_64.rpm
[root@centos-linux work]#
[root@centos-linux work]# ll
总用量 300
-rw-r--r--. 1 root root  55463 8月  12 12:00 c069b8480cc85496dc5e6be5b9183098.jpg
-rw-r--r--. 1 root root  55463 8月  12 12:03 c069b8480cc85496dc5e6be5b9183098.jpg.1
drwxr-xr-x. 2 u2   root   4096 8月  12 11:26 d1
drwxr-xr-x. 2 root root   4096 8月  12 10:50 d2
drwxr-xr-x. 2 root root   4096 8月  12 10:44 f11
drwxr-xr-x. 2 root root   4096 8月  12 10:45 f2
-rw-r--r--. 1 u1   g2   175944 10月 15 2020 vsftpd-3.0.2-28.el7.x86_64.rpm
[root@centos-linux work]#
[root@centos-linux work]# ll ./d1
总用量 8
-rw-r--r--. 1 u2 root  101 8月  11 16:56 f2.log
-rw-r--r--. 1 u2 root 1149 8月  11 16:58 f3.txt
-rw-r--r--. 1 u2 root    0 8月  11 17:02 f4.txt
-rw-r--r--. 1 u2 root    0 8月  11 17:02 f5.txt
[root@centos-linux work]#
[root@centos-linux work]# chgrp -R g1 ./d1
[root@centos-linux work]#
[root@centos-linux work]# ll
总用量 300
-rw-r--r--. 1 root root  55463 8月  12 12:00 c069b8480cc85496dc5e6be5b9183098.jpg
-rw-r--r--. 1 root root  55463 8月  12 12:03 c069b8480cc85496dc5e6be5b9183098.jpg.1
drwxr-xr-x. 2 u2   g1     4096 8月  12 11:26 d1
drwxr-xr-x. 2 root root   4096 8月  12 10:50 d2
drwxr-xr-x. 2 root root   4096 8月  12 10:44 f11
drwxr-xr-x. 2 root root   4096 8月  12 10:45 f2
-rw-r--r--. 1 u1   g2   175944 10月 15 2020 vsftpd-3.0.2-28.el7.x86_64.rpm
[root@centos-linux work]#
[root@centos-linux work]# ll ./d1
总用量 8
-rw-r--r--. 1 u2 g1  101 8月  11 16:56 f2.log
-rw-r--r--. 1 u2 g1 1149 8月  11 16:58 f3.txt
-rw-r--r--. 1 u2 g1    0 8月  11 17:02 f4.txt
-rw-r--r--. 1 u2 g1    0 8月  11 17:02 f5.txt
权限操作
语法:chmod [参数] 权限 文件/目录
参数:-R 递归修改目录权限(将目录本身以及目录下的所有内容同时修改
权限表示方法
-
数字:读-
4,写-2,执行-1,无权限 -0例:
chmod 764 ./f1.log7, 7=4+2+1 ,表示所有者有读,写,执行权限
6,6=4+2,表示所属组的用户有读,写权限
4,表示其他用户有读权限
-
字符
r,读w,写x,执行u,所有者g,所属组o,其他用户a,所有用户+,添加权限-,删除权限=,赋予权限例:
chmod u+x,g-w,o=r ./f1.logu+x,表示为所有添加执行权限g-w,表示为所属组用户删除写权限o=r,表示为其他用户赋予读权限权限说明
| 权限 | 目录 | 文件 |
| 读 | 列出目录的内容(ls) | 查看文件内容(cat、head) |
| 写 | 可以在目录中新建、删除文件 | 编辑文件内容 |
| 执行 | 可以进入目录(cd) | 运行文件 |
权限掩码
查看当前用户权限掩码:umask
超级用户root :0022
普通用户:0002
系统默认目录权限为777,文件权限为666,实际在创建文件或目录时,将默认权限-权限掩码即为文件或者目录的实际权限
root;目录-777-022=755 文件—— 666-022=644
普通用户:文件——666-002=664 ; 目录——777-002=775


 611
611


 被折叠的 条评论
为什么被折叠?
被折叠的 条评论
为什么被折叠?
 到【灌水乐园】发言


