场景
-
光标移入一个元素执行执行一段逻辑,比如:按钮颜色要变,其他弹框要显示,光标移出元素时又恢复。如果仅仅是样式不同可直接css,但是要执行js代码就有点麻烦了。可能你立马会想到mouseenter和mouseleave。但是如果有多层元素都需要这个就没有那么优雅了

-
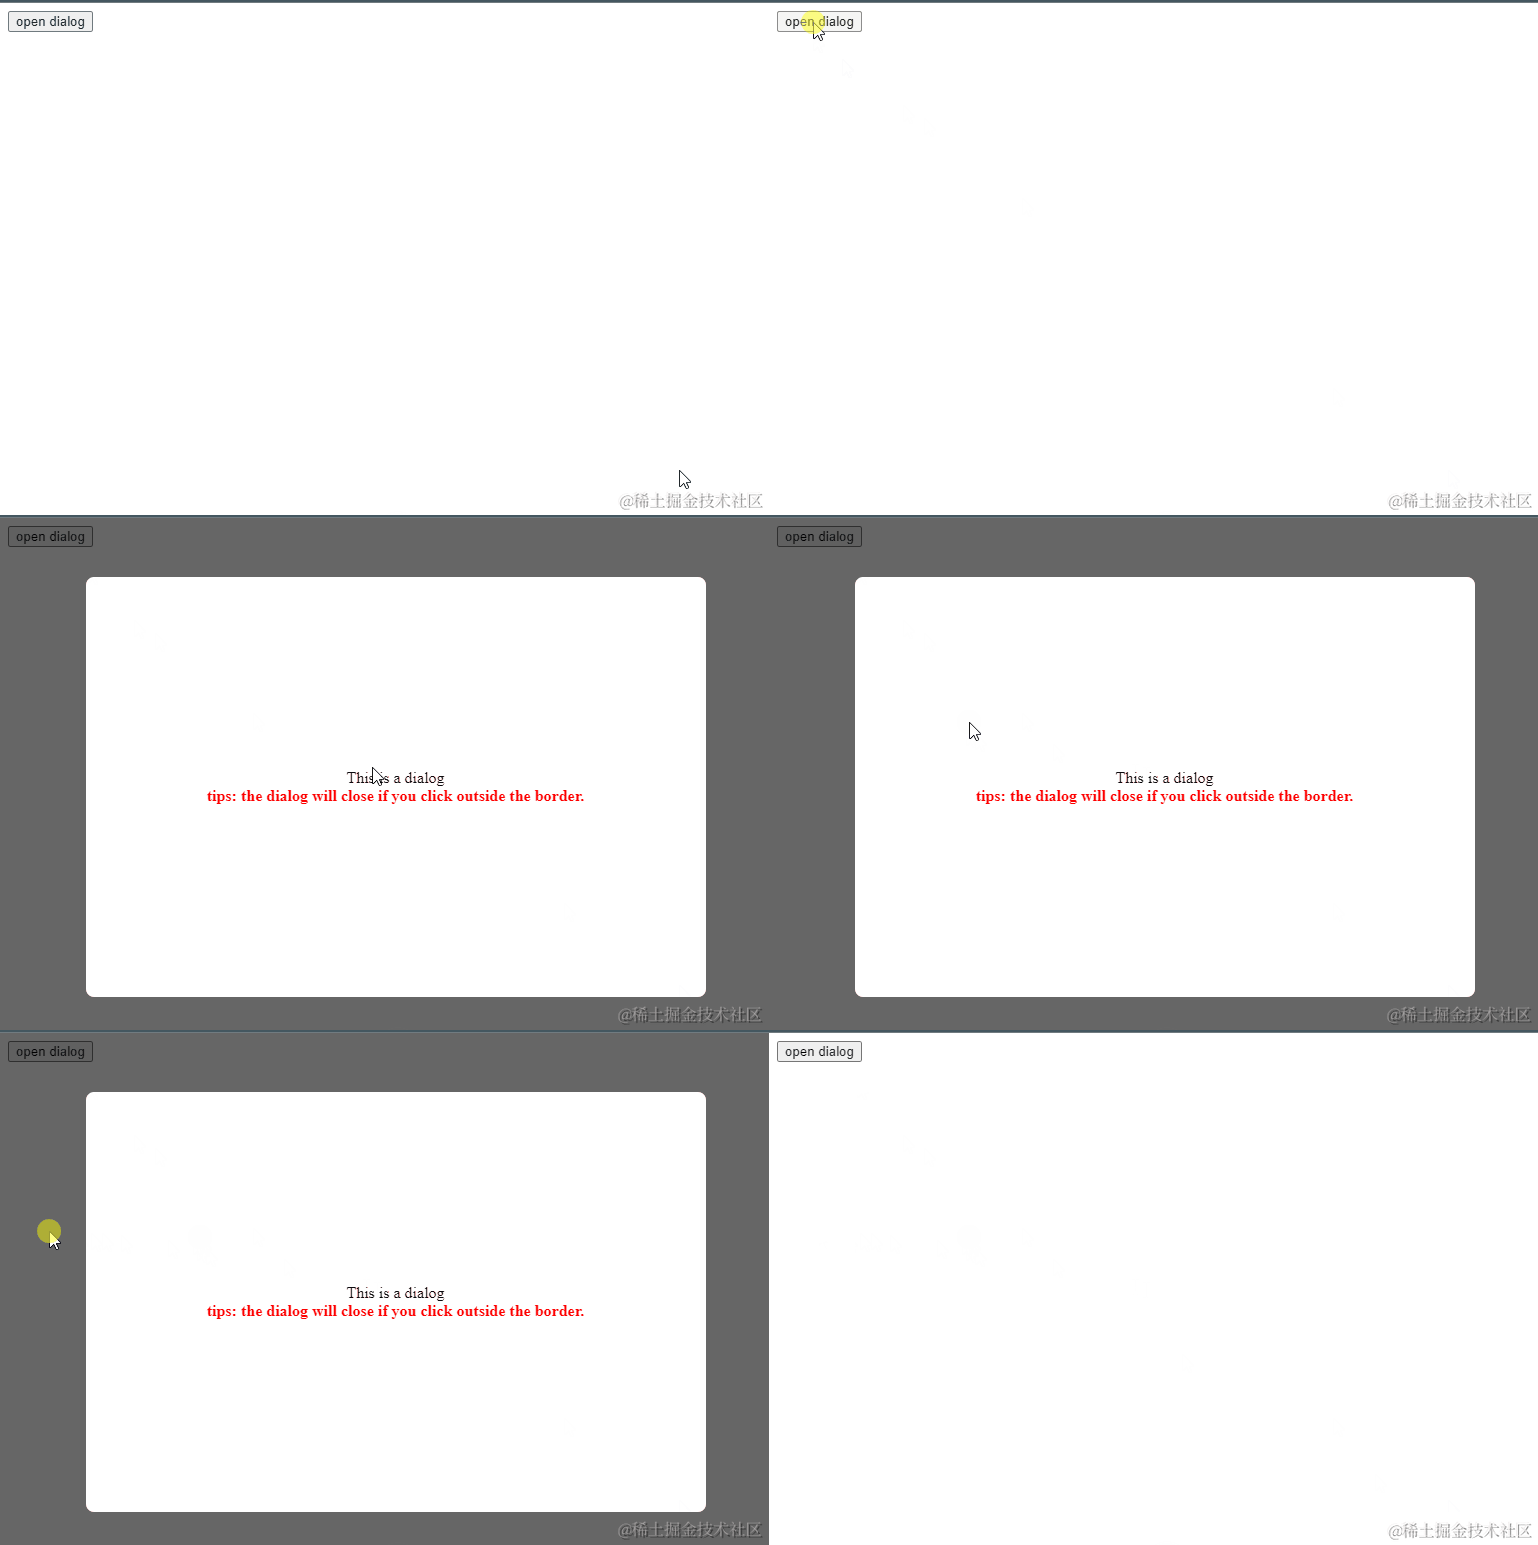
点击一个按钮弹出modal对话框,背景是黑色透明,只有中间一部分是显示的内容,点击内容外面就关闭对话框。

实现自定义自定v-hover-el
-
使用方式
<template> <div class="root"> <button v-hover-el="(v: boolean) => isHoverEl = v">isHoverEl: {{ isHoverEl }}</button> </div> </template> <script setup lang="ts"> const isHoverEl = ref(false); </script> -
代码实现
import type { ObjectDirective, DirectiveBinding } from 'vue';

type FlushList = Map<
	HTMLElement,
	{
		bindingFn: (isMouseEnter: boolean, event: MouseEvent) => void,
		enterFn: (event: MouseEvent) => void,
		leaveFn: (event: MouseEvent) => void,
	}
>

const nodeList: FlushList = new Map();

function executeHandler(isMouseEnter: boolean, event: MouseEvent) {
	let target = event.target as HTMLElement;
	for (let [key, value] of nodeList.entries()) {
		//! 说明:如果触发事件target是遍历的元素时就触发调用绑定的方法
		if (key == target) {
			value.bindingFn(isMouseEnter, event);
		}
	}
}

function addListener(el: HTMLElement, enterListener: any, leaveListener: any) {
	el.addEventListener("mouseenter", enterListener);
	el.addEventListener("mouseleave", leaveListener);
}

function delListener(el: HTMLElement, enterListener: any, leaveListener: any) {
	el.removeEventListener("mouseenter", enterListener);
	el.removeEventListener("mouseleave", leaveListener);
}

const HoverEl: ObjectDirective = {
	beforeMount(el: HTMLElement, binding: DirectiveBinding) {
		let options = {
			bindingFn: binding.value,
			enterFn: executeHandler.bind(null, true),
			leaveFn: executeHandler.bind(null, false)
		}
		//! 挂载阶段:
		//! 1.记录设置了指令的元素
		nodeList.set(el, options);
		//! 2.给元素添加移入移出事件
		addListener(el, options.enterFn, options.leaveFn);
	},
	unmounted(el: HTMLElement) {
		let options = nodeList.get(el);
		//! 卸载阶段:
		//! 需要把事件移除掉
		if (options) {
			delListener(el, options.enterFn, options.leaveFn);
		}
		nodeList.delete(el);
	}
}

export { HoverEl }
实现自定义指令v-click-outside
-
使用方式
<template> <div class="root"> <button @click="isDialogVis = true">open dialog</button> <div class="dialog" v-if="isDialogVis"> <div class="wrapper" v-click-outside="() => isDialogVis = false"> This is a dialog <div class="tips"> tips: the dialog will close if you click outside the border. </div> </div> </div> </div> </template> <script setup lang="ts"> const isDialogVis = ref(false); </script> -
代码实现
import type { ObjectDirective, DirectiveBinding } from 'vue';
import { isClient } from '@vueuse/core'

type DocumentHandler = <T extends MouseEvent>(mouseup: T, mousedown: T) => void
type FlushList = Map<
	HTMLElement,
	{
		documentHandler: DocumentHandler
		bindingFn: (...args: unknown[]) => unknown
	}
>

const nodeList: FlushList = new Map()
//! 记录点击的开始事件对象
let startClick: MouseEvent;

if (isClient) {
	//! 点击事件绑定在document上
	document.addEventListener('mousedown', (e: MouseEvent) => (startClick = e))
	document.addEventListener('mouseup', (e: MouseEvent) => {
		for (const handler of nodeList.values()) {
			const { documentHandler } = handler;
			documentHandler(e as MouseEvent, startClick)
		}
	});
}

function createDocumentHandler(
	el: HTMLElement,
	binding: DirectiveBinding
): DocumentHandler {
	let excludes: HTMLElement[] = []
	if (Array.isArray(binding.arg)) {
		excludes = binding.arg
	} else if (isElement(binding.arg)) {
		excludes.push(binding.arg as unknown as HTMLElement)
	}

	//! 事件处理
	return function (mouseup, mousedown) {
		const mouseUpTarget = mouseup.target as Node
		const mouseDownTarget = mousedown?.target as Node
		const isContainedByEl =
			el.contains(mouseUpTarget) || el.contains(mouseDownTarget);
		const isSelf = el === mouseUpTarget;
		//! 如果点击是父容器元素 or 元素本身不触发事件,否则:就是点击元素外面了,需要抛事件
		if (isContainedByEl || isSelf) {
			return;
		}
		binding.value(mouseup, mousedown);
	}
}

const ClickOutside: ObjectDirective = {
	beforeMount(el: HTMLElement, binding: DirectiveBinding) {
		//! 挂载阶段:
		//! 记录设置了指令的元素 && 给元素绑定事件
		nodeList.set(el, {
			documentHandler: createDocumentHandler(el, binding),
			bindingFn: binding.value,
		});
	},
	unmounted(el: HTMLElement) {
		//! 卸载阶段:
		//! 需要把元素移除
		nodeList.delete(el)
	}
}

export { ClickOutside }
注册自定义指令
import { defineNuxtPlugin } from '#app'
import { ClickOutside } from '~/composables/directives/click-outside'
import { HoverEl } from '~/composables/directives/hover-el'

export default defineNuxtPlugin((nuxtApp) => {
	nuxtApp.vueApp.directive("click-outside", ClickOutside)
	nuxtApp.vueApp.directive("hover-el", HoverEl)
})
说明:我这个是Nuxt3 中的注册方式,Vue 改成app.directive的方式就可以了
总结
- 不知到怎么弄就给别人多借鉴借鉴
- 实现功能只是最基本的完成任务,如果能用更优雅的方式解决那么就发挥你的潜力去实现,或许这是你提升的有效方式
demo 传送门
更多
最近我开源了一个文章助手artipub,可以帮你一键将markdown发布至多平台,方便大家更好的传播知识和分享你的经验。
官网地址:https://artipub.github.io/artipub/ (提示:国内访问可能有点慢,翻墙就会很快)
帮忙点个star⭐,让更多人知道这个工具,谢谢大家🙏。如果你有兴趣,欢迎加入你的加入,一起完善这个工具。


 1379
1379

 被折叠的 条评论
为什么被折叠?


