


完整原文地址见简书https://www.jianshu.com/p/dc2f242f0f73
本文内容提要
简单的事件逻辑,可以直接用表达式 代替 函数 作为
@click的参数MouseEvent对象 了解
事件函数传入参
事件函数传入参 同时获取 原生MouseEvent对象的 写法
一个按钮 同时触发多个 回调函数 的写法
Vue的事件传递
Vue的默认事件传递是
由里而外的【与安卓 自上而下的事件分发机制 恰恰相反】可以使用
.stop修饰符,拦截事件外传
@click的.self修饰符
@click的.capture修饰符
@click的.once/.prevent修饰符
@click的鼠标修饰符left、right、middle
@click的精确修饰符.exact
@scroll.passive的.passive可以提高滚动性能按键事件指令
@keydown
@keydown的按键修饰符.enter
@keydown的按键修饰符tab、delete、esc、up、down、left、right等
简单的事件逻辑,可以直接用表达式 代替 函数 作为 @click的参数
methods函数型:
<!DOCTYPE html>
<html lang="en">
<head>
    <meta charset="UTF-8">
    <meta name="viewport" content="width=device-width, initial-scale=1.0">
    <title>Hello World! heheheheheheda</title>
    <script src="https://unpkg.com/vue@next"></script>
</head>

<body>
    <div id="heheApp"></div>
</body>
<script>
    const app = Vue.createApp({
        data() {
            return {
                counter: 0
            }
        },
        methods:{
            handleBtnClick() {
                this.counter += 1;
            }
        },
        template: `
        <div>
            {{counter}}
            <button @click='handleBtnClick'>button</button>
        </div>`
    });

    const vm = app.mount('#heheApp');
</script>
</html>
简化表达式型:
<script>
    const app = Vue.createApp({
        data() {
            return {
                counter: 0
            }
        },
        template: `
        <div>
            {{counter}}
            <button @click='counter += 1'>button</button>
        </div>`
    });

    const vm = app.mount('#heheApp');
</script>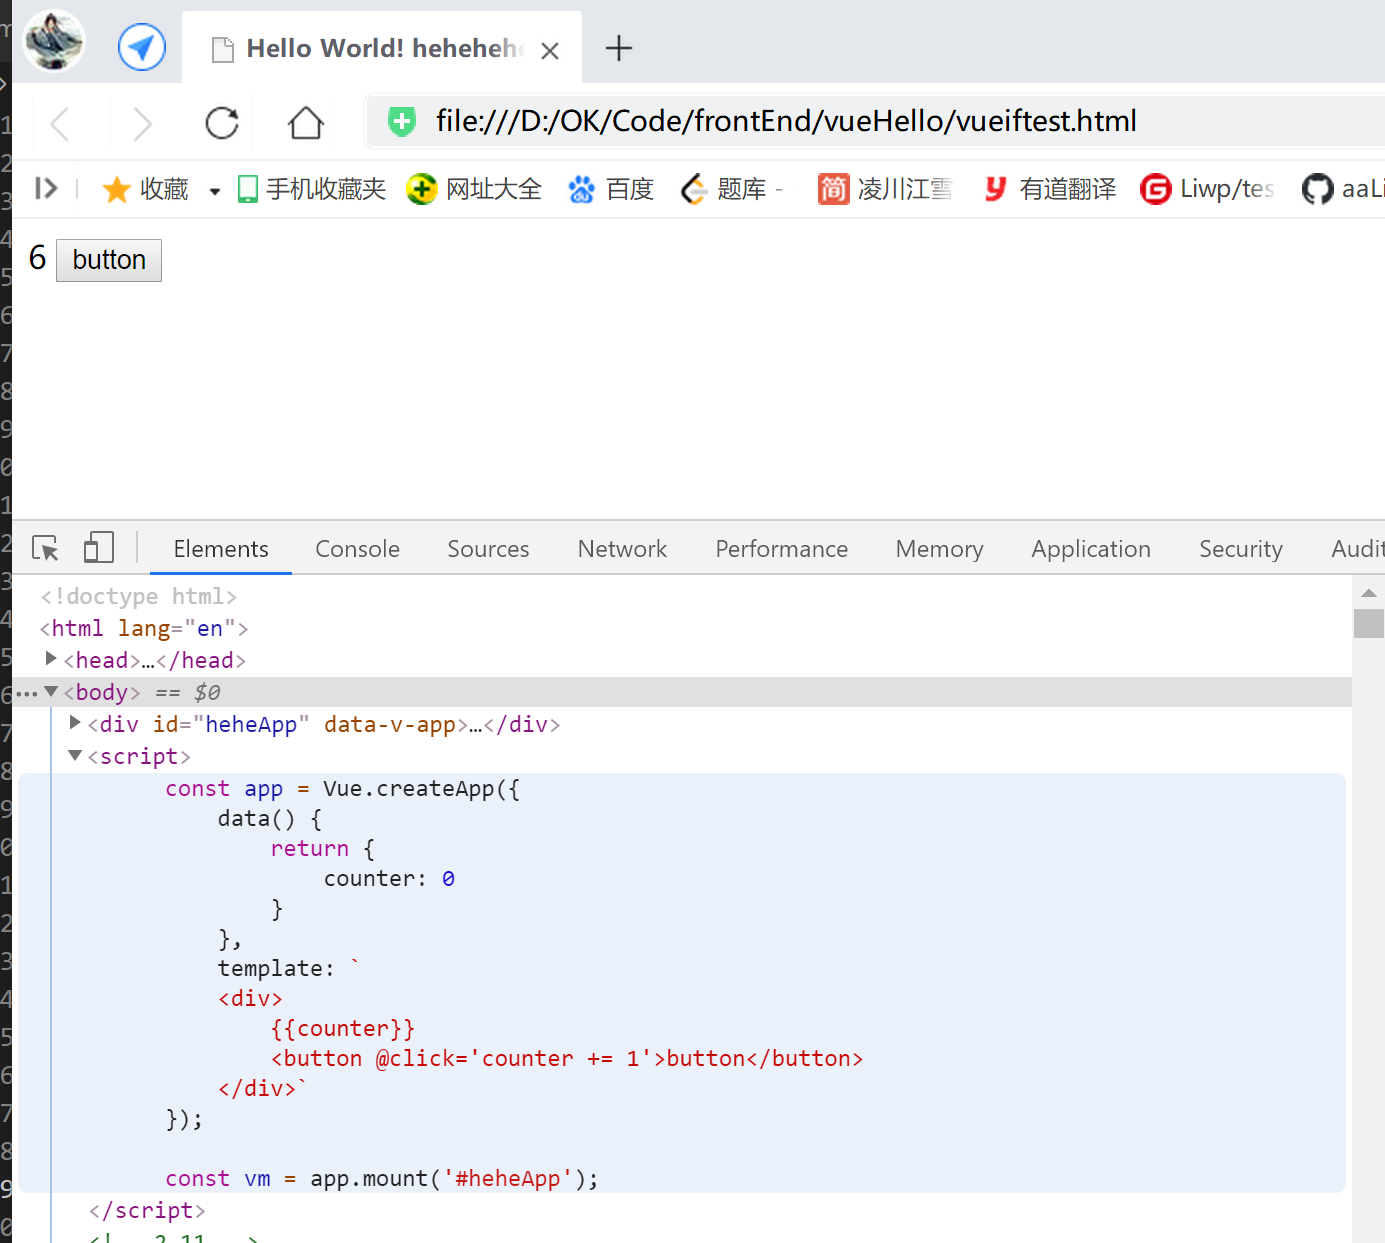
MouseEvent对象 了解
事件响应函数无入参时,默认第一个参数,即是MouseEvent对象:
<script>
    const app = Vue.createApp({
        data() {
            return {
                counter: 0
            }
        },
        methods:{
            handleBtnClick(event) {
                console.log(event);
                this.counter += 1;
            }
        },
        template: `
        <div>
            {{counter}}
            <button @click='handleBtnClick'>button</button>
        </div>`
    });

    const vm = app.mount('#heheApp');
</script>点击打印MouseEvent对象:
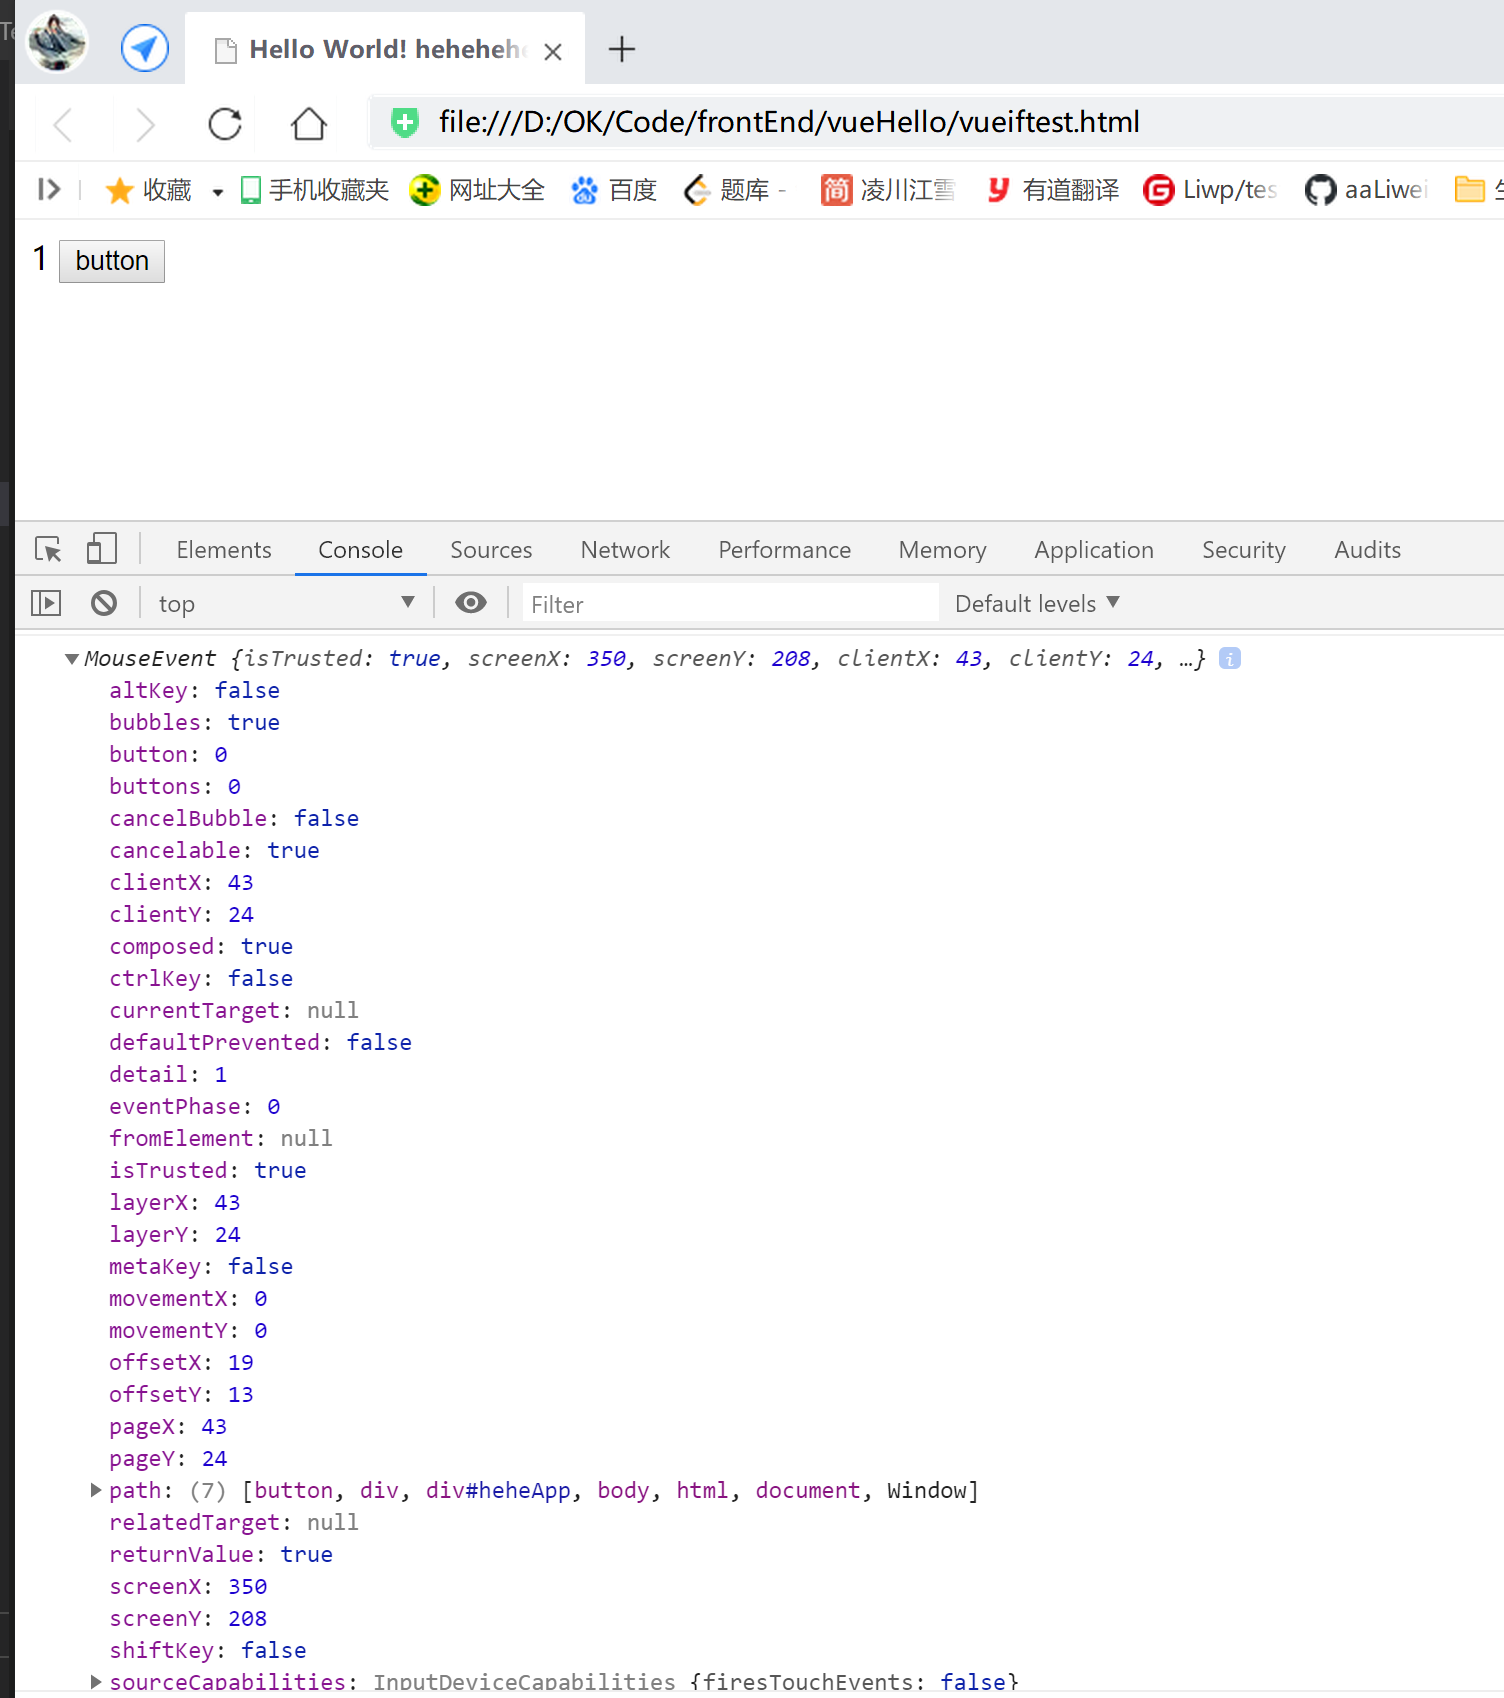
event.target是 被点击到的组件:
<script>
...
        methods:{
            handleBtnClick(event) {
                console.log(event.target);
                this.counter += 1;
            }
        },
...
</script>
效果图:
事件函数传入参
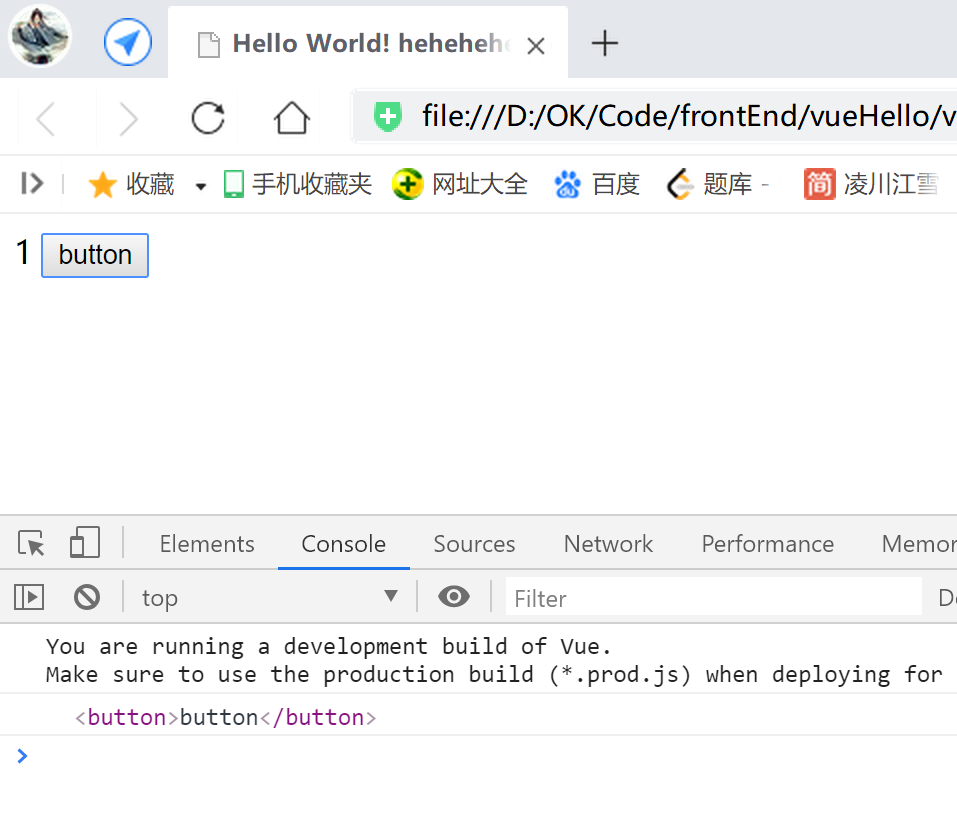
案例代码:
<script>
    const app = Vue.createApp({
        data() {
            return {
                counter: 0
            }
        },
        methods:{
            handleBtnClick(num) {
                this.counter += num;
                console.log(this.counter);
            }
        },
        template: `
        <div>
            {{counter}}
            <button @click='handleBtnClick(2)'>button</button>
        </div>`
    });

    const vm = app.mount('#heheApp');
</script>
实现内容即,点击按钮时,counter加2:
事件函数传入参 同时获取 原生MouseEvent对象的 写法
即如<button @click='handleBtnClick(2, $event)'>button</button>,
在事件函数调用时候,末尾入参处,加上 入参变量$event:
<script>
    const app = Vue.createApp({
        data() {
            return {
                counter: 0
            }
        },
        methods:{
            handleBtnClick(num ,event) {
                this.counter += num;
                console.log(this.counter);
                console.log(event);
                console.log(event.target);
            }
        },
        template: `
        <div>
            {{counter}}
            <button @click='handleBtnClick(2, $event)'>button</button>
        </div>`
    });

    const vm = app.mount('#heheApp');
</script>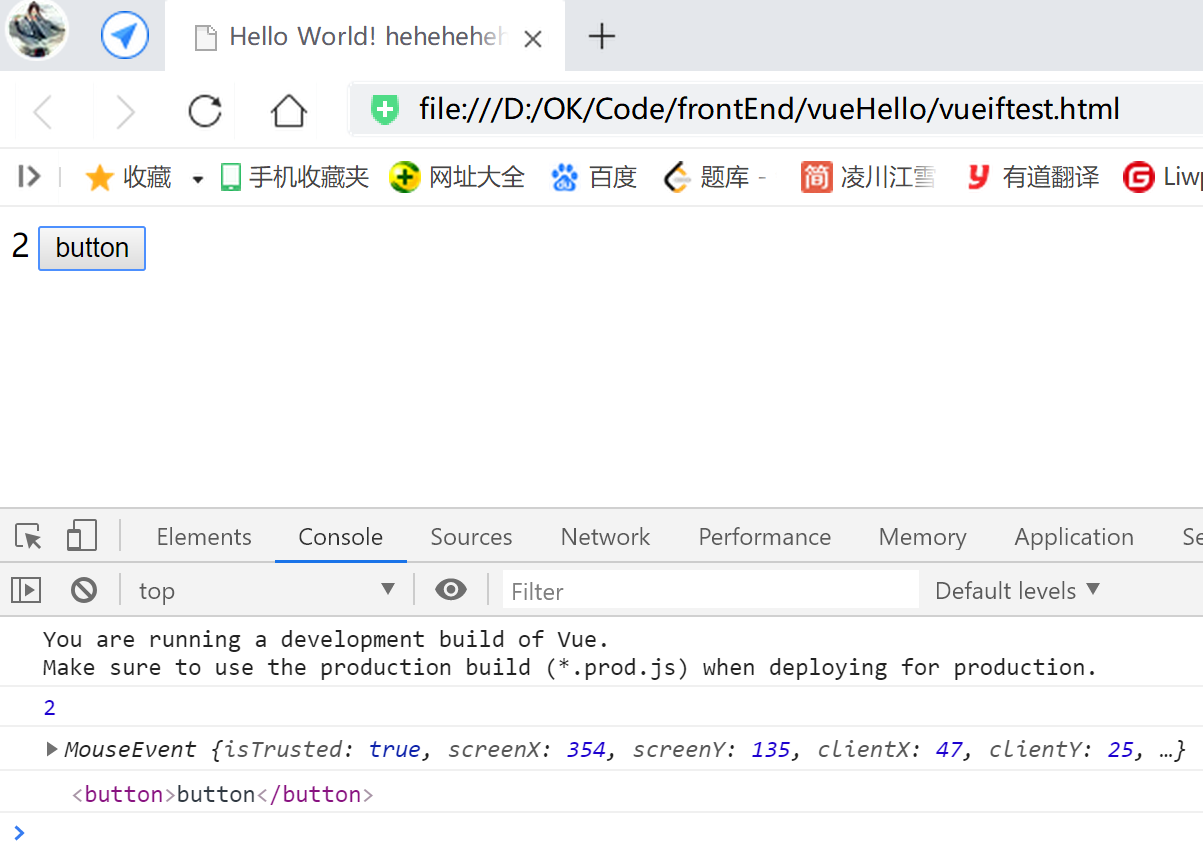
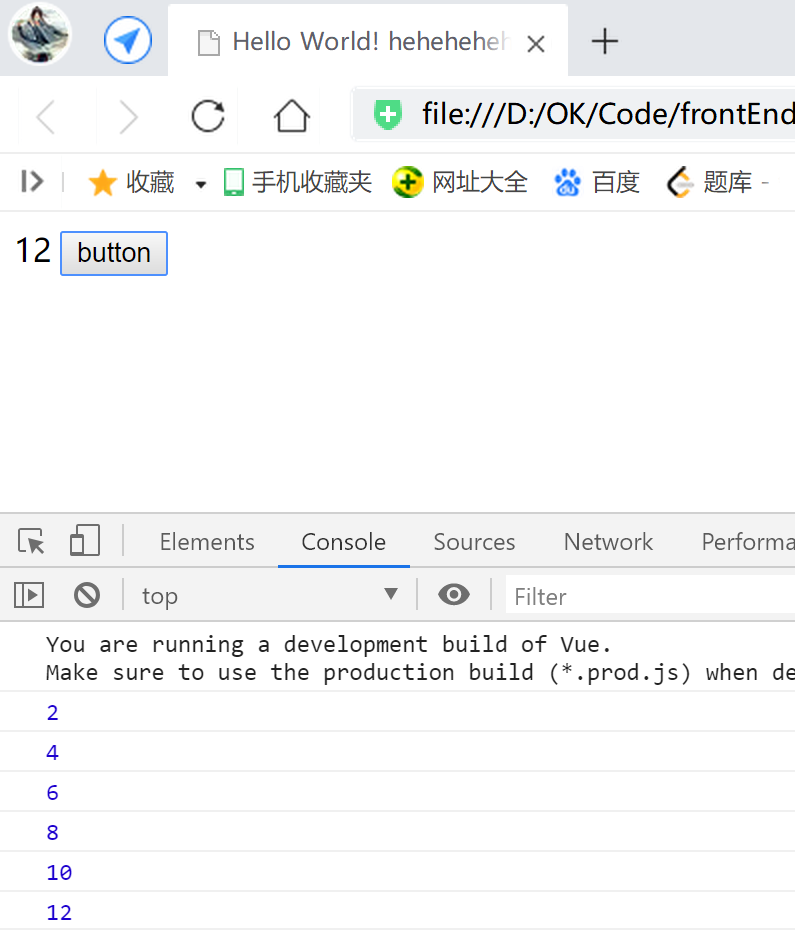
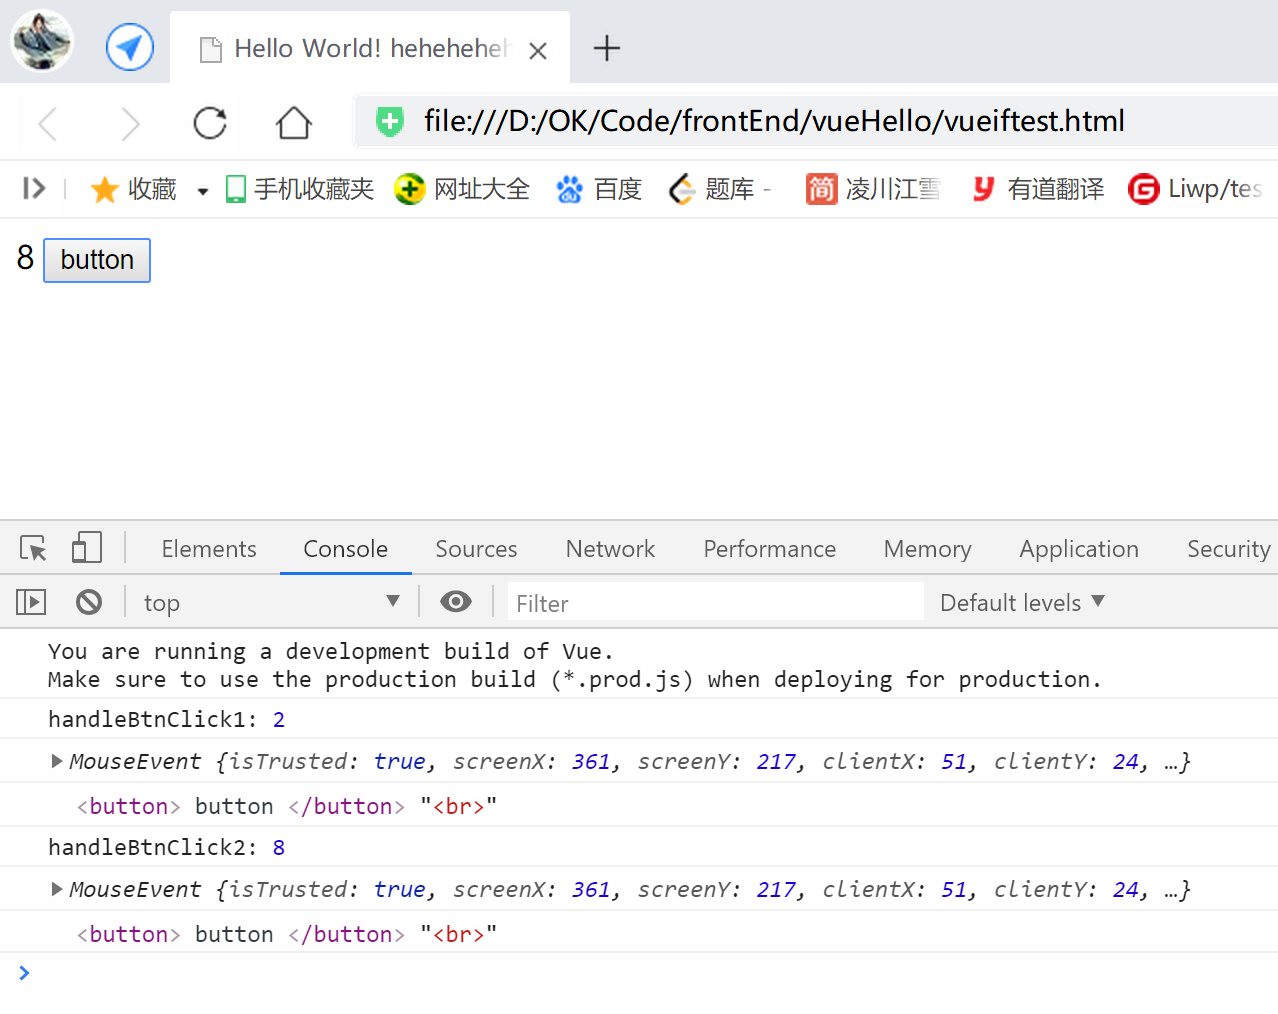
一个按钮 同时触发多个 回调函数 的写法
在methods中准备好回调方法,
将要回调的函数名以逗号隔开,作为@click的参数即可:
<script>
    const app = Vue.createApp({
        data() {
            return {
                counter: 0
            }
        },
        methods:{
            handleBtnClick1(num ,event) {
                this.counter += num;
                console.log('handleBtnClick1:', this.counter);
                console.log(event);
                console.log(event.target, '<br>');
            },
            handleBtnClick2(num ,event) {
                this.counter += num;
                console.log('handleBtnClick2:', this.counter);
                console.log(event);
                console.log(event.target, '<br>');
            }

        },
        template: `
        <div>
            {{counter}}
            <button
                @click='handleBtnClick1(2, $event), handleBtnClick2(6, $event)'>
                button
            </button>
        </div>`
    });

    const vm = app.mount('#heheApp');
</script>
运行代码,点击按钮一次,效果:
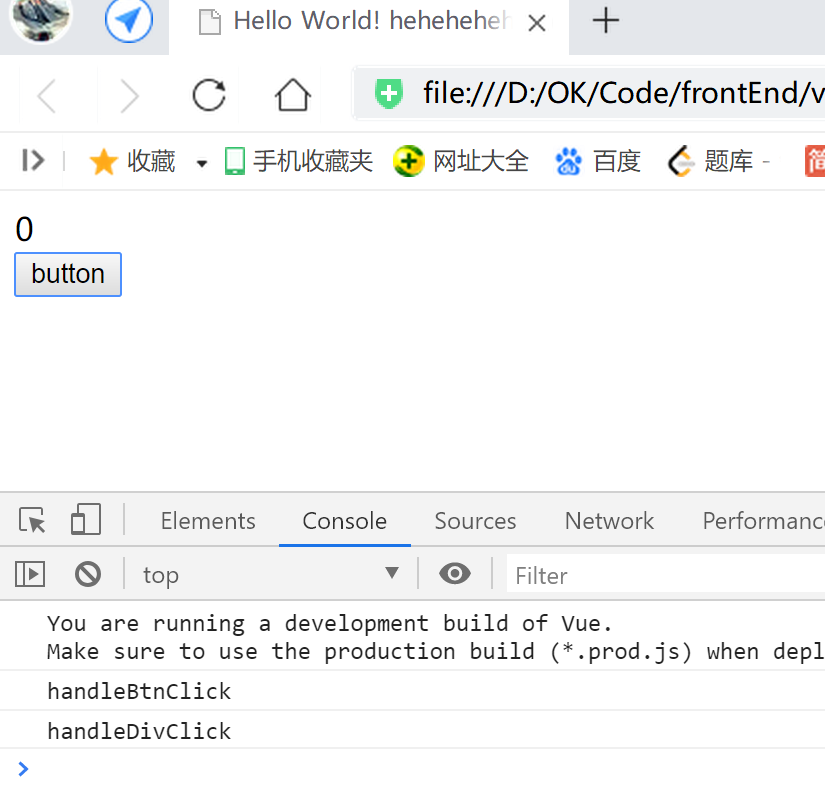
Vue的事件传递
Vue的默认事件传递是由里而外的【与安卓 自上而下的事件分发机制 恰恰相反】:
如下,我们设置一层div组件,里面套着一个button,
内外两层皆设置点击事件,进行观察:
<!DOCTYPE html>
<html lang="en">
<head>
    <meta charset="UTF-8">
    <meta name="viewport" content="width=device-width, initial-scale=1.0">
    <title>Hello World! heheheheheheda</title>
    <script src="https://unpkg.com/vue@next"></script>
</head>

<body>
    <div id="heheApp"></div>
</body>
<script>
    const app = Vue.createApp({
        data() {
            return {
                counter: 0
            }
        },
        methods:{
            handleDivClick() {
                console.log("handleDivClick");
            },
            handleBtnClick() {
                console.log("handleBtnClick");
            }
        },
        template: `
        <div>
            {{counter}}
            <div @click="handleDivClick">
                <button @click="handleBtnClick">button</button>
            </div>
        </div>`
    });

    const vm = app.mount('#heheApp');
</script>
</html>
运行,点击按钮,日志如下,
验证了 Vue的事件传递是由里而外的:
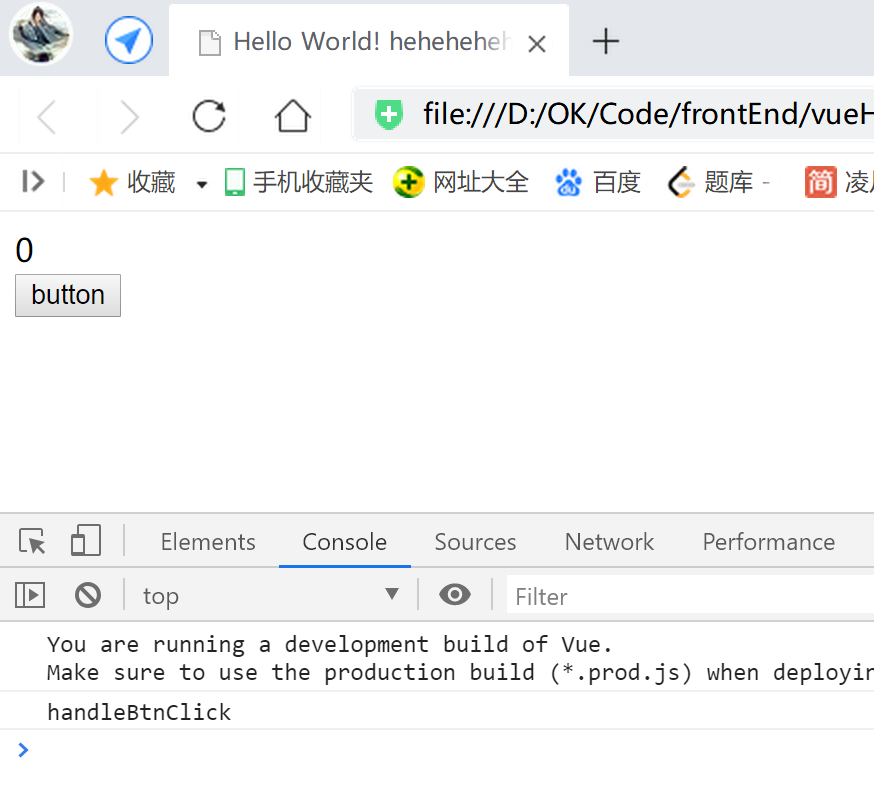
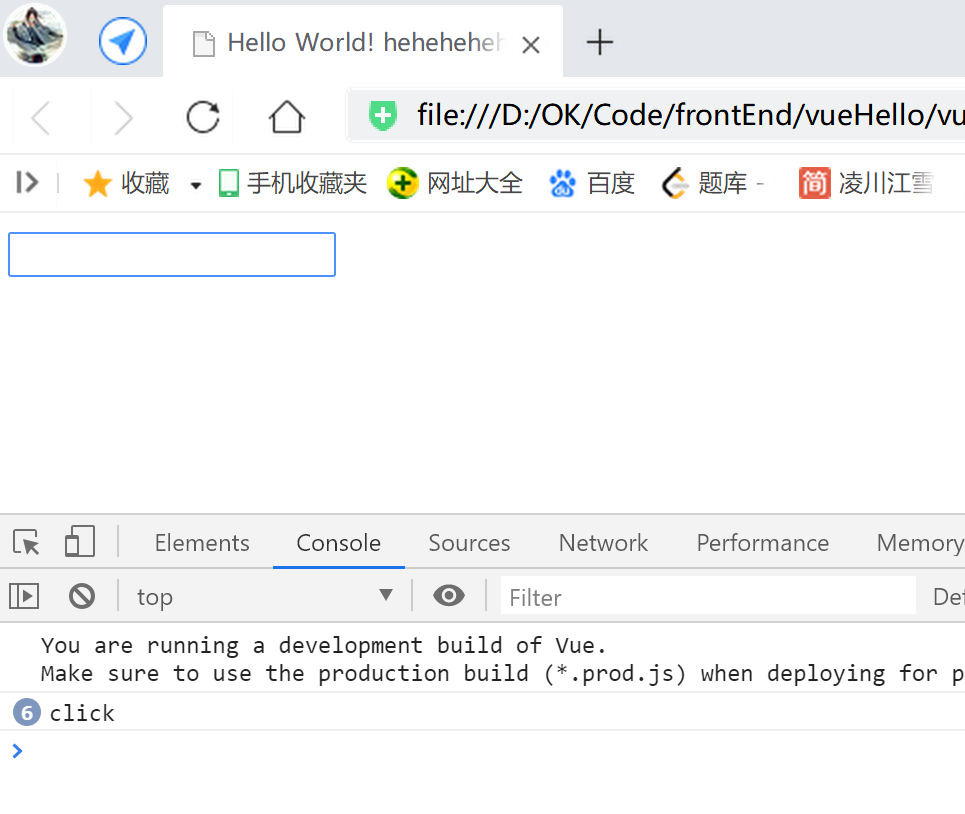
可以使用.stop修饰符,拦截事件外传:
<script>
...
        template: `
        <div>
            {{counter}}
            <div @click="handleDivClick">
                <button @click.stop="handleBtnClick">button</button>
            </div>
        </div>`
    });
...
</script>
运行,点击按钮,效果如下,成功拦截:
@click的.self修饰符
修饰在外层DOM组件的@click上,
使得 仅在点击 外层组件本身(如下代码的外层<div>) 或 仅隶属于外层组件的组件(如下代码的{{counter}})的时候,
才会回调外层组件的回调方法,
而点击内部标签组件元素(如下代码的button)时候,
不会触发外层组件的回调方法:
<script>
    const app = Vue.createApp({
        data() {
            return {
                counter: 0
            }
        },
        methods:{
            handleDivClick() {
                console.log("handleDivClick");
            },
            handleBtnClick() {
                console.log("handleBtnClick");
            }
        },
        template: `
        <div>
            <div @click.self="handleDivClick">
                {{counter}}
                <button @click="handleBtnClick">button</button>
            </div>
        </div>`
    });

    const vm = app.mount('#heheApp');
</script> @click的.capture修饰符
.capture修饰符 使得事件处理顺序变成从外到内:
<script>
    ...
        template: `
        <div>
            <div @click.capture="handleDivClick">
                {{counter}}
                <button @click="handleBtnClick">button</button>
            </div>
        </div>`
    });
  ...
</script>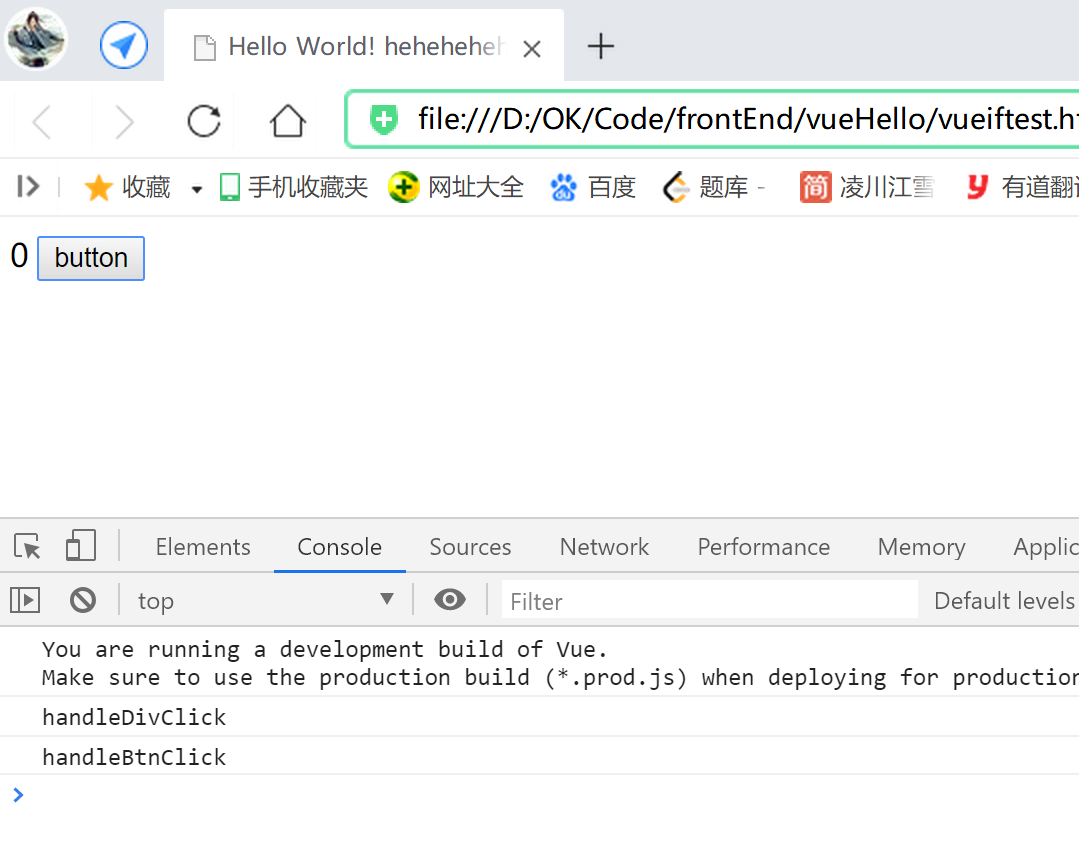
@click的.once/.prevent修饰符
.once使得对应事件仅执行一次;.prevent则用于阻止默认行为;
这两个修饰符在之前的博客中都有涉及过;
@click的鼠标修饰符left、right、middle
左键、右键、中间滚轮
@click的精确修饰符.exact
常规点击修饰符 修饰组件,如:
<script>
    const app = Vue.createApp({
        methods:{
            handleClick() {
                console.log("click");
            }
        },
        template: `
        <div>
            <input @click.ctrl="handleClick"/>
        </div>`
    });

    const vm = app.mount('#heheApp');
</script>
按住ctrl键 或者 按住ctrl键同时按住其他键,再点击组件,都可以响应回调:
.exact之后,只有单独按ctrl键点击组件才响应:
<div @click.ctrl.exact="handleClick">123456</div> @scroll.passive的.passive可以提高滚动性能
按键事件指令@keydown
常规的按键回调指令是@keydown,
被该指令修饰的组件,只要点击了,就会触发相关的回调方法:
<!DOCTYPE html>
<html lang="en">
<head>
    <meta charset="UTF-8">
    <meta name="viewport" content="width=device-width, initial-scale=1.0">
    <title>Hello World! heheheheheheda</title>
    <script src="https://unpkg.com/vue@next"></script>
</head>

<body>
    <div id="heheApp"></div>
</body>
<script>
    const app = Vue.createApp({
        methods:{
            handleKeyDown() {
                console.log("keyDown");
            }
        },
        template: `
        <div>
            <input @keydown="handleKeyDown"/>
        </div>`
    });

    const vm = app.mount('#heheApp');
</script>
</html>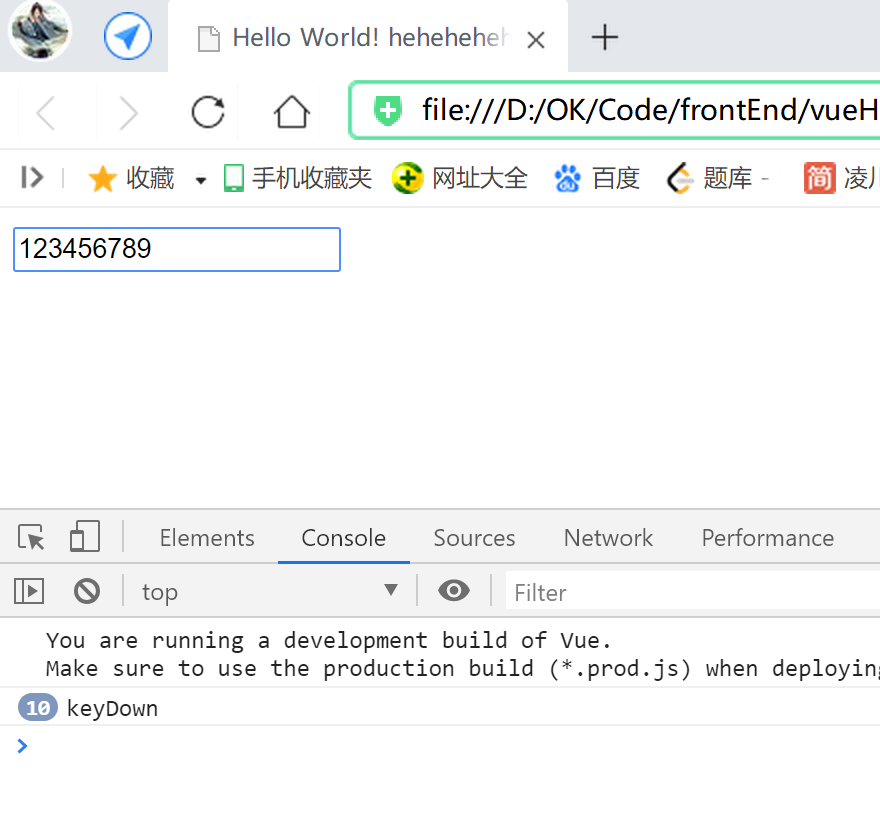
@keydown的按键修饰符.enter
当.enter修饰按键事件指令时,对应的组件需要输入回车键,
才会触发按键事件keydown回调:
<script>
    const app = Vue.createApp({
        methods:{
            handleKeyDown() {
                console.log("keyDown");
            }
        },
        template: `
        <div>
            <input @keydown.enter="handleKeyDown"/>
        </div>`
    });

    const vm = app.mount('#heheApp');
</script>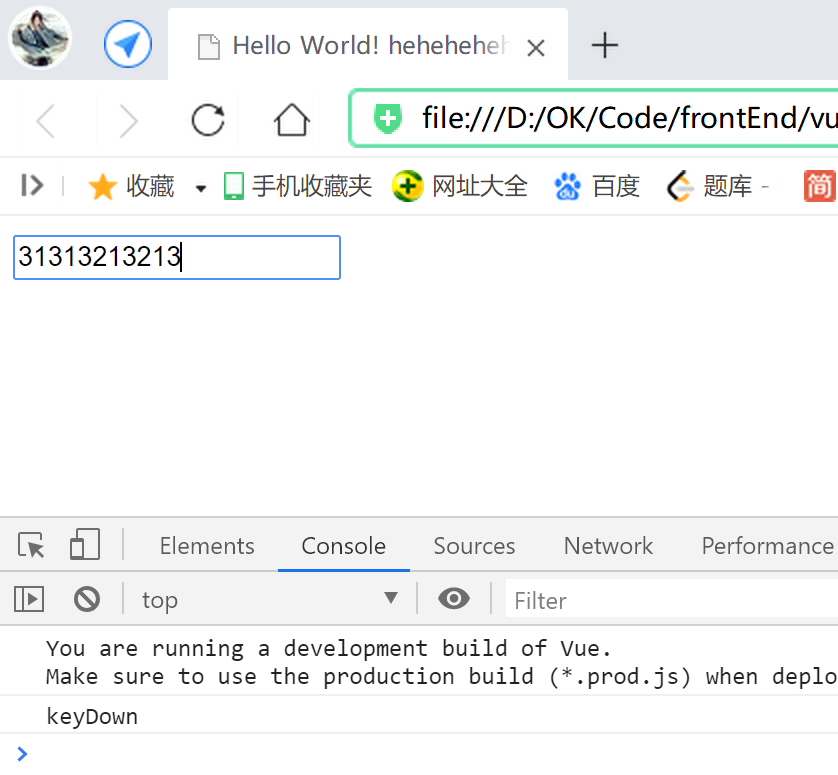
@keydown的按键修饰符tab、delete、esc、up、down、left、right等
意义同理于以上的.enter,被修饰的对应的组件需要输入对应修饰符的键,
才会触发按键事件keydown回调;


 1772
1772

 被折叠的 条评论
为什么被折叠?
被折叠的 条评论
为什么被折叠?
 到【灌水乐园】发言


