


详细方法(conda篇)
因为不同库对python要求不同,所以我们需要一个管理python的软件(conda)anaconda下载地址:
https://mirrors.tuna.tsinghua.edu.cn/anaconda/archive/Anaconda3-2020.11-Windows-x86_64.exe
软件如下:

点击

选择just me

安装路径默认即可

这两个都勾上

两个“learn”,都取消打勾

重启电脑
重启后按windows键+x,选择run
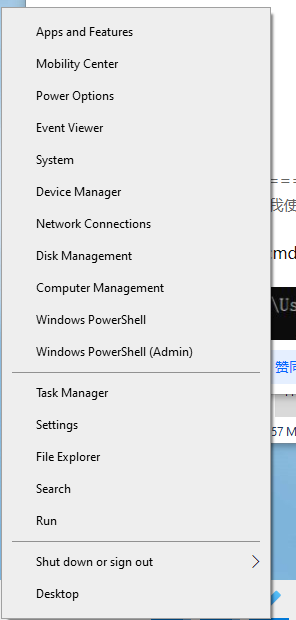
选择cmd
按ok

在这个黑框框中打入conda --version查看是否安装成功

增加Anaconda中国镜像
在cmd中操作:
conda config --add channels https://mirrors.tuna.tsinghua.edu.cn/anaconda/pkgs/free/
conda config --add channels https://mirrors.tuna.tsinghua.edu.cn/anaconda/pkgs/main/
conda config --set show_channel_urls yes
查看是否修改好通道?
conda config --show channels
再创建环境
键入
conda create -n python=3.8 learning
说明:conda create -n (python版本) (环境名)
最后面在询问是否创建环境时键入‘Y’
然后激活虚拟环境
conda activate learning

然后安装tensorflow
pip install tensorflow -i https://pypi.tuna.tsinghua.edu.cn/simple
安装numpy
pip install numpy -i https://pypi.tuna.tsinghua.edu.cn/simple
安装sklearn
pip install sklearn -i https://pypi.tuna.tsinghua.edu.cn/simple
安装matplotlib
pip install matplotlib -i https://pypi.tuna.tsinghua.edu.cn/simple
以后想安装什么库
就先
conda activate (环境名)
转换到你想要安装到的环境
再
pip install (库名) -i https://pypi.tuna.tsinghua.edu.cn/simple
安装你缺少的库

集成开发环境安装
装好了python,我们肯定要一个顺手的IDE,我觉得pycharm写python非常顺手
打开jetbrains官网

下载好后

一路确定安装

点开

安装pycharm community即可

记住不要点ultimate(如果你不想为此花钱)


 12万+
12万+


 被折叠的 条评论
为什么被折叠?
被折叠的 条评论
为什么被折叠?
 到【灌水乐园】发言


