


OpenGauss集群安装
- 一、安装包的下载
- 二.安装环境的准备
- 二、开始安装数据库
- 三、验证
- 四、客户端远程连接opengauss
- 五、修改数据库主机IP地址
一、安装包的下载
1.centos 7.6的下载
链接: http://mirror.nsc.liu.se/centos-store/7.6.1810/isos/x86_64/

二.安装环境的准备
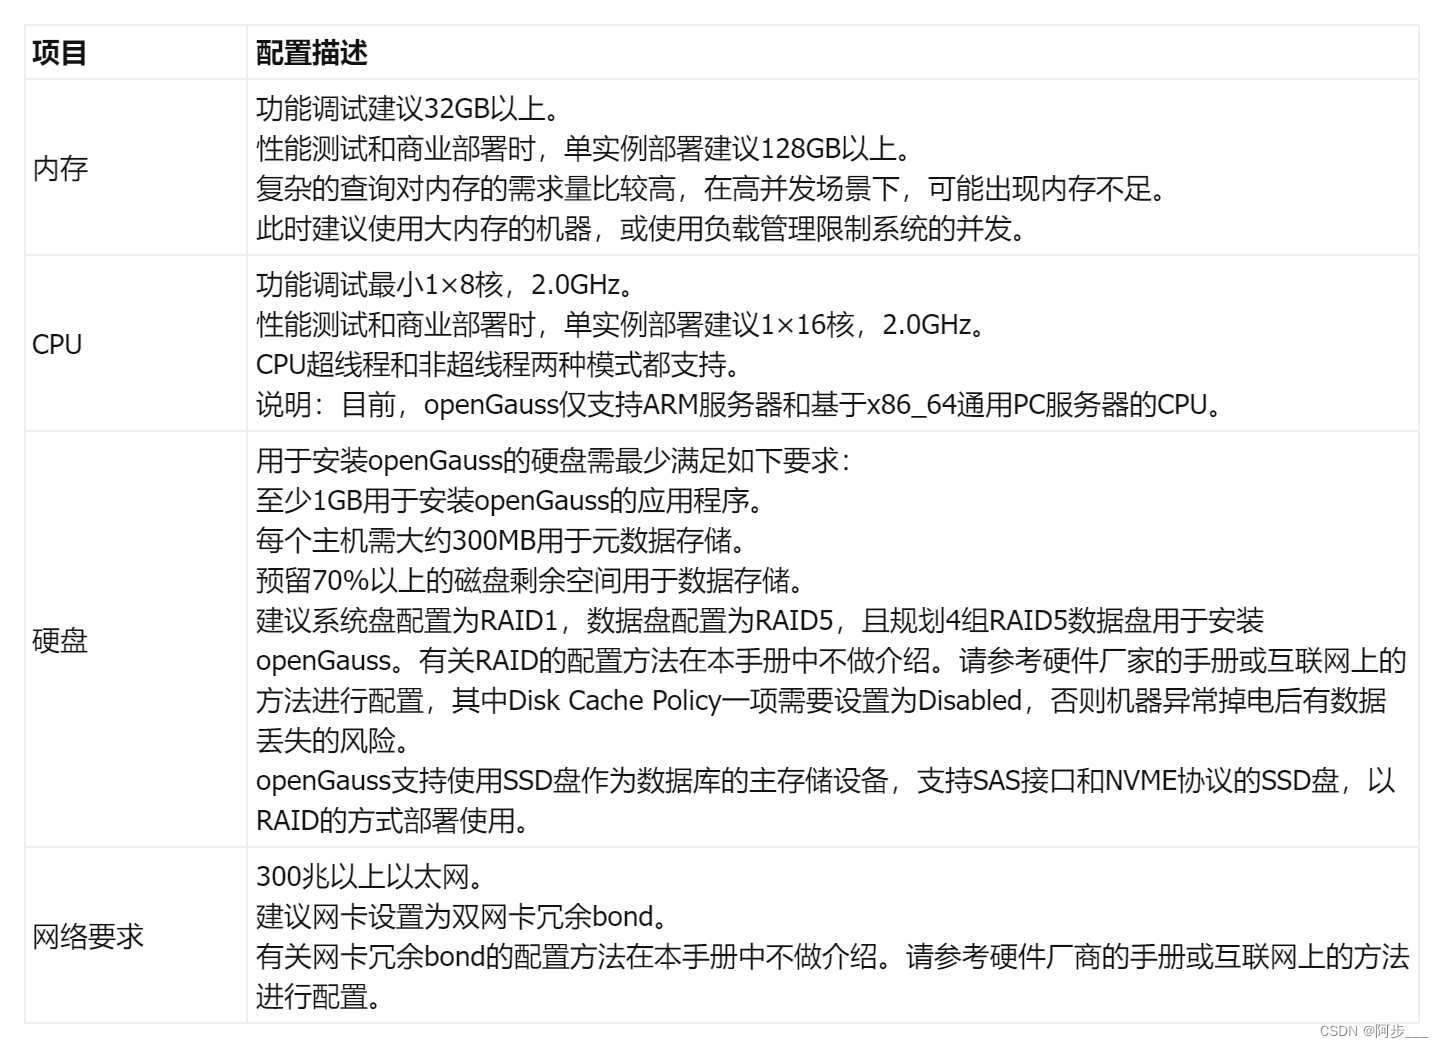
1、硬件环境要求
2、软件环境
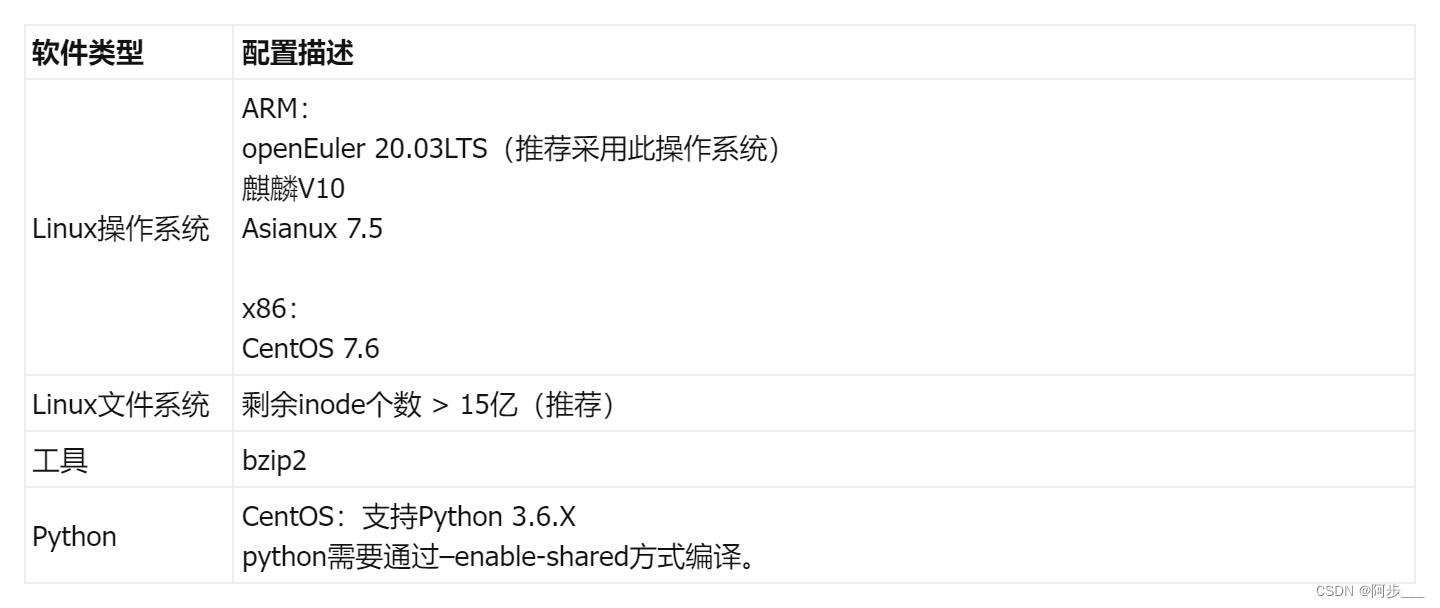
a 依赖要求

3.使用yum来安装依赖包
yum install -y bzip2 cpp gcc zlib-devel
yum install net-tools -y
ifconfig bond0 mtu 8192
yum -y install vim*
yum install expect
yum install wget -y
yum -y install bzip2 cpp gcc zlib-devel net-tools vim* expect wget libaio-devel flex bison ncurses-devel glibc-devel patch redhat-lsb-core readline-devel python3
4、关闭操作系统防火墙
- 目前仅支持在防火墙关闭的状态下进行安装。
设置防火墙开机不自动启动
systemctl disable firewalld.service
关闭防火墙
systemctl stop firewalld.service
设置selinux
vi /etc/selinux/config
修改为:SELINUX=disabled
在root用户下临时关闭selinux
setenforce 0
5、设置操作系统字符集编码
LANG=en_US.UTF-8
echo "LANG=en_US.UTF-8" >> /etc/profile
source /etc/profile
echo $LANG
6、设置时区和时间
查询时区
timedatectl
timedatectl list-timezones |grep Shanghai
timedatectl set-timezone Asia/Shanghai
修改时区和时间
ln -sf /usr/share/zoneinfo/Asia/Shanghai /etc/localtime

date -s "2021-04-29 15:51:50"
7、服务部署-NTP时间同步服务
服务软件的安装
#查看是否安装
rpm -q ntp
如果没有安装过的话,可以执行此命令安装
yum install ntpdate ntp -y
服务的基本配置(/etc/ntp.conf)
# For more information about this file, see the man pages
# ntp.conf(5), ntp_acc(5), ntp_auth(5), ntp_clock(5), ntp_misc(5), ntp_mon(5).

driftfile /var/lib/ntp/drift

# Permit time synchronization with our time source, but do not
# permit the source to query or modify the service on this system.
restrict default nomodify notrap nopeer noquery

# Permit all access over the loopback interface.  This could
# be tightened as well, but to do so would effect some of
# the administrative functions.
restrict 127.0.0.1
restrict ::1
restrict 10.110.140.0 mask 255.255.255.0 nomodify notrap
# 这一行的含义是授权网段上的所有机器可以从这台机器上查询和同步时间
# Hosts on local network are less restricted.
#restrict 192.168.1.0 mask 255.255.255.0 nomodify notrap

# Use public servers from the pool.ntp.org project.
# Please consider joining the pool (http://www.pool.ntp.org/join.html).
#server 0.centos.pool.ntp.org iburst
#server 1.centos.pool.ntp.org iburst
#server 2.centos.pool.ntp.org iburst
#server 3.centos.pool.ntp.org iburst
server  127.127.1.0     # local clock
fudge   127.127.1.0 stratum 10

#broadcast 192.168.1.255 autokey        # broadcast server
#broadcastclient                        # broadcast client
#broadcast 224.0.1.1 autokey            # multicast server
#multicastclient 224.0.1.1              # multicast client
#manycastserver 239.255.254.254         # manycast server
#manycastclient 239.255.254.254 autokey # manycast client

# Enable public key cryptography.
#crypto
设置系统ntp开机自启动
#默认为CentOS7的配置,CentOS6中需要使用chkconfig命令
systemctl enable ntpd
systemctl enable ntpdate
systemctl is-enabled ntpd
 将正确时间写入硬件
ss -tlunp | grep ntp
ntpq -p
hwclock -w
客户端使用配置
# (1) 以服务进程方式实时同步
# 编辑客户端的配置文件(/etc/ntp.conf),添加如下内容
server 10.110.140.213

# (2) 重启服务
# 修改任意节点服务器的NTP配置文件都需要重启ntpd服务
systemctl restart ntpd

# (3) 设置定时任务进行时间校对
# 需安装ntpdate,每天24点更新同步时间
crontab -e
0 0 * * * /usr/sbin/sntp -P no -r 172.16.128.171; hwclock -w
查看 ntp 同步状态
使用如下命令查看节点同步状态
[root@gauss_sec ~]# ntpq -p
     remote           refid      st t when poll reach   delay   offset  jitter
==============================================================================
 gauss_pri       LOCAL(0)        11 u   53   64    3    0.090    6.058   0.447
[root@gauss_sec ~]#
8、关闭swap交换内存
关闭swap交换内存是为了保障数据库的访问性能,避免把数据库的缓冲区内存淘汰到磁盘上。
- 关闭
swapoff -a
9、设置网卡MTU值
将各数据库节点的网卡MTU值设置为相同大小。
操作步骤
执行如下命令查询服务器的网卡名称。
ifconfig
使用如下命令将各数据库节点的网卡MTU值设置为相同大小。MTU值推荐8192,要求不小于1500。
ifconfig bond0 mtu 8192
10、关闭virbr0网卡(如果有virbr0)
centos 7.6
ifconfig virbr0 down
systemctl disable libvirtd.service
11、设置root用户远程登录
修改PermitRootLogin配置,允许用户远程登录。
- a. 打开sshd_config文件。
vim /etc/ssh/sshd_config
- b. 修改权限配置,可以使用以下两种方式实现:
注释掉“PermitRootLogin no”。
#PermitRootLogin no
将“PermitRootLogin”改为“yes”。
PermitRootLogin yes
12、配置Banner
修改Banner配置,去掉连接到系统时,系统提示的欢迎信息。
欢迎信息会干扰安装时远程操作的返回结果,影响安装正常执行。
- a. 编辑sshd_config文件。
vim /etc/ssh/sshd_config
- b. 修改Banner配置,注释掉“Banner”所在的行。
#Banner XXXX
- c. 执行:wq保存并退出编辑页面。
使用如下命令使设置生效。
systemctl restart sshd.service
以root用户身份重新登录。
ssh xxx.xxx.xxx.xxx
13、创建用户和用户组
为了实现安装过程中安装帐户权限最小化,及安装后openGauss的系统运行安全性,安装脚本在安装过程中会自动按照用户指定内容创建安装用户,并将此用户作为后续运行和维护openGauss的管理员帐户。
1、用户组:dbgrp
初始化安装环境时,由-G参数所指定的安装用户所属的用户组。
该用户组如果不存在,则会自动创建,也可提前创建好用户组。
在执行gs_preinstall脚本时会检查权限。
gs_preinstall脚本会自动赋予此组中的用户对安装目录、数据目录的访问和执行权限。
2、用户:omm
初始化安装环境时,由-U参数所指定和自动创建的
此用户具备数据库的最高操作权限,此用户初始密码由用户指定。
从安全性考虑,用户所属组是dbgrp
操作:
groupadd dbgrp
useradd -g dbgrp omm
echo 'omm@123' | passwd --stdin omm
14、设置sysctl.conf 不用配置
vi /etc/sysctl.conf
net.ipv4.tcp_retries1 = 5
net.ipv4.tcp_syn_retries = 5
net.sctp.path_max_retrans = 10
net.sctp.max_init_retransmits = 10
net.ipv4.tcp_max_tw_buckets = 10000
net.ipv4.tcp_tw_reuse = 1
net.ipv4.tcp_tw_recycle = 1
net.ipv4.tcp_keepalive_time = 30
net.ipv4.tcp_keepalive_intvl = 30
net.ipv4.tcp_retries2 = 12
net.ipv4.ip_local_reserved_ports = 15400-15407,20050-20057
net.core.wmem_max = 21299200
net.core.rmem_max = 21299200
net.core.wmem_default = 21299200
net.core.rmem_default = 21299200
kernel.sem = 250 6400000 1000 25600
net.ipv4.tcp_rmem = 8192 250000 16777216
net.ipv4.tcp_wmem = 8192 250000 16777216
vm.min_free_kbytes = 201318
net.core.netdev_max_backlog = 65535
net.ipv4.tcp_max_syn_backlog = 65535
net.core.somaxconn = 65535
kernel.shmall = 1152921504606846720
kernel.shmmax = 18446744073709551615
执行命令,使其生效
sysctl -p
15、配置资源限制
echo "* soft stack 3072" >> /etc/security/limits.conf
echo "* hard stack 3072" >> /etc/security/limits.conf
echo "* soft nofile 1000000" >> /etc/security/limits.conf
echo "* hard nofile 1000000" >> /etc/security/limits.conf
echo "* soft nproc unlimited" >> /etc/security/limits.d/90-nproc.conf
- 查看
tail -n 4 /etc/security/limits.conf
tail -n 1 /etc/security/limits.d/90-nproc.conf
16、关闭透明大页
echo never > /sys/kernel/mm/transparent_hugepage/defrag
echo never > /sys/kernel/mm/transparent_hugepage/enabled

echo 'echo never > /sys/kernel/mm/transparent_hugepage/defrag' >> /etc/rc.d/rc.local
echo 'echo never > /sys/kernel/mm/transparent_hugepage/enabled' >> /etc/rc.d/rc.local
chmod +x /etc/rc.d/rc.local
/usr/bin/sh /etc/rc.d/rc.local
17、创建目录
mkdir -p /opt/software/openGauss
chmod 755 -R /opt/software
cd /opt/
chown -R omm:dbgrp software
18、使用WINSCP软件上传文件到opt/software/
下载 链接: https://www.opengauss.org/zh/download/
文件名:openGauss-3.1.0-CentOS-64bit-all.tar.gz
19、设置hostname /etc/hosts
执行命令:hostname 与 /etc/hostname中的主机名需要一致
修改主机名
hostnamectl set-hostname gauss_pri
hostnamectl set-hostname gauss_sec
vi /etc/hosts文件 增加如下示例行
10.110.140.213 gauss_pri
10.110.140.214 gauss_sec
20、解压安装包
[root@gauss_pri ~]# cd /opt/software/
[root@gauss_pri software]# tar -zxvf openGauss-3.1.0-CentOS-64bit-all.tar.gz -C  /opt/software/openGauss/

继续解压安装包openGauss-3.1.0-CentOS-64bit-om.tar.gz
cd /opt/software/openGauss/
 tar -zxvf openGauss-3.1.0-CentOS-64bit-om.tar.gz
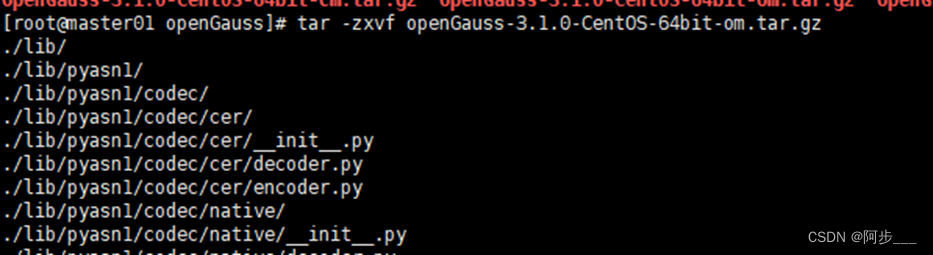
解压出来的内容比较多
chmod -R 777 /opt/software/openGauss
21、创建XML配置文件
<?xml version="1.0" encoding="UTF-8"?>
<ROOT>
    <!-- openGauss整体信息 -->
    <CLUSTER>
        <!-- 数据库名称 -->
        <PARAM name="clusterName" value="dbCluster" />
        <!-- 数据库节点名称(hostname) -->
        <PARAM name="nodeNames" value="gauss_pri,gauss_sec" />
        <!-- 数据库安装目录-->
        <PARAM name="gaussdbAppPath" value="/opt/software/install/app" />
        <!-- 日志目录-->
        <PARAM name="gaussdbLogPath" value="/opt/software/log/omm" />
        <!-- 临时文件目录-->
        <PARAM name="tmpMppdbPath" value="/opt/software/tmp" />
        <!-- 数据库工具目录-->
        <PARAM name="gaussdbToolPath" value="/opt/software/om" />
        <!-- 数据库core文件目录-->
        <PARAM name="corePath" value="/opt/software/corefile" />
        <!-- 节点IP,与数据库节点名称列表一一对应 -->
        <PARAM name="backIp1s" value="10.110.140.213,10.110.140.214"/>
    </CLUSTER>
    <!-- 每台服务器上的节点部署信息 -->
    <DEVICELIST>
        <!-- 节点1上的部署信息 -->
        <DEVICE sn="gauss_pri">
            <!-- 节点1的主机名称 -->
            <PARAM name="name" value="gauss_pri"/>
            <!-- 节点1所在的AZ及AZ优先级 -->
            <PARAM name="azName" value="AZ1"/>
            <PARAM name="azPriority" value="1"/>
            <!-- 节点1的IP,如果服务器只有一个网卡可用,将backIP1和sshIP1配置成同一个IP -->
            <PARAM name="backIp1" value="10.110.140.213"/>
            <PARAM name="sshIp1" value="10.110.140.213"/>

    <!--dbnode-->
    <PARAM name="dataNum" value="1"/>
    <PARAM name="dataPortBase" value="15400"/>
    <PARAM name="dataNode1" value="/opt/software/install/data/dn,gauss_sec,/opt/software/install/data/dn"/>
            <PARAM name="dataNode1_syncNum" value="0"/>
        </DEVICE>
   <!-- node2上的节点部署信息,其中“name”的值配置为主机名称 -->
        <DEVICE sn="gauss_sec">
            <PARAM name="name" value="gauss_sec"/>
            <PARAM name="azName" value="AZ1"/>
            <PARAM name="azPriority" value="1"/>
            <!-- 如果服务器只有一个网卡可用,将backIP1和sshIP1配置成同一个IP -->
            <PARAM name="backIp1" value="10.110.140.214"/>
            <PARAM name="sshIp1" value="10.110.140.214"/>
        </DEVICE>

    </DEVICELIST>
</ROOT>
23、执行预安装脚本
export MY_HOSTNAME=master01
cd /opt/software/openGauss/script
./gs_preinstall -U omm -G dbgrp -X /opt/software/cluster_config.xml
输出结果参考
[root@gauss_pri script]# ./gs_preinstall -U omm -G dbgrp -X /opt/software/cluster_config.xml
Parsing the configuration file.
Successfully parsed the configuration file.
Installing the tools on the local node.
Successfully installed the tools on the local node.
Are you sure you want to create trust for root (yes/no)?yes
Please enter password for root
Password:
Successfully created SSH trust for the root permission user.
Setting host ip env
Successfully set host ip env.
Distributing package.
Begin to distribute package to tool path.
Successfully distribute package to tool path.
Begin to distribute package to package path.
Successfully distribute package to package path.
Successfully distributed package.
Are you sure you want to create the user[omm] and create trust for it (yes/no)? yes
Preparing SSH service.
Successfully prepared SSH service.
Installing the tools in the cluster.
Successfully installed the tools in the cluster.
Checking hostname mapping.
Successfully checked hostname mapping.
Creating SSH trust for [omm] user.
Please enter password for current user[omm].
Password:
Checking network information.
All nodes in the network are Normal.
Successfully checked network information.
Creating SSH trust.
Creating the local key file.
Successfully created the local key files.
Appending local ID to authorized_keys.
Successfully appended local ID to authorized_keys.
Updating the known_hosts file.
Successfully updated the known_hosts file.
Appending authorized_key on the remote node.
Successfully appended authorized_key on all remote node.
Checking common authentication file content.
Successfully checked common authentication content.
Distributing SSH trust file to all node.
Distributing trust keys file to all node successfully.
Successfully distributed SSH trust file to all node.
Verifying SSH trust on all hosts.
Successfully verified SSH trust on all hosts.
Successfully created SSH trust.
Successfully created SSH trust for [omm] user.
Checking OS software.
Successfully check os software.
Checking OS version.
Successfully checked OS version.
Creating cluster's path.
Successfully created cluster's path.
Set and check OS parameter.
Setting OS parameters.
Successfully set OS parameters.
Warning: Installation environment contains some warning messages.
Please get more details by "/opt/software/openGauss/script/gs_checkos -i A -h gauss_pri,gauss_sec --detail".
Set and check OS parameter completed.
Preparing CRON service.
Successfully prepared CRON service.
Setting user environmental variables.
Successfully set user environmental variables.
Setting the dynamic link library.
Successfully set the dynamic link library.
Setting Core file
Successfully set core path.
Setting pssh path
Successfully set pssh path.
Setting Cgroup.
Successfully set Cgroup.
Set ARM Optimization.
No need to set ARM Optimization.
Fixing server package owner.
Setting finish flag.
Successfully set finish flag.
Preinstallation succeeded.
[root@gauss_pri script]#
- 查系统环境
/opt/software/openGauss/script/gs_checkos -i A -h gauss_pri,gauss_sec --detail
二、开始安装数据库
1、切换用户omm
必须使用上面预安装指定的用户进行安装
su – omm
2、开始安装
使用XML配置文件
./gs_install -X /opt/software/cluster_config.xml
需要输入密码,密码要求:
- 最少包含8个字符。
- 不能和用户名、当前密码(ALTER)、或当前密码反序相同。
- 至少包含大写字母(A-Z)、小写字母(a-z)、数字、非字母数字字符(限定为~!@#$%^&*()-_=+|[{}];:,<.>/?)四类字符中的三类字符。
su - omm
gs_install -X /opt/software/cluster_config.xml

Parsing the configuration file.
Check preinstall on every node.
Successfully checked preinstall on every node.
Creating the backup directory.
Last time end with Start cluster.
Continue this step.
Successfully created the backup directory.
begin deploy..
Successfully started cluster.
Successfully installed application.
end deploy..
安装成功
三、验证
su - omm
gs_om -t status
gs_om -t status --detail
登录库
gsql -d postgres -p 15400
输出结果参考
[omm@gauss_pri ~]$ gs_om -t status
-----------------------------------------------------------------------

cluster_name    : dbCluster
cluster_state   : Unavailable
redistributing  : No

-----------------------------------------------------------------------
[omm@gauss_pri ~]$ gs_om -t start
Starting cluster.
=========================================
[SUCCESS] gauss_pri
2022-12-06 13:32:27.219 638ed3eb.1 [unknown] 140650705994880 [unknown] 0 dn_6001_6002 01000  0 [BACKEND] WARNING:  could not create any HA TCP/IP sockets
[SUCCESS] gauss_sec
2022-12-06 13:32:30.383 638ed3ee.1 [unknown] 139972099314816 [unknown] 0 dn_6001_6002 01000  0 [BACKEND] WARNING:  could not create any HA TCP/IP sockets
=========================================
Successfully started.
[omm@gauss_pri ~]$ gs_om -t status
-----------------------------------------------------------------------

cluster_name    : dbCluster
cluster_state   : Normal
redistributing  : No

-----------------------------------------------------------------------
[omm@gauss_pri ~]$ gs_om -t status --detail
[   Cluster State   ]

cluster_state   : Normal
redistributing  : No
current_az      : AZ_ALL

[  Datanode State   ]

    node     node_ip         port      instance                              state
--------------------------------------------------------------------------------------------------
1  gauss_pri 10.110.140.213  15400      6001 /opt/software/install/data/dn   P Primary Normal
2  gauss_sec 10.110.140.214  15400      6002 /opt/software/install/data/dn   S Standby Normal
四、客户端远程连接opengauss
修改 pg_hba.conf 文件,添加访问控制及md5加密连接(对设置参数前以存在的用户不生效)
vim /opt/software/install/data/dn/pg_hba.conf


# local      DATABASE  USER  METHOD  [OPTIONS]
host       all  all  0.0.0.0/0  md5   #允许所有网段用户访问
# hostssl    DATABASE  USER  ADDRESS  METHOD  [OPTIONS]
# hostnossl  DATABASE  USER  ADDRESS  METHOD  [OPTIONS]
vim /opt/software/install/data/dn/postgresql.conf

password_encryption_type=0  #将值修改为0
重启数据库(重启后pg_hba.conf生效)
gs_om -t restart
无法使用初始用户进行远程连接,需要再建一个用户
创建rd用户。
CREATE USER rd PASSWORD 'mstc#123456';
--创建数据库mstc
CREATE DATABASE mstc;
--权限设置
GRANT ALL PRIVILEGES TO rd;
五、修改数据库主机IP地址
1. 直接启动数据库
- 发现报错
[omm@ecs-0001 ~]$ gs_om -t startStarting cluster.========================================= [GAUSS-51400] : Failed to execute the command: scp ecs-0002:/appdata/app/opengauss_f892ccb7/bin/cluster_dynamic_config /appdata/app/opengauss_f892ccb7/bin/cluster_dynamic_config_ecs-0002. Error:ssh: connect to host ecs-0002 port 22: No route to host
2. 修改配置文件
- postgresql.conf
- pg_hba.conf
- cluster_config.xml (用于生成 static configuration)
- /etc/hosts
[root@ecs-0001 ~]# sed -i 's/192.168.0.10/192.168.0.30/g' /appdata/data/postgresql.conf /appdata/data/pg_hba.conf /opt/software/opengauss/clusterconfig.xml /etc/hosts
[root@ecs-0001 ~]# sed -i 's/192.168.0.20/192.168.0.40/g' /appdata/data/postgresql.conf /appdata/data/pg_hba.conf /opt/software/opengauss/clusterconfig.xml /etc/hosts
[root@ecs-0002 ~]# sed -i 's/192.168.0.10/192.168.0.30/g' /appdata/data/postgresql.conf /appdata/data/pg_hba.conf /opt/software/opengauss/clusterconfig.xml /etc/hosts
[root@ecs-0002 ~]# sed -i 's/192.168.0.20/192.168.0.40/g' /appdata/data/postgresql.conf /appdata/data/pg_hba.conf /opt/software/opengauss/clusterconfig.xml /etc/hosts
3. 生成集群文件并发送到备库
- 自动发送到备库 /opt/software/cluster_config.xml
[omm@ecs-0001 ~]$ gs_om -t generateconf -X /opt/software/opengauss/cluster_config.xml --distributeGenerating static configuration files for all nodes.Creating temp directory to store static configuration files.Successfully created the temp directory.Generating static configuration files.Successfully generated static configuration files.Static configuration files for all nodes are saved in /appdata/app/tools/script/static_config_files.Distributing static configuration files to all nodes.Successfully distributed static configuration files.
4. 启动数据库验证
- 主库启动
[omm@ecs-0001 ~]$ gs_om -t startStarting cluster.=========================================[SUCCESS] ecs-00012022-01-20 12:45:15.721 [unknown] [unknown] localhost 281457640472592 0 0 [BACKEND] WARNING: Failed to initialize the memory protect for g_instance.attr.attr_storage.cstore_buffers (16 Mbytes) or shared memory (8004 Mbytes) is larger.[SUCCESS] ecs-00022022-01-20 12:45:18.071 [unknown] [unknown] localhost 281465901482000 0 0 [BACKEND] WARNING: Failed to initialize the memory protect for g_instance.attr.attr_storage.cstore_buffers (16 Mbytes) or shared memory (8004 Mbytes) is larger.=========================================Successfully started.
- 备库查看状态
[omm@ecs-0002 ~]$ gs_om -t status --all-----------------------------------------------------------------------
cluster_state             : Normalredistributing            : No
-----------------------------------------------------------------------
node                      : 1node_name                 : ecs-0001instance_id               : 6001node_ip                   : 192.168.0.30data_path                 : /appdata/datatype                      : Datanodeinstance_state            : Normalaz_name                   : AZ1static_connections        : 1HA_state                  : Normalinstance_role             : Primary
-----------------------------------------------------------------------
node                      : 2node_name                 : ecs-0002instance_id               : 6002node_ip                   : 192.168.0.40data_path                 : /appdata/datatype                      : Datanodeinstance_state            : Normalaz_name                   : AZ1instance_role             : StandbyHA_state                  : Streamingsender_sent_location      : 0/452D3E8sender_write_location     : 0/452D3E8sender_flush_location     : 0/452D3E8sender_replay_location    : 0/452D3E8receiver_received_location: 0/452D3E8receiver_write_location   : 0/452D3E8receiver_flush_location   : 0/452D3E8receiver_replay_location  : 0/452D3E8sync_percent              : 100%sync_state                : Sync
-----------------------------------------------------------------------


 7214
7214

 被折叠的 条评论
为什么被折叠?
被折叠的 条评论
为什么被折叠?
 到【灌水乐园】发言


