


目录
1、运行环境
| VMware | 16.1.0 |
| CentOS Linux release 7.9.2009 : 2C2G 20G | |
| Python3.6.8 |
2、部署方案
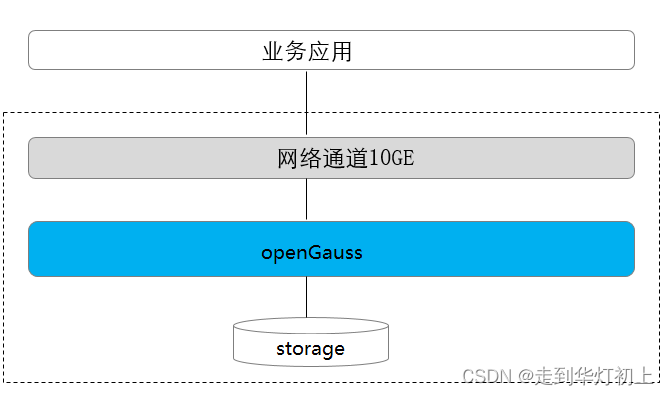
单机部署形态是一种非常特殊的部署形态,这种形态对于可靠性、可用性均无任何保证。由于只有一个数据副本,一旦发生数据损坏、丢失,只能通过物理备份恢复数据。这种部署形态,一般用于数据库体验用户,以及测试环境做语法功能调测等场景。不建议用于商业现网运行。
单机部署形态图:
3、安装准备
3.1、依赖包准备
| 所需软件 | |
|---|---|
| expect | 建议版本:5.45 |
| bzip2 | 建议版本:1.0.6 |
1、安装
yum install -y libaio-devel flex bison ncurses-devel glibc-devel patch lsb_release readline-devel expect bzip22、检查依赖包
rpm -qa libaio-devel flex bison ncurses-devel glibc-devel patch lsb_release readline-devel expect bzip2
3.2、关闭防火墙
systemctl disable firewalld.service
systemctl stop firewalld.service

# 检查防火墙状态
systemctl status firewalld
3.3、设置字符集
# 检查
cat /etc/profile | grep LANG

# 设置
cat>> /etc/profile<<EOF
export LANG=en_US.UTF-8
EOF

source /etc/profile
3.4、设置时区和时间
# 查看
date

# 如果时间与当前时间不一致,则执行
cp /usr/share/zoneinfo/Asia/Shanghai /etc/localtime
3.5、设置网卡MTU值
MTU值推荐8192,要求不小于1500,使用默认值 1500 满足要求即可
-- 设置网卡为1500
ifconfig ens33 mtu 1500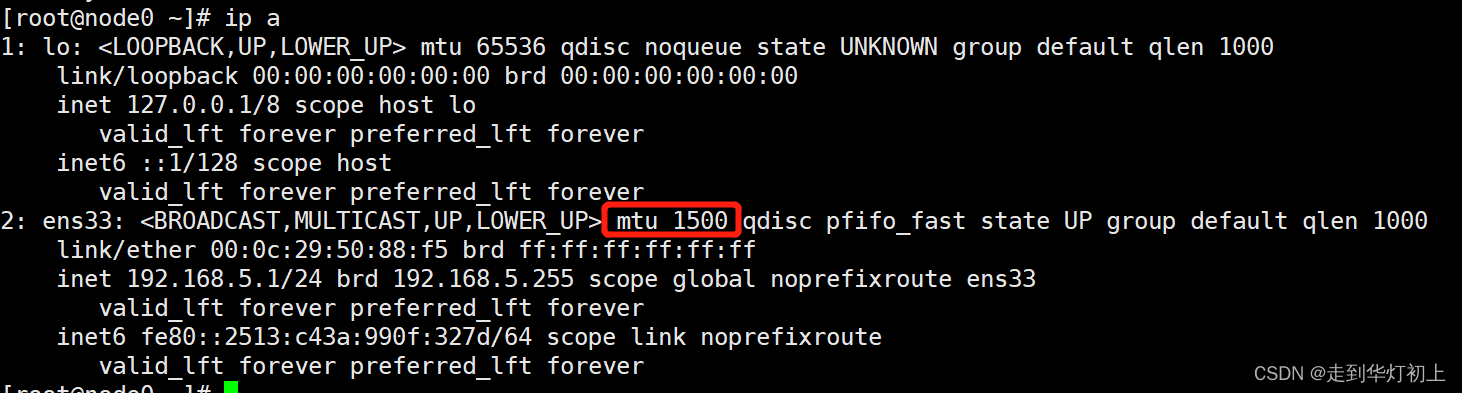
3.6、创建安装目录及用户
mkdir -p /opt/software/openGauss

useradd omm -p openGauss@1234

chown omm:omm -R /opt/software/openGauss
4、极简版安装
4.1、获取安装包
openGauss-5.0.0-CentOS-64bit.tar.bz2
4.2、安装
1、上传安装包至安装目录并授权
cd /opt/software/openGauss
2、切换omm用户

3、解压
tar -jxf openGauss-5.0.0-CentOS-64bit.tar.bz2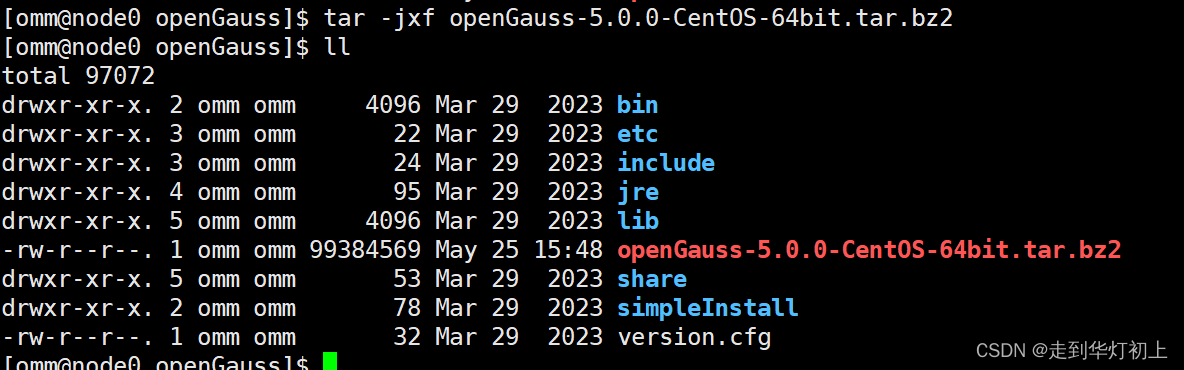
4、安装
cd simpleInstall/

sh install.sh  -w "openGauss123"

source ~/.bashrc
[omm@node0 simpleInstall]$ sh install.sh -w "openGauss123"
[step 1]: check parameter
[step 2]: check install env and os setting
install.sh: line 91: netstat: command not found
[step 3]: change_gausshome_owner
[step 4]: set environment variables[step 6]: init datanode
The files belonging to this database system will be owned by user "omm".
This user must also own the server process.The database cluster will be initialized with locale "en_US.UTF-8".
The default database encoding has accordingly been set to "UTF8".
The default text search configuration will be set to "english".creating directory /opt/software/openGauss/data/single_node ... ok
creating subdirectories ... in ordinary occasionok
creating configuration files ... ok
selecting default max_connections ... 100
selecting default shared_buffers ... 1024MB
Begin init undo subsystem meta.
[INIT UNDO] Init undo subsystem meta successfully.
creating template1 database in /opt/software/openGauss/data/single_node/base/1 ... 2024-05-25 16:28:42.404 [unknown] [unknown] localhost 140530382528768 0[0:0#0] [BACKEND] WARNING: macAddr is 12/693143797, sysidentifier is 797008/2297791399, randomNum is 3661202343
ok
initializing pg_authid ... ok
setting password ... ok
initializing dependencies ... ok
loading PL/pgSQL server-side language ... ok
creating system views ... ok
creating performance views ... ok
loading system objects' descriptions ... ok
creating collations ... ok
creating conversions ... ok
creating dictionaries ... ok
setting privileges on built-in objects ... ok
initialize global configure for bucketmap length ... ok
creating information schema ... ok
loading foreign-data wrapper for distfs access ... ok
loading foreign-data wrapper for log access ... ok
loading hstore extension ... ok
loading foreign-data wrapper for MOT access ... ok
loading security plugin ... ok
update system tables ... ok
creating snapshots catalog ... ok
vacuuming database template1 ... ok
copying template1 to template0 ... ok
copying template1 to postgres ... ok
freezing database template0 ... ok
freezing database template1 ... ok
freezing database postgres ... okWARNING: enabling "trust" authentication for local connections
You can change this by editing pg_hba.conf or using the option -A, or
--auth-local and --auth-host, the next time you run gs_initdb.Success. You can now start the database server of single node using:
gaussdb -D /opt/software/openGauss/data/single_node --single_node
or
gs_ctl start -D /opt/software/openGauss/data/single_node -Z single_node -l logfile[step 7]: start datanode
[2024-05-25 16:28:57.544][4841][][gs_ctl]: gs_ctl started,datadir is /opt/software/openGauss/data/single_node
[2024-05-25 16:28:57.585][4841][][gs_ctl]: waiting for server to start...
.0 LOG: [Alarm Module]can not read GAUSS_WARNING_TYPE env.
0 LOG: [Alarm Module]Host Name: node0
0 LOG: [Alarm Module]Host IP: node0. Copy hostname directly in case of taking 10s to use 'gethostbyname' when /etc/hosts does not contain <HOST IP>
0 LOG: [Alarm Module]Cluster Name: dbCluster
0 LOG: [Alarm Module]Invalid data in AlarmItem file! Read alarm English name failed! line: 57
0 WARNING: failed to open feature control file, please check whether it exists: FileName=gaussdb.version, Errno=2, Errmessage=No such file or directory.
0 WARNING: failed to parse feature control file: gaussdb.version.
0 WARNING: Failed to load the product control file, so gaussdb cannot distinguish product version.
2024-05-25 16:28:57.662 [unknown] [unknown] localhost 139962522611968 0[0:0#0] 0 [BACKEND] LOG: when starting as multi_standby mode, we couldn't support data replicaton.
gaussdb.state does not exist, and skipt setting since it is optional.2024-05-25 16:28:57.667 [unknown] [unknown] localhost 139962522611968 0[0:0#0] 0 [BACKEND] LOG: [Alarm Module]can not read GAUSS_WARNING_TYPE env.
2024-05-25 16:28:57.667 [unknown] [unknown] localhost 139962522611968 0[0:0#0] 0 [BACKEND] LOG: [Alarm Module]Host Name: node0
2024-05-25 16:28:57.667 [unknown] [unknown] localhost 139962522611968 0[0:0#0] 0 [BACKEND] LOG: [Alarm Module]Host IP: node0. Copy hostname directly in case of taking 10s to use 'gethostbyname' when /etc/hosts does not contain <HOST IP>
2024-05-25 16:28:57.667 [unknown] [unknown] localhost 139962522611968 0[0:0#0] 0 [BACKEND] LOG: [Alarm Module]Cluster Name: dbCluster
2024-05-25 16:28:57.667 [unknown] [unknown] localhost 139962522611968 0[0:0#0] 0 [BACKEND] LOG: [Alarm Module]Invalid data in AlarmItem file! Read alarm English name failed! line: 57
2024-05-25 16:28:57.669 [unknown] [unknown] localhost 139962522611968 0[0:0#0] 0 [BACKEND] LOG: loaded library "security_plugin"
2024-05-25 16:28:57.670 [unknown] [unknown] localhost 139962522611968 0[0:0#0] 0 [BACKEND] WARNING: could not create any HA TCP/IP sockets
2024-05-25 16:28:57.670 [unknown] [unknown] localhost 139962522611968 0[0:0#0] 0 [BACKEND] WARNING: could not create any HA TCP/IP sockets
2024-05-25 16:28:57.671 [unknown] [unknown] localhost 139962522611968 0[0:0#0] 0 [BACKEND] LOG: InitNuma numaNodeNum: 1 numa_distribute_mode: none inheritThreadPool: 0.
2024-05-25 16:28:57.672 [unknown] [unknown] localhost 139962522611968 0[0:0#0] 0 [BACKEND] LOG: reserved memory for backend threads is: 220 MB
2024-05-25 16:28:57.672 [unknown] [unknown] localhost 139962522611968 0[0:0#0] 0 [BACKEND] LOG: reserved memory for WAL buffers is: 128 MB
2024-05-25 16:28:57.672 [unknown] [unknown] localhost 139962522611968 0[0:0#0] 0 [BACKEND] LOG: Set max backend reserve memory is: 348 MB, max dynamic memory is: 8143 MB
2024-05-25 16:28:57.672 [unknown] [unknown] localhost 139962522611968 0[0:0#0] 0 [BACKEND] LOG: shared memory 3284 Mbytes, memory context 8491 Mbytes, max process memory 12288 Mbytes
2024-05-25 16:28:57.672 [unknown] [unknown] localhost 139962522611968 0[0:0#0] 0 [BACKEND] LOG: shared memory that key is 5432001 is owned by pid 3621
2024-05-25 16:28:57.713 [unknown] [unknown] localhost 139962522611968 0[0:0#0] 0 [CACHE] LOG: set data cache size(402653184)
2024-05-25 16:28:57.737 [unknown] [unknown] localhost 139962522611968 0[0:0#0] 0 [SEGMENT_PAGE] LOG: Segment-page constants: DF_MAP_SIZE: 8156, DF_MAP_BIT_CNT: 65248, DF_MAP_GROUP_EXTENTS: 4175872, IPBLOCK_SIZE: 8168, EXTENTS_PER_IPBLOCK: 1021, IPBLOCK_GROUP_SIZE: 4090, BMT_HEADER_LEVEL0_TOTAL_PAGES: 8323072, BktMapEntryNumberPerBlock: 2038, BktMapBlockNumber: 25, BktBitMaxMapCnt: 512
2024-05-25 16:28:57.749 [unknown] [unknown] localhost 139962522611968 0[0:0#0] 0 [BACKEND] LOG: gaussdb: fsync file "/opt/software/openGauss/data/single_node/gaussdb.state.temp" success
2024-05-25 16:28:57.749 [unknown] [unknown] localhost 139962522611968 0[0:0#0] 0 [BACKEND] LOG: create gaussdb state file success: db state(STARTING_STATE), server mode(Normal), connection index(1)
2024-05-25 16:28:57.774 [unknown] [unknown] localhost 139962522611968 0[0:0#0] 0 [BACKEND] LOG: max_safe_fds = 976, usable_fds = 1000, already_open = 14
2024-05-25 16:28:57.775 [unknown] [unknown] localhost 139962522611968 0[0:0#0] 0 [BACKEND] LOG: user configure file is not found, it will be created.
2024-05-25 16:28:57.780 [unknown] [unknown] localhost 139962522611968 0[0:0#0] 0 [BACKEND] LOG: the configure file /opt/software/openGauss/etc/gscgroup_omm.cfg doesn't exist or the size of configure file has changed. Please create it by root user!
2024-05-25 16:28:57.780 [unknown] [unknown] localhost 139962522611968 0[0:0#0] 0 [BACKEND] LOG: Failed to parse cgroup config file.
2024-05-25 16:28:57.790 [unknown] [unknown] localhost 139962522611968 0[0:0#0] 0 [EXECUTOR] WARNING: Failed to obtain environment value $GAUSSLOG!
2024-05-25 16:28:57.790 [unknown] [unknown] localhost 139962522611968 0[0:0#0] 0 [EXECUTOR] DETAIL: N/A
2024-05-25 16:28:57.790 [unknown] [unknown] localhost 139962522611968 0[0:0#0] 0 [EXECUTOR] CAUSE: Incorrect environment value.
2024-05-25 16:28:57.790 [unknown] [unknown] localhost 139962522611968 0[0:0#0] 0 [EXECUTOR] ACTION: Please refer to backend log for more details.
2024-05-25 16:28:57.791 [unknown] [unknown] localhost 139962522611968 0[0:0#0] 0 [EXECUTOR] WARNING: Failed to obtain environment value $GAUSSLOG!
2024-05-25 16:28:57.791 [unknown] [unknown] localhost 139962522611968 0[0:0#0] 0 [EXECUTOR] DETAIL: N/A
2024-05-25 16:28:57.791 [unknown] [unknown] localhost 139962522611968 0[0:0#0] 0 [EXECUTOR] CAUSE: Incorrect environment value.
2024-05-25 16:28:57.791 [unknown] [unknown] localhost 139962522611968 0[0:0#0] 0 [EXECUTOR] ACTION: Please refer to backend log for more details.
2024-05-25 16:28:57.791 [unknown] [unknown] localhost 139962522611968 0[0:0#0] 0 [EXECUTOR] WARNING: Failed to obtain environment value $GAUSSLOG!
2024-05-25 16:28:57.791 [unknown] [unknown] localhost 139962522611968 0[0:0#0] 0 [EXECUTOR] DETAIL: N/A
2024-05-25 16:28:57.791 [unknown] [unknown] localhost 139962522611968 0[0:0#0] 0 [EXECUTOR] CAUSE: Incorrect environment value.
2024-05-25 16:28:57.791 [unknown] [unknown] localhost 139962522611968 0[0:0#0] 0 [EXECUTOR] ACTION: Please refer to backend log for more details.[2024-05-25 16:28:58.595][4841][][gs_ctl]: done
[2024-05-25 16:28:58.595][4841][][gs_ctl]: server started (/opt/software/openGauss/data/single_node)
import sql file
Would you like to create a demo database (yes/no)? yes
Load demoDB [school,finance] success.
[complete successfully]: You can start or stop the database server using:
gs_ctl start|stop|restart -D $GAUSSHOME/data/single_node -Z single_node
- 如果遇到“On systemwide basis, the maximum number of SEMMNI is not correct. the current SEMMNI value is: 128. Please check it.”异常,则用root用户执行:
sysctl -w kernel.sem="250 85000 250 330"

- 如果遇到“/home/omm/.bashrc: line 16: ulimit: open files: cannot modify limit: Operation not permitted”或“-bash: ulimit: open files: cannot modify limit: Operation not permitted”
可以在执行install.sh前将“ulimit -n 1000000”的信息注释掉,然后再重新执行安装
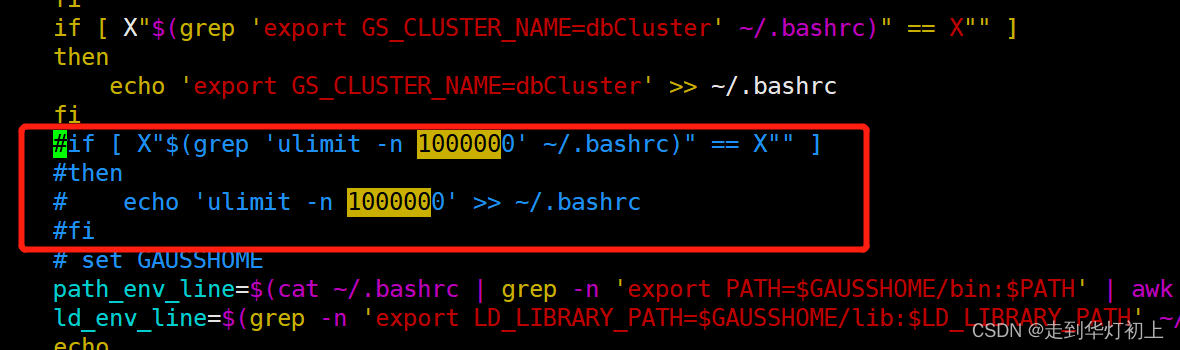
或者在安装完成后删除“ulimit -n 1000000”

vim ~/.bashrc

#删除ulimit -n 1000000

source ~/.bashrc
5、验证
# 查看状态
gs_ctl query -D /opt/software/openGauss/data/single_node
或
gs_ctl status -D /opt/software/openGauss/data/single_node

# 启停
gs_ctl start/stop/restart -D /opt/software/openGauss/data/single_node

# 连接
gsql -d postgres -p 5432 -r
4.3、重装
1、停止数据库服务
gs_ctl stop -D /opt/software/openGauss/data/single_node/
2、删除数据目录
rm -rf /opt/software/openGauss/data/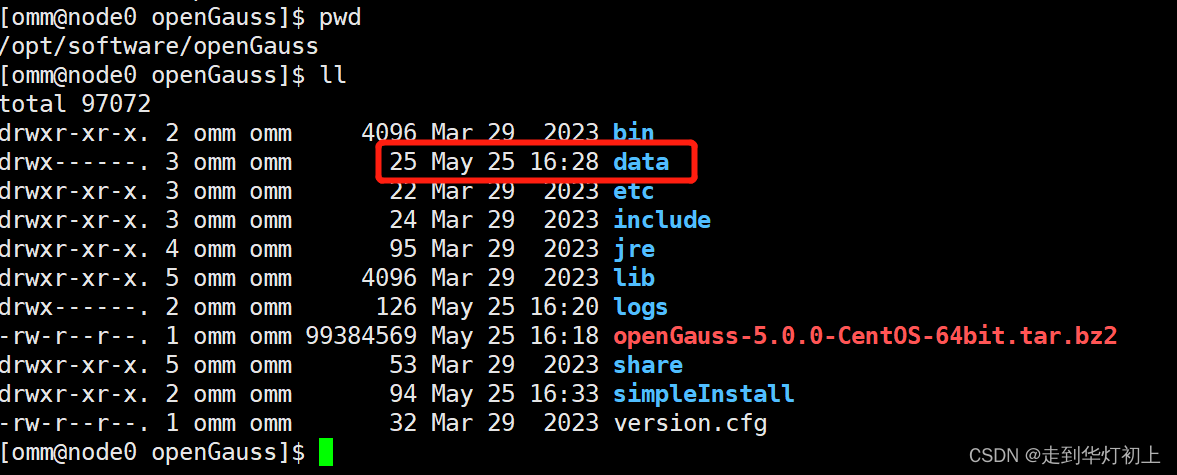
至此,就可以重新执行安装,如果需要完全卸载,可继续执行后续步骤
3、安装目录
rm -rf /opt/software/openGauss/4、删除omm用户
# 用root用户
userdel omm -r
至此已删除完成,如果需要重新安装,可从3.6开始重新安装。
5、企业版安装
5.1、获取安装包
openGauss-5.0.0-CentOS-64bit-all.tar.gz
5.2、安装
1、上传安装包至安装目录并授权
cd /opt/software/openGauss
2、解压
tar -zxvf openGauss-5.0.0-CentOS-64bit-all.tar.gz
tar -zxvf openGauss-5.0.0-CentOS-64bit-om.tar.gz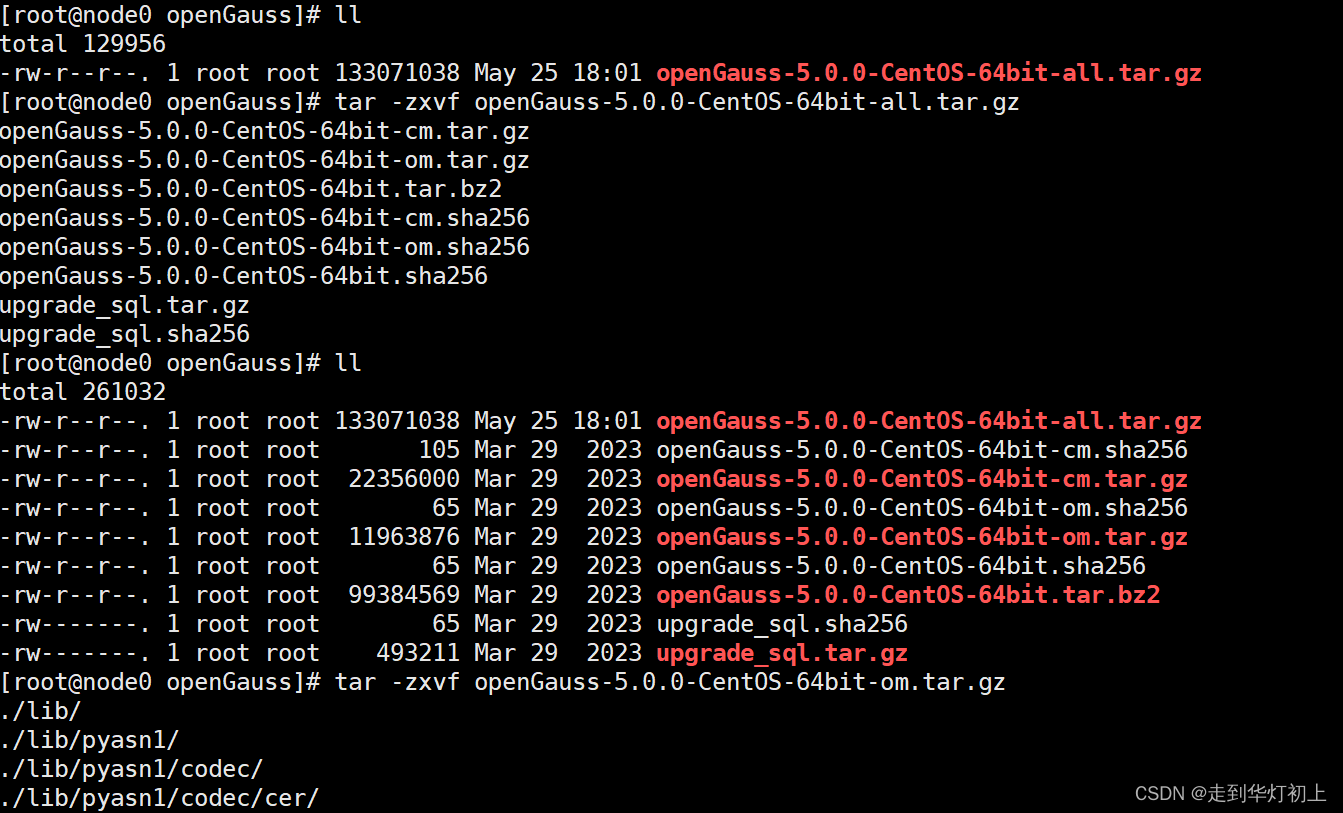 3、配置xml文件
# 查找xml配置模板
find / -name cluster_config_template.xml

# 拷贝到安装目录
cp /opt/software/openGauss/script/gspylib/etc/conf/cluster_config_template.xml /opt/software/openGauss/cluster_config.xml


# 编辑xml文件,或者直接创建个新文件也可
vi /opt/software/openGauss/cluster_config.xml
<?xml version="1.0" encoding="UTF-8"?>
<ROOT>
<!-- openGauss整体信息 -->
<CLUSTER>
<!-- 数据库名称 -->
<PARAM name="clusterName" value="opengauss" />
<!-- 数据库节点名称(hostname) -->
<PARAM name="nodeNames" value="node0" />
<!-- 数据库安装目录-->
<PARAM name="gaussdbAppPath" value="/opt/openGauss/app" />
<!-- 日志目录-->
<PARAM name="gaussdbLogPath" value="/opt/openGauss/log/omm" />
<!-- 临时文件目录-->
<PARAM name="tmpMppdbPath" value="/opt/openGauss/tmp"/>
<!-- 数据库工具目录-->
<PARAM name="gaussdbToolPath" value="/opt/openGauss/om" />
<!-- 数据库core文件目录-->
<PARAM name="corePath" value="/opt/openGauss/corefile"/>
<!-- 节点IP,与数据库节点名称列表一一对应 -->
<PARAM name="backIp1s" value="192.168.5.1"/>
</CLUSTER>
<!-- 每台服务器上的节点部署信息 -->
<DEVICELIST>
<!-- 节点1上的部署信息 -->
<DEVICE sn="node0">
<!-- 节点1的主机名称 -->
<PARAM name="name" value="node0"/>
<!-- 节点1所在的AZ及AZ优先级 -->
<PARAM name="azName" value="AZ1"/>
<PARAM name="azPriority" value="1"/>
<!-- 节点1的IP,如果服务器只有一个网卡可用,将backIP1和sshIP1配置成同一个IP -->
<PARAM name="backIp1" value="192.168.5.1"/>
<PARAM name="sshIp1" value="192.168.5.1"/>
<!--dn-->
<PARAM name="dataNum" value="1"/>
<PARAM name="dataPortBase" value="15400"/>
<PARAM name="dataNode1" value="/data/openGauss/data/dn"/>
<PARAM name="dataNode1_syncNum" value="0"/>
</DEVICE>
</DEVICELIST>
</ROOT>
4、预安装
cd /opt/software/openGauss/script/

# 预安装,注:在正式执行安装脚本之前,预安装可反复执行
./gs_preinstall -U omm -G omm -X /opt/software/openGauss/cluster_config.xml
[root@node0 script]# ./gs_preinstall -U omm -G omm -X /opt/software/openGauss/cluster_config.xml
Parsing the configuration file.
Successfully parsed the configuration file.
Installing the tools on the local node.
Successfully installed the tools on the local node.
Setting host ip env
Successfully set host ip env.
Are you sure you want to create the user[omm] (yes/no)? no
Preparing SSH service.
Successfully prepared SSH service.
Checking OS software.
Successfully check os software.
Checking OS version.
Successfully checked OS version.
Creating cluster's path.
Successfully created cluster's path.
Set and check OS parameter.
Setting OS parameters.
Successfully set OS parameters.
Warning: Installation environment contains some warning messages.
Please get more details by "/opt/software/openGauss/script/gs_checkos -i A -h node0 --detail".
Set and check OS parameter completed.
Preparing CRON service.
Successfully prepared CRON service.
Setting user environmental variables.
Successfully set user environmental variables.
Setting the dynamic link library.
Successfully set the dynamic link library.
Setting Core file
Successfully set core path.
Setting pssh path
Successfully set pssh path.
Setting Cgroup.
Successfully set Cgroup.
Set ARM Optimization.
No need to set ARM Optimization.
Fixing server package owner.
Setting finish flag.
Successfully set finish flag.
Preinstallation succeeded.
5、安装
# 切换omm用户
su - omm

/*
# 如果omm用户下主机信息为:-bash-4.2$,将下面代码添加至~/.bashrc即可
# .bashrc

# Source global definitions
if [ -f /etc/bashrc ]; then
        . /etc/bashrc
fi

source ~/.bashrc
*/

# 执行安装数据库omm用户初始密码要求:
# 最少包含8个字符,最多包含16个字符。
# 不能和用户名、当前密码(ALTER)、或当前密码反序相同。
# 至少包含大写字母(A-Z)、小写字母(a-z)、数字、非字母数字字符(限定为~!@#$%^&*()-_=+\|[{}];:,<.>/?)四类字符中的三类字符

# 执行安装
gs_install -X /opt/software/openGauss/cluster_config.xml
[omm@node0 ~]$ gs_install -X /opt/software/openGauss/cluster_config.xml
Parsing the configuration file.
Check preinstall on every node.
Successfully checked preinstall on every node.
Creating the backup directory.
Successfully created the backup directory.
begin deploy..
Installing the cluster.
begin prepare Install Cluster..
Checking the installation environment on all nodes.
begin install Cluster..
Installing applications on all nodes.
Successfully installed APP.
begin init Instance..
encrypt cipher and rand files for database.
Please enter password for database:
Please repeat for database:
begin to create CA cert files
The sslcert will be generated in /opt/openGauss/app/share/sslcert/om
NO cm_server instance, no need to create CA for CM.
Non-dss_ssl_enable, no need to create CA for DSS
Cluster installation is completed.
Configuring.
Deleting instances from all nodes.
Successfully deleted instances from all nodes.
Checking node configuration on all nodes.
Initializing instances on all nodes.
Updating instance configuration on all nodes.
Check consistence of memCheck and coresCheck on database nodes.
Configuring pg_hba on all nodes.
Configuration is completed.
The cluster status is Normal.
Successfully started cluster.
Successfully installed application.
end deploy..
6、验证
# 查看状态
gs_om -t status --detail

# 启停
gs_om -t stop/start/restart

# 连接
gsql -d postgres -p 15400 -r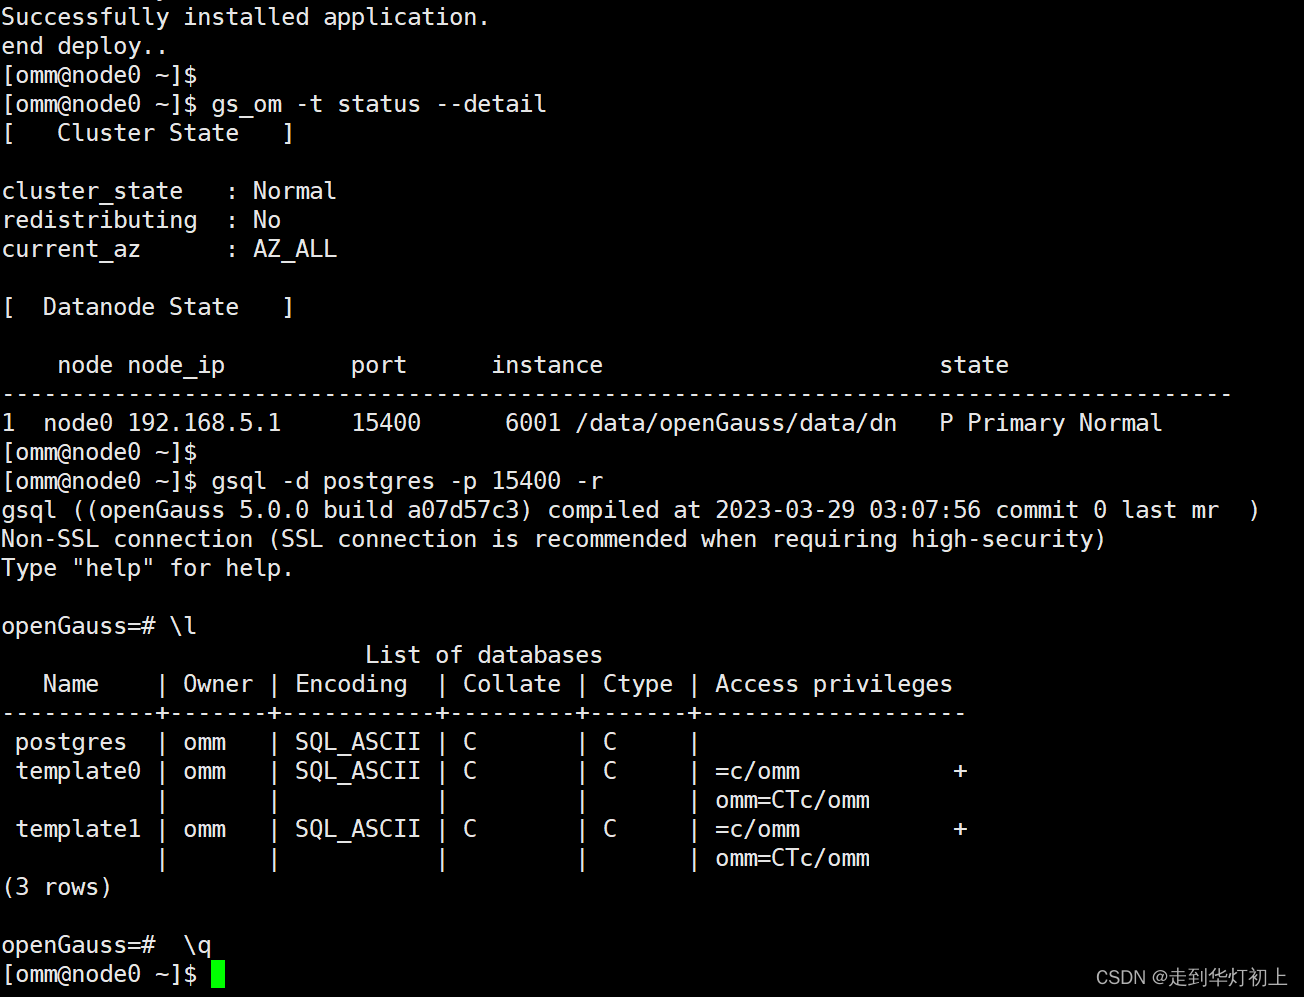
5.3、重装
# 暂停openGauss服务
gs_om -t stop

# 查看服务是否存在
ps aux | grep gauss

# 删除安装文件
rm -rf /opt/openGauss/app_a07d57c3/*

# 删除数据文件
rm -rf /data/openGauss/

# 修改环境变量,将omm用户GAUSS_ENV改成=1;GAUSS_ENV=1 表示预安装成功,GAUSS_ENV=2 表示安装成功
vim ~/.bashrc

source ~/.bashrc

# 重新执行安装
gs_install -X /opt/software/openGauss/cluster_config.xml
6、容器安装
6.1、docker环境准备
# 安装docker
yum -y install docker

# 查看docker状态
service docker status

# 启动docker
service docker start
6.2、安装 - 数据库
1、搜索镜像仓库
# 查看镜像仓库
docker search opengauss
2、 获取镜像
前两个镜像仓库都可使用:enmotech/opengauss、opengauss/opengauss
# 拉取镜像
docker pull opengauss/opengauss:5.0.0
3、启动容器
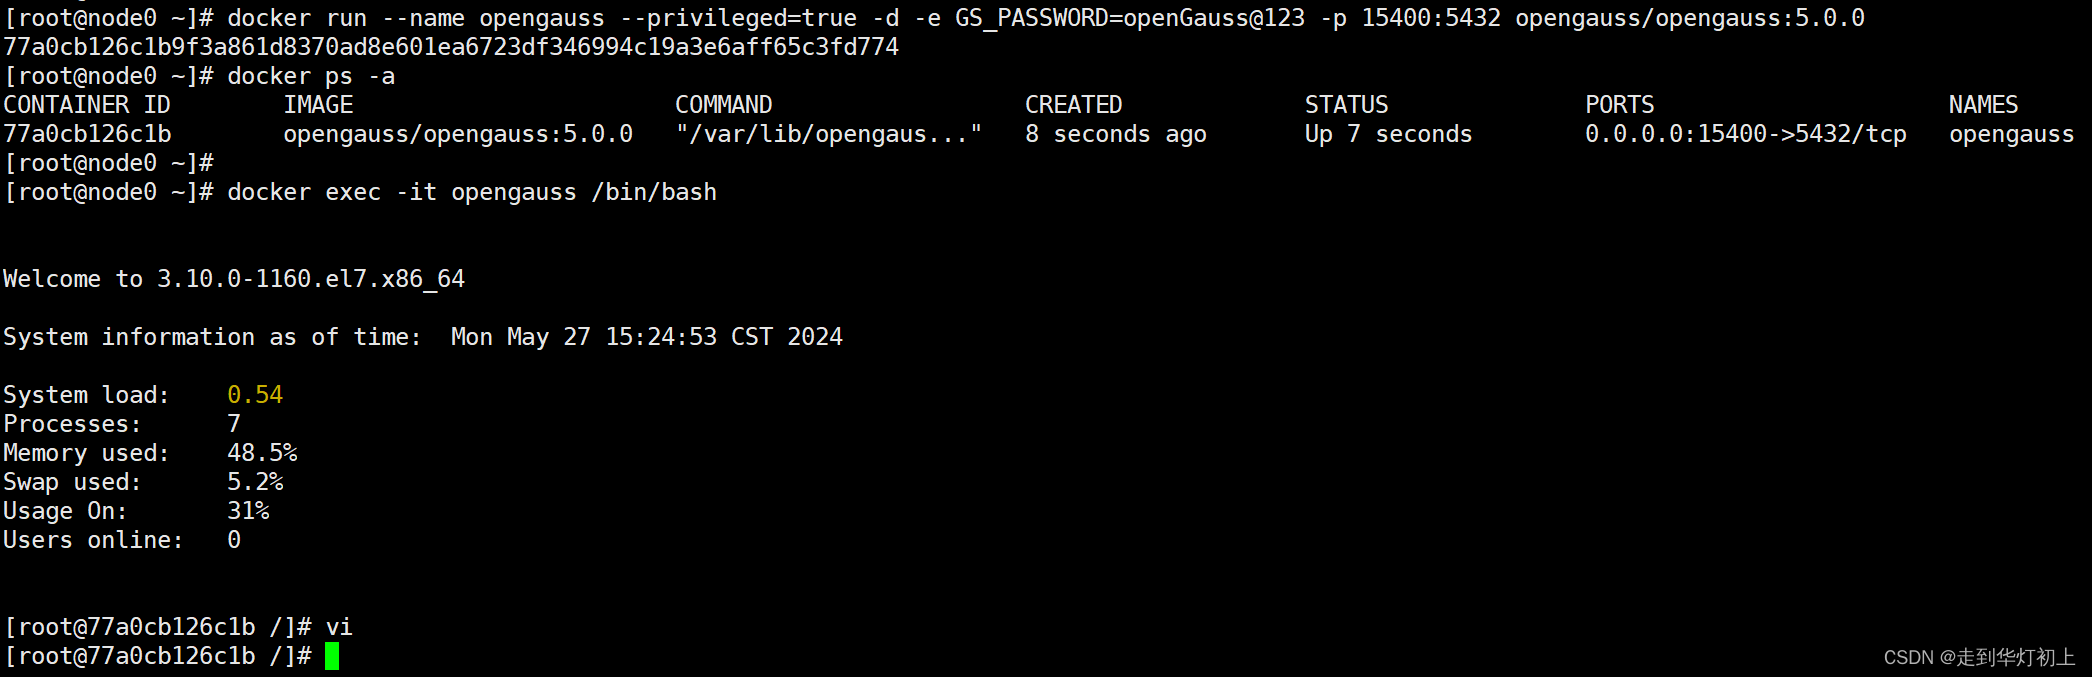
# 启动容器
docker run --name opengauss \
--privileged=true -d \
-e GS_PASSWORD=openGauss@123 \
-p 15400:5432 opengauss/opengauss:5.0.0

# 进入容器
docker exec -it opengauss /bin/bash

# 如果进入容器后提示“bash: vi: command not found”,则是因为没有安装vim
执行:
apt-get update
apt-get install vim
4、远程登录配置
5.0版本已默认配置远程登录,如果已配置可跳过此步骤
vim /var/lib/opengauss/data/postgresql.conf
listen_addresses = '*'

vim /var/lib/opengauss/data/pg_hba.conf
host all all 0.0.0.0/0 sha256

gs_ctl restart -D /var/lib/opengauss/data/

# 如果无法执行gs_ctl、gsql等命令,则修改安装数据库用户的环境变量
su opengauss

vim ~/.bashrc
export GAUSSHOME=/usr/local/opengauss
export PATH=$GAUSSHOME/bin:$PATH
export LD_LIBRARY_PATH=$GAUSSHOME/lib:$LD_LIBRARY_PATH

source ~/.bashrc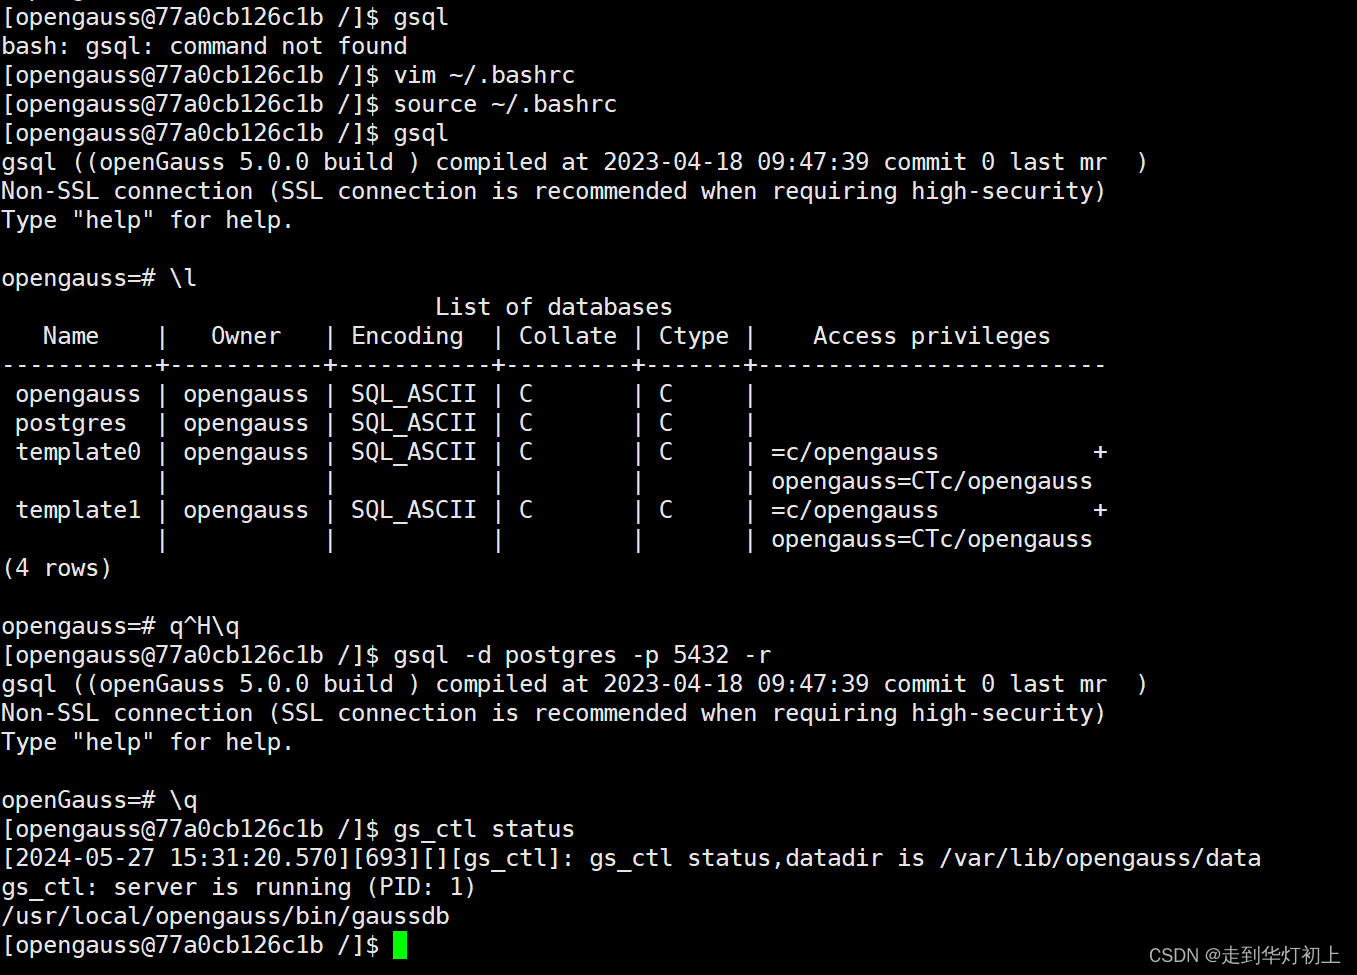
5、创建登录用户
# 连接
gsql -r
或
gsql -d postgres -p 5432 -r
# 创建用户
create user dbuser password 'dbuser@123';
# 赋权
alter user dbuser sysadmin;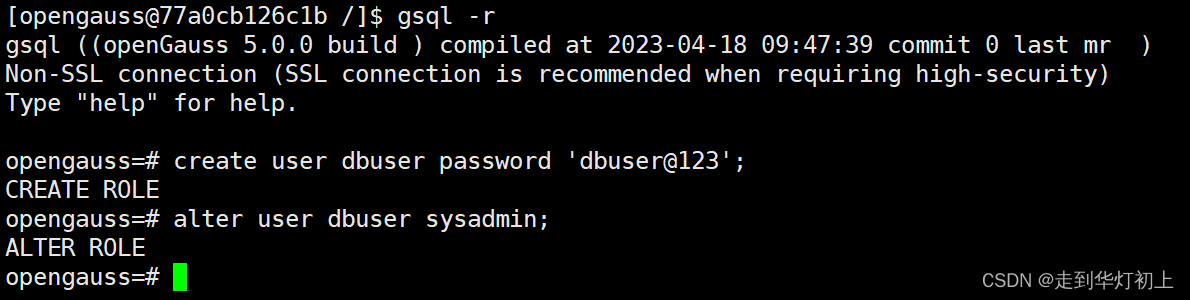 6、远程连接
# 在容器中通过ifconfig获取容器的ip地址,在容器外通过此ip远程连接数据库
gsql -d postgres -p 5432 -h 172.17.0.2 -U dbuser -r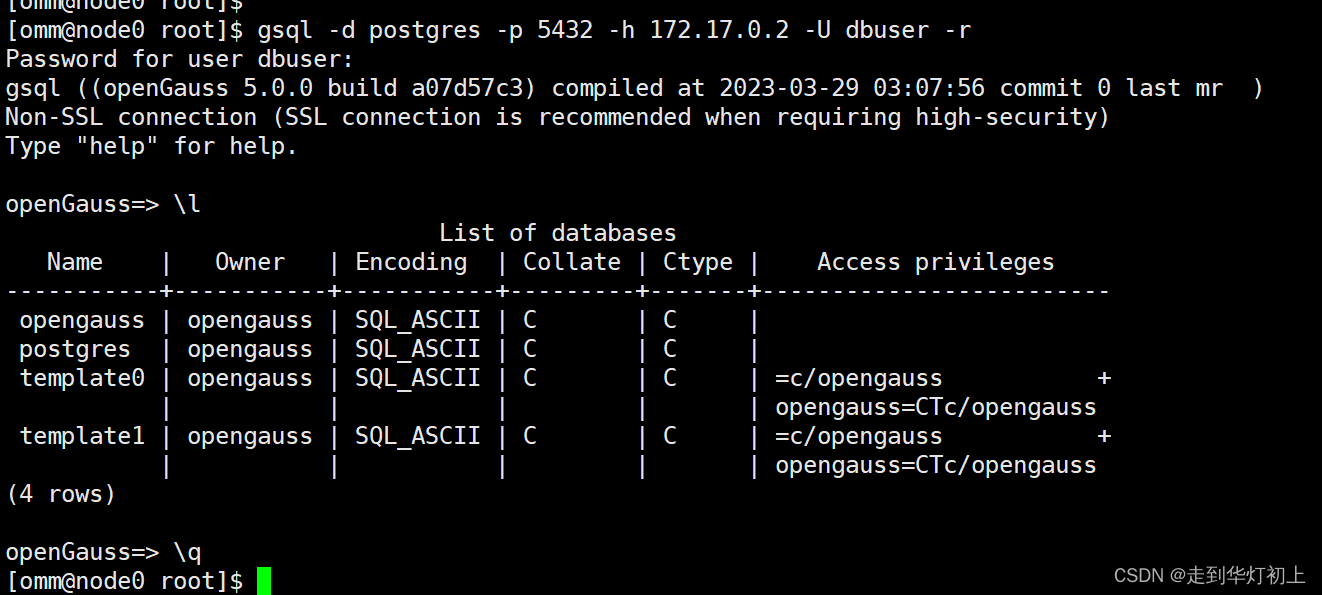
7、重装
# 查看容器ID
docker ps -a

# 停止容器
docker stop 77a0cb126c1b

# 删除容器
docker rm 77a0cb126c1b

# 查看镜像ID
docker images

# 删除镜像
docker rmi 187da08af341
6.3、安装 - 操作系统
此方法主要是先通过docker安装操作系统,然后再操作系统镜像中安装openGauss数据库,简单写了个半自动安装脚本,以极简版为例,需要提前准备的内容有:

- 数据库依赖包:openGauss-5.0.0-CentOS-64bit.tar.bz2
- dockerfile文件:centos_opengauss
FROM centos:7

# 安装依赖
RUN yum install -y libaio-devel flex bison ncurses-devel glibc-devel patch lsb_release readline-devel expect bzip2

# 创建用户
RUN useradd omm

# 上传安装包
RUN mkdir -p /opt/software/openGauss
ADD ./openGauss-5.0.0-CentOS-64bit.tar.bz2 /opt/software/openGauss/

# 上传安装脚本
ADD ./install.sh /opt/software/openGauss/

# 赋权
RUN chown omm:omm -R /opt/software/openGauss

CMD ["bin/bash"]- 安装脚本:install.sh
#!/bin/bash

sysctl -w kernel.sem="250 85000 250 330"

su - omm -c "

cd /opt/software/openGauss/
tar -jxf openGauss-5.0.0-CentOS-64bit.tar.bz2
sh ./simpleInstall/install.sh  -w 'openGauss123'
source /home/omm/.bashrc

"
1、创建镜像
# 创建安装路径
mkdir /opt/software/docker

# 将上面3个文件添加至此目录下

# 创建镜像
docker build -f centos_opengauss . -t centos7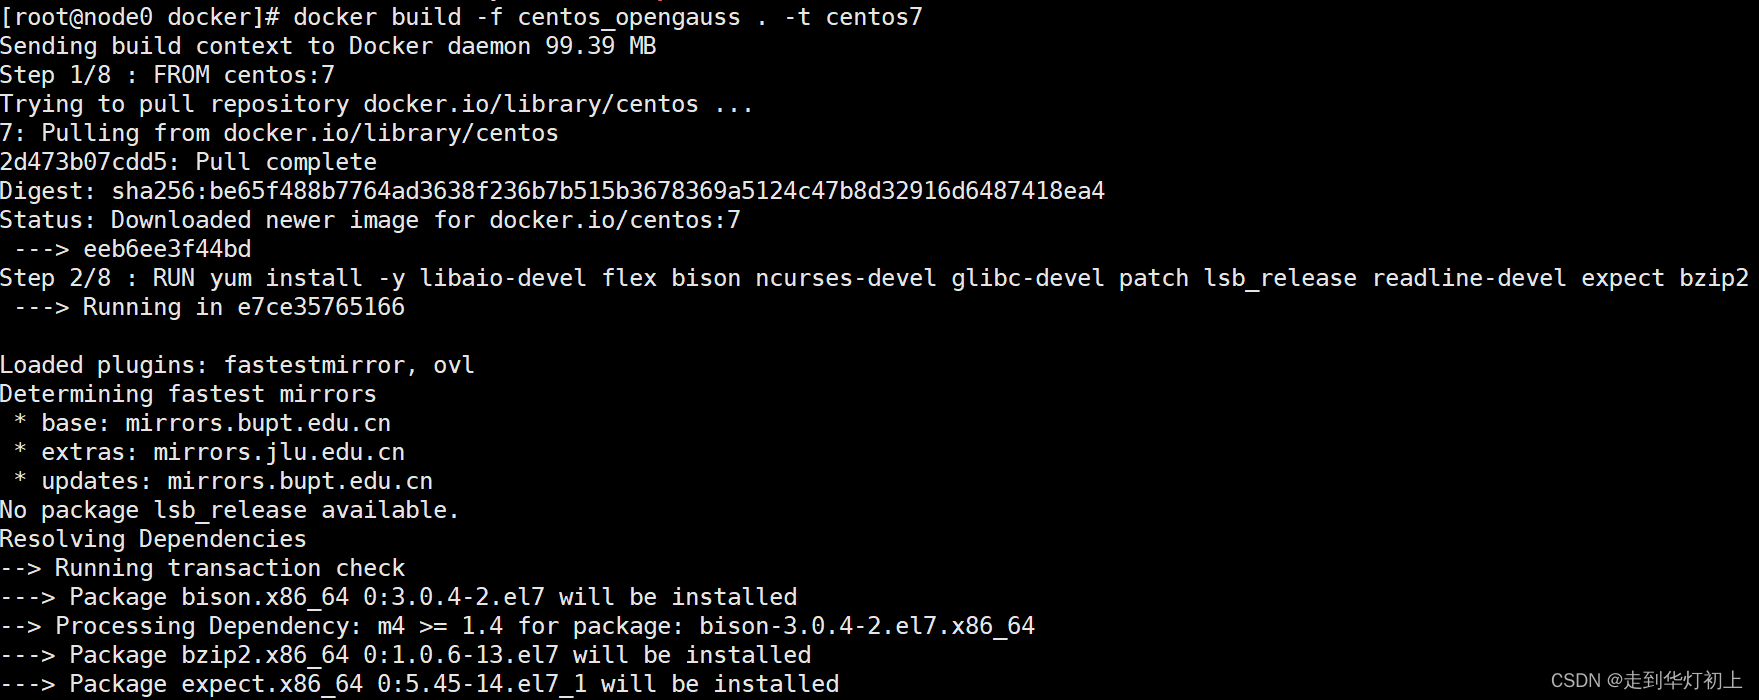
2、 创建容器
docker run -itd --privileged=true --name=centos7 centos7 /bin/bash3、运行容器
docker exec -it centos7 /bin/bash4、安装数据库
cd /opt/software/openGauss/

sh install.sh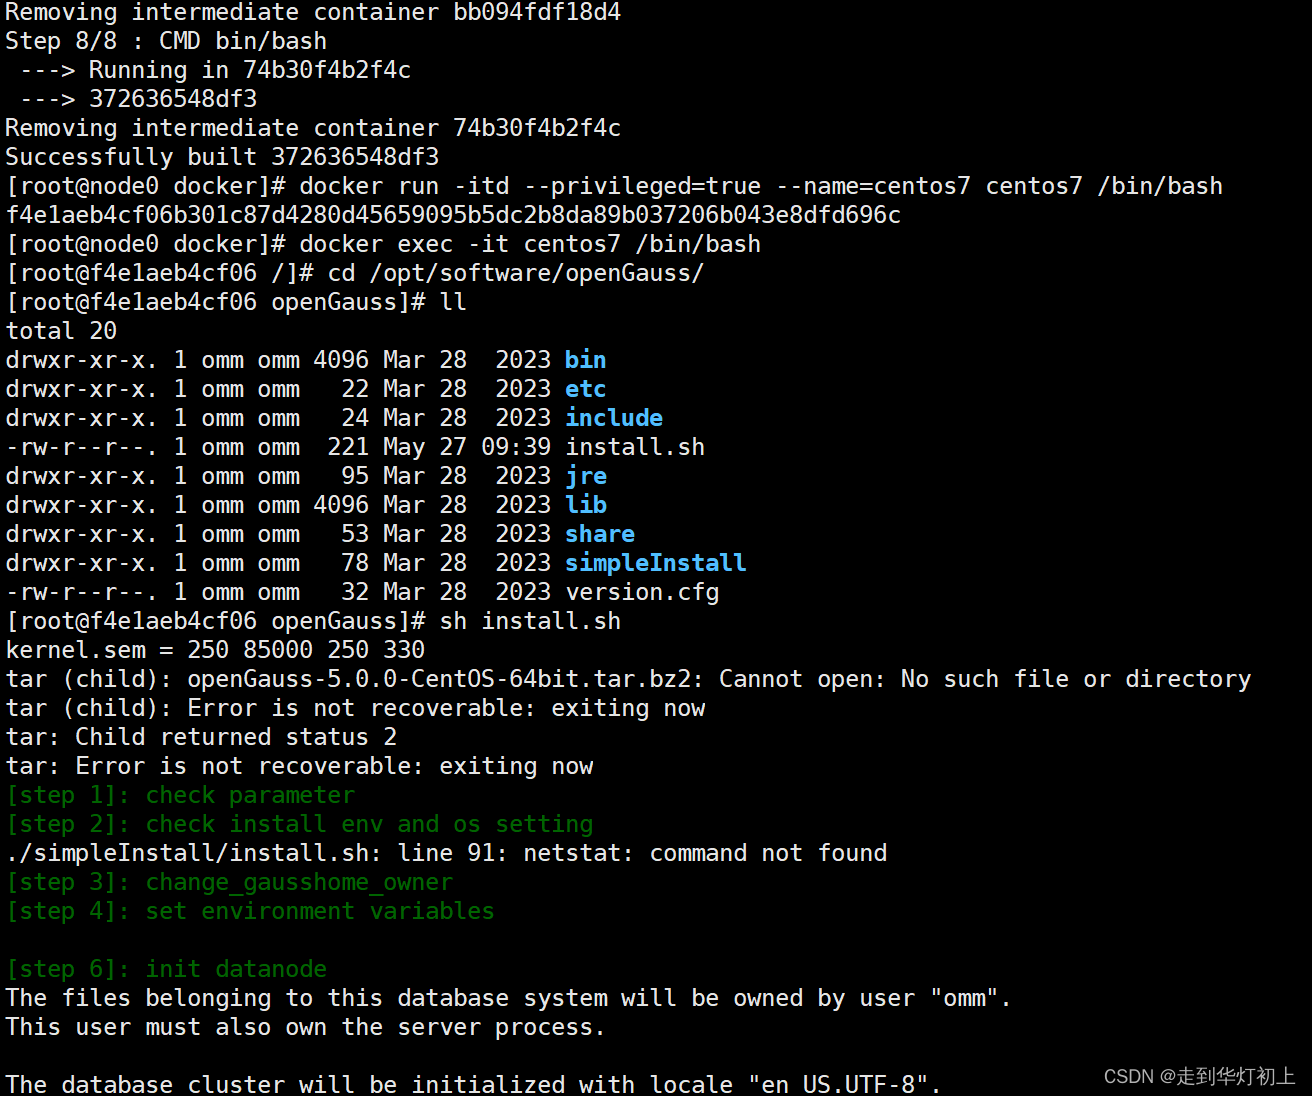
7、卸载
此方案主要针对企业版,极简版直接关闭服务删除文件即可。
1、关闭服务
gs_om -t stop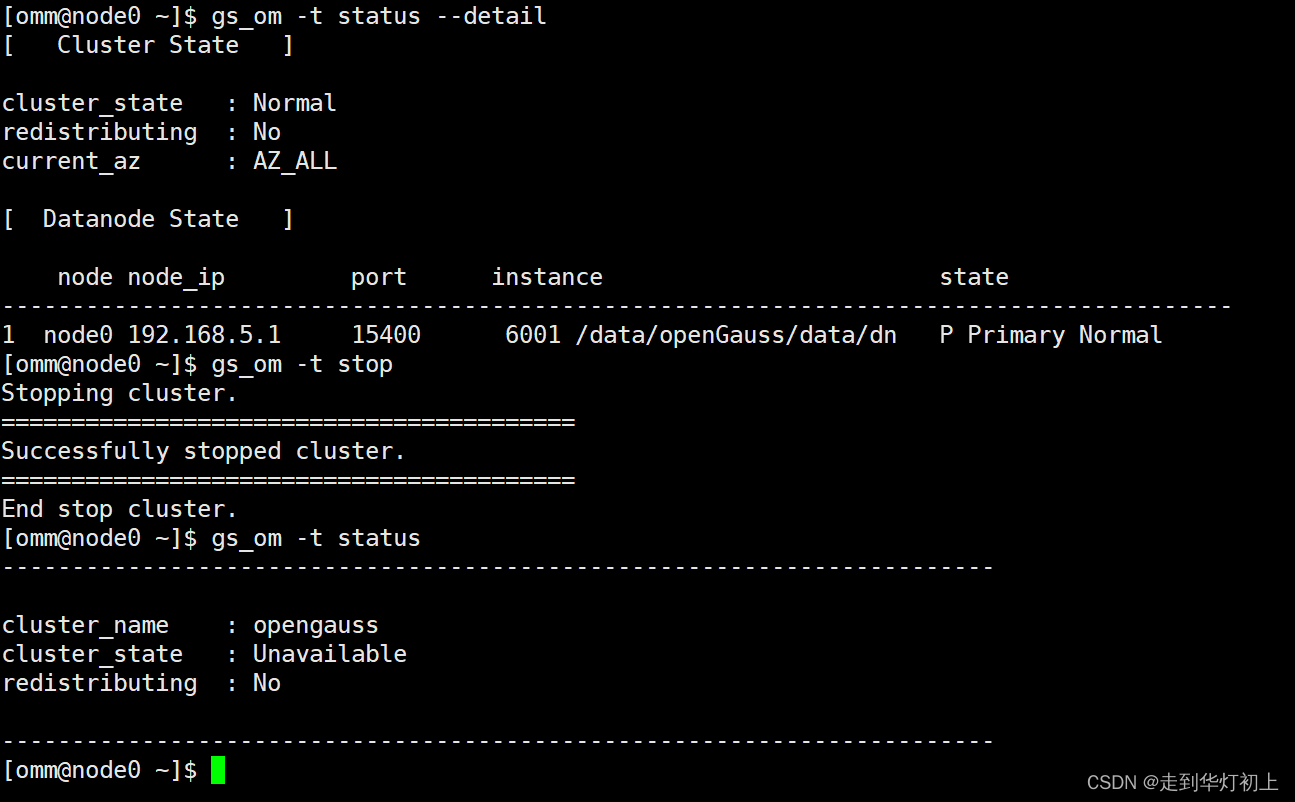
2、卸载
# 此命令主要是返回到预安装之后的状态,预安装的文件还是会存在
gs_uninstall --delete-data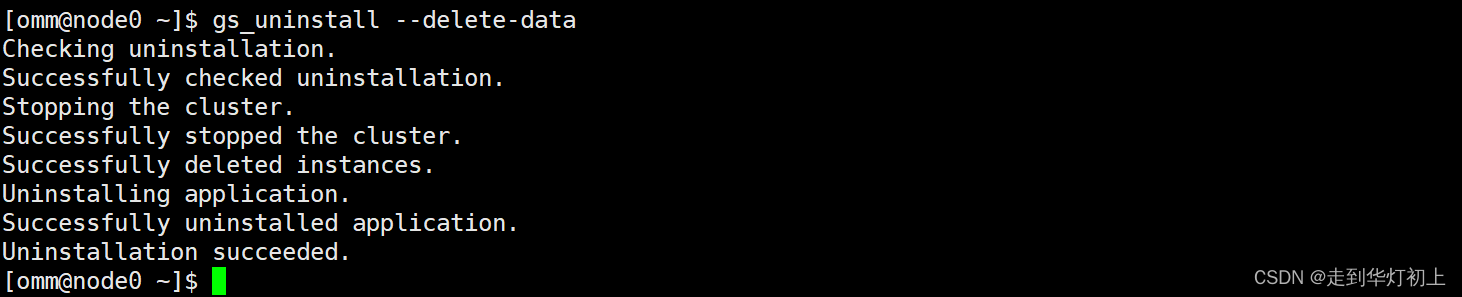 3、环境清理
# 切换至root用户
cd /opt/software/openGauss/script

# 需先执行完gs_uninstall,此步骤会删除安装用户、用户组和相关日志等
./gs_postuninstall -U omm -X /opt/software/openGauss/cluster_config.xml --delete-user --delete-group
4、删除安装文件
rm -rf /opt/software/openGauss /data/openGauss/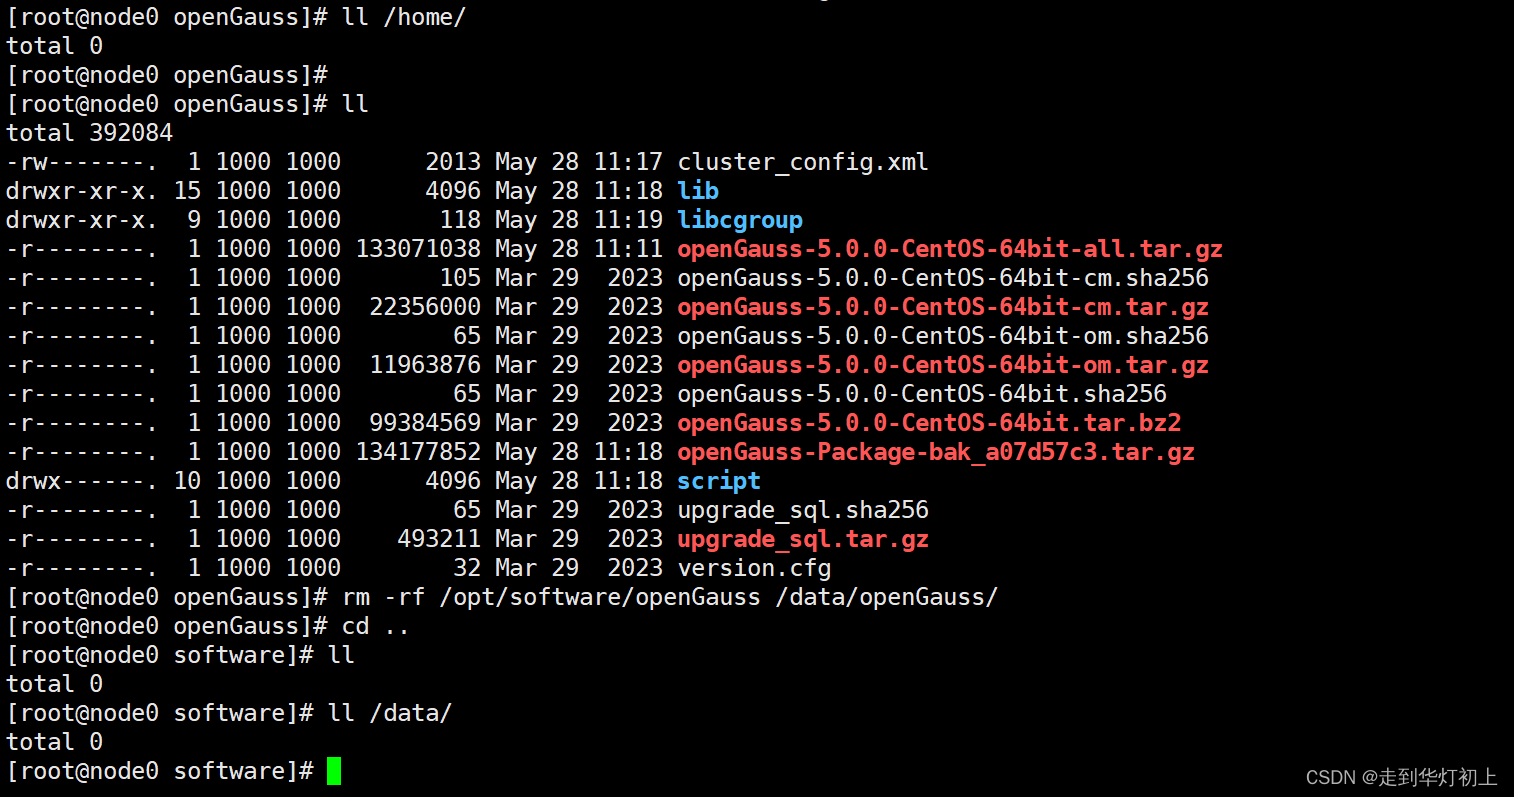
参考资料:


 1万+
1万+

 被折叠的 条评论
为什么被折叠?
被折叠的 条评论
为什么被折叠?
 到【灌水乐园】发言


