


SpringBoot的安全机制Spring Security
本小记学习目标
1、安全机制的概述及简单安全认证
2、WebSecurityConfigurerAdapter的使用
3、对请求的限制
4、简单的用户认证功能
一、安全机制概述及简单安全认证
为了保证网站的安全得到保障,Spring提供了安全框架Spring Security,它是一个能基于Spring生态圈,提供安全访问控制解决方案的框架。利用Spring的特性,为应用系统提供声明式的安全访问控制功能,减少为企业系统安全控制编写大量重复代码的工作。
要使用Spring Security, 需要引入相应的依赖包。
<dependency>
<groupId>org.springframework.boot</groupId>
<artifactId>spring-boot-starter-security</artifactId>
</dependency>
在Java Web工程中,一般来说使用Serevlet的过滤器(Filter)对请求进行拦截,然后在Filter中通过自己的验证逻辑来决定是否放行请求。Spring Security也是基于这个原理,在进入到DispatcherServlet之前就可以对Spring MVC的请求进行拦截,然后通过一定的验证,决定是否放行请求。
Sping Security提供了过滤器DelegatingFilterProxy类给开发者进行配置
在传统的Spring全注解的方式下,只需要加入@EnableWebSecurity就可以驱动Spring Sercurity了。
Spring Boot中引入对应的Spring Security依赖包就可以启动Spring Security
Spring Security原理简述
当启用了Spring Security,Spring IoC容器会创建一个名为springSecurityFilterChain的Spring Bean,这的类型是FilterChainProxy(这实现了Filter接口),它就是一个特殊的拦截器。在Spring Security操作的过程中会提供Servlet过滤器DelegatingFilterProxy,这个过滤器会通过Spring Web IoC容器去获取Spring Security所自动创建的FilterChainProxy对象,在这个对象上存在一个拦截器列表(List),列表上存在用户验证拦截器、跨站点请求伪造拦截器……,通过FilterChainProxy对外象还可以注册自定义Filter来满足不同需求下的拦截逻辑(为了简化开发Spring Security基本上实现了大部分的常用安全功能,一般情况下无需自定义开发了)。
新增一个Maven工程,修改pom.xml文件如下
<?xml version="1.0" encoding="UTF-8"?>
<project xmlns="http://maven.apache.org/POM/4.0.0"
xmlns:xsi="http://www.w3.org/2001/XMLSchema-instance"
xsi:schemaLocation="http://maven.apache.org/POM/4.0.0 http://maven.apache.org/xsd/maven-4.0.0.xsd">
<modelVersion>4.0.0</modelVersion>
<groupId>com.xiaoxie</groupId>
<artifactId>SpringBoot_SpringSecurity</artifactId>
<version>1.0-SNAPSHOT</version>
<parent>
<groupId>org.springframework.boot</groupId>
<artifactId>spring-boot-starter-parent</artifactId>
<version>2.0.0.RELEASE</version>
</parent>
<properties>
<projcect.build.sourceEncoding>UTF-8</projcect.build.sourceEncoding>
<projcect.reporting.outputEncoding>UTF-8</projcect.reporting.outputEncoding>
<java.version>1.8</java.version>
</properties>
<dependencies>
<!-- web开发依赖 -->
<dependency>
<groupId>org.springframework.boot</groupId>
<artifactId>spring-boot-starter-web</artifactId>
</dependency>
<!-- aop依赖 -->
<dependency>
<groupId>org.springframework.boot</groupId>
<artifactId>spring-boot-starter-aop</artifactId>
</dependency>
<!-- test依赖 -->
<dependency>
<groupId>org.springframework.boot</groupId>
<artifactId>spring-boot-starter-test</artifactId>
</dependency>
<!-- Jstl,jsp依赖-->
<dependency>
<groupId>org.apache.tomcat.embed</groupId>
<artifactId>tomcat-embed-jasper</artifactId>
</dependency>
<dependency>
<groupId>javax.servlet</groupId>
<artifactId>jstl</artifactId>
</dependency>
<!--mysql,jdbc依赖-->
<dependency>
<groupId>mysql</groupId>
<artifactId>mysql-connector-java</artifactId>
</dependency>
<dependency>
<groupId>org.springframework.boot</groupId>
<artifactId>spring-boot-starter-jdbc</artifactId>
</dependency>
<!-- Druid依赖 -->
<dependency>
<groupId>com.alibaba</groupId>
<artifactId>druid-spring-boot-starter</artifactId>
<version>1.1.10</version>
</dependency>
<!--mybatis依赖-->
<dependency>
<groupId>org.mybatis.spring.boot</groupId>
<artifactId>mybatis-spring-boot-starter</artifactId>
<version>1.3.1</version>
</dependency>
<!--Spring Security依赖-->
<dependency>
<groupId>org.springframework.boot</groupId>
<artifactId>spring-boot-starter-security</artifactId>
</dependency>
</dependencies>
<!-- 引入相关的插件 -->
<build>
<plugins>
<plugin>
<groupId>org.springframework.boot</groupId>
<artifactId>spring-boot-maven-plugin</artifactId>
</plugin>
</plugins>
</build>
</project>
注意:这个pom文件的关键点是加入了Spring Security依赖,在Spring Boot中只要加入了这个依赖则会启动Spring Security机制
将项目配置为web项目,在Project Structure--->Modules中添加web根目录及web.xml
在resources目录下新增application.properties文件
#Spring MVC的视图解析配置
spring.mvc.view.prefix=/WEB-INF/jsp/
spring.mvc.view.suffix=.jsp
#datasource配置
spring.datasource.type=com.alibaba.druid.pool.DruidDataSource
#连接信息
spring.datasource.driver-class-name=org.gjt.mm.mysql.Driver
spring.datasource.url=jdbc:mysql://127.0.0.1:3306/test
spring.datasource.username=root
spring.datasource.password=root
#连接池配置
spring.datasource.druid.initial-size=15
spring.datasource.druid.max-active=100
spring.datasource.druid.min-idle=15
spring.datasource.druid.max-wait=60000
spring.datasource.druid.keep-alive=true
#默认事务隔离级别“读写提交”
spring.datasource.druid.default-transaction-isolation=2
#Mybatis配置
mybatis.mapper-locations=classpath:mybatis/mapper/*.xml
mybatis.type-aliases-package=com.xiaoxie.pojo
根据上述配置文件的信息把mapper的配置目录建立起来,在resources目录下新增mybatis/mapper目录
根据上述配置文件的信息把视jsp的目录建立起来,在webapp/WEB-INF目录下新增jsp目录
新增一个SpringBoot的启动类,com.xiaoxie.SpringBootStartApplication
package com.xiaoxie;
import org.springframework.boot.SpringApplication;
import org.springframework.boot.autoconfigure.SpringBootApplication;
@SpringBootApplication
public class SpringBootStartApplication {
public static void main(String[] args) {
SpringApplication.run(SpringBootStartApplication.class,args);
}
}
新增jsp文件first.jsp页面(webapp/WEB-INF/jsp目录下)
<%@ page language="java" contentType="text/html; charset=UTF-8"
pageEncoding="UTF-8"%>
<!DOCTYPE html PUBLIC "-//W3C//DTD HTML 4.01 Transitional//EN" "http://www.w3.org/TR/html4/loose.dtd">
<HTML>
<HEAD>
<TITLE>JSP测试页面</TITLE>
</HEAD>
<BODY>
<h2>测试页面 first.jsp,项目:SpringBoot_Spring Security</h2>
</BODY>
</HTML>
新增一个测试的controller,com.xiaoxie.controller.TestController
package com.xiaoxie.controller;
import org.springframework.stereotype.Controller;
import org.springframework.web.bind.annotation.GetMapping;
import org.springframework.web.bind.annotation.RestController;
import org.springframework.web.servlet.ModelAndView;
@RestController
public class TestController {
@GetMapping("/test")
public ModelAndView test(){
ModelAndView mv = new ModelAndView("first");
return mv;
}
}
启动Spring Boot,访问http://localhost:8080/test,它会跳转到first.jsp页面,但是由于添加了Spring Security的依赖,所以首先会看到一个登录页面
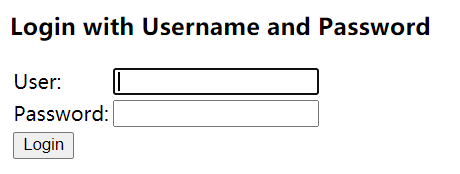
这里的User为user
Password的信息可以在控制台找到类似如下信息:
Using generated security password: 0383dc32-2638-428e-b688-5015475f41e9
输入相关的user和password信息,点击Login按钮,验证通过后会进入到first.jsp页面,如果验证不成功则会在在浏览器上提示:
e8411870-22d7-41d6-ba01-e7c30bde0af8
Your login attempt was not successful, try again.
Reason: 坏的凭证
从这里我们看到Spring Security已经起了作用,但是现在来看还是会有些问题
1、每次启动密码会变化,用户每次要输入不同的密码,不方便
2、用户是user,无法多样化,无法针对不同的用户给予不同的权限
3、无法自定义验证方法
4、登录页面太简陋,不够美观
5、无法自定义哪些请求是要安全验证,哪些是不需要安全验证的,不灵活
……
以上的问题Spring都考虑到了接下来看看相对应的解决方案
在application.properties文件中修改用户名和密码,在其中添加如下配置信息
#Spring Security
#自定义用户名和密码
spring.security.user.name=xiaoxie
spring.security.user.password=123456
这个时候访问时在弹出的对话框中User输入xiaoxie,Password输入123456 即可,这样就不使用随机生成的密码
在实际的开发过程中,一般会选择配置自定义用户、角色和权限等内容。
二、WebSecurityConfigurerAdapter的使用
过滤器DelegatingFilterProxy的拦截逻辑是根据FilterChainProxy的逻辑来完成的,为了给FilterChainProxy对象有加入自定义的初始化,Spring Security提供了SecurityConfigurer接口,通过它可以实现对Spring Security的配置,为了更加的方便,Spring对Web工程还提供了新的接口:WebSecurityConfigurer,同时在这个接口的定义上还提供了一个抽象类WebSecurityConfigurerAdapter。通过继承这个抽象类就可以得到Spring Security的默认安全功能。同时也可以通过覆盖它提供的方法来实现自己定义的安全拦截方案。
WebSecurityConfigurerAdapter抽象类定义在如下包中:
org.springframework.security.config.annotation.web.configuration
它其中有三个configure()方法需要注意
|
方法签名
|
说明
|
|
protected void configure(AuthenticationManagerBuilder auth);
|
用来配置用户签名服务,主要是user-details机制,还可以给用户赋予色
参数:auth 签名管理器构造器,用于构建用户具体权限控制
|
|
public void configure(WebSecurity web);
|
用来配置Filter链
参数 web Spring Web Security对象
|
|
protected void configure(HttpSecurity http) throws Exception;
|
用来配置拦截保护的请求,如什么请求放行,什么请求需要验证
参数:http http安全请求对象
|
protected void configure(AuthenticationManagerBuilder auth),它是用来配置用户信息的方法,在Spring Security中默认是没有任何配置的,而在Spring Boot中,如果没有用户的配置,它将会自动地生成一个名称为user、密码通过随机生成(在打印的日志中可以看到对应密码)
自定义用户签名服务,主要包含使用内存签名服务、数据库服务、自己定义签名服务。
内存签名服务
它是把用户的信息存放在内存中
新增一个config类:com.xiaoxie.WebSecurityConfig
package com.xiaoxie.config;
import org.springframework.context.annotation.Configuration;
import org.springframework.security.config.annotation.authentication.builders.AuthenticationManagerBuilder;
import org.springframework.security.config.annotation.authentication.configurers.provisioning.InMemoryUserDetailsManagerConfigurer;
import org.springframework.security.config.annotation.web.configuration.WebSecurityConfigurerAdapter;
import org.springframework.security.crypto.bcrypt.BCryptPasswordEncoder;
import org.springframework.security.crypto.password.PasswordEncoder;
@Configuration
public class WebSecurityConfig extends WebSecurityConfigurerAdapter {
@Override
protected void configure(AuthenticationManagerBuilder auth) throws Exception {
//密码编辑器
PasswordEncoder passwordEncoder = new BCryptPasswordEncoder();
//使用内存存储,使用密码编辑器
/*auth.inMemoryAuthentication().passwordEncoder(passwordEncoder).
//注册用户admin,密码为‘abc’加密后的密码(使用这个方式可以获取加密密码,new BCryptPasswordEncoder().encode("123456")),设置权限为USER、ADMIN
withUser("admin").password("$2a$10$./oOe3f7lCC4f3qltu7Cl.Eec5TtVxMmKk2860fiF7LCkIMW9bmz.").roles("USER","ADMIN").
and(). //and().表示连接方法
//注册myuser,密码为‘123456’加密后的密码,设置权限为USER
withUser("myuser").password("$2a$10$YV7SOlKUw19Rg1cWIPlqy.18j6HC0oxuNn/Yelz3yudhO4AsIRS9S").roles("USER");*/
//下面的写法与上面的效果一致,但结构相对清晰一些
//使用内存存储
InMemoryUserDetailsManagerConfigurer<AuthenticationManagerBuilder> userConfig = auth.inMemoryAuthentication().passwordEncoder(passwordEncoder);
//注册用户admin
userConfig.withUser("admin").password("$2a$10$./oOe3f7lCC4f3qltu7Cl.Eec5TtVxMmKk2860fiF7LCkIMW9bmz.").authorities("ROLE_USER","ROLE_ADMIN");
//注册用户myuser
userConfig.withUser("myuser").password("$2a$10$YV7SOlKUw19Rg1cWIPlqy.18j6HC0oxuNn/Yelz3yudhO4AsIRS9S").authorities("ROLE_USER");
//super.configure(auth);
}
}
在这个方法中我们把用户及权限信息存放在内存中,super.configure(auth);这个语句要注释掉要不然上面的配置会不生效,直接会去使用application.properties中的用户密码配置。
使用数据库定义用户认证服务
大部分的情况下,用户的信息会存放在数据库,Spring Security提供了对数据库的查询方法。
JdbcUserDetailsManagerConfigurer是Spring Security对数据库配置的支持
在数据库中新增三张表:用户表、权限表、用户权限表
/** 用户表 */
CREATE TABLE `sec_user` (
`id` int(12) NOT NULL AUTO_INCREMENT,
`user_name` varchar(60) NOT NULL,
`pwd` varchar(100) NOT NULL,
`available` int(1) DEFAULT '1',
`note` varchar(255) DEFAULT NULL,
PRIMARY KEY (`id`),
UNIQUE KEY `user_name` (`user_name`)
) ENGINE=InnoDB AUTO_INCREMENT=4 DEFAULT CHARSET=utf8;
/** 权限表 */
CREATE TABLE `sec_role` (
`id` int(12) NOT NULL AUTO_INCREMENT,
`role_name` varchar(50) NOT NULL,
`note` varchar(255) DEFAULT NULL,
PRIMARY KEY (`id`)
) ENGINE=InnoDB AUTO_INCREMENT=4 DEFAULT CHARSET=utf8;
/** 用户权限中间表 */
CREATE TABLE `sec_user_role` (
`id` int(12) NOT NULL AUTO_INCREMENT,
`role_id` int(12) NOT NULL,
`user_id` int(12) NOT NULL,
PRIMARY KEY (`id`),
UNIQUE KEY `role_id` (`role_id`,`user_id`)
) ENGINE=InnoDB AUTO_INCREMENT=4 DEFAULT CHARSET=utf8;
对于前面的使用内存签名的配置类需要把@Configuration注解注释掉,同时新增一个配置类:com.xiaoxie.config.WebSecurityConfig4Database
package com.xiaoxie.config;
import org.springframework.beans.factory.annotation.Autowired;
import org.springframework.beans.factory.annotation.Qualifier;
import org.springframework.context.annotation.Configuration;
import org.springframework.security.config.annotation.authentication.builders.AuthenticationManagerBuilder;
import org.springframework.security.config.annotation.authentication.configurers.provisioning.JdbcUserDetailsManagerConfigurer;
import org.springframework.security.config.annotation.web.configuration.WebSecurityConfigurerAdapter;
import org.springframework.security.crypto.bcrypt.BCryptPasswordEncoder;
import org.springframework.security.crypto.password.PasswordEncoder;
import javax.sql.DataSource;
@Configuration
public class WebSecurityConfig4Database extends WebSecurityConfigurerAdapter {
//注入数据源
@Qualifier("dataSource")
@Autowired
private DataSource dataSource = null;
//使用用户名称查询密码
String getPwd = "select user_name,pwd,available from sec_user where user_name = ?";
//使用用户名称查询角色信息
String getRole = "select u.user_name,r.role_name from sec_user u,sec_user_role ur,sec_role r where u.id = ur.user_id and r.id = ur.role_id and u.user_name = ?";
@Override
protected void configure(AuthenticationManagerBuilder auth) throws Exception {
//密码编辑器
PasswordEncoder passwordEncoder = new BCryptPasswordEncoder();
//使用数据库认证
JdbcUserDetailsManagerConfigurer<AuthenticationManagerBuilder> userConfig = auth.jdbcAuthentication().passwordEncoder(passwordEncoder);
//配置连接数据源、查询用户、查询权限
userConfig.dataSource(dataSource).usersByUsernameQuery(getPwd).authoritiesByUsernameQuery(getRole);
}
}
注意:这里使用了加密的方式为BCryptPasswordEncoder,所有在用户表中的pwd也需要存储为这种对密码字符串加密后的信息
对于使用BCryptPasswordEncoder这种密码编辑器是对明文进行了加密处理,但是还是有可能会被别人撞到从而破解,为了克服这个问题,在系统中可以使用自已的密文再对密码进行加密处理,而这个密文是存放在服务器内的。这样就算是得到了密码也是破解不了的。Spring Security对此也进行了相应的支持,这里就需要使用Pbkdf2PasswordEncoder对象。
把配置类:WebSecurityConfig4Database的@Configuration注解去掉,新增一个配置类con.xiaoxie.config.WebSecurityConfig4Database
package com.xiaoxie.config;
import org.springframework.beans.factory.annotation.Autowired;
import org.springframework.beans.factory.annotation.Qualifier;
import org.springframework.beans.factory.annotation.Value;
import org.springframework.context.annotation.Configuration;
import org.springframework.security.config.annotation.authentication.builders.AuthenticationManagerBuilder;
import org.springframework.security.config.annotation.web.configuration.WebSecurityConfigurerAdapter;
import org.springframework.security.crypto.password.PasswordEncoder;
import org.springframework.security.crypto.password.Pbkdf2PasswordEncoder;
import javax.sql.DataSource;
@Configuration
public class WebSecurityConfig4Database2 extends WebSecurityConfigurerAdapter {
//注入数据源
@Qualifier("dataSource")
@Autowired
private DataSource dataSource = null;
//注入密文串
@Value("${system.user.password.secret}")
private String secret = null;
//使用用户名称查询密码
String getPwd = "select user_name,pwd,available from sec_user where user_name = ?";
//使用用户名称查询角色信息
String getRole = "select u.user_name,r.role_name from sec_user u,sec_user_role ur,sec_role r where u.id = ur.user_id and r.id = ur.role_id and u.user_name = ?";
@Override
protected void configure(AuthenticationManagerBuilder auth) throws Exception {
//密码编辑器
PasswordEncoder passwordEncoder = new Pbkdf2PasswordEncoder(secret);
//使用数据库认证,配置连接数据源、查询用户、查询权限
auth.jdbcAuthentication().passwordEncoder(passwordEncoder).dataSource(dataSource).usersByUsernameQuery(getPwd).authoritiesByUsernameQuery(getRole);
}
}
这里的密文串我们看到是从配置文件中读取的,system.user.password.secret,所以需要在application.properties中新增一个对应的配置
#添加一个密文串
system.user.password.secret=xiaoxie
使用自定义用户认证服务
首先我们程序可以获取到数据库中的用户、权限信息。
Spring Security提供了一个UserDetailsService接口,这个接口有一个loadUserByUsername方法需要实现,这个方法定义返回UserDetails接口对象。
获取数据库中的用户、权限信息
新增pojo:com.xiaoxie.pojo.User、com.xiaoxie.pojo.Role
package com.xiaoxie.pojo;
import org.apache.ibatis.type.Alias;
@Alias("user")
public class User {
private Long id;
private String userName;
private String pwd;
private Integer available;
private String note;
public Long getId() {
return id;
}
public void setId(Long id) {
this.id = id;
}
public String getUserName() {
return userName;
}
public void setUserName(String userName) {
this.userName = userName;
}
public String getPwd() {
return pwd;
}
public void setPwd(String pwd) {
this.pwd = pwd;
}
public Integer getAvailable() {
return available;
}
public void setAvailable(Integer available) {
this.available = available;
}
public String getNote() {
return note;
}
public void setNote(String note) {
this.note = note;
}
}
package com.xiaoxie.pojo;
import org.apache.ibatis.type.Alias;
@Alias("role")
public class Role {
private Long id;
private String roleName;
private String note;
public Long getId() {
return id;
}
public void setId(Long id) {
this.id = id;
}
public String getRoleName() {
return roleName;
}
public void setRoleName(String roleName) {
this.roleName = roleName;
}
public String getNote() {
return note;
}
public void setNote(String note) {
this.note = note;
}
}
新增一个UerRoleDao的接口:com.xiaoxie.dao.UserRoleDao
package com.xiaoxie.dao;
import com.xiaoxie.pojo.Role;
import com.xiaoxie.pojo.User;
import org.apache.ibatis.annotations.Mapper;
import org.apache.ibatis.annotations.Param;
import org.springframework.stereotype.Component;
import java.util.List;
@Mapper
@Component
public interface UserRoleDao {
public User getUserByName(@Param("userName") String userName); //根据用户名来获取用户信息(数据库模型定义用户名是唯一的)
public Role getRoleById(Long id); //根据id获取角色信息
public List<Role> getRolesByUserName(@Param("userName") String userName); //根据用户名称获取用户权限列表
}
对应于上面dao接口,新增一个mapper的配置文件:resoures/mybatis/mapper/UserRoleMapper.xml
<?xml version="1.0" encoding="UTF-8" ?>
<!DOCTYPE mapper
PUBLIC "-//mybatis.org//DTD Mapper 3.0//EN"
"http://mybatis.org/dtd/mybatis-3-mapper.dtd">
<mapper namespace="com.xiaoxie.dao.UserRoleDao">
<select id="getUserByName" resultType="user">
select id,user_name as userName,pwd,available,note from sec_user where user_name = #{userName}
</select>
<select id="getRoleById" parameterType="long" resultType="role">
select id,role_name as roleName,note from sec_role where id = #{id}
</select>
<select id="getRolesByUserName" resultType="role">
select r.id,r.role_name as roleName,r.note from sec_user u,sec_user_role ur,sec_role r where u.id = ur.user_id and r.id = ur.role_id and u.user_name = #{userName}
</select>
</mapper>
新增service接口:com.xiaoxie.service.UserRoleService
package com.xiaoxie.service;
import com.xiaoxie.pojo.Role;
import com.xiaoxie.pojo.User;
import java.util.List;
public interface UserRoleService {
public User getUserByName(String userName); //根据用户名来获取用户信息(数据库模型定义用户名是唯一的)
public Role getRoleById(Long id); //根据id获取角色信息
public List<Role> getRolesByUserName(String userName); //根据用户名称获取用户权限列表
}
新增service接口实现类:com.xiaoxie.service.UserRoleServiceImpl
package com.xiaoxie.service.impl;
import com.xiaoxie.dao.UserRoleDao;
import com.xiaoxie.pojo.Role;
import com.xiaoxie.pojo.User;
import com.xiaoxie.service.UserRoleService;
import org.springframework.beans.factory.annotation.Autowired;
import org.springframework.stereotype.Service;
import java.util.List;
@Service
public class UserRoleServiceImpl implements UserRoleService {
//注入Dao
@Autowired
private UserRoleDao userRoleDao = null;
@Override
public User getUserByName(String userName) {
return userRoleDao.getUserByName(userName);
}
@Override
public Role getRoleById(Long id) {
return userRoleDao.getRoleById(id);
}
@Override
public List<Role> getRolesByUserName(String userName) {
return userRoleDao.getRolesByUserName(userName);
}
}
新增controller进行测试:com.iaoxie.controller.UserRoleController
package com.xiaoxie.controller;
import com.xiaoxie.pojo.Role;
import com.xiaoxie.pojo.User;
import com.xiaoxie.service.UserRoleService;
import org.springframework.beans.factory.annotation.Autowired;
import org.springframework.stereotype.Controller;
import org.springframework.web.bind.annotation.GetMapping;
import org.springframework.web.bind.annotation.PathVariable;
import org.springframework.web.bind.annotation.ResponseBody;
import java.util.List;
@Controller
public class UserRoleController {
//service注入
@Autowired
private UserRoleService userRoleService = null;
@GetMapping("/getUser/{userName}")
@ResponseBody
public User getUser(@PathVariable("userName") String userName){
return userRoleService.getUserByName(userName);
}
@GetMapping("/getRole/{id}")
@ResponseBody
public Role getRole(@PathVariable("id") Long id){
return userRoleService.getRoleById(id);
}
@GetMapping("/getRoles/{userName}")
@ResponseBody
public List<Role> getRolesByUserName( @PathVariable("userName") String userName){
return userRoleService.getRolesByUserName(userName);
}
}
上面的controller访问测通过则说明我们向数据库中读取用户及权限是可以正常拿到了。
定义一个service的实现类来实现
Spring Security提供的UserDetailsService接口,新增service实现类:com.xiaoxie.service.impl.UserDetailsServiceImpl
package com.xiaoxie.service.impl;
import com.xiaoxie.pojo.Role;
import com.xiaoxie.pojo.User;
import com.xiaoxie.service.UserRoleService;
import com.xiaoxie.utils.SecurityUtils;
import org.springframework.beans.factory.annotation.Autowired;
import org.springframework.security.core.userdetails.UserDetails;
import org.springframework.security.core.userdetails.UserDetailsService;
import org.springframework.security.core.userdetails.UsernameNotFoundException;
import org.springframework.stereotype.Service;
import java.util.List;
@Service
public class UserDetailsServiceImpl implements UserDetailsService {
//注入服务接口
@Autowired
private UserRoleService userRoleService = null;
@Override
public UserDetails loadUserByUsername(String s) throws UsernameNotFoundException {
//获取数据库用户信息
User user = userRoleService.getUserByName(s);
//获取数据库角色信息
List<Role> roleList = userRoleService.getRolesByUserName(s);
//把获取到的信息转换为UserDetail对象
return SecurityUtils.changeToUser(user,roleList);
}
}
我们实现接口方法loadUserByUserByName,其中返回UserDetails,我们设计了一个util类:com.xiaoxie.utils.SecurityUtils
package com.xiaoxie.utils;
import com.xiaoxie.pojo.Role;
import com.xiaoxie.pojo.User;
import org.springframework.security.core.GrantedAuthority;
import org.springframework.security.core.authority.SimpleGrantedAuthority;
import org.springframework.security.core.userdetails.UserDetails;
import java.util.ArrayList;
import java.util.List;
public class SecurityUtils {
public static UserDetails changeToUser(User user, List<Role> roleList){
//权限列表
List<GrantedAuthority> authorityList = new ArrayList<>();
//对权限列表进行赋值
for(Role role:roleList){
GrantedAuthority authority = new SimpleGrantedAuthority(role.getRoleName());
authorityList.add(authority);
}
//创建UserDetail对象,设置用户名、密码和权限
UserDetails userDetails = new org.springframework.security.core.userdetails.User(user.getUserName(),user.getPwd(),authorityList);
return userDetails;
}
}
新增一个config类使用自定义的认证:com.xiaoxie.config.WebSecurityCustomConfig
package com.xiaoxie.config;
import org.springframework.beans.factory.annotation.Autowired;
import org.springframework.beans.factory.annotation.Qualifier;
import org.springframework.beans.factory.annotation.Value;
import org.springframework.context.annotation.Configuration;
import org.springframework.security.config.annotation.authentication.builders.AuthenticationManagerBuilder;
import org.springframework.security.config.annotation.web.configuration.WebSecurityConfigurerAdapter;
import org.springframework.security.core.userdetails.UserDetailsService;
import org.springframework.security.crypto.password.PasswordEncoder;
import org.springframework.security.crypto.password.Pbkdf2PasswordEncoder;
@Configuration
public class WebSecurityCustomConfig extends WebSecurityConfigurerAdapter {
//注入密文串
@Value("${system.user.password.secret}")
private String secret = null;
@Qualifier("userDetailsServiceImpl") //这里这样注解是因为Spring Boot提供了默认的UserDetailsService但不是我们想要的,我们要把我们自己设计的配置上
@Autowired
private UserDetailsService userDetailsService = null;
@Override
protected void configure(AuthenticationManagerBuilder auth) throws Exception {
//密码编辑器
PasswordEncoder passwordEncoder = new Pbkdf2PasswordEncoder(secret);
//设置用户密码服务与密码编辑器
auth.userDetailsService(userDetailsService).passwordEncoder(passwordEncoder);
}
}
三、对请求的限制
如果要对不同的用户角色赋予不同权限,则需要对WebSecurityConfigurerAdapter中的configure(HttpSecurity)方法进行覆盖。
WebSecurityConfigurerAdapter抽象类中
configure(HttpSecurity http)的默认实现如下
protected void configure(HttpSecurity http) throws Exception {
logger.debug("Using default configure(HttpSecurity). If subclassed this will potentially override subclass configure(HttpSecurity).");
//authorizeRequests:限定只对签名成功的用户请求
//anyRequest:限定所有请求
//authenticated:对所有签名成功的用户允许方法
http.authorizeRequests().anyRequest().authenticated()
.and().formLogin() //formLogin:使用Spring Security默信的登录页面
.and().httpBasic(); //httpBasic:启用HTTP基础认证
}
配置请求路径访问权限
对地Spring Security,支持使用Ant风格或正则式的路径限定安全请求,在
WebSecurityCustomConfig类中新增覆盖父类中的configure(HttpSecurity http)
@Override
protected void configure(HttpSecurity http) throws Exception {
http.authorizeRequests()
.antMatchers("/user/welcome","/user/details").hasAnyAuthority("role1","admin") //这里如果用hasAnyRole需要在我们自己定义的色上加上"ROLE_"因为源码中判断角色时默认加上了"ROLE_"前缀
.antMatchers("/admin/**").hasAuthority("admin")
.anyRequest().permitAll()
.and().anonymous()
.and().formLogin()
.and().httpBasic();
}
对于上面覆盖方法的说明
authorizeRequests表示设置哪些需求签名的请求,并且可以把不同的请求权限赋予不同的角色
antMatchers用来配置请求路径,比如:/user/welcome,/user/details是指定了请求路径
hasAnyAuthority表示指定角色为“role1”、“admin”,上面的这两个链接只能这两个角色访问
antMatchers("/admin/**").hasAuthority("admin") 表示/admin/下的所有链接只能是admin这个角色访问
anyRequest表示作意没有限定的请求
permitAll表示没有配置过权限限定的路径允许全部访问
and方法代表连接词
anonymous允许匿名访问没有配置过的请求
formLogin代表启用Spring Security默认登录页面
httpBasic方法表示启用HTTP的Basic请求输入用户和密码
注意:对于配置会采用先配置优先原则,有时候权限的配置会产生冲突,比如上面的先配置了指定的地址需要限制访问,后面又有允许匿名访问的没有给出具体的地址,根据先配置优先则会对指定地址产生权限限制。所以在实际的开发中都是把具体的配放到前面,不具体的配置放在后面。
关于权限的方法还有如下一些
|
方法
|
说明
|
|
access(String)
|
参数是Spring EL,如果为true则允许访问
|
|
anonymous()
|
允许匿名访问
|
|
authorizeRequests()
|
限定通过签名的请求
|
|
anyRequest()
|
限定任意请求
|
|
hasAnyRole(String ...)
|
把访问权限赋予多个角色,注意角色名会自动加ROLE_前缀
|
|
hasRole(String)
|
把访问权限赋予一个角色,注意角色名会自动加ROL_前缀
|
|
permitAll()
|
无条件允许访问
|
|
and()
|
连接词
|
|
httpBasic()
|
启用浏览器的HTTP基础验证
|
|
formLogin()
| 启用Spring Security提供的默认登录页面 |
|
not()
|
对其他方法的访问采取求反
|
|
fullyAuthenticated()
|
如果是完整验证(不是Remember-me),则允许访问
|
|
denyAll()
|
无条件不允许任何访问
|
|
hasIpAddress(String)
|
如果是给定的IP地址则允许访问
|
|
rememberme()
|
用户通过Remember-me功能验证则允许访问
|
|
hasAuthority(String)
|
把访问权限赋予指定的一个角色,注意,角色不会加ROLE_前缀
|
|
hasAnyAuthority(String...)
|
把访问权限赋予指定的多个角色,注意,角色不会加ROLE_前缀
|
Spring EL配置访问权限
修改方法
configure(HttpSecurity http)的内容如下:
@Override
protected void configure(HttpSecurity http) throws Exception {
http.authorizeRequests()
//限定只有role1或者admin角色可以访问
.antMatchers("/user/**").access("hasAuthority('admin') or hasAuthority('role1')")
//限定只有admin角色可以访问,要求完整登录并非记住我登录
.antMatchers("/admin/welcome").access("hasAuthority('admin') && isFullyAuthenticated()")
//限定为admin角色可以访问,允许不完整登录
.antMatchers("/admin/welcome1").access("hasAuthority('admin')")
//使用记住我功能
.and().rememberMe()
.and().formLogin()
.and().httpBasic();
}
注意上面方法中的access方法,它的内容则使用了Spring表达式
Spring Security中的Spring表达式方法如下:
|
方法
|
说明
|
|
authentication()
|
用户认证对象
|
|
denyAll()
|
拒绝任何访问
|
|
hasAnyRole(String ...)
|
当前用户是否存在参数中指定的角色
|
|
hasRole(String)
|
当前用户是否存在角色
|
|
hasIpAddress(String)
|
是否请求来自指定的IP
|
|
isAnonymous()
|
是否匿名访问
|
|
isAuthenticated()
|
是否用户通过认证签名
|
|
isFullyAuthenticated()
|
是否用户是完整双色球证,不是记住我功能通过的认证
|
|
isRememberMe()
|
是否是通过记住我功能通过的验证
|
|
permitAll()
|
无条件允许任何访问
|
|
principal()
|
用户的principal对象
|
强制使用HTTP请求
修改方法
configure(HttpSecurity http)的内容如下:
@Override
protected void configure(HttpSecurity http) throws Exception {
//限定为HTTPS请求
http.requiresChannel().antMatchers("/admin/**").requiresSecure();
//不使用HTTPS请求
http.requiresChannel().antMatchers("/user/**").requiresInsecure();
http
.authorizeRequests()
.antMatchers("/admin/**").hasAnyAuthority("admin")
.antMatchers("/user/**").hasAnyAuthority("admin","role1").and().formLogin().and().httpBasic();
}
从上面的限制来看,/admin/下的所有请求都心须是HTTPS的请求了。
防止跨站点请求伪造
CSRF(Cross-Site Request Forgery),它是一种常见的攻击手段。
1、浏览器请求安全站点,进行登录
2、在登录后,浏览器会记录一些信息,并以Cookie的形式进行保存
3、在不关闭浏览器的情况下,用户访问危险站点
4、危险站点通过获取Cookie信息来仿造用户请求,进而请求安全站点
Spring Securiyt提供了过滤器来进行安全处理,默认情况下会启用这个过滤器。
每次HTTP请求的表单Form要求存在CSRF参数。当访问表单时,Spring Security会生成CSRF参数,放到表单当中,这样在表单提交到服务器时就会连同CSRF参数一并提交到服务器,这时Spring Security可以对CSRF参数进行判断,判断是否与其生成的保持一致,如果不一致则会拒绝请求(注意这个参数是不会出现在Cookie中的),从而有效地防止请求伪造的产生。
在controller中新增CSRFController类
package com.xiaoxie.controller;
import org.springframework.stereotype.Controller;
import org.springframework.ui.Model;
import org.springframework.ui.ModelMap;
import org.springframework.web.bind.annotation.GetMapping;
import org.springframework.web.bind.annotation.PostMapping;
import org.springframework.web.bind.annotation.RestController;
import org.springframework.web.servlet.ModelAndView;
import org.springframework.web.servlet.View;
import java.util.HashMap;
import java.util.Map;
@RestController
public class CSRFController {
@GetMapping("/csrf/form")
public ModelAndView page(){
ModelAndView mv = new ModelAndView();
mv.setViewName("csrf_form");
return mv;
}
@PostMapping("/csrf/ok")
public Map<String,Object> ok(String name,String desc){
Map<String,Object> map = new HashMap<>();
map.put("name",name);
map.put("desc",desc);
return map;
}
}
page是用来定位到JSP页面的,从page方法中可以看到我们需要一个csrf_form.jsp的页面
ok方法接收一个post的请求
新增一个jsp页面webapp/WEB-INF/jsp/csrf-form.jsp
<%@ page contentType="text/html;charset=UTF-8" language="java" %>
<html>
<head>
<title>CSRF表单</title>
</head>
<body>
<form action="./ok" method="post">
<p>
名称:<input id="name" name="name" type="text" value=""/>
</p>
<p>
描述:<input id="desc" name="desc" type="text" value=""/>
</p>
<p>
<input type="submit" value="OK"/>
</p>
<!-- CSRF参数 -->
<input type="hidden" id="${_csrf.parameterName}" name="${_csrf.parameterName}" value="${_csrf.token}" />
</form>
</body>
</html>
从上的面的页面可以看到新增了一个hidden类型的隐藏提交参数,并且这里的名称和值都是读的 _csrf中的对应信息,如果不这样我们在提交请求时会报403
由于_csrf的token不会存在Cookie中,所以这样就防止了请求的伪造。
四、简单的用户认证功能
自定义登录页面
我们把覆盖configure(HttpSecurity)方法进行修改为如下:
@Override
protected void configure(HttpSecurity http) throws Exception {
http
//访问/admin下的请求需要admin权限
.authorizeRequests().antMatchers("/admin/**")
.access("hasAuthority('admin')")
.and()
//启用remember me功能,有效期为1天,Cookie以rm-key作为键保存
.rememberMe().tokenValiditySeconds(86400).key("rm-key")
.and()
//启用HTTP basic功能
.httpBasic()
.and()
//通过签名后可以访问任何请求
.authorizeRequests().antMatchers("/**").permitAll()
.and()
//设置登录页面
.formLogin().loginPage("/login/page");
}
这里我们可以看一formLogin()后有指定登录页面:loginPage("/login/page")
这里/login/page是一个GET请求的链接,所以我们可以新增一个controller,让这这个GET请求可以定位到一个JSP视图
新增controller:com.xiaoxie.controller.SecurityController
package com.xiaoxie.controller;
import org.springframework.stereotype.Controller;
import org.springframework.web.bind.annotation.GetMapping;
import org.springframework.web.bind.annotation.PostMapping;
@Controller
public class SecurityController {
//登录页面
@GetMapping("/login/page")
public String loginPage(){
return "login";
}
}
从这里可以看到/login/page的请求是映身到login.jsp
新增login.jsp
<%@ page contentType="text/html;charset=UTF-8" language="java" %>
<html>
<head>
<title>登录</title>
</head>
<body>
<form action="/login/page" method="post">
<p>
名称:<input type="text" id="username" name="username"/>
</p>
<p>
密码:<input type="password" id="password" name="password"/>
</p>
<p>
<input type="checkbox" id="remember_me" name="remember_me"/>记住我
</p>
<p><input type="submit" value="登录"/></p>
<input type="hidden" id="${_csrf.parameterName}" name="${_csrf.parameterName}" value="${_csrf.token}"/>
</form>
</body>
</html>
对于这个JSP页面有几点要注意
1、一定是一个POST请求
2、各个参数的名称必须要正确:username、password、remember_me
3、由于默认启用了CSRF,所以这里表单需要有一个隐藏域来同步提交_csrf相关的信息
这样我们在浏览器提交相关的请求需要做验证时就不会使用默认的登录页面而使用的是我们上面的JSP登录页面,有时候我们不希望打开新的登录页面而只是模态对话框,则可以把覆盖configure(HttpSecurity)方法进行修改为如下:
@Override
protected void configure(HttpSecurity http) throws Exception {
http
//访问/admin下的请求需要admin权限
.authorizeRequests().antMatchers("/admin/**")
.access("hasAuthority('admin')")
.and()
//启用remember me功能,有效期为1天,Cookie以rm-key作为键保存
.rememberMe().tokenValiditySeconds(86400).key("rm-key")
.and()
//启用HTTP basic功能,下面的realName可要可不要不影响
.httpBasic().realmName("验证")
.and()
//通过签名后可以访问任何请求
.authorizeRequests().antMatchers("/**").permitAll();
}
通过上面的配置,则在需要验证时会打开一个对话框而不是打开一个登录页面。
如何进行登出
对于登出,默认情况下,Spring Security会提供一个URL:/logout,只要使用POST请求(GET请求是不能登出的)就可以登出了。同时也会清除掉Remember Me功能保存的相关信息。
定义一个登出后的欢迎页面:logout_welcome.jsp
<%@ page contentType="text/html;charset=UTF-8" language="java" %>
<html>
<head>
<title>Security登出</title>
</head>
<body>
<h2>您已登出了系统!</h2>
</body>
</html>
定义一个logout.jsp
<%@ page contentType="text/html;charset=UTF-8" language="java" %>
<html>
<head>
<title>登出</title>
</head>
<body>
<form action="/logout/page" method="post">
<p><input type="submit" value="登出"/></p>
<input type="hidden" id="${_csrf.parameterName}" name="${_csrf.parameterName}" value="${_csrf.token}"/>
</form>
</body>
</html>
注意:这里必须要是post请求才能登出生效
我们把覆盖configure(HttpSecurity)方法进行修改为如下:
@Override
protected void configure(HttpSecurity http) throws Exception {
http
.authorizeRequests().antMatchers("/admin/**")
.access("hasAuthority('admin')")
.and()
.rememberMe().tokenValiditySeconds(86400).key("rm-key")
.and()
.authorizeRequests().antMatchers("/**").permitAll()
.and()
.formLogin().loginPage("/login/page")
.and()
.logout().logoutUrl("/logout/page").logoutSuccessUrl("/logout/welcome");
}
从这里覆盖的方法中可以看到.logout().logoutUrl("/logout/page").logoutSuccessUrl("/logout/welcome"),那么在请求/logout/page会做登出,完成登出后会跳转到/logout/welcome
在控制器SecurityController中新增中下两个方法
@GetMapping("/logout/page")
public String logoutPage(){
return "logout";
}
@GetMapping("/logout/welcome")
public String logoutWelcome(){
return "logout_welcome";
}
这两个方法分别对应的映射到logout.jsp,logout_welcome.jsp


 1019
1019

 被折叠的 条评论
为什么被折叠?
被折叠的 条评论
为什么被折叠?
 到【灌水乐园】发言


