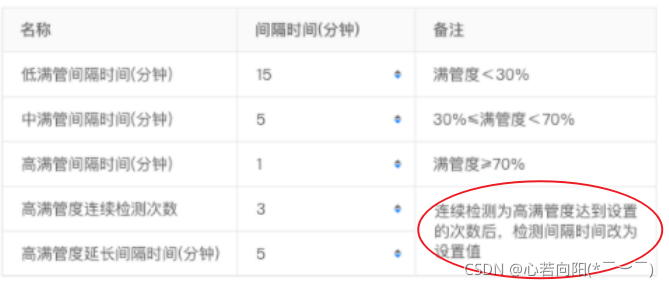
1、需求如图(表格中编辑间隔时间和备注):
2、直接贴代码:
html:
<a-table
  bordered
  :columns="inspectionColumns"
  :dataSource="inspectionData"
  :pagination="false"
  rowKey="id"
>
  <template
    v-for="col in ['intervalTime']"
    :slot="col"
    slot-scope="record"
  >
    <div :key="col">
      <a-input
        v-if="record.min"
        style="margin: -5px 0"
        :value="record.min"
        @change="e => changeMin(e.target.value, record)"
      />
      <template v-else>
        {{ record.min }}
      </template>
    </div>
  </template>
  <template
    v-for="item in ['remark']"
    :slot="item"
    slot-scope="record"
  >
    <div :key="item">
      <a-textarea
        v-if="record.remark"
        style="margin: -5px 0"
        :value="record.remark"
        @change="e => changeRemark(e.target.value, record)"
      />
      <template v-else>
        {{ record.remark }}
      </template>
    </div>
  </template>
</a-table>

js:
<script>
const inspectionColumns = [
  {
    title: "名称",
    dataIndex: "name",
    width: 220,
  },
  {
    title: "间隔时间(分钟)",
    scopedSlots: {
      customRender: "intervalTime",
    },
    width: 150,
  },
  {
    title: '备注',
    scopedSlots: {customRender: 'remark'},
    customCell: ((remark, index) => {
      const obj = {
        children: remark,
        style: {},
        attrs: {},
      };
      if (index === 3) {
        obj.attrs.rowSpan = 2;
      }
      if (index === 4) {
        obj.style = {display: "none"};
      }
      return obj;
    })
  }
];
export default {
  data() {
    return {
      inspectionColumns,
      inspectionData: [
        {
          id: 1,
          name: '低满管度间隔时间(分钟)',
          min: '5',
          remark: '发送到发1'
        },
        {
          id: 2,
          name: '中满管度间隔时间(分钟)',
          min: '6',
          remark: '发送到发2'
        },
        {
          id: 3,
          name: '高满管度间隔时间(分钟)',
          min: '7',
          remark: '发送到发3'
        },
        {
          id: 4,
          name: '高满管度连续检测次数',
          min: '8',
          remark: '发送到发4'
        },
        {
          id: 5,
          name: '高满管度延长间隔时间(分钟)',
          min: '9',
          remark: '发送到发5'
        },
      ]
    }
  },
  methods: {
    changeMin(value, item) {
      console.log(value, item);
    },
    changeRemark(value, item) {
      console.log(value, item);
    },
  }
}
</script>
3、重要的代码片段:
{
  title: '备注',
  scopedSlots: {customRender: 'remark'},
  customCell: ((remark, index) => {
    const obj = {
      children: remark,
      style: {},
      attrs: {},
    };
    if (index === 3) {
      obj.attrs.rowSpan = 2; // 合并
    }
    if (index === 4) {
      obj.style = {display: "none"}; // 隐藏多余的项
    }
    return obj;
  })
}
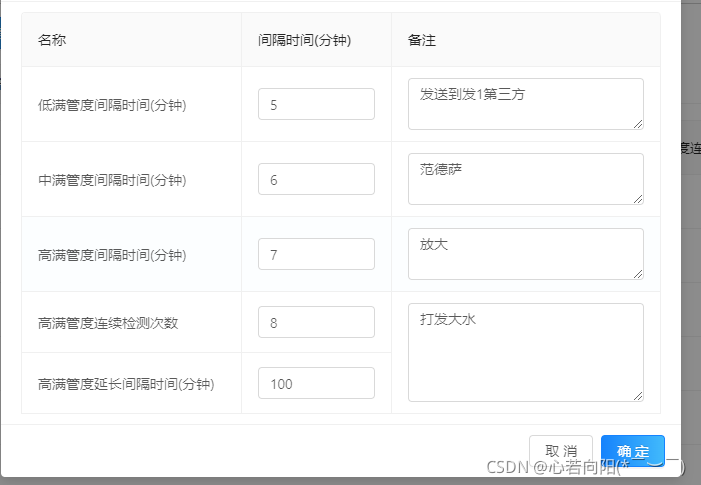
4、最后效果:
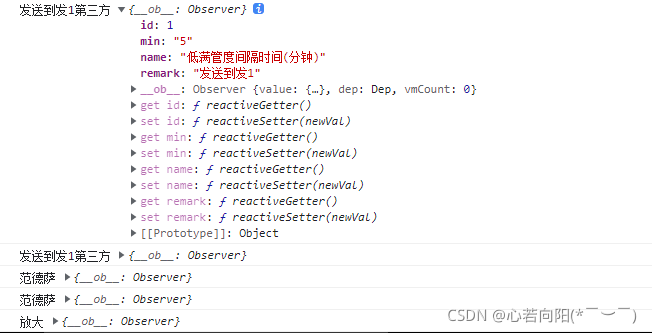
5、细心的朋友们会发现,间隔时间的输入框与UI图有差距,是的,因为如果使用InputNumber 数字输入框,change事件只返回value,区分不出是哪条数据修改了,而a-input的change事件是输入框内容变化时的回调
changeMin(value, item) {
 console.log(value, item);
},
changeRemark(value, item) {
  console.log(value, item);
},
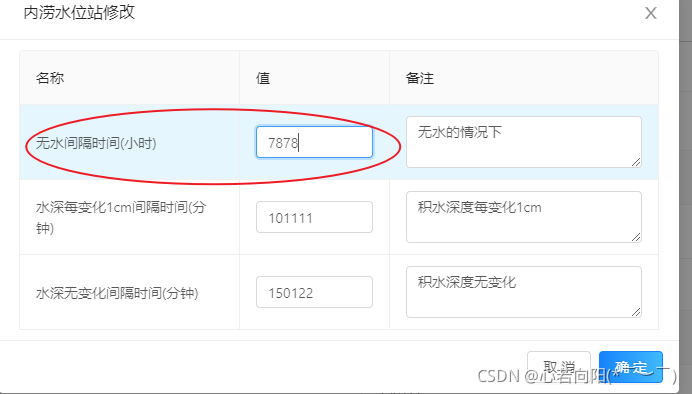
6、添加需求:值只能输入数字或者小数点儿,如图:小时能输入小数点儿、分钟能输入数字
// 第一项小时单位可以输入小数点儿
if(item.id == 1) {
  this.waterLoggingData[item.id - 1].min =
    this.getDecimal(obj) == "0" || this.getDecimal(obj) == ""
      ? "0"
      : this.getDecimal(obj);
} else {
  this.waterLoggingData[item.id - 1].min =
    this.getNumber(obj) == "0" || this.getNumber(obj) == ""
      ? "0"
      : this.getNumber(obj);
}
7、完整代码:
// 只能输入数字
getNumber(obj) {
  obj.target.value = obj.target.value.replace(/[^\d]/g, "");
  return obj.target.value;
},
// 可输入四位小数点儿
getDecimal(obj) {
  obj.target.value = obj.target.value.replace(/[^\d.]/g, "");
  obj.target.value = obj.target.value.replace(/^\./g, "");
  obj.target.value = obj.target.value
    .replace(".", "$#$")
    .replace(/\./g, "")
    .replace("$#$", ".");
  obj.target.value = obj.target.value.replace(
    /^(\-)*(\d+)\.(\d\d\d\d).*$/,
    "$1$2.$3"
  );
  return obj.target.value;
},
// 修改间隔时间
changeMin(obj, item) {
  this.$nextTick(() => {
    if (this.activeTab == "1") {
      this.inspectionData[item.id - 1].min =
        this.getNumber(obj) == "0" || this.getNumber(obj) == ""
          ? "0"
          : this.getNumber(obj);
    } else if (this.activeTab == "2") {
      // 第一项小时单位可以输入小数点儿
      if(item.id == 1) {
        this.waterLoggingData[item.id - 1].min =
          this.getDecimal(obj) == "0" || this.getDecimal(obj) == ""
            ? "0"
            : this.getDecimal(obj);
      } else {
        this.waterLoggingData[item.id - 1].min =
          this.getNumber(obj) == "0" || this.getNumber(obj) == ""
            ? "0"
            : this.getNumber(obj);
      }
    } else if (this.activeTab == "3") {
      this.riverWaterData[item.id - 1].min =
        this.getNumber(obj) == "0" || this.getNumber(obj) == ""
          ? "0"
          : this.getNumber(obj);
    } else if (this.activeTab == "4") {
      this.networkData[item.id - 1].min =
        this.getNumber(obj) == "0" || this.getNumber(obj) == ""
          ? "0"
          : this.getNumber(obj);
    } else if (this.activeTab == "5") {
      this.pumpData[item.id - 1].min =
        this.getNumber(obj) == "0" || this.getNumber(obj) == ""
          ? "0"
          : this.getNumber(obj);
    } else if (this.activeTab == "6") {
      this.gateData[item.id - 1].min =
        this.getNumber(obj) == "0" || this.getNumber(obj) == ""
          ? "0"
          : this.getNumber(obj);
    }
  });
  switch (this.activeTab) {
    case "1":
      this.$emit("getInspectionEditData", this.inspectionData);
      break;
    case "2":
      this.$emit("getWaterLoggingData", this.waterLoggingData);
      break;
    case "3":
      this.$emit("getRiverWaterData", this.riverWaterData);
      break;
    case "4":
      this.$emit("getNetworkData", this.networkData);
      break;
    case "5":
      this.$emit("getPumpData", this.pumpData);
      break;
    case "6":
      this.$emit("getGateData", this.gateData);
      break;
    default:
      break;
  }
},
我为你翻山越岭 却无心看风景


 3134
3134

 被折叠的 条评论
为什么被折叠?
被折叠的 条评论
为什么被折叠?
 到【灌水乐园】发言


