


尊重原创转载请注明:From AigeStudio(http://blog.csdn.net/aigestudio)Power by Aige 侵权必究!
炮兵
要在数量上统计中国菜的品种,在地域上毫无争议地划分菜系,在今天,是一件几乎不可能完成的事……Cut……
/**
 *
 * @author AigeStudio {@link http://blog.csdn.net/aigestudio}
 * @since 2015/1/12
 *
 */
public class ImgView extends View {
	private Bitmap mBitmap;// 位图对象

	public ImgView(Context context, AttributeSet attrs) {
		super(context, attrs);
	}

	@Override
	protected void onDraw(Canvas canvas) {
		// 绘制位图
		canvas.drawBitmap(mBitmap, 0, 0, null);
	}

	/**
	 * 设置位图
	 *
	 * @param bitmap
	 *            位图对象
	 */
	public void setBitmap(Bitmap bitmap) {
		this.mBitmap = bitmap;
	}
}/**
* 主界面
*
* @author Aige {@link http://blog.csdn.net/aigestudio}
* @since 2014/11/17
*/
public class MainActivity extends Activity {
private ImgView mImgView;
@Override
public void onCreate(Bundle savedInstanceState) {
super.onCreate(savedInstanceState);
setContentView(R.layout.activity_main);
mImgView = (ImgView) findViewById(R.id.main_pv);
Bitmap bitmap = BitmapFactory.decodeResource(getResources(), R.drawable.lovestory);
mImgView.setBitmap(bitmap);
}
}

很简单对吧,可是上面的代码其实是有个问题的,至于什么问题?我们待会再说,就看你通过前面我们的学习能不能发现了。这一节我们重点是控件的测量,大家不知道注意没有,这个系列文章的命名我用了“控件”而非“View”其实目的就是说明我们的控件不仅包括View也应该包含ViewGroup,当然你也可以以官方的方式将其分为控件和布局,不过我更喜欢View和ViewGroup,好了废话不说,我们先来看看View的测量方式,上面的代码中MainActivity对应的布局文件如下:
<LinearLayout xmlns:android="http://schemas.android.com/apk/res/android"
    android:layout_width="match_parent"
    android:layout_height="match_parent"
    android:background="#FFFFFFFF"
    android:orientation="vertical" >

    <com.aigestudio.customviewdemo.views.ImgView
        android:id="@+id/main_pv"
        android:layout_width="match_parent"
        android:layout_height="match_parent" />
</LinearLayout><LinearLayout xmlns:android="http://schemas.android.com/apk/res/android"
android:layout_width="match_parent"
android:layout_height="match_parent"
android:background="#FFFFFFFF"
android:orientation="vertical" >
<com.aigestudio.customviewdemo.views.ImgView
android:id="@+id/main_pv"
android:layout_width="match_parent"
android:layout_height="match_parent" />
<Button
android:layout_width="wrap_content"
android:layout_height="wrap_content"
android:text="AigeStudio" />
<TextView
android:layout_width="wrap_content"
android:layout_height="wrap_content"
android:text="AigeStudio" />
</LinearLayout><LinearLayout xmlns:android="http://schemas.android.com/apk/res/android"
android:layout_width="match_parent"
android:layout_height="match_parent"
android:background="#FFFFFFFF"
android:orientation="vertical" >
<com.aigestudio.customviewdemo.views.ImgView
android:id="@+id/main_pv"
android:layout_width="wrap_content"
android:layout_height="wrap_content" />
<!-- ……省略一些代码…… -->
</LinearLayout>@Override
protected void onMeasure(int widthMeasureSpec, int heightMeasureSpec) {
super.onMeasure(widthMeasureSpec, heightMeasureSpec);
}@Override
public void onCreate(Bundle savedInstanceState) {
super.onCreate(savedInstanceState);
setContentView(R.layout.activity_main);
}public void setContentView(int layoutResID) {
getWindow().setContentView(layoutResID);
initActionBar();
}public Window getWindow() {
return mWindow;
}final void attach(Context context, ActivityThread aThread,
// 此处省去一些代码……
mWindow = PolicyManager.makeNewWindow(this);
mWindow.setCallback(this);
mWindow.getLayoutInflater().setPrivateFactory(this);
if (info.softInputMode != WindowManager.LayoutParams.SOFT_INPUT_STATE_UNSPECIFIED) {
mWindow.setSoftInputMode(info.softInputMode);
}
if (info.uiOptions != 0) {
mWindow.setUiOptions(info.uiOptions);
}
// 此处省去巨量代码……
}public final class PolicyManager {
private static final String POLICY_IMPL_CLASS_NAME =
"com.android.internal.policy.impl.Policy";
private static final IPolicy sPolicy;
static {
try {
Class policyClass = Class.forName(POLICY_IMPL_CLASS_NAME);
sPolicy = (IPolicy)policyClass.newInstance();
} catch (ClassNotFoundException ex) {
throw new RuntimeException(
POLICY_IMPL_CLASS_NAME + " could not be loaded", ex);
} catch (InstantiationException ex) {
throw new RuntimeException(
POLICY_IMPL_CLASS_NAME + " could not be instantiated", ex);
} catch (IllegalAccessException ex) {
throw new RuntimeException(
POLICY_IMPL_CLASS_NAME + " could not be instantiated", ex);
}
}
// 省去构造方法……
public static Window makeNewWindow(Context context) {
return sPolicy.makeNewWindow(context);
}
// 省去无关代码……
}public Window makeNewWindow(Context context) {
return new PhoneWindow(context);
}public abstract class Window {
// 省去不可估量的代码……
public abstract void setContentView(int layoutResID);
public abstract void setContentView(View view);
public abstract void setContentView(View view, ViewGroup.LayoutParams params);
// 省去数以亿计的代码……
}public class PhoneWindow extends Window implements MenuBuilder.Callback {
// 省去草泥马个代码……
@Override
public void setContentView(int layoutResID) {
if (mContentParent == null) {
installDecor();
} else {
mContentParent.removeAllViews();
}
mLayoutInflater.inflate(layoutResID, mContentParent);
final Callback cb = getCallback();
if (cb != null && !isDestroyed()) {
cb.onContentChanged();
}
}
@Override
public void setContentView(View view) {
setContentView(view, new ViewGroup.LayoutParams(MATCH_PARENT, MATCH_PARENT));
}
@Override
public void setContentView(View view, ViewGroup.LayoutParams params) {
if (mContentParent == null) {
installDecor();
} else {
mContentParent.removeAllViews();
}
mContentParent.addView(view, params);
final Callback cb = getCallback();
if (cb != null && !isDestroyed()) {
cb.onContentChanged();
}
}
// 省去法克鱿个代码……
}private void installDecor() {
if (mDecor == null) {
mDecor = generateDecor();
// 省省省……
}
if (mContentParent == null) {
mContentParent = generateLayout(mDecor);
// 省省省……
}
// 省省省……
}protected ViewGroup generateLayout(DecorView decor) {
// 省去巨量代码……
ViewGroup contentParent = (ViewGroup)findViewById(ID_ANDROID_CONTENT);
// 省去一些代码……
}
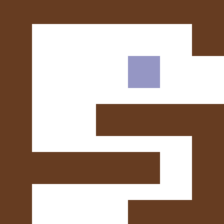
说了大半天才理清这个小关系,但是我们还没说到重点…………………………就是widthMeasureSpec和heightMeasureSpec究竟是从哪来的……………………如果我们不做上面的一个分析,很多童鞋压根无从下手,有了上面一个分析,我们知道我们界面的真正根视图应该是DecorView,那么我们的widthMeasureSpec和heightMeasureSpec应该从这里或者更上一层PhoneWindow传递进来对吧,但是DecorView是FrameLayout的一个实例,在FrameLayout的onMeasure中我们确实有对子元素的测量,但是问题是FrameLayout:onMeasure方法中的widthMeasureSpec和heightMeasureSpec又是从何而来呢?追溯上去我们又回到了View…………………………………………………………不了解Android GUI框架的童鞋迈出的第一步就被无情地煽了回去。其实在Android中我们可以在很多方面看到类似MVC架构的影子,比如最最常见的就是我们的xml界面布局——Activity等组件——model数据之间的关系,而在整个GUI的框架中,我们也可以对其做出类似的规划,View在设计过程中就注定了其只会对显示数据进行处理比如我们的测量布局和绘制还有动画等等,而承担Controller控制器重任的是谁呢?在Android中这一功能由ViewRootImpl承担,我们在前面提到过这个类,其负责的东西很多,比如我们窗口的显示、用户的输入输出当然还有关于处理我们绘制流程的方法:
private void performTraversals() {
	// ………………啦啦啦啦………………
}private void performTraversals() {
// ………省略宇宙尘埃数量那么多的代码………
if (!mStopped) {
// ……省略一些代码
int childWidthMeasureSpec = getRootMeasureSpec(mWidth, lp.width);
int childHeightMeasureSpec = getRootMeasureSpec(mHeight, lp.height);
// ……省省省
performMeasure(childWidthMeasureSpec, childHeightMeasureSpec);
}
// ………省略人体细胞数量那么多的代码………
}private static int getRootMeasureSpec(int windowSize, int rootDimension) {
int measureSpec;
switch (rootDimension) {
case ViewGroup.LayoutParams.MATCH_PARENT:
// Window不能调整其大小,强制使根视图大小与Window一致
measureSpec = MeasureSpec.makeMeasureSpec(windowSize, MeasureSpec.EXACTLY);
break;
case ViewGroup.LayoutParams.WRAP_CONTENT:
// Window可以调整其大小,为根视图设置一个最大值
measureSpec = MeasureSpec.makeMeasureSpec(windowSize, MeasureSpec.AT_MOST);
break;
default:
// Window想要一个确定的尺寸,强制将根视图的尺寸作为其尺寸
measureSpec = MeasureSpec.makeMeasureSpec(rootDimension, MeasureSpec.EXACTLY);
break;
}
return measureSpec;
}至此,我们算是真正接触到根视图的测量规格,尔后这个规格会被由上至下传递下去,并由当前view与其父容器共同作用决定最终的测量大小,在View与ViewGroup递归调用实现测量的过程中有几个重要的方法,对于View而言则是measure方法:
public final void measure(int widthMeasureSpec, int heightMeasureSpec) {
    // 省略部分代码……

    /*
     * 判断当前mPrivateFlags是否带有PFLAG_FORCE_LAYOUT强制布局标记
     * 判断当前widthMeasureSpec和heightMeasureSpec是否发生了改变
     */
    if ((mPrivateFlags & PFLAG_FORCE_LAYOUT) == PFLAG_FORCE_LAYOUT ||
            widthMeasureSpec != mOldWidthMeasureSpec ||
            heightMeasureSpec != mOldHeightMeasureSpec) {

        // 如果发生了改变表示需要重新进行测量此时清除掉mPrivateFlags中已测量的标识位PFLAG_MEASURED_DIMENSION_SET
        mPrivateFlags &= ~PFLAG_MEASURED_DIMENSION_SET;

        resolveRtlPropertiesIfNeeded();

        int cacheIndex = (mPrivateFlags & PFLAG_FORCE_LAYOUT) == PFLAG_FORCE_LAYOUT ? -1 :
                mMeasureCache.indexOfKey(key);
        if (cacheIndex < 0 || sIgnoreMeasureCache) {
        	// 测量View的尺寸
            onMeasure(widthMeasureSpec, heightMeasureSpec);
            mPrivateFlags3 &= ~PFLAG3_MEASURE_NEEDED_BEFORE_LAYOUT;
        } else {
            long value = mMeasureCache.valueAt(cacheIndex);

            setMeasuredDimension((int) (value >> 32), (int) value);
            mPrivateFlags3 |= PFLAG3_MEASURE_NEEDED_BEFORE_LAYOUT;
        }

        /*
         * 如果mPrivateFlags里没有表示已测量的标识位PFLAG_MEASURED_DIMENSION_SET则会抛出异常
	     */
        if ((mPrivateFlags & PFLAG_MEASURED_DIMENSION_SET) != PFLAG_MEASURED_DIMENSION_SET) {
            throw new IllegalStateException("onMeasure() did not set the"
                    + " measured dimension by calling"
                    + " setMeasuredDimension()");
        }

        // 如果已测量View那么就可以往mPrivateFlags添加标识位PFLAG_LAYOUT_REQUIRED表示可以进行布局了
        mPrivateFlags |= PFLAG_LAYOUT_REQUIRED;
    }

    // 最后存储测量完成的测量规格
    mOldWidthMeasureSpec = widthMeasureSpec;
    mOldHeightMeasureSpec = heightMeasureSpec;

    mMeasureCache.put(key, ((long) mMeasuredWidth) << 32 |
            (long) mMeasuredHeight & 0xffffffffL); // suppress sign extension
}protected void onMeasure(int widthMeasureSpec, int heightMeasureSpec) {
setMeasuredDimension(getDefaultSize(getSuggestedMinimumWidth(), widthMeasureSpec),
getDefaultSize(getSuggestedMinimumHeight(), heightMeasureSpec));
}protected final void setMeasuredDimension(int measuredWidth, int measuredHeight) {
// 省去部分代码……
// 设置测量后的宽高
mMeasuredWidth = measuredWidth;
mMeasuredHeight = measuredHeight;
// 重新将已测量标识位存入mPrivateFlags标识测量的完成
mPrivateFlags |= PFLAG_MEASURED_DIMENSION_SET;
}protected int getSuggestedMinimumWidth() {
return (mBackground == null) ? mMinWidth : max(mMinWidth, mBackground.getMinimumWidth());
}public static int getDefaultSize(int size, int measureSpec) {
// 将我们获得的最小值赋给result
int result = size;
// 从measureSpec中解算出测量规格的模式和尺寸
int specMode = MeasureSpec.getMode(measureSpec);
int specSize = MeasureSpec.getSize(measureSpec);
/*
* 根据测量规格模式确定最终的测量尺寸
*/
switch (specMode) {
case MeasureSpec.UNSPECIFIED:
result = size;
break;
case MeasureSpec.AT_MOST:
case MeasureSpec.EXACTLY:
result = specSize;
break;
}
return result;
}@Override
protected void onMeasure(int widthMeasureSpec, int heightMeasureSpec) {
// 设置测量尺寸
setMeasuredDimension(250, 250);
}
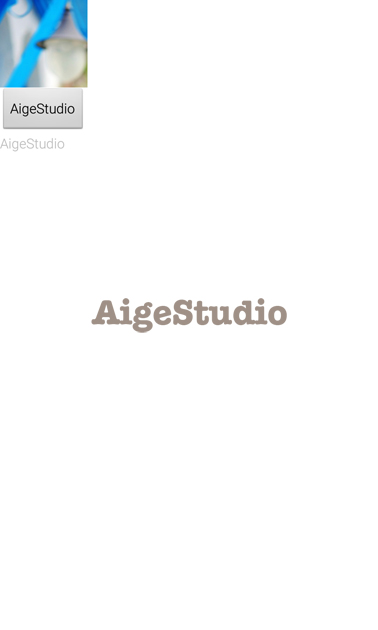
当然这样不好,用Android官方的话来说就是太过“专政”,因为它完全摒弃了父容器的意愿,完全由自己决定了大小,如果大家逛blog看技术文章或者听别人讨论常常会听到别人这么说view的最终测量尺寸是由view本身何其父容器共同决定的,至于如何共同决定我们呆会再说,这里我们先看看如何能在一定程度上顺应爹的“意愿”呢?从View默认的测量模式中我们可以看到它频繁使用了一个叫做MeasureSpec的类,而在ViewRootImpl中呢也有大量用到该类,该类的具体说明大家可以围观我早期的一篇文章:http://blog.csdn.net/aigestudio/article/details/38636531,里面有对MeasureSpec类的详细说明,这里我就简单概述下MeasureSpec类中的三个Mode常量值的意义,其中UNSPECIFIED表示未指定,爹不会对儿子作任何的束缚,儿子想要多大都可以;EXACTLY表示完全的,意为儿子多大爹心里有数,爹早已算好了;AT_MOST表示至多,爹已经为儿子设置好了一个最大限制,儿子你不能比这个值大,不能再多了!父容器所谓的“意图”其实就由上述三个常量值表现,既然如此我们就该对这三个Mode常量做一个判断才行,不然怎么知道爹的意图呢:
@Override
protected void onMeasure(int widthMeasureSpec, int heightMeasureSpec) {
	// 声明一个临时变量来存储计算出的测量值
	int resultWidth = 0;

	// 获取宽度测量规格中的mode
	int modeWidth = MeasureSpec.getMode(widthMeasureSpec);

	// 获取宽度测量规格中的size
	int sizeWidth = MeasureSpec.getSize(widthMeasureSpec);

	/*
	 * 如果爹心里有数
	 */
	if (modeWidth == MeasureSpec.EXACTLY) {
		// 那么儿子也不要让爹难做就取爹给的大小吧
		resultWidth = sizeWidth;
	}
	/*
	 * 如果爹心里没数
	 */
	else {
		// 那么儿子可要自己看看自己需要多大了
		resultWidth = mBitmap.getWidth();

		/*
		 * 如果爹给儿子的是一个限制值
		 */
		if (modeWidth == MeasureSpec.AT_MOST) {
			// 那么儿子自己的需求就要跟爹的限制比比看谁小要谁
			resultWidth = Math.min(resultWidth, sizeWidth);
		}
	}

	int resultHeight = 0;
	int modeHeight = MeasureSpec.getMode(heightMeasureSpec);
	int sizeHeight = MeasureSpec.getSize(heightMeasureSpec);

	if (modeHeight == MeasureSpec.EXACTLY) {
		resultHeight = sizeHeight;
	} else {
		resultHeight = mBitmap.getHeight();
		if (modeHeight == MeasureSpec.AT_MOST) {
			resultHeight = Math.min(resultHeight, sizeHeight);
		}
	}

	// 设置测量尺寸
	setMeasuredDimension(resultWidth, resultHeight);
}

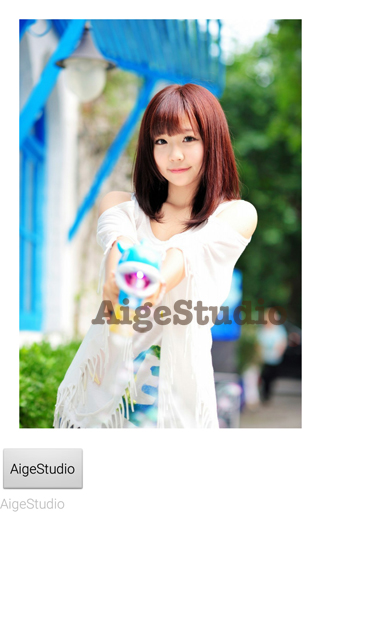
如我所说,控件的实际大小需要根据我们的实际需求去计算,这里我更改一下xml为我们的ImgView加一个内边距值:
<LinearLayout xmlns:android="http://schemas.android.com/apk/res/android"
    android:layout_width="match_parent"
    android:layout_height="match_parent"
    android:background="#FFFFFFFF"
    android:orientation="vertical" >

    <com.aigestudio.customviewdemo.views.ImgView
        android:id="@+id/main_pv"
        android:layout_width="wrap_content"
        android:layout_height="wrap_content"
        android:padding="20dp" />

    <Button
        android:layout_width="wrap_content"
        android:layout_height="wrap_content"
        android:text="AigeStudio" />

    <TextView
        android:layout_width="wrap_content"
        android:layout_height="wrap_content"
        android:text="AigeStudio" />

</LinearLayout>resultWidth = mBitmap.getWidth() + getPaddingLeft() + getPaddingRight();
resultHeight = mBitmap.getHeight() + getPaddingTop() + getPaddingBottom();

诶、等等,好像不对啊,上边距和左边距为什么没有了?原因很简单,因为我们在绘制时并没有考虑到Padding的影响,下面我们更改一下绘制逻辑:
@Override
protected void onDraw(Canvas canvas) {
	// 绘制位图
	canvas.drawBitmap(mBitmap, getPaddingLeft(), getPaddingTop(), null);
}
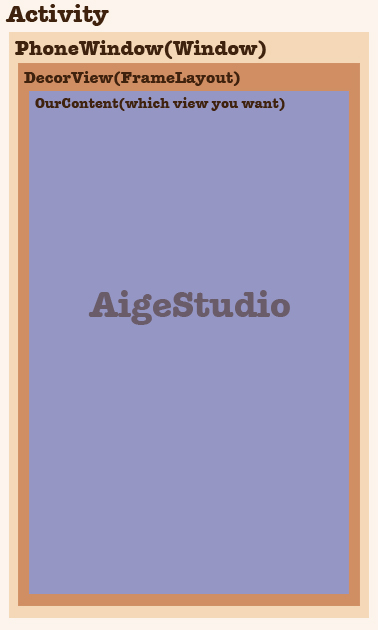
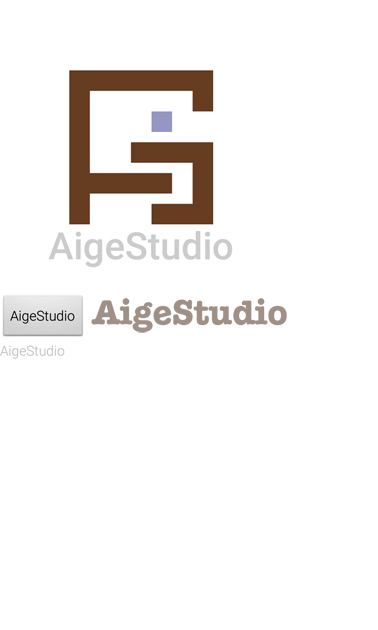
很多朋友问那Margin外边距呢??淡定,外边距轮不到view来算,Andorid将其封装在LayoutParams内交由父容器统一处理。很多时候我们的控件往往不只是一张简单的图片那么乏味,比如类似图标的效果:

一个图标常常除了一张图片外底部还有一个title,这时我们的测量逻辑就应该做出相应的改变了,这里我用一个新的IconView去做:
/**
 *
 * @author AigeStudio {@link http://blog.csdn.net/aigestudio}
 * @since 2015/1/13
 *
 */
public class IconView extends View {
	private Bitmap mBitmap;// 位图
	private TextPaint mPaint;// 绘制文本的画笔
	private String mStr;// 绘制的文本

	private float mTextSize;// 画笔的文本尺寸

	/**
	 * 宽高枚举类
	 *
	 * @author AigeStudio {@link http://blog.csdn.net/aigestudio}
	 *
	 */
	private enum Ratio {
		WIDTH, HEIGHT
	}

	public IconView(Context context, AttributeSet attrs) {
		super(context, attrs);

		// 计算参数
		calArgs(context);

		// 初始化
		init();
	}

	/**
	 * 参数计算
	 *
	 * @param context
	 *            上下文环境引用
	 */
	private void calArgs(Context context) {
		// 获取屏幕宽
		int sreenW = MeasureUtil.getScreenSize((Activity) context)[0];

		// 计算文本尺寸
		mTextSize = sreenW * 1 / 10F;
	}

	/**
	 * 初始化
	 */
	private void init() {
		/*
		 * 获取Bitmap
		 */
		if (null == mBitmap) {
			mBitmap = BitmapFactory.decodeResource(getResources(), R.drawable.logo);
		}

		/*
		 * 为mStr赋值
		 */
		if (null == mStr || mStr.trim().length() == 0) {
			mStr = "AigeStudio";
		}

		/*
		 * 初始化画笔并设置参数
		 */
		mPaint = new TextPaint(Paint.ANTI_ALIAS_FLAG | Paint.DITHER_FLAG | Paint.LINEAR_TEXT_FLAG);
		mPaint.setColor(Color.LTGRAY);
		mPaint.setTextSize(mTextSize);
		mPaint.setTextAlign(Paint.Align.CENTER);
		mPaint.setTypeface(Typeface.DEFAULT_BOLD);
	}

	@Override
	protected void onMeasure(int widthMeasureSpec, int heightMeasureSpec) {
		// 设置测量后的尺寸
		setMeasuredDimension(getMeasureSize(widthMeasureSpec, Ratio.WIDTH), getMeasureSize(heightMeasureSpec, Ratio.HEIGHT));
	}

	/**
	 * 获取测量后的尺寸
	 *
	 * @param measureSpec
	 *            测量规格
	 * @param ratio
	 *            宽高标识
	 * @return 宽或高的测量值
	 */
	private int getMeasureSize(int measureSpec, Ratio ratio) {
		// 声明临时变量保存测量值
		int result = 0;

		/*
		 * 获取mode和size
		 */
		int mode = MeasureSpec.getMode(measureSpec);
		int size = MeasureSpec.getSize(measureSpec);

		/*
		 * 判断mode的具体值
		 */
		switch (mode) {
		case MeasureSpec.EXACTLY:// EXACTLY时直接赋值
			result = size;
			break;
		default:// 默认情况下将UNSPECIFIED和AT_MOST一并处理
			if (ratio == Ratio.WIDTH) {
				float textWidth = mPaint.measureText(mStr);
				result = ((int) (textWidth >= mBitmap.getWidth() ? textWidth : mBitmap.getWidth())) + getPaddingLeft() + getPaddingRight();
			} else if (ratio == Ratio.HEIGHT) {
				result = ((int) ((mPaint.descent() - mPaint.ascent()) * 2 + mBitmap.getHeight())) + getPaddingTop() + getPaddingBottom();
			}

			/*
			 * AT_MOST时判断size和result的大小取小值
			 */
			if (mode == MeasureSpec.AT_MOST) {
				result = Math.min(result, size);
			}
			break;
		}
		return result;
	}

	@Override
	protected void onDraw(Canvas canvas) {
		/*
		 * 绘制
		 * 参数就不做单独处理了因为只会Draw一次不会频繁调用
		 */
		canvas.drawBitmap(mBitmap, getWidth() / 2 - mBitmap.getWidth() / 2, getHeight() / 2 - mBitmap.getHeight() / 2, null);
		canvas.drawText(mStr, getWidth() / 2, mBitmap.getHeight() + getHeight() / 2 - mBitmap.getHeight() / 2 - mPaint.ascent(), mPaint);
	}
}<LinearLayout xmlns:android="http://schemas.android.com/apk/res/android"
android:layout_width="match_parent"
android:layout_height="match_parent"
android:background="#FFFFFFFF"
android:orientation="vertical" >
<com.aigestudio.customviewdemo.views.IconView
android:id="@+id/main_pv"
android:layout_width="wrap_content"
android:layout_height="wrap_content"
android:padding="50dp" />
<Button
android:layout_width="wrap_content"
android:layout_height="wrap_content"
android:text="AigeStudio" />
<TextView
android:layout_width="wrap_content"
android:layout_height="wrap_content"
android:text="AigeStudio" />
</LinearLayout>

好了就先这样吧,上面我们曾说过View的测量大小是由View和其父容器共同决定的,但是上述源码的分析中我们其实并没有体现,因为它们都在ViewGroup中,这里我们就要涉及ViewGroup中与测量相关的另外几个方法:measureChildren、measureChild和measureChildWithMargins还有getChildMeasureSpec,见名知意这几个方法都跟ViewGroup测量子元素有关,其中measureChildWithMargins和measureChildren类似只是加入了对Margins外边距的处理,ViewGroup提供对子元素测量的方法从measureChildren开始:
protected void measureChildren(int widthMeasureSpec, int heightMeasureSpec) {
    final int size = mChildrenCount;
    final View[] children = mChildren;
    for (int i = 0; i < size; ++i) {
        final View child = children[i];
        if ((child.mViewFlags & VISIBILITY_MASK) != GONE) {
            measureChild(child, widthMeasureSpec, heightMeasureSpec);
        }
    }
}protected void measureChild(View child, int parentWidthMeasureSpec,
int parentHeightMeasureSpec) {
// 获取子元素的布局参数
final LayoutParams lp = child.getLayoutParams();
/*
* 将父容器的测量规格已经上下和左右的边距还有子元素本身的布局参数传入getChildMeasureSpec方法计算最终测量规格
*/
final int childWidthMeasureSpec = getChildMeasureSpec(parentWidthMeasureSpec,
mPaddingLeft + mPaddingRight, lp.width);
final int childHeightMeasureSpec = getChildMeasureSpec(parentHeightMeasureSpec,
mPaddingTop + mPaddingBottom, lp.height);
// 调用子元素的measure传入计算好的测量规格
child.measure(childWidthMeasureSpec, childHeightMeasureSpec);
}public static int getChildMeasureSpec(int spec, int padding, int childDimension) {
// 获取父容器的测量模式和尺寸大小
int specMode = MeasureSpec.getMode(spec);
int specSize = MeasureSpec.getSize(spec);
// 这个尺寸应该减去内边距的值
int size = Math.max(0, specSize - padding);
// 声明临时变量存值
int resultSize = 0;
int resultMode = 0;
/*
* 根据模式判断
*/
switch (specMode) {
case MeasureSpec.EXACTLY: // 父容器尺寸大小是一个确定的值
/*
* 根据子元素的布局参数判断
*/
if (childDimension >= 0) { //如果childDimension是一个具体的值
// 那么就将该值作为结果
resultSize = childDimension;
// 而这个值也是被确定的
resultMode = MeasureSpec.EXACTLY;
} else if (childDimension == LayoutParams.MATCH_PARENT) { //如果子元素的布局参数为MATCH_PARENT
// 那么就将父容器的大小作为结果
resultSize = size;
// 因为父容器的大小是被确定的所以子元素大小也是可以被确定的
resultMode = MeasureSpec.EXACTLY;
} else if (childDimension == LayoutParams.WRAP_CONTENT) { //如果子元素的布局参数为WRAP_CONTENT
// 那么就将父容器的大小作为结果
resultSize = size;
// 但是子元素的大小包裹了其内容后不能超过父容器
resultMode = MeasureSpec.AT_MOST;
}
break;
case MeasureSpec.AT_MOST: // 父容器尺寸大小拥有一个限制值
/*
* 根据子元素的布局参数判断
*/
if (childDimension >= 0) { //如果childDimension是一个具体的值
// 那么就将该值作为结果
resultSize = childDimension;
// 而这个值也是被确定的
resultMode = MeasureSpec.EXACTLY;
} else if (childDimension == LayoutParams.MATCH_PARENT) { //如果子元素的布局参数为MATCH_PARENT
// 那么就将父容器的大小作为结果
resultSize = size;
// 因为父容器的大小是受到限制值的限制所以子元素的大小也应该受到父容器的限制
resultMode = MeasureSpec.AT_MOST;
} else if (childDimension == LayoutParams.WRAP_CONTENT) { //如果子元素的布局参数为WRAP_CONTENT
// 那么就将父容器的大小作为结果
resultSize = size;
// 但是子元素的大小包裹了其内容后不能超过父容器
resultMode = MeasureSpec.AT_MOST;
}
break;
case MeasureSpec.UNSPECIFIED: // 父容器尺寸大小未受限制
/*
* 根据子元素的布局参数判断
*/
if (childDimension >= 0) { //如果childDimension是一个具体的值
// 那么就将该值作为结果
resultSize = childDimension;
// 而这个值也是被确定的
resultMode = MeasureSpec.EXACTLY;
} else if (childDimension == LayoutParams.MATCH_PARENT) { //如果子元素的布局参数为MATCH_PARENT
// 因为父容器的大小不受限制而对子元素来说也可以是任意大小所以不指定也不限制子元素的大小
resultSize = 0;
resultMode = MeasureSpec.UNSPECIFIED;
} else if (childDimension == LayoutParams.WRAP_CONTENT) { //如果子元素的布局参数为WRAP_CONTENT
// 因为父容器的大小不受限制而对子元素来说也可以是任意大小所以不指定也不限制子元素的大小
resultSize = 0;
resultMode = MeasureSpec.UNSPECIFIED;
}
break;
}
// 返回封装后的测量规格
return MeasureSpec.makeMeasureSpec(resultSize, resultMode);
}/**
*
* @author AigeStudio {@link http://blog.csdn.net/aigestudio}
* @since 2015/1/15
*
*/
public class CustomLayout extends ViewGroup {
public CustomLayout(Context context, AttributeSet attrs) {
super(context, attrs);
}
@Override
protected void onLayout(boolean changed, int l, int t, int r, int b) {
}
}public class View implements Drawable.Callback, KeyEvent.Callback,
AccessibilityEventSource {
// 省去无数代码………………
/**
* Called from layout when this view should
* assign a size and position to each of its children.
*
* Derived classes with children should override
* this method and call layout on each of
* their children.
* @param changed This is a new size or position for this view
* @param left Left position, relative to parent
* @param top Top position, relative to parent
* @param right Right position, relative to parent
* @param bottom Bottom position, relative to parent
*/
protected void onLayout(boolean changed, int left, int top, int right, int bottom) {
}
// 省去无数代码………………
}/**
*
* @author AigeStudio {@link http://blog.csdn.net/aigestudio}
* @since 2015/1/15
*
*/
public class CustomLayout extends ViewGroup {
public CustomLayout(Context context, AttributeSet attrs) {
super(context, attrs);
}
@Override
protected void onMeasure(int widthMeasureSpec, int heightMeasureSpec) {
super.onMeasure(widthMeasureSpec, heightMeasureSpec);
/*
* 如果有子元素
*/
if (getChildCount() > 0) {
// 那么对子元素进行测量
measureChildren(widthMeasureSpec, heightMeasureSpec);
}
}
@Override
protected void onLayout(boolean changed, int l, int t, int r, int b) {
}
}<com.aigestudio.customviewdemo.views.CustomLayout xmlns:android="http://schemas.android.com/apk/res/android"
android:layout_width="match_parent"
android:layout_height="match_parent"
android:background="#FFFFFFFF"
android:orientation="vertical" >
<com.aigestudio.customviewdemo.views.IconView
android:id="@+id/main_pv"
android:layout_width="wrap_content"
android:layout_height="wrap_content"
android:padding="50dp" />
<Button
android:layout_width="wrap_content"
android:layout_height="wrap_content"
android:text="AigeStudio" />
<TextView
android:layout_width="wrap_content"
android:layout_height="wrap_content"
android:text="AigeStudio" />
</com.aigestudio.customviewdemo.views.CustomLayout>@Override
protected void onLayout(boolean changed, int l, int t, int r, int b) {
/*
* 如果有子元素
*/
if (getChildCount() > 0) {
// 那么遍历子元素并对其进行定位布局
for (int i = 0; i < getChildCount(); i++) {
View child = getChildAt(i);
child.layout(0, 0, getMeasuredWidth(), getMeasuredHeight());
}
}
}
看到屏幕上的巨大Button我不禁吸了一口屁!这样的布局太蛋疼,全被Button一个玩完了还搞毛,可不可以像LinearLayout那样挨个显示呢?答案是肯定的!我们来修改下onLayout的逻辑:
@Override
protected void onLayout(boolean changed, int l, int t, int r, int b) {

	/*
	 * 如果有子元素
	 */
	if (getChildCount() > 0) {
		// 声明一个临时变量存储高度倍增值
		int mutilHeight = 0;

		// 那么遍历子元素并对其进行定位布局
		for (int i = 0; i < getChildCount(); i++) {
			// 获取一个子元素
			View child = getChildAt(i);

			// 通知子元素进行布局
			child.layout(0, mutilHeight, child.getMeasuredWidth(), child.getMeasuredHeight() + mutilHeight);

			// 改变高度倍增值
			mutilHeight += child.getMeasuredHeight();
		}
	}
}
是不是和上面LinearLayout效果有点一样了?当然LinearLayout的布局逻辑远比我们的复杂得多,我们呢也只是对其进行一个简单的模拟而已。大家注意到ViewGroup的onLayout方法的签名列表中有五个参数,其中boolean changed表示是否与上一次位置不同,其具体值在View的layout方法中通过setFrame等方法确定:
public void layout(int l, int t, int r, int b) {
    // 省略一些代码……

    boolean changed = isLayoutModeOptical(mParent) ?
            setOpticalFrame(l, t, r, b) : setFrame(l, t, r, b);

    // 省略大量代码……
}
好了,说到这里想必大家对ViewGroup的测量也有一定的了解了,但是这必定不是测量过程全部,如我上面所说,测量的具体过程因控件而异,上面我们曾因为给我们的自定义View加了内边距后修改了绘制的逻辑,因为我们需要在绘制时考虑内边距的影响,而我们的自定义ViewGroup呢?是不是也一样呢?这里我给其加入60dp的内边距:
<com.aigestudio.customviewdemo.views.CustomLayout xmlns:android="http://schemas.android.com/apk/res/android"
    android:layout_width="match_parent"
    android:layout_height="match_parent"
    android:padding="60dp"
    android:background="#FFFFFFFF"
    android:orientation="vertical" >

    <com.aigestudio.customviewdemo.views.IconView
        android:id="@+id/main_pv"
        android:layout_width="wrap_content"
        android:layout_height="wrap_content"
        android:padding="50dp" />

    <Button
        android:layout_width="wrap_content"
        android:layout_height="wrap_content"
        android:text="AigeStudio" />

    <TextView
        android:layout_width="wrap_content"
        android:layout_height="wrap_content"
        android:text="AigeStudio" />

</com.aigestudio.customviewdemo.views.CustomLayout>

内边距把我们的子元素给“吃”掉了,那么也就是说我们在对子元素进行定位时应该进一步考虑到父容器内边距的影响对吧,OK,我们重理onLayout的逻辑:
@Override
protected void onLayout(boolean changed, int l, int t, int r, int b) {
	// 获取父容器内边距
	int parentPaddingLeft = getPaddingLeft();
	int parentPaddingTop = getPaddingTop();

	/*
	 * 如果有子元素
	 */
	if (getChildCount() > 0) {
		// 声明一个临时变量存储高度倍增值
		int mutilHeight = 0;

		// 那么遍历子元素并对其进行定位布局
		for (int i = 0; i < getChildCount(); i++) {
			// 获取一个子元素
			View child = getChildAt(i);

			// 通知子元素进行布局
			// 此时考虑父容器内边距的影响
			child.layout(parentPaddingLeft, mutilHeight + parentPaddingTop, child.getMeasuredWidth() + parentPaddingLeft, child.getMeasuredHeight() + mutilHeight + parentPaddingTop);

			// 改变高度倍增值
			mutilHeight += child.getMeasuredHeight();
		}
	}
}

既然内边距如此,那么Margins外边距呢?我们来看看,在xml布局文件中为我们的CustomLayout加一个margins:
<com.aigestudio.customviewdemo.views.CustomLayout xmlns:android="http://schemas.android.com/apk/res/android"
    android:layout_width="match_parent"
    android:layout_height="match_parent"
    android:layout_margin="30dp"
    android:padding="20dp"
    android:background="#FF597210"
    android:orientation="vertical" >

    <com.aigestudio.customviewdemo.views.IconView
        android:id="@+id/main_pv"
        android:layout_width="wrap_content"
        android:layout_height="wrap_content" />

    <Button
        android:layout_width="wrap_content"
        android:layout_height="wrap_content"
        android:text="AigeStudio" />

    <TextView
        android:layout_width="wrap_content"
        android:layout_height="wrap_content"
        android:text="AigeStudio" />

</com.aigestudio.customviewdemo.views.CustomLayout>
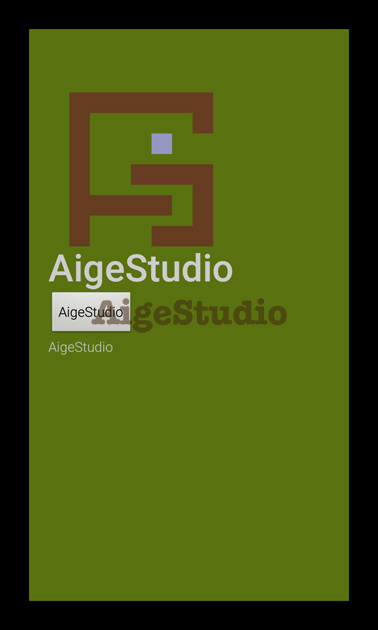
OK,目测没什么问题,可是当我们为子元素设置外边距时,问题就来了……不管你怎么设都不会有任何效果,原因很简单,我们上面也说了,Margins是由父容器来处理,而我们的CustomLayout中并没有对其做任何的处理,那么我们应该怎么做呢?首先要知道Margins封装在LayoutParams中,如果我们想实现自己对其的处理那么我们必然也有必要实现自己布局的LayoutParams:
/**
 *
 * @author AigeStudio {@link http://blog.csdn.net/aigestudio}
 * @since 2015/1/15
 *
 */
public class CustomLayout extends ViewGroup {
	// 省略部分代码…………

	/**
	 *
	 * @author AigeStudio {@link http://blog.csdn.net/aigestudio}
	 *
	 */
	public static class CustomLayoutParams extends MarginLayoutParams {

		public CustomLayoutParams(MarginLayoutParams source) {
			super(source);
		}

		public CustomLayoutParams(android.view.ViewGroup.LayoutParams source) {
			super(source);
		}

		public CustomLayoutParams(Context c, AttributeSet attrs) {
			super(c, attrs);
		}

		public CustomLayoutParams(int width, int height) {
			super(width, height);
		}
	}
}/**
*
* @author AigeStudio {@link http://blog.csdn.net/aigestudio}
* @since 2015/1/15
*
*/
public class CustomLayout extends ViewGroup {
// 省略部分代码…………
/**
* 生成默认的布局参数
*/
@Override
protected CustomLayoutParams generateDefaultLayoutParams() {
return new CustomLayoutParams(ViewGroup.LayoutParams.MATCH_PARENT, ViewGroup.LayoutParams.MATCH_PARENT);
}
/**
* 生成布局参数
* 将布局参数包装成我们的
*/
@Override
protected android.view.ViewGroup.LayoutParams generateLayoutParams(android.view.ViewGroup.LayoutParams p) {
return new CustomLayoutParams(p);
}
/**
* 生成布局参数
* 从属性配置中生成我们的布局参数
*/
@Override
public android.view.ViewGroup.LayoutParams generateLayoutParams(AttributeSet attrs) {
return new CustomLayoutParams(getContext(), attrs);
}
/**
* 检查当前布局参数是否是我们定义的类型这在code声明布局参数时常常用到
*/
@Override
protected boolean checkLayoutParams(android.view.ViewGroup.LayoutParams p) {
return p instanceof CustomLayoutParams;
}
// 省略部分代码…………
}@Override
protected void onMeasure(int widthMeasureSpec, int heightMeasureSpec) {
// 声明临时变量存储父容器的期望值
int parentDesireWidth = 0;
int parentDesireHeight = 0;
/*
* 如果有子元素
*/
if (getChildCount() > 0) {
// 那么遍历子元素并对其进行测量
for (int i = 0; i < getChildCount(); i++) {
// 获取子元素
View child = getChildAt(i);
// 获取子元素的布局参数
CustomLayoutParams clp = (CustomLayoutParams) child.getLayoutParams();
// 测量子元素并考虑外边距
measureChildWithMargins(child, widthMeasureSpec, 0, heightMeasureSpec, 0);
// 计算父容器的期望值
parentDesireWidth += child.getMeasuredWidth() + clp.leftMargin + clp.rightMargin;
parentDesireHeight += child.getMeasuredHeight() + clp.topMargin + clp.bottomMargin;
}
// 考虑父容器的内边距
parentDesireWidth += getPaddingLeft() + getPaddingRight();
parentDesireHeight += getPaddingTop() + getPaddingBottom();
// 尝试比较建议最小值和期望值的大小并取大值
parentDesireWidth = Math.max(parentDesireWidth, getSuggestedMinimumWidth());
parentDesireHeight = Math.max(parentDesireHeight, getSuggestedMinimumHeight());
}
// 设置最终测量值O
setMeasuredDimension(resolveSize(parentDesireWidth, widthMeasureSpec), resolveSize(parentDesireHeight, heightMeasureSpec));
}
@Override
protected void onLayout(boolean changed, int l, int t, int r, int b) {
// 获取父容器内边距
int parentPaddingLeft = getPaddingLeft();
int parentPaddingTop = getPaddingTop();
/*
* 如果有子元素
*/
if (getChildCount() > 0) {
// 声明一个临时变量存储高度倍增值
int mutilHeight = 0;
// 那么遍历子元素并对其进行定位布局
for (int i = 0; i < getChildCount(); i++) {
// 获取一个子元素
View child = getChildAt(i);
CustomLayoutParams clp = (CustomLayoutParams) child.getLayoutParams();
// 通知子元素进行布局
// 此时考虑父容器内边距和子元素外边距的影响
child.layout(parentPaddingLeft + clp.leftMargin, mutilHeight + parentPaddingTop + clp.topMargin, child.getMeasuredWidth() + parentPaddingLeft + clp.leftMargin, child.getMeasuredHeight() + mutilHeight + parentPaddingTop + clp.topMargin);
// 改变高度倍增值
mutilHeight += child.getMeasuredHeight() + clp.topMargin + clp.bottomMargin;
}
}
}<com.aigestudio.customviewdemo.views.CustomLayout xmlns:android="http://schemas.android.com/apk/res/android"
android:layout_width="match_parent"
android:layout_height="match_parent"
android:background="#FF597210"
android:orientation="vertical" >
<com.aigestudio.customviewdemo.views.IconView
android:id="@+id/main_pv"
android:layout_width="wrap_content"
android:layout_height="wrap_content"
android:layout_marginBottom="10dp"
android:layout_marginLeft="20dp"
android:layout_marginRight="30dp"
android:layout_marginTop="5dp" />
<Button
android:layout_width="wrap_content"
android:layout_height="wrap_content"
android:layout_marginBottom="16dp"
android:layout_marginLeft="2dp"
android:layout_marginRight="8dp"
android:layout_marginTop="4dp"
android:text="AigeStudio" />
<TextView
android:layout_width="wrap_content"
android:layout_height="wrap_content"
android:layout_marginBottom="28dp"
android:layout_marginLeft="7dp"
android:layout_marginRight="19dp"
android:layout_marginTop="14dp"
android:background="#FF166792"
android:text="AigeStudio" />
</com.aigestudio.customviewdemo.views.CustomLayout>

~~~~~~~~好了好了、不讲了,View的基本测量过程大致就是这样,如我所说测量并不是定式的过程,总会因控件而已,我们在自定义控件时要准确地测量,一定要准确,测量的结果会直接影响后面的布局定位、绘制甚至交互,所以马虎不得,你也可以看到Android给我们提供的LinearLayout、FrameLayout等布局都有极其严谨的测量逻辑,为的就是确保测量结果的准确。
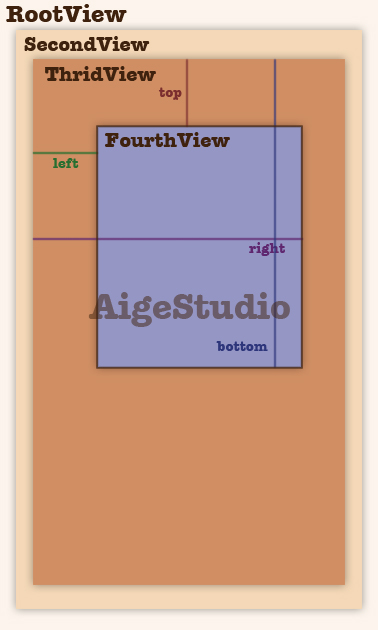
本篇幅虽长,但是我们其实就讲了三点:
- 一个界面窗口的元素构成
- framework对View测量的控制处理
- View和ViewGroup的简单测量
好了、不说了、实在说不动了………………到此为止&¥……#¥……%#¥%#¥%#%¥哦!对了,文章开头我给各位设了一个问题,不知道大家发现没有,本来说这节顺带讲了,看着篇幅太长下节再说吧……
源码下载:传送门


 871
871


 被折叠的 条评论
为什么被折叠?
被折叠的 条评论
为什么被折叠?
 到【灌水乐园】发言


