


Secure Registration System with PHP and MySQL
本教程是我们之前教程使用 PHP 和 MySQL 安全登录系统的后续。在本教程中,我们将创建一个安全的注册表单并实现基本验证。
注册表单是您网站的访问者可以用来注册他们的详细信息的表格,这些信息随后将存储在 MySQL 数据库中。
高级包包括附加功能和源代码的下载链接。
1. 入门
在创建安全注册系统之前,我们需要采取一些步骤。我们需要设置我们的 Web 服务器环境并确保我们启用了所需的扩展(如果您遵循安全登录系统教程,请跳过)。
1.1。要求
- 如果您没有设置本地 Web 服务器,则需要下载并安装XAMPP。XAMPP 是一个服务器端 Web 开发环境,包括后端 Web 开发人员的基本要素。
1.2. 您将在本教程中学到什么
- 表单设计— 使用 HTML5 和 CSS3 设计注册表单。
- Prepared SQL Queries — 如何准备 SQL 查询以防止 SQL 注入并将新记录插入 MySQL 数据库。
- 基本验证——验证发送到服务器的表单数据(用户名、密码和电子邮件)。
1.3. 文件结构和设置
我们现在需要启动我们的 Web 服务器并创建我们将用于注册系统的文件和目录。
- 打开XAMPP 控制面板
- 在 Apache 模块旁边单击开始
- 在 MySQL 模块旁边单击Start
- 导航到 XAMPPs 安装文件夹 ( C:\xampp )
- 打开htdocs文件夹
- 创建以下文件夹和文件:
文件结构
\-- phplogin
|-- register.html
|-- style.css
|-- register.php
|-- activate.php (可选)
每个文件将包含以下内容:
- register.html — 使用 HTML5 和 CSS3 创建的注册表单。由于这个文件不需要我们使用 PHP,我们将它保存为纯 HTML。
- style.css — 我们的安全注册表单的样式表 (CSS3)。
- register.php — 验证表单数据并将新帐户插入 MySQL 数据库。
- activate.php — 使用唯一代码激活用户帐户(基于电子邮件的激活)。
2. 创建注册表设计
我们的网站访问者将使用注册表单。他们可以使用它来输入他们的帐户信息。我们将使用 HTML 和 CSS 创建注册表单。
编辑register.html文件并添加以下代码:
<!DOCTYPE html>
<html>
	<head>
		<meta charset="utf-8">
		<title>Register</title>
		<link rel="stylesheet" href="https://use.fontawesome.com/releases/v5.7.1/css/all.css">
	</head>
	<body>
		<div class="register">
			<h1>Register</h1>
			<form action="register.php" method="post" autocomplete="off">
				<label for="username">
					<i class="fas fa-user"></i>
				</label>
				<input type="text" name="username" placeholder="Username" id="username" required>
				<label for="password">
					<i class="fas fa-lock"></i>
				</label>
				<input type="password" name="password" placeholder="Password" id="password" required>
				<label for="email">
					<i class="fas fa-envelope"></i>
				</label>
				<input type="email" name="email" placeholder="Email" id="email" required>
				<input type="submit" value="Register">
			</form>
		</div>
	</body>
</html>导航到http://localhost/phplogin/register.html,我们的注册表将如下所示:
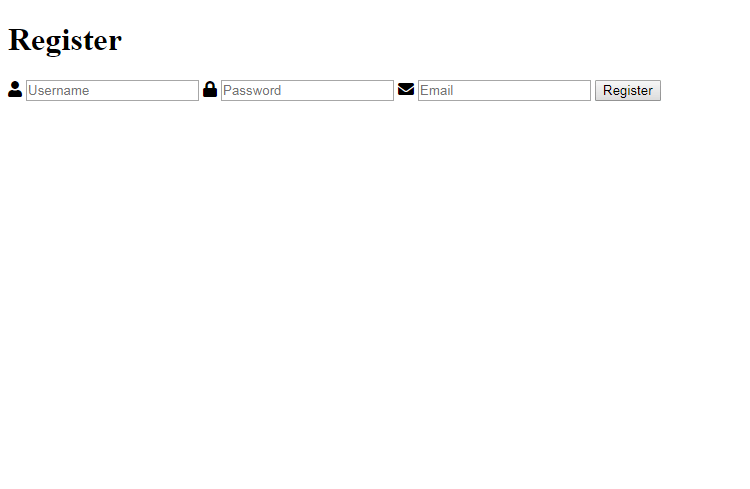
注册表非常基础,现在让我们添加一些 CSS,编辑style.css文件并添加以下内容:
* {
  	box-sizing: border-box;
  	font-family: -apple-system, BlinkMacSystemFont, "segoe ui", roboto, oxygen, ubuntu, cantarell, "fira sans", "droid sans", "helvetica neue", Arial, sans-serif;
  	font-size: 16px;
  	-webkit-font-smoothing: antialiased;
  	-moz-osx-font-smoothing: grayscale;
}
body {
  	background-color: #435165;
  	margin: 0;
}
.register {
  	width: 400px;
  	background-color: #ffffff;
  	box-shadow: 0 0 9px 0 rgba(0, 0, 0, 0.3);
  	margin: 100px auto;
}
.register h1 {
  	text-align: center;
  	color: #5b6574;
  	font-size: 24px;
  	padding: 20px 0 20px 0;
  	border-bottom: 1px solid #dee0e4;
}
.register form {
  	display: flex;
  	flex-wrap: wrap;
  	justify-content: center;
  	padding-top: 20px;
}
.register form label {
  	display: flex;
  	justify-content: center;
  	align-items: center;
  	width: 50px;
 	height: 50px;
  	background-color: #3274d6;
  	color: #ffffff;
}
.register form input[type="password"], .register form input[type="text"], .register form input[type="email"] {
  	width: 310px;
  	height: 50px;
  	border: 1px solid #dee0e4;
  	margin-bottom: 20px;
  	padding: 0 15px;
}
.register form input[type="submit"] {
  	width: 100%;
  	padding: 15px;
  	margin-top: 20px;
  	background-color: #3274d6;
 	border: 0;
  	cursor: pointer;
  	font-weight: bold;
  	color: #ffffff;
  	transition: background-color 0.2s;
}
.register form input[type="submit"]:hover {
	background-color: #2868c7;
  	transition: background-color 0.2s;
}我们需要在register.html文件中包含我们的样式表,将以下代码复制并粘贴到 head 部分:
<link href="style.css" rel="stylesheet" type="text/css">现在我们的注册表会看起来更有吸引力:
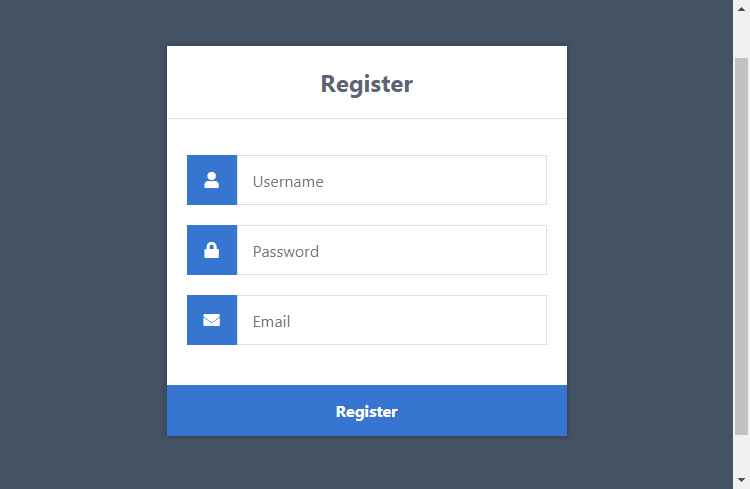
让我们缩小表格的范围,以便更好地了解正在发生的事情。
- 表单——我们需要同时使用行动和邮政属性,行动属性将设置为注册文件。当表单提交时,表单数据将被发送到注册文件进行处理。这方法是邮政,这将允许我们处理表单数据。
- 输入(文本/密码/电子邮件) ——我们需要命名我们的表单字段以便服务器可以识别它们,所以如果我们设置属性的值姓名到用户名,我们可以使用注册文件中的 post 变量来获取数据,如下所示:$_POST['用户名'].
- 输入(提交) ——点击后,表单数据将发送到我们的注册文件。
这基本上是我们在客户端需要做的所有事情,下一步是设置数据库并使用 PHP 创建注册文件。
3. 创建数据库和设置表
如果您按照安全登录系统教程进行操作,则可以跳过此步骤。
对于这一部分,您将需要使用phpMyAdmin或您首选的 MySQL 数据库管理应用程序访问您的 MySQL 数据库。
如果您使用的是phpMyAdmin ,请按照以下说明操作:
- 导航到:http://localhost/phpmyadmin/
- 单击顶部的数据库选项卡
- 在Create database下,在文本框中输入phplogin
- 选择utf8_general_ci作为排序规则
- 单击创建
您可以使用自己的数据库名称,但在本教程中,我们将使用phplogin。
我们现在需要的是一个帐户表,它将存储我们所有的帐户(用户名、密码、电子邮件等)。
单击左侧面板上的数据库(phplogin)并执行以下 SQL 语句:
CREATE TABLE IF NOT EXISTS `accounts` (
	`id` int(11) NOT NULL AUTO_INCREMENT,
  	`username` varchar(50) NOT NULL,
  	`password` varchar(255) NOT NULL,
  	`email` varchar(100) NOT NULL,
    PRIMARY KEY (`id`)
) ENGINE=InnoDB AUTO_INCREMENT=2 DEFAULT CHARSET=utf8;在phpMyAdmin上,这应该如下所示:
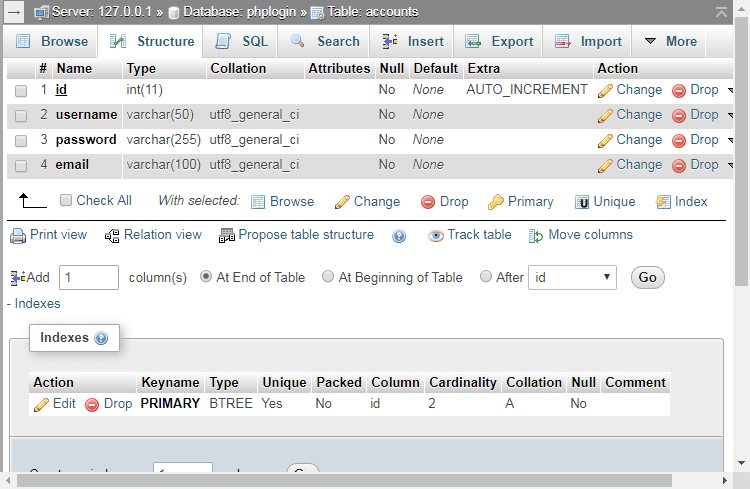
上面的 SQL 语句代码将创建包含列的帐户表ID, 用户名,密码, 和电子邮件.
4. 用 PHP & MySQL 注册用户
现在我们需要创建将处理表单字段的注册文件,检查基本验证,并将新帐户插入我们的数据库。
注册页面需要连接到我们的数据库,因此我们必须包含必要的变量和 MySQL 函数。编辑register.php文件并添加以下代码:
<?php
// Change this to your connection info.
$DATABASE_HOST = 'localhost';
$DATABASE_USER = 'root';
$DATABASE_PASS = '';
$DATABASE_NAME = 'phplogin';
// Try and connect using the info above.
$con = mysqli_connect($DATABASE_HOST, $DATABASE_USER, $DATABASE_PASS, $DATABASE_NAME);
if (mysqli_connect_errno()) {
	// If there is an error with the connection, stop the script and display the error.
	exit('Failed to connect to MySQL: ' . mysqli_connect_error());
}
如果您的 MySQL 凭据不反映声明的值,请不要忘记更新 MySQL 变量。
接下来,我们可以添加基本验证以确保用户输入了他们的详细信息并检查空变量。
// Now we check if the data was submitted, isset() function will check if the data exists.
if (!isset($_POST['username'], $_POST['password'], $_POST['email'])) {
	// Could not get the data that should have been sent.
	exit('Please complete the registration form!');
}
// Make sure the submitted registration values are not empty.
if (empty($_POST['username']) || empty($_POST['password']) || empty($_POST['email'])) {
	// One or more values are empty.
	exit('Please complete the registration form');
}现在我们需要检查该帐户是否已存在于数据库中。我们可以通过从我们的帐户表中选择一条记录来检查这一点用户名用户提供的。
之后添加:
// We need to check if the account with that username exists.
if ($stmt = $con->prepare('SELECT id, password FROM accounts WHERE username = ?')) {
	// Bind parameters (s = string, i = int, b = blob, etc), hash the password using the PHP password_hash function.
	$stmt->bind_param('s', $_POST['username']);
	$stmt->execute();
	$stmt->store_result();
	// Store the result so we can check if the account exists in the database.
	if ($stmt->num_rows > 0) {
		// Username already exists
		echo 'Username exists, please choose another!';
	} else {
		// Insert new account
	}
	$stmt->close();
} else {
	// Something is wrong with the sql statement, check to make sure accounts table exists with all 3 fields.
	echo 'Could not prepare statement!';
}
$con->close();
?>
代替:
// Insert new account
和:
// Username doesnt exists, insert new account
if ($stmt = $con->prepare('INSERT INTO accounts (username, password, email) VALUES (?, ?, ?)')) {
	// We do not want to expose passwords in our database, so hash the password and use password_verify when a user logs in.
	$password = password_hash($_POST['password'], PASSWORD_DEFAULT);
	$stmt->bind_param('sss', $_POST['username'], $password, $_POST['email']);
	$stmt->execute();
	echo 'You have successfully registered, you can now login!';
} else {
	// Something is wrong with the sql statement, check to make sure accounts table exists with all 3 fields.
	echo 'Could not prepare statement!';
}
这将在我们的帐户表中插入一个新帐户。
请记住,在我们的登录系统中,我们使用了密码验证功能?正如您在上面的代码中看到的,我们使用密码哈希函数,这将使用单向算法加密用户的密码 - 如果您的数据库因某种原因变得易受攻击,这将防止您的用户密码被暴露。
这基本上就是我们在我们的网站上注册帐户所需要做的一切。
5. 验证表单数据
我们已经在我们的 PHP 脚本中进行了基本验证,但是如果我们想检查电子邮件是否真的是电子邮件,或者用户名和密码是否应该是一定数量的字符长,你可以使用下面的代码来做到这一点,将它们添加到这register.php以下行之前的文件:
if ($stmt = $con->prepare('SELECT id, password FROM accounts WHERE username = ?')) {
电子邮件验证
if (!filter_var($_POST['email'], FILTER_VALIDATE_EMAIL)) {
	exit('Email is not valid!');
}
无效字符验证
if (preg_match('/^[a-zA-Z0-9]+$/', $_POST['username']) == 0) {
    exit('Username is not valid!');
}
字符长度检查
if (strlen($_POST['password']) > 20 || strlen($_POST['password']) < 5) {
	exit('Password must be between 5 and 20 characters long!');
}
您应该始终实现自己的验证,这些只是基本示例。
6.实现账户激活
用户注册后,账户激活系统将向用户发送一封包含激活链接的电子邮件。
我们需要做的第一件事是进入phpMyAdmin并选择我们的数据库,在我们的例子中这将是phplogin,您可以添加列激活码到accounts表或者执行下面的SQL语句。
ALTER TABLE accounts ADD activation_code varchar(50) DEFAULT ''现在我们需要编辑我们的register.php文件,搜索这行代码:
if ($stmt = $con->prepare('INSERT INTO accounts (username, password, email) VALUES (?, ?, ?)')) {
用。。。来代替:
if ($stmt = $con->prepare('INSERT INTO accounts (username, password, email, activation_code) VALUES (?, ?, ?, ?)')) {搜索:
$stmt->bind_param('sss', $_POST['username'], $password, $_POST['email']);
用。。。来代替:
$uniqid = uniqid();
$stmt->bind_param('ssss', $_POST['username'], $password, $_POST['email'], $uniqid);
这$uniqud变量将生成一个唯一的 ID,我们将用于我们的激活码,这将被发送到用户的电子邮件地址。
搜索:
echo 'You have successfully registered, you can now login!';
用。。。来代替:
$from    = 'noreply@yourdomain.com';
$subject = 'Account Activation Required';
$headers = 'From: ' . $from . "\r\n" . 'Reply-To: ' . $from . "\r\n" . 'X-Mailer: PHP/' . phpversion() . "\r\n" . 'MIME-Version: 1.0' . "\r\n" . 'Content-Type: text/html; charset=UTF-8' . "\r\n";
// Update the activation variable below
$activate_link = 'http://yourdomain.com/phplogin/activate.php?email=' . $_POST['email'] . '&code=' . $uniqid;
$message = '<p>Please click the following link to activate your account: <a href="' . $activate_link . '">' . $activate_link . '</a></p>';
mail($_POST['email'], $subject, $message, $headers);
echo 'Please check your email to activate your account!';帐户注册后,用户需要使用发送到其电子邮件地址的激活链接来激活其帐户。您需要同时更新$来自和$activate_link变量。
现在我们可以继续创建激活文件。激活文件将处理 GET 参数并验证电子邮件和代码。如果代码有效,用户的帐户将被激活。
编辑/创建activate.php文件并添加以下代码:
<?php
// Change this to your connection info.
$DATABASE_HOST = 'localhost';
$DATABASE_USER = 'root';
$DATABASE_PASS = '';
$DATABASE_NAME = 'phplogin';
// Try and connect using the info above.
$con = mysqli_connect($DATABASE_HOST, $DATABASE_USER, $DATABASE_PASS, $DATABASE_NAME);
if (mysqli_connect_errno()) {
	// If there is an error with the connection, stop the script and display the error.
	exit('Failed to connect to MySQL: ' . mysqli_connect_error());
}
// First we check if the email and code exists...
if (isset($_GET['email'], $_GET['code'])) {
	if ($stmt = $con->prepare('SELECT * FROM accounts WHERE email = ? AND activation_code = ?')) {
		$stmt->bind_param('ss', $_GET['email'], $_GET['code']);
		$stmt->execute();
		// Store the result so we can check if the account exists in the database.
		$stmt->store_result();
		if ($stmt->num_rows > 0) {
			// Account exists with the requested email and code.
			if ($stmt = $con->prepare('UPDATE accounts SET activation_code = ? WHERE email = ? AND activation_code = ?')) {
				// Set the new activation code to 'activated', this is how we can check if the user has activated their account.
				$newcode = 'activated';
				$stmt->bind_param('sss', $newcode, $_GET['email'], $_GET['code']);
				$stmt->execute();
				echo 'Your account is now activated! You can now <a href="index.html">login</a>!';
			}
		} else {
			echo 'The account is already activated or doesn\'t exist!';
		}
	}
}
?>如果代码反映了数据库中与用户帐户相关联的代码,则激活码列将更新为活性.
如果我们想检查用户是否激活了他们的帐户,我们可以在我们想要限制未激活用户的页面中添加以下代码:
if ($account['activation_code'] == 'activated') {
	// account is activated
	// Display home page etc
} else {
	// account is not activated
	// redirect user or display an error
}
要使上述代码正常工作,您需要连接到 MySQL 数据库并选择用户帐户。
另外,请注意 PHP 邮件功能只有在您的计算机或服务器支持时才能使用。如果它不发送电子邮件,请检查您的配置或安装邮件服务器,例如Postfix。
结论
恭喜!您已经使用 PHP 和 MySQL 成功创建了登录系统(如果您按照前面的教程进行操作)和注册系统。您可以自由使用本教程中的代码并将其改编为您自己的项目。
请记住,这只是您应该使用的安全基础。考虑更改或实施您自己的验证,并实施您自己的功能。
如果您想了解本教程系列的更多内容,请随时发表评论并向我们建议我们接下来可以创建的内容。
享受编码!


 6514
6514


 被折叠的 条评论
为什么被折叠?
被折叠的 条评论
为什么被折叠?
 到【灌水乐园】发言


