


pugixml的基本操作
汇总一下pugixml的基本操作
官网的教程示例大多是对属性的操作,而对元素(Element)的操作则较少
原文件
testRead.xml 文件的内容如下:
<?xml version="1.0" encoding='utf-8'?>
<project>
    <name>
        Test
    </name>
    <uuid>
        ABCDEFG
    </uuid>
    <editRecord>
        2022-7-19
    </editRecord>
    <forDel>
        nothing
    </forDel>
</project>
代码
经过下列代码:
#include <iostream>
#include <chrono>
#include <sstream>
#include <iomanip>

#include <QString>
#include <QDebug>
#include "pugixml.hpp"

using namespace std;

int main(int argc, char *argv[])
{
    pugi::xml_document doc;
    pugi::xml_parse_result result = doc.load_file("testRead.xml",pugi::parse_default,pugi::encoding_utf8);
    if(!result){
        std::cout<<"Error: "<<result.description()<<std::endl;
    }

    // 查询
    const char * projectName = doc.child("project").child("name").child_value();
    cout<<projectName<<endl;

    // 增加,或追加
    // 获取当前日期
    pugi::xml_node edit = doc.child("project").child("editRecord");
    auto t = std::chrono::system_clock::to_time_t(std::chrono::system_clock::now());
    std::stringstream ss;
    ss << std::put_time(std::localtime(&t), "%Y-%m-%d");
    std::string str_time = ss.str();
    // 追加到 editRecord项
    edit.append_child(pugi::node_pcdata).set_value(str_time.c_str());


    // 修改
    doc.child("project").child("uuid").text().set("XYZWS");

    // 删除
    pugi::xml_node p = doc.child("project");
    //p.remove_child(p.child("forDel")); 具有同样的效果
    p.remove_child(p.last_child());

    // 增加属性
    p.append_attribute("modified time") = str_time.c_str();

    doc.save_file("modified.xml");
    return 0;
}
修改后的结果
结果 modified.xml:
<?xml version="1.0"?>
<project modified time="2022-07-20">
	<name>
        Test
    </name>
	<uuid>XYZWS</uuid>
	<editRecord>
        2022-7-19
    2022-07-20</editRecord>
</project>
需要注意的点
有几个需要注意的点:
- 原文件中xml有缩进,因此
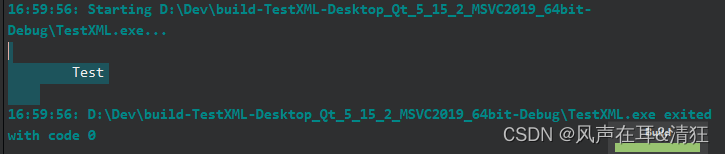
name的值包含前后的空格和换行。如下图,name的值占据了三行
- 增加和修改不同,增加是在原来的基础上追加,正如函数名append()所表示的那样。修改则相当于清空再写入。
参考文章:
https://stackoverflow.com/questions/30789222/how-to-replace-a-nodes-pcdata-or-text-using-pugixml


 3799
3799


 被折叠的 条评论
为什么被折叠?
被折叠的 条评论
为什么被折叠?
 到【灌水乐园】发言


