


最近根据设计图写listView 的时候,listView个item 之间存在间距,左右上下都有,一开始的想法是在item 的根布局 设置margin 属性,但是在listView 中margin 无法生效,所以在此研究下失效的原因。而解决办法就是在加一层布局,作为根布局 设置padding ,或者 新增根布局的下一次布局设置margin.
下面直接看效果图:

1.解决办法,我这里使用的是再嵌套一层布局加padding的方案
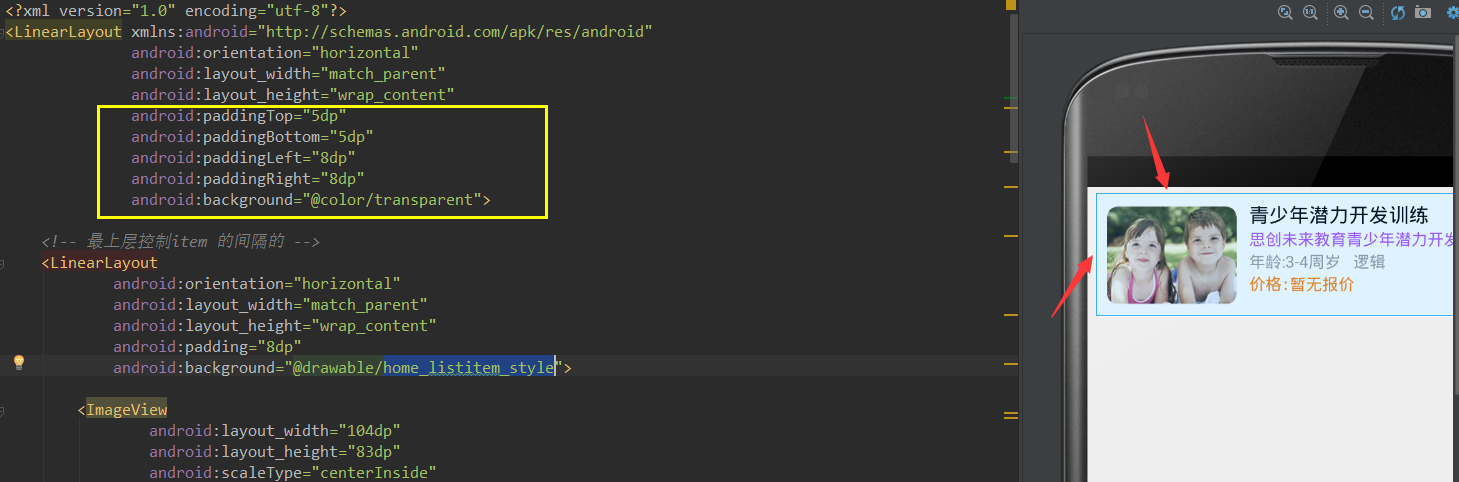
<LinearLayout xmlns:android="http://schemas.android.com/apk/res/android"
              android:orientation="horizontal"
              android:layout_width="match_parent"
              android:layout_height="wrap_content"
              android:paddingTop="5dp"
              android:paddingBottom="5dp"
              android:paddingLeft="8dp"
              android:paddingRight="8dp"
              android:background="@color/transparent">

    <!-- 最上层控制item 的间隔的 -->
    <LinearLayout
            android:orientation="horizontal"
            android:layout_width="match_parent"
            android:layout_height="wrap_content"
            android:padding="8dp"
            android:background="@drawable/home_listitem_style">
当然你也可以选择 在再嵌套一层布局的下面的一层布局,使用margin 一样的效果,如果没有左右的间距只有上下的间距,还有一种方案就是 设置dividerHeight 的高度,颜色为透明就可。
2.着重研究的是margin失效的原因
这是我看到的一段解释,
The fact is that, the margin of LinearLayout (child) asks its parent layout (container) to give child layout a margin of x value.So if the parent layouts’ LayoutParams support the margins then that margin is honored and applied.
ListView uses AbsListView.LayoutParams by default, which doesn’t include any margin support, just the height and width, thats why, it simply ignores the params value for margins.
- 2.1 ListView extends AbsListView 查看 AbsListView 如何加入布局参数的

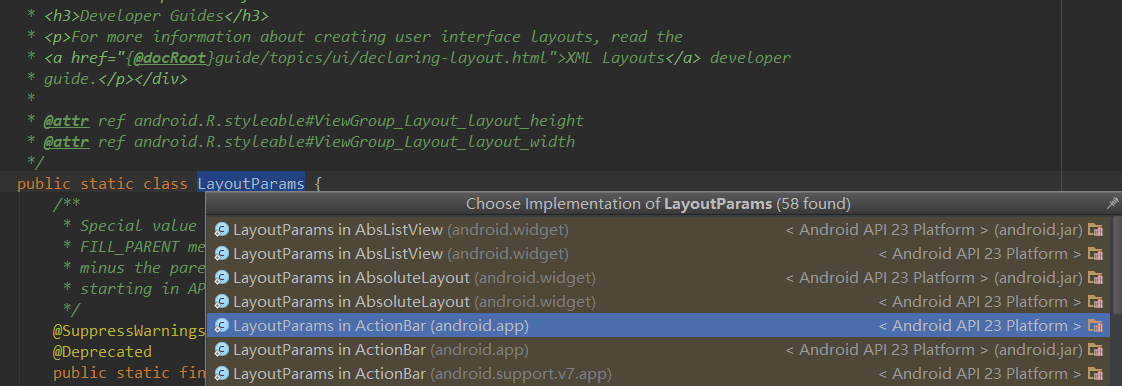
直接使用的是ViewGroup的 layoutParams, 没有包含 margin 的信息,在viewGroup 源码中发现
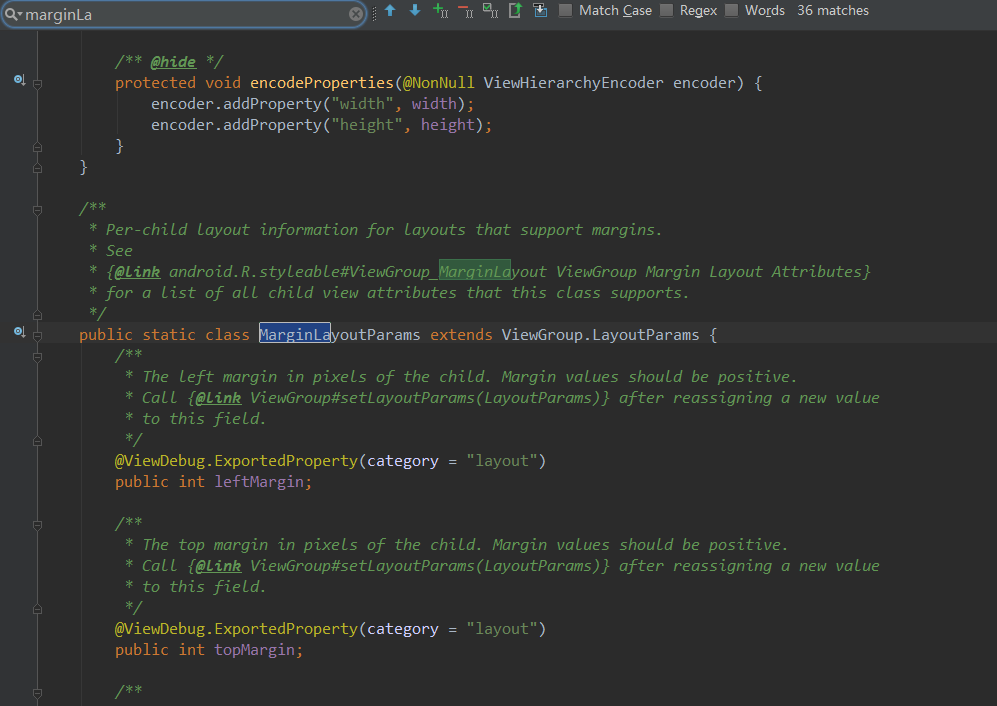
有个叫 MarginLayoutParams 的类,继续查看他的实现类 ,其中并没有发现AbsListView,
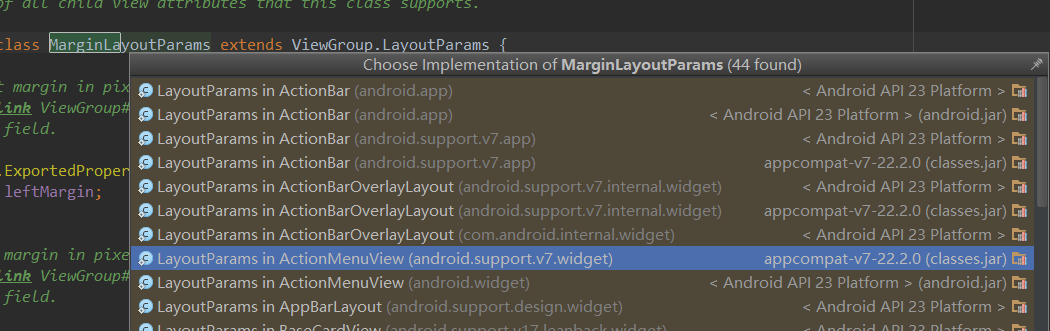
而在 ViewGroup layoutParams 中的实现类中却发现了 AbsListView
由此说明 listView 根布局中 设置margin 直接被忽略了,因为没有实现 marginLayoutParams ,虽然子类LinearLayout 里面设置margin 是有效的,但是其父类 AbsListView layoutparams 并没有实现 marginLayoutParams,没有提供相关的margin 的值,所以子类中也获取不到对应的值,尽管已经设置了。
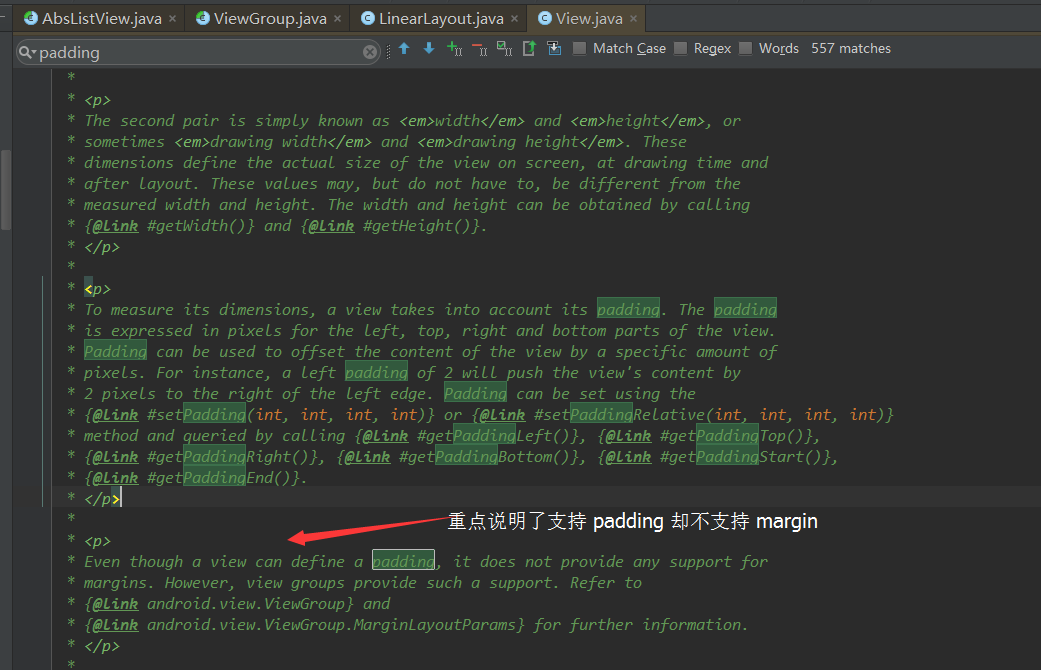
3.为什么margin 失效,padding 却有效呢?
我个人的理解是:padding 是内边距,不需要父类,自己就是父类,就可以提供子类具体的距离和值等,而margin 是外边距,需要父类提供具体的距离,当父类不支持就无法获取到对应的值。
LinearLayout extends ViewGroup extends View
view 本身就可以提供padding 的属性,而margin 却需要父类的支持。


 1864
1864


 被折叠的 条评论
为什么被折叠?
被折叠的 条评论
为什么被折叠?
 到【灌水乐园】发言


