


(四)Spring教程——控制反转或依赖注入与Java的反射技术
目录
前言
在Spring框架中,Bean的实例化和组装都是IoC容器配置元数据完成的。Spring框架提供的容器主要是基于BeanFactory和ApplicationContext两个接口,一种是实现BeanFactory接口的简单容器,另一种是实现ApplicationContext接口的高级容器。
BeanFactory是比较传统的IoC实现方式,容器内的对象主动使用容器所提供的API来查找自己所依赖的组件。这种方式可以降低对象间的耦合度,同时也增加了对象对容器API的依赖。
Spring框架可以通过名称、类型和注解这3种方式在BeanFactory接口种进行依赖查找。
示例
1.添加springframework的引用
在pom.xml中添加springframework的引用
<!-- https://mvnrepository.com/artifact/org.springframework/spring-context -->
<dependency>
<groupId>org.springframework</groupId>
<artifactId>spring-context</artifactId>
<version>4.0.0.RELEASE</version>
</dependency>
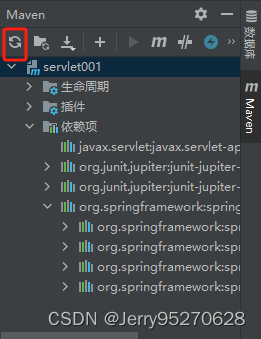
点击右侧的刷新按钮,下载添加的依赖
2.添加配置文件
在main/resouce文件夹中添加test.xml文件,文件的内容如下
<?xml version="1.0" encoding="UTF-8"?>

<beans xmlns="http://www.springframework.org/schema/beans" xmlns:xsi="http://www.w3.org/2001/XMLSchema-instance" xsi:schemaLocation="http://www.springframework.org/schema/beans https://www.springframework.org/schema/beans/spring-beans.xsd">

<bean id="test" class="com.example.servlet001.bean.User">

        <property name="userId" value="1" />

        <property name="userName" value="用户1" />

</bean>

</beans>
3.添加User类
在com.example.servlet001包中添加名字为bean的软件包,然后在该包中添加User类,User类的内容如下
package com.example.servlet001.bean;


public class User {

    public String getUserName() {

        return userName;

    }


    public void setUserName(String userName) {

        this.userName = userName;

    }


    public String getUserId() {

        return userId;

    }


    public void setUserId(String userId) {

        this.userId = userId;

    }


    String userName;

    String userId;


    @Override

    public String toString() {

        return "User{" +

                "userName='" + userName + '\'' +

                ", userId='" + userId + '\'' +

                '}';

    }

}
该类提供了获取userName和设置userName的方法以及获取userId和设置userId的方法,并重写了该类的toString方法。
4.添加测试代码
添加Demo1.java类测试使用配置的加载User类
package com.example.servlet001;


import com.example.servlet001.bean.User;

import org.springframework.beans.factory.BeanFactory;

import org.springframework.beans.factory.xml.XmlBeanFactory;

import org.springframework.core.io.ClassPathResource;


public class Demo1 {

    public static void main(String[] args) {

        BeanFactory factory=new XmlBeanFactory(new ClassPathResource("test.xml"));

        User user=(User)factory.getBean("test");

        System.out.println(user);

    }

}
顾名思义,XmlBeanFactory就是能够读取并解析xml资源,解析出各种Bean后存入自身。
然后使用id为test来获取User这个对象。
运行该测试类后的输出结果为
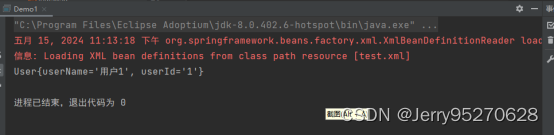


 816
816


 被折叠的 条评论
为什么被折叠?
被折叠的 条评论
为什么被折叠?
 到【灌水乐园】发言


