


(四)Spring教程——控制反转或依赖注入与Java的反射技术
目录
1.前言
WebApplicationContext是专门为Web应用准备的,它允许从相对于Web根目录的路径中装载配置文件完成初始化工作。从WebApplicationContext中可以获得ServletContext的引用,整个Web应用上下文对象将作为属性放置到ServletContext中,以便Web应用环境可以访问Spring应用上下文。Spring专门为此提供了一个工具类WebApplicationContextUtils,通过该类的getWebApplicationContext(ServletContext sc)方法,可以从ServletContext中获取WebApplicationContext实例。
2.增加依赖
由于后面需要用到org.framework.web中内容,需要在项目中引入spring-web的依赖,在pom.xml中增加配置spring-web的依赖
        <dependency>

            <groupId>org.springframework</groupId>

            <artifactId>spring-web</artifactId>

            <version>4.2.1.RELEASE</version>

        </dependency>
点击右侧的刷新按钮,下载添加的依赖
3.添加Car类
package com.example.reflect;
public class Car {
    private String brand;
    private String color;
    private int maxSpeed;
    public Car(){System.out.println("init car!!");}
    public Car(String brand,String color,int maxSpeed){
        this.brand = brand;
        this.color = color;
        this.maxSpeed = maxSpeed;
    }
    public void introduce() {
        System.out.println("brand:"+brand+";color:"+color+";maxSpeed:"+maxSpeed);
    }
    public String getBrand() {
        return brand;
    }
    public void setBrand(String brand) {
        this.brand = brand;
    }
    public String getColor() {
        return color;
    }
    public void setColor(String color) {
        this.color = color;
    }
    public int getMaxSpeed() {
        return maxSpeed;
    }
    public void setMaxSpeed(int maxSpeed) {
        this.maxSpeed = maxSpeed;
    }
}
该类中有两个Car的构造函数,一个是不带参数的构造函数,一个是带参数的构造函数。然后实现了一个introduce方法,其它的是属性设置和获取方法。
4.增加Bean配置文件
在Web-Info文件夹中添加beans.xml文件,文件的内容如下
<?xml version="1.0" encoding="UTF-8" ?>

<beans xmlns="http://www.springframework.org/schema/beans"

       xmlns:xsi="http://www.w3.org/2001/XMLSchema-instance" xmlns:p="http://www.springframework.org/schema/p"

       xsi:schemaLocation="http://www.springframework.org/schema/beans

       http://www.springframework.org/schema/beans/spring-beans-4.0.xsd">

    <bean id="car" class="com.example.reflect.Car"

          p:brand="红旗CA72"

          p:color="黑色"

          p:maxSpeed="200"

            />

</beans>
该配置文件配置Bean的id为car,对应的类是Car,然后设置了三个属性对应的值,分别设置brand属性的值为“红旗CA72”,color属性的值为“黑色”,maxSpeed属性的值为200。
5.修改web.xml
修改Web-INFO文件夹下的web.xml文件
    <!--①指定配置文件-->

    <context-param>

        <param-name>contextConfigLocation</param-name>

        <param-value>/WEB-INF/beans.xml</param-value>

    </context-param>

    <!--②声明Web容器监听器-->

    <listener>

        <listener-class>org.springframework.web.context.ContextLoaderListener</listener-class>

</listener>
Spring分别提供了用于启动WebApplicationContext的Servlet和Web容器监听器:
org.springframework.web.context.ContextLoaderServlet
org.springframework.web.context.ContextLoaderListener
二者内部都实现了启动WebApplicationContext实例的逻辑,只要根据Web容器的具体情况选择二者之一,并在web.xml中完成配置即可。
ContextLloaderListener通过Web容器上下文参数contextConfigLocation获取Spring配置文件的位置。用户可以指定多个配置文件,用逗号、空格或冒号分割均可。对于未带资源类型前缀的配置文件路径,WebApplicationContext默认这些路径相对于Web的部署根路径。
6.具体实现
<%@ page import="org.springframework.web.context.WebApplicationContext" %>

<%@ page import="org.springframework.web.context.support.WebApplicationContextUtils" %>

<%@ page import="com.example.reflect.Car" %>

<%@ page contentType="text/html; charset=UTF-8" pageEncoding="UTF-8" %>

<!DOCTYPE html>

<html>

<head>

    <title></title>

</head>

<body>

<%

    //获取ServletContext

    ServletContext servletContext = request.getServletContext();

    WebApplicationContext wac = WebApplicationContextUtils.getWebApplicationContext(servletContext);

    Car car = wac.getBean(Car.class);

    System.out.println("品牌:" + car.getBrand());

    System.out.println("最高速度:" + car.getMaxSpeed());

%>

</body>

</html>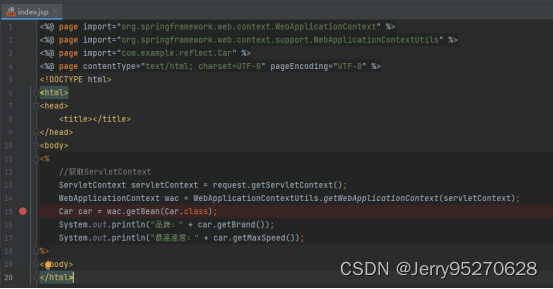
该代码首先从request对象中获取Servlet上下文,然后根据Servlet上下文生成WebApplicationContext,然后从WebApplicationContext获取Car对象。
启动该应用后,在浏览器地址栏中输入:index.jsp对应的地址


 816
816

 被折叠的 条评论
为什么被折叠?
被折叠的 条评论
为什么被折叠?
 到【灌水乐园】发言


