


DI的定义
:给配置文件中的bean的属性赋值。
方式:
一种是利用其属性的setter方法,另外一种是利用构造函数
我们先来讨论第一种:
利用属性的setter方法赋值:
首先,先创建好类,并且配置到配置文件中:
public class Person implements Serializable {
    //基本类型
    private Long pid;
    //String
    private String pname;
    //引用类型
    private Student student;
    //集合
    private List list;
    private Set set;
    private Map map;

    private Properties properties;
    //这里省略getter&setter方法

    private
    }


public class Student implements Serializable {

}
配置文件的配置如下:
    <bean class="cn.anlse.di.Person" id="person">
        <!--
            property:描述属性
            name:属性名
            ref:当我们用的是引用类型,就用ref
            value:当我们用的是string类型,就用value
            list:当我们设置的值为list集合的话,用list;set/map同理
         -->
        <property name="list">
            <list>
                <value>list1</value>
                <ref bean="student"/>
                <value>list3</value>
            </list>
        </property>
        <!--
            map有点特殊,因为便利map的时候,里面都是entry,所以在设置map的值的时候,要先设置好entry
         -->
        <property name="map">
            <map>
                <entry key="m1">
                    <value>map1</value>
                </entry>
                <entry key="m2">
                    <ref bean="student"/>
                </entry>
            </map>
        </property>
        <property name="pid" value="1"></property>
        <property name="pname" value="ansel"></property>
        <property name="set">
            <set>
                <value>set1</value>
                <ref bean="student"/>
            </set>
        </property>
        <property name="student" ref="student"></property>

        <property name="properties">
            <props>
                <prop key="prop1">
                    p1
                </prop>
            </props>
        </property>
    </bean>
    <bean class="cn.anlse.di.Student" id="student"></bean>
然后我们创建一个测试类,来获取里面的内容:
public class testDI {
    @Test
    public void test(){
        //启动spring容器后,获取我们刚刚利用setter设置的值
        ApplicationContext applicationContext=new ClassPathXmlApplicationContext("applicationContext.xml");
        Person person=(Person) applicationContext.getBean("person");
        System.out.println(person.getPname());
        System.out.println(person.getList().size());
        System.out.println(person.getPid());
        System.out.println(person.getSet().size());
        System.out.println(person.getStudent());
        System.out.println(person.getProperties());
        }
}
输出结果:
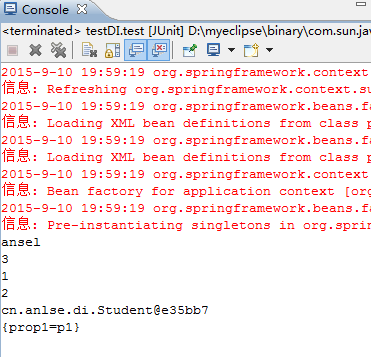
如上图所示,但是这种在配置文件中直接赋值的方法,对于某些固定的配置文件信息比较有用。比如存放配置文件的位置及名字
利用构造函数给bean的属性赋值
首先,我们新建一个包,里面放着Person和Student,
public class Person implements Serializable {
    private Long pid;
    //String
    private String pname;
    //引用类型
    private Student student;
    //集合
    private List list;
    private Set set;
    private Map map;
    //键值
    private Properties properties;

    //构造函数1
    public Person(Long pid, Student student) {
        super();
        this.pid = pid;
        this.student = student;
    }
    //构造函数2
    public Person(String pname, Student student) {
        this.pname = pname;
        this.student = student;
    }
    //构造函数3
    public Person() {

    }
    //构造函数4
    public Person(Long pid, String pname, Student student, List list, Set set,
            Map map, Properties properties) {
        this.pid = pid;
        this.pname = pname;
        this.student = student;
        this.list = list;
        this.set = set;
        this.map = map;
        this.properties = properties;
    }
    //省略getter&setter方法
}
student:
public class Student implements Serializable {
    public void read(){
        System.out.println("student");
    }
}
配置文件:
<bean class="cn.ansel.di.constructor.Person" id="person_con">
        <!--
            constructor-argL:用来指定该bean对应的唯一构造函数的参数,因为有几个参数,就对应着有几个参数的构造函数
                            没有这个属性的话,默认调用空参的构造函数
            index:表示构造函数的位置,从0开始计算
            type:表示该位置构造函数的类型,这里用的都是全名。比如拿index为0的type来说,如果没有写type的取值,我们直接调用测试类的话
                  返回的pid为null。所以也要把type写上
            ref:引用对象的名字,
         -->
        <constructor-arg index="0" type="java.lang.Long" value="1"></constructor-arg>
        <constructor-arg index="1" type="cn.ansel.di.constructor.Student" ref="student_con"></constructor-arg>
    </bean>
    <bean class="cn.ansel.di.constructor.Student" id="student_con"></bean>
测试类:
public class testDiConstructor {
    /**
     * 在这里我们就用构造函数1来做例子。
     */
    @Test
    public void test(){
        //启动spring容器
        ApplicationContext applicationContext=new ClassPathXmlApplicationContext("applicationContext.xml");
        //得到person这个对象
        Person person=(Person) applicationContext.getBean("person_con");
        //得到我们刚刚赋的值
        System.out.println(person.getPid());
        person.getStudent().read();
    }
}
运行结果:

总结:
由上面的测试我们可以看到spring对于bean属性赋值的两种方式,可是感觉好像也没什么,我们直接在客户端调用也可以阿,为什么偏偏要写到配置文件中,有待进一步研究。


 5273
5273


 被折叠的 条评论
为什么被折叠?
被折叠的 条评论
为什么被折叠?
 到【灌水乐园】发言


