


最近在写一个交流资讯类的小程序想着记录一下
项目框架使用Vue3+Vite+TS+uniapp,开发工具使用的vscode,别问为什么不在Hbuilder中开发?因为想用vscode开发想用ts开发,当然组件也是可以再Hbuild中使用,根据自己需求去改动即可!
先看效果图:
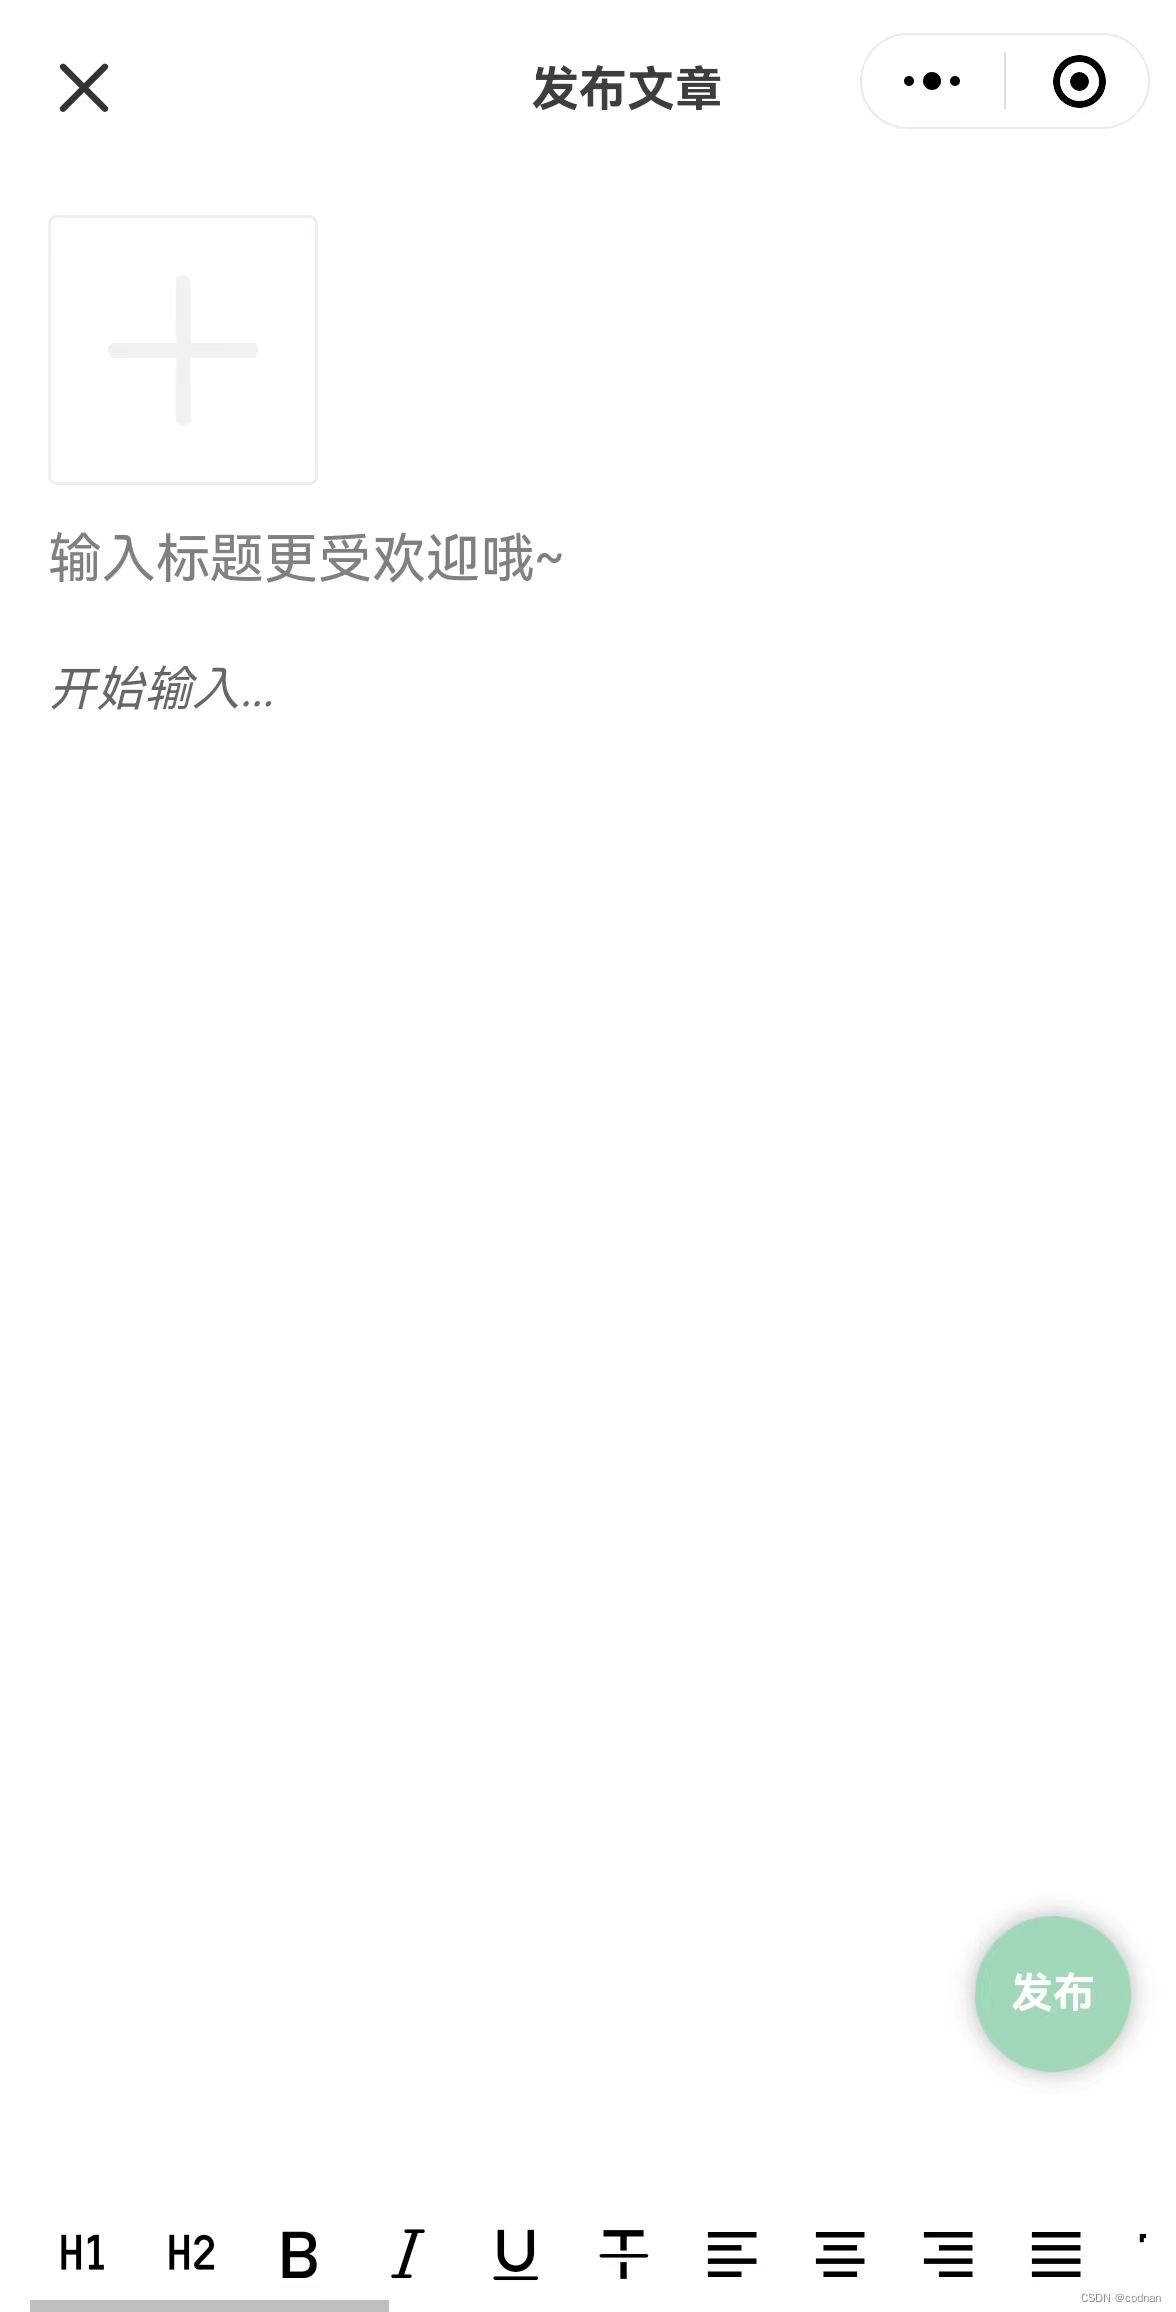
图片上传用的uni-app的上传组件uni-file-picker,中间内容区域用的自带的editor富文本编辑器,上传图片什么的都没有什么问题~
上代码:
发布文章 releaseArticle.vue
// releaseArticle.vue
<template>
  <view class="ashome-article">
    <!-- 自定义导航栏 page.json中 设置 "navigationStyle": "custom"-->
    <view class="relase-top" :style="{ marginTop: safeAreaInsets!.top + 'px' }">
      <uni-icons type="closeempty" size="26" @click="closeExchange"></uni-icons>
      <view class="titles">发布文章</view>
      <text></text>
    </view>
    <!-- 发布文章 -->
    <view class="release-article">
      <view class="article-img">
        <uni-file-picker :limit="9" mode="grid" :image-styles="imageStyles" file-mediatype="image" :auto-upload="false"
          @select="selectImage" ref="filePickerRef" v-model="imageList" @delete="deletea"></uni-file-picker>
      </view>
      <!-- 输入标题 -->
      <view class="article-title">
        <input class="title" type="text" placeholder="输入标题更受欢迎哦~" :maxlength="30" v-model="articleTitle"
          @input="inputTitle(1)" />
      </view>
      <!-- 输入文章内容 -->
      <view class="article-content">
        <!-- 富文本 -->
        <richTextEditor v-model:value="articleContent" />
      </view>
    </view>
    <!-- 发布按钮 -->
    <view class="release-btn" hover-class="button-hover" @tap="releaseExchange">
      发布
    </view>
  </view>
  <uni-popup ref="alertDialogRef" type="dialog">
    <uni-popup-dialog type="info" cancelText="取消" confirmText="确认" title="提示" content="有内容未发布,是否确认退出?"
      @confirm="dialogConfirm"></uni-popup-dialog>
  </uni-popup>
</template>

<script lang="ts" setup>
import { ref } from 'vue'
import type { AddArticleParams } from '@/types/article'
import { onLoad } from '@dcloudio/uni-app'
import { uploadImages } from '@/utils/public'
import richTextEditor from "@/components/Editor/Editor.vue"
export type imageType = {
  url: string
  // extname: string
  name: string
}

// 获取屏幕边界到安全区域距离
const { safeAreaInsets } = uni.getSystemInfoSync()


// 弹出层组件
const alertDialogRef = ref()

// 发布文章参数
const articleParams = ref({
} as AddArticleParams)

// 标题
const articleTitle = ref<string>('')

// 内容
const articleContent = ref<string>('')

// 上传图片组件
const filePickerRef = ref<UniHelper.UniFilePicker>()

// 上传完毕后的图片列表
const imageList = ref<imageType[]>([])

// 上传图标样式
const imageStyles = ref({
  height: 100, // 边框高度
  width: 100, // 边框宽度
})

// 加载
onLoad((option: any) => {
})


const inputTitle = (type: number) => {
  if (type === 1) {
    // 校验输入的标题,如果字数超过30个,则不能继续输入,然后提示最多只能输入30个字
    if (articleTitle.value.length > 30) {
      uni.showToast({
        title: '最多可输入30个字',
        icon: 'none',
      })
      articleTitle.value = articleTitle.value.substring(0, 30)
    }
  } else {
    if (articleContent.value.length > 1000) {
      uni.showToast({
        title: '最多可输入1000个字',
        icon: 'none',
      })
      articleContent.value = articleContent.value.substring(0, 1000)
    }
  }
}

// 关闭发布文章页面
const closeExchange = () => {
  alertDialogRef.value && alertDialogRef.value.open()
}
// 确认关闭
const dialogConfirm = () => {
  uni.navigateBack({
    delta: 1,
  })
}

// 立即发表
const releaseExchange = async () => {
  // 标题和内容必填
  if (!articleTitle.value || !articleContent.value) {
    uni.showToast({
      title: '标题和内容必填!',
      icon: 'none',
    })
    return
  }

  uni.showToast({
    title: '发布成功',
    icon: 'success',
  })

  setTimeout(() => {
    uni.navigateBack()
  }, 500)
}

// 选择完图片
const selectImage = (e: UniHelper.UniFilePickerOnSelectEvent) => {

  const tempFiles = e.tempFiles
  // 处理每张选中的图片
  tempFiles.forEach(async (tempFile) => {
    await uploadImages(tempFile, imageList.value)
  })
}

// 删除
const deletea = (e: UniHelper.UniFilePickerOnDeleteEvent) => {
  console.log('删除图片', e)
}
</script>

<style scoped lang="scss">
.ashome-article {
  height: 100%;
  background-color: #fff;
  display: flex;
  flex-direction: column;

  .relase-top {
    display: flex;
    justify-content: space-between;
    align-items: center;
    padding: 0 30rpx;
    height: 100rpx;
    background-color: #fff;
    // border-bottom: 1px solid #f5f5f5;
    color: #3d3d3d;
    font-size: 32rpx;

    .titles {
      font-weight: bold;
    }
  }

  .release-article {
    flex: 1;
    padding: 32rpx;

    .article-img {
      margin-bottom: 20rpx;

      // /deep/ .file-picker__box {}
      :deep(.uni-file-picker) {
        .uni-file-picker__container {
          overflow-x: scroll;
          white-space: nowrap;
          display: block !important;

          .file-picker__box {
            display: inline-block !important;

            .file-picker__box-content {
              .file-picker__progress {
                display: none;
              }
            }
          }
        }
      }
    }

    .article-title {
      margin-bottom: 20rpx;

      .title {
        display: block;
        // height: 46rpx;
        // font-weight: bold;
        font-size: 36rpx;
      }
    }

    .article-content {
      height: 62vh;
      // overflow: auto;
      width: 100%;

      .content {
        // height: calc(100vh - 500rpx);
        height: 100%;
        width: 100%;
        display: block;
        font-size: 28rpx;
      }
    }
  }

  // 发布按钮 固定定到底部
  .release-btn {
    position: fixed;
    bottom: 10%;
    right: 30rpx;
    height: 100rpx;
    width: 100rpx;
    display: flex;
    z-index: 99;
    border-radius: 50%;
    background-color: #a1d8ba;
    font-size: 28rpx;
    font-weight: bold;
    align-items: center;
    justify-content: center;
    color: #fff;
    box-shadow: 0px 0px 8px 0px rgba(0, 0, 0, 0.3) !important;

  }

  .button-hover {
    background-color: #97cbb0;
  }
}
</style>
封装的富文本组件 richTextEditor
// Editor.vue
<template>
    <view class="container">
        <view class="editor-wrapper">
            <editor id="editor" ref="editorRef" class="ql-container" :placeholder="placeholder"
                @statuschange="onStatusChange" :show-img-resize="true" @ready="onEditorReady" @input="getCtx"></editor>
        </view>
        <view class="wrapper">
            <view class="toolbar" @tap="formatToolbar">
                <view :class="formats.header === 1 ? 'ql-active' : ''" class="iconfont icon-format-header-1"
                    data-name="header" :data-value="1"></view>
                <view :class="formats.header === 2 ? 'ql-active' : ''" class="iconfont icon-format-header-2"
                    data-name="header" :data-value="2"></view>
                <view :class="formats.bold ? 'ql-active' : ''" class="iconfont icon-zitijiacu" data-name="bold"></view>
                <view :class="formats.italic ? 'ql-active' : ''" class="iconfont icon-zitixieti" data-name="italic">
                </view>
                <view :class="formats.underline ? 'ql-active' : ''" class="iconfont icon-zitixiahuaxian"
                    data-name="underline"></view>
                <view :class="formats.strike ? 'ql-active' : ''" class="iconfont icon-zitishanchuxian" data-name="strike">
                </view>
                <view :class="formats.align === 'left' ? 'ql-active' : ''" class="iconfont icon-zuoduiqi" data-name="align"
                    data-value="left"></view>
                <view :class="formats.align === 'center' ? 'ql-active' : ''" class="iconfont icon-juzhongduiqi"
                    data-name="align" data-value="center"></view>
                <view :class="formats.align === 'right' ? 'ql-active' : ''" class="iconfont icon-youduiqi" data-name="align"
                    data-value="right"></view>
                <view :class="formats.align === 'justify' ? 'ql-active' : ''" class="iconfont icon-zuoyouduiqi"
                    data-name="align" data-value="justify"></view>
                <view :class="formats.lineHeight ? 'ql-active' : ''" class="iconfont icon-line-height"
                    data-name="lineHeight" data-value="2"></view>
                <view :class="formats.letterSpacing ? 'ql-active' : ''" class="iconfont icon-Character-Spacing"
                    data-name="letterSpacing" data-value="2em"></view>
                <view :class="formats.marginTop ? 'ql-active' : ''" class="iconfont icon-722bianjiqi_duanqianju"
                    data-name="marginTop" data-value="20px"></view>
                <view :class="formats.previewarginBottom ? 'ql-active' : ''" class="iconfont icon-723bianjiqi_duanhouju"
                    data-name="marginBottom" data-value="20px"></view>
                <!-- <view class="iconfont icon-clearedformat" @tap="removeFormat"></view> -->
                <view :class="formats.fontFamily ? 'ql-active' : ''" class="iconfont icon-font" data-name="fontFamily"
                    data-value="Pacifico"></view>
                <view :class="formats.fontSize === '24px' ? 'ql-active' : ''" class="iconfont icon-fontsize"
                    data-name="fontSize" data-value="24px"></view>
                <view :class="formats.color === '#0000ff' ? 'ql-active' : ''" class="iconfont icon-text_color"
                    data-name="color" data-value="#0000ff"></view>
                <view :class="formats.backgroundColor === '#00ff00' ? 'ql-active' : ''" class="iconfont icon-fontbgcolor"
                    data-name="backgroundColor" data-value="#00ff00"></view>
                <view class="iconfont icon-date" @tap="insertDate"></view>
                <view class="iconfont icon--checklist" data-name="list" data-value="check"></view>
                <view :class="formats.list === 'ordered' ? 'ql-active' : ''" class="iconfont icon-youxupailie"
                    data-name="list" data-value="ordered"></view>
                <view :class="formats.list === 'bullet' ? 'ql-active' : ''" class="iconfont icon-wuxupailie"
                    data-name="list" data-value="bullet"></view>
                <view class="iconfont icon-undo" @tap="undo"></view>
                <view class="iconfont icon-redo" @tap="redo"></view>

                <view class="iconfont icon-outdent" data-name="indent" data-value="-1"></view>
                <view class="iconfont icon-indent" data-name="indent" data-value="+1"></view>
                <view class="iconfont icon-fengexian" @tap="insertDivider"></view>
                <view class="iconfont icon-charutupian" @tap="insertImage"></view>

                <view :class="formats.script === 'sub' ? 'ql-active' : ''" class="iconfont icon-zitixiabiao"
                    data-name="script" data-value="sub"></view>
                <view :class="formats.script === 'super' ? 'ql-active' : ''" class="iconfont icon-zitishangbiao"
                    data-name="script" data-value="super"></view>
                <view class="iconfont icon-shanchu" @tap="clear"></view>
                <view :class="formats.direction === 'rtl' ? 'ql-active' : ''" class="iconfont icon-direction-rtl"
                    data-name="direction" data-value="rtl"></view>
            </view>
        </view>
    </view>
</template>

<script setup lang="ts">
import { ref, getCurrentInstance, nextTick } from 'vue';

const instance = getCurrentInstance(); // 组件实例
const props = defineProps({
    value: {
        type: String,
        default: 'ces'
    }
})
const emit = defineEmits(['update:value'])
// 只读
const readOnly = ref(false)
// 提示词
const placeholder = ref('开始输入...')
// 富文本内容
const richText = ref('')
// 底部工具栏
const formats = ref({} as any)
// 图片上传 - 接口
const serverUrl = ref('/resource/oss/upload')
// editor编辑器
const editorCtx = ref<any>(null)

// 只读改变
const readOnlyChange = () => {
    readOnly.value = !readOnly.value;
}

// 编辑器初始化完成时触发
const onEditorReady = () => {
    // 富文本节点渲染完成
    const htmls = props.value
    const contents = JSON.stringify(htmls)
    const query = uni.createSelectorQuery().in(instance);
    query.select("#editor").context((res: any) => {
        editorCtx.value = res.context;
        editorCtx.value?.setContents({
            html: htmls,
            delta: contents
        })
    }).exec();
}

// 编辑器内容改变时触发,detail = {html, text, delta}
const getCtx = (e: UniHelper.EditorOnBlurEvent) => {
    richText.value = e.detail.html;
    // console.log('richText.value', richText.value);
    emit('update:value', richText.value)
    // this.$emit('input', e.detail.html);
}

// 撤销
const undo = () => {
    editorCtx.value.undo();
}

// 重做
const redo = () => {
    editorCtx.value.redo();
}

// 工具栏点击触发
const formatToolbar = (e: any) => {
    const { name, value } = e.target.dataset;
    if (!name) return;
    editorCtx.value.format(name, value);
}

// 通过 Context 方法改变编辑器内样式时触发,返回选区已设置的样式
const onStatusChange = (e: any) => {
    console.log(e);

    const format = e.detail;
    formats.value = format;
}

// 插入分割线
const insertDivider = () => {
    editorCtx.value.insertDivider({
        success: function () {
            console.log('insert divider success');
        }
    });
}

// 清空
const clear = () => {
    editorCtx.value.clear({
        success: function () {
            console.log('clear success');
        }
    });
}

// 重置格式
const removeFormat = () => {
    editorCtx.value.removeFormat();
}

// 插入当前日期
const insertDate = () => {
    const date = new Date();
    const formatDate = `${date.getFullYear()}/${date.getMonth() + 1}/${date.getDate()}`;
    editorCtx.value.insertText({
        text: formatDate
    });
}

// 插入图片
const insertImage = () => {
    // 选择图片
    uni.chooseImage({
        count: 1,
        sizeType: ['original', 'compressed'],
        sourceType: ['album', 'camera'],
        success: async (res: any) => {
            uni.uploadFile({
                url: serverUrl.value, //请求的图片上传接口,这里是基准地址加上传接口
                filePath: res.tempFilePaths[0],
                name: 'file',
                formData: {
                    file: res.tempFiles[0],
                },
                success: res => {
                    // 装换
                    const data = JSON.parse(res.data)?.data;
                    if (data?.url) {
                        editorCtx.value?.insertImage({
                            width: '98%', //设置宽度为100%防止宽度溢出手机屏幕
                            height: 'auto',
                            src: data.url,
                            alt: data.fileName,
                            success: function () {
                                console.log('insert image success');
                            }
                        });
                    } else {
                        uni.showToast({
                            title: '上传失败,请重试!',
                            icon: 'error',
                        })
                    }
                },
                fail: err => {
                    uni.showToast({
                        title: '上传失败,请重试!',
                        icon: 'error',
                    })
                }
            });
        }
    });
}
</script>

<style lang="scss" scoped>
@import './editor-icon.css';

.container {
    height: 100%;

    .editor-wrapper {
        height: 100%;
    }

    .wrapper {
        /* height: 100%; */
        position: fixed;
        left: 0;
        bottom: 0;
        width: 100%;
    }

    .iconfont {
        padding: 16rpx;
        /* width: 60rpx; */
        /* height: 60rpx; */
        cursor: pointer;
        font-size: 40rpx;
    }

    .toolbar {
        box-sizing: border-box;
        border-bottom: 0;
        font-family: 'Helvetica Neue', 'Helvetica', 'Arial', sans-serif;
        height: 74rpx;
        display: flex;
        align-items: center;
        flex-wrap: nowrap;
        overflow-x: scroll;
        margin: 0 20rpx;
        background-color: #fff;
        /* width: 100%; */
    }

    .ql-container {
        box-sizing: border-box;
        /* padding: 0 32rpx; */
        width: 100%;
        min-height: 30vh;
        height: 100%;
        margin-top: 20px;
        font-size: 16px;
        line-height: 1.5;
        overflow: scroll;
    }

    .ql-active {
        color: #a1d5ba;
    }
}
</style>
公共上传图片方法 uploadImages
封装了一个上传图片的方法,上传图片方法可以根据实际需求自行修改,最终都是拿到http或者https的地址塞到富文本中。
 // 上传图片
export const uploadImages = async (
  tempFile: any,
  imageList: imageType[] | string[],
  type: number = 0,
) => {
  uni.uploadFile({
    url: '/resource/oss/upload',
    name: 'file',
    filePath: tempFile.path,
    formData: {
      file: tempFile,
    },
    // 文件对应的 key , 开发者在服务器端通过这个 key 可以获取到文件二进制内容
    // 成功函数
    success: (res) => {
      // uni.uploadFile返回来的结果默认是JSON格式字符串,需要用JSON.parse转换成js对象
      const uploadData = JSON.parse(res.data).data

      // 判断imageList 是imageType[]类型 还是string[] 类型
      // 还是string[]类型,则直接push
      if (type) {
        imageList.push(uploadData.url)
      } else {
        // 如果是imageType[]类型,则需要创建一个imageType对象,并push进去
        const x = {} as any
        // 下面3个值是uni-app规定的一个不能少
        x.url = uploadData.url
        // x.extname = uploadData.ext
        x.name = uploadData.fileName
        imageList.push(x)
      }
    },
    // 失败提示用户重新上传
    fail: (error) => {
      console.log(error);

      uni.showToast({
        title: '上传失败,请重试!',
        icon: 'error',
      })
      return false
    },
  })
}
上传成功后查文章详情的时候解析富文本?
用的是网络上的文章做的一个测试,回显没有任何问题!

解析富文本用的 mp-html
官网:mp-html: 小程序富文本组件,支持渲染和编辑 html,支持在微信、QQ、百度、支付宝、头条和 uni-app 平台使用![]() https://gitee.com/jin-yufeng/mp-html/
https://gitee.com/jin-yufeng/mp-html/
功能介绍:(用法自己查看官网)
- 支持在多个主流的小程序平台和
uni-app中使用 - 支持丰富的标签(包括
table、video、svg等) - 支持丰富的事件效果(自动预览图片、链接处理等)
- 支持设置占位图(加载中、出错时、预览时)
- 支持锚点跳转、长按复制等丰富功能
- 支持大部分 html 实体
- 丰富的插件(关键词搜索、内容编辑、
latex公式等) - 效率高、容错性强且轻量化(
≈25KB,9KB gzipped)
上代码:
npm安装:
npm install mp-html
自定义组件:EditorParse.vue
// EditorParse.vue

<script setup lang="ts">
import { ref, nextTick, defineProps } from 'vue'
import mpHtml from 'mp-html/dist/uni-app/components/mp-html/mp-html'

const props = defineProps({
  content: {
    type: String,
    default: ''
  }
})
</script>

<template>
  <view class="content">
    <mp-html :content="content" container-style="font-size: 28rpx;color:#3d3d3d;white-space: pre-wrap;line-height: 1.5"
      :tag-style="{ img: 'width:100%;height:auto' }" />
  </view>
</template>
使用:
<template>

 <!-- 发布的详情内容 -->
   <view class="content">
     <EditorParse :content="articleInfo.content"></EditorParse>
   </view>

</template>


<script lang="ts" setup>
import EditorParse from '@/components/Editor/EditorParse.vue'

</script>
结语:
至此就已经完成了从发布文章到解析文章的全部了,解析wangeditor等等基础的富文本图片视频也都没啥问题
总体来说用vue3+ts写小程序还是要多注意一些用法上会和vue2有所不同,也多加了类型定义
后面继续分享文章详情以及评论(图片评论、表情评论)
如有问题请及时指正!


 1万+
1万+


 被折叠的 条评论
为什么被折叠?
被折叠的 条评论
为什么被折叠?
 到【灌水乐园】发言


