


系列文章
Spring-Cloud-Gateway-01-网关基本概念
Spring-Cloud-Gateway-02-请求调用基本流程
Spring-Cloud-Gateway-03-网关自动装配
Spring-Cloud-Gateway-04-HttpWebHandlerAdapter到DispatcherHandler调用流程
Spring-Cloud-Gateway-05-请求到HttpWebHandlerAdapter的调用链路
Spring-Cloud-Gateway-06-DispatcherHandler调用解析
Spring-Cloud-Gateway-07-GatewayFilterChain的执行过程
Spring-Cloud-Gateway-08-路由的自动装配与加载流程
Spring-Cloud-Gateway-09-动态路由与自动刷新
事件发布与监听
ApplicationEventPublisherAware事件发布详解
上面这篇文章讲的很通俗易通,建议大家去看看。大体的意思就是说,事件的发布者发布事件,事件的监听这对对应的事件进行监听,当监听到对应的事件时,就会触发调用相关的方法。因此,在事件处理中,事件是核心,是事件发布者和事件监听者的桥梁。
事件,关联到代码里就是ApplicationEvent抽象类,我们创建一个事件就需要继承这个抽象类。
事件监听者,关联到代码里就是ApplicationListener接口,其中onApplicationEvent方法就是在事件发布的时候触发。实现该接口,其中泛型就是需要监听的事件,然后在重写方法实现逻辑即可。
事件发布者,关联到代码里就是ApplicationEventPublisherAware接口,会给我们提供一个ApplicationEventPublisher对象,其中publishEvent方法表示发布一个事件。
RefreshRoutesEvent事件监听
回到具体的代码,看SpringCloudGateway是如何实现的
public class CachingRouteLocator
		implements Ordered, RouteLocator, ApplicationListener<RefreshRoutesEvent>, ApplicationEventPublisherAware {
    private ApplicationEventPublisher applicationEventPublisher;

    @Override
	public void onApplicationEvent(RefreshRoutesEvent event) {
		try {
			fetch().collect(Collectors.toList()).subscribe(
					list -> Flux.fromIterable(list).materialize().collect(Collectors.toList()).subscribe(signals -> {
						applicationEventPublisher.publishEvent(new RefreshRoutesResultEvent(this));
						cache.put(CACHE_KEY, signals);
					}, this::handleRefreshError), this::handleRefreshError);
		}
		catch (Throwable e) {
			handleRefreshError(e);
		}
	}

    @Override
	public void setApplicationEventPublisher(ApplicationEventPublisher applicationEventPublisher) {
		this.applicationEventPublisher = applicationEventPublisher;
	}
可以看到SpringCloudGateway定义了RefreshRoutesEvent这个刷新路由的事件,然后实现了ApplicationListener接口,重写了onApplicationEvent方法,并且实现了ApplicationEventPublisherAware接口用来发布事件。
我们接着来看onApplicationEvent方法具体做了什么
首先调用fetch方法
    CachingRouteLocator.java

	//this.delegate之前说过就是CompositeRouteLocator
	private Flux<Route> fetch() {
		return this.delegate.getRoutes().sort(AnnotationAwareOrderComparator.INSTANCE);
	}
	CompositeRouteLocator.java

	@Override
	public Flux<Route> getRoutes() {
        //this.delegates就是RouteLocator的实现bean,分别调用它们的getRoutes方法返回所有的Route
        //目前来说就只有RouteDefinitionRouteLocator
		return this.delegates.flatMapSequential(RouteLocator::getRoutes);
	}
	RouteDefinitionRouteLocator.java

	@Override
	public Flux<Route> getRoutes() {
         //this.routeDefinitionLocator之前说过就是CompositeRouteDefinitionLocator,用来组合所有途径的RouteDefinition
         //通过convertToRoute方法转换为Route
		Flux<Route> routes = this.routeDefinitionLocator.getRouteDefinitions().map(this::convertToRoute);

		if (!gatewayProperties.isFailOnRouteDefinitionError()) {
			// instead of letting error bubble up, continue
			routes = routes.onErrorContinue((error, obj) -> {
				if (logger.isWarnEnabled()) {
					logger.warn("RouteDefinition id " + ((RouteDefinition) obj).getId()
							+ " will be ignored. Definition has invalid configs, " + error.getMessage());
				}
			});
		}

		return routes.map(route -> {
			if (logger.isDebugEnabled()) {
				logger.debug("RouteDefinition matched: " + route.getId());
			}
			return route;
		});
	}
总的来看,fetch方法就是获取所有的Route并进行排序,也算是更新Route。
	CachingRouteLocator

	@Override
	public void onApplicationEvent(RefreshRoutesEvent event) {
		try {
			fetch().collect(Collectors.toList()).subscribe(
					list -> Flux.fromIterable(list).materialize().collect(Collectors.toList()).subscribe(signals -> {
        				 //发布RefreshRoutesResultEvent路由刷新结果的事件,并加入到cache中
                          //cache就是一map集合,缓存着所有的路由
						applicationEventPublisher.publishEvent(new RefreshRoutesResultEvent(this));
						cache.put(CACHE_KEY, signals);
					}, this::handleRefreshError), this::handleRefreshError);
		}
		catch (Throwable e) {
			handleRefreshError(e);
		}
	}
RefreshRoutesResultEvent事件发布之后并没有看到有专门监听的,可能会在后续扩展中吧。
到目前为止,我们就知道路由的更新逻辑是如何处理的,那么有一个问题
RefreshRoutesEvent事件的发布是在什么时候触发的?
RefreshRoutesEvent事件触发

用IDEA搜索一下可以看到,分别有两个地方发布了RefreshRoutesEvent事件,分别点进去看
一个是在AbstractGatewayControllerEndpoint中
	@PostMapping("/refresh")
	public Mono<Void> refresh() {
		this.publisher.publishEvent(new RefreshRoutesEvent(this));
		return Mono.empty();
	}
可以看到这是一个Post请求,路径/refresh,猜想这是用来调用接口手动刷新的
另外一个是在RouteRefreshListener中,通过名称可以猜到这是一个监听类,并且实现了ApplicationListener接口,监听的对象事件则是ApplicationEvent这个抽象类,也就是所有继承了ApplicationEvent类的事件发布之后,都是在RouteRefreshListener中触发
	@Override
	public void onApplicationEvent(ApplicationEvent event) {
		if (event instanceof ContextRefreshedEvent) {
			ContextRefreshedEvent refreshedEvent = (ContextRefreshedEvent) event;
			if (!WebServerApplicationContext.hasServerNamespace(refreshedEvent.getApplicationContext(), "management")) {
				reset();
			}
		}
		else if (event instanceof RefreshScopeRefreshedEvent || event instanceof InstanceRegisteredEvent) {
			reset();
		}
		else if (event instanceof ParentHeartbeatEvent) {
			ParentHeartbeatEvent e = (ParentHeartbeatEvent) event;
			resetIfNeeded(e.getValue());
		}
		else if (event instanceof HeartbeatEvent) {
			HeartbeatEvent e = (HeartbeatEvent) event;
			resetIfNeeded(e.getValue());
		}
	}

	private void resetIfNeeded(Object value) {
		if (this.monitor.update(value)) {
			reset();
		}
	}

	private void reset() {
		this.publisher.publishEvent(new RefreshRoutesEvent(this));
	}
可以看到RefreshRoutesEvent事件的发布是在onApplicationEvent方法中触发的
重点关注HeartbeatEvent事件,通过名字可以猜到和心跳机制相关
在resetIfNeeded方法中做了检验,this.monitor就是HeartbeatMonitor对象
/**
 * Helper class for listeners to the {@link HeartbeatEvent}, providing a convenient way to
 * determine if there has been a change in state.
 *
 * @author Dave Syer
 */
public class HeartbeatMonitor {

	private AtomicReference<Object> latestHeartbeat = new AtomicReference<>();

	/**
	 * @param value The latest heartbeat.
	 * @return True if the state changed.
	 */
	public boolean update(Object value) {
		Object last = this.latestHeartbeat.get();
		if (value != null && !value.equals(last)) {
			return this.latestHeartbeat.compareAndSet(last, value);
		}
		return false;
	}

}
通过注释可以看到这个一个心跳的监控器,提供一种方式来判断当前状态是否改变
update方法中通过CAS来进行判断的
下面我们关注HeartbeatEvent这个事件是如何触发的
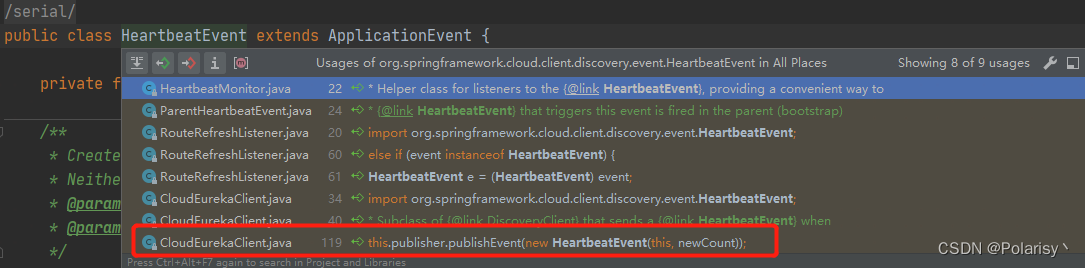
	public class CloudEurekaClient extends DiscoveryClient {

	@Override
	protected void onCacheRefreshed() {
		super.onCacheRefreshed();

		if (this.cacheRefreshedCount != null) { // might be called during construction and
			// will be null
			long newCount = this.cacheRefreshedCount.incrementAndGet();
			log.trace("onCacheRefreshed called with count: " + newCount);
			this.publisher.publishEvent(new HeartbeatEvent(this, newCount));
		}
	}
CloudEurekaClient是DiscoveryClient的子类,并重写了onCacheRefreshed方法
DiscoveryClient应该比较熟悉了,Eureka的客户端
再往上找
    	DiscoveryClient.java

		private boolean fetchRegistry(boolean forceFullRegistryFetch) {
		......

        // Notify about cache refresh before updating the instance remote status
        onCacheRefreshed();

        // Update remote status based on refreshed data held in the cache
        updateInstanceRemoteStatus();

        // registry was fetched successfully, so return true
        return true;
    }
继续往上找
    @VisibleForTesting
    void refreshRegistry() {
        ......
            boolean success = fetchRegistry(remoteRegionsModified);
    class CacheRefreshThread implements Runnable {
        public void run() {
            refreshRegistry();
        }
    }
可以看到是由CacheRefreshThread线程来执行的
private void initScheduledTasks() {
        if (clientConfig.shouldFetchRegistry()) {
            // registry cache refresh timer
            int registryFetchIntervalSeconds = clientConfig.getRegistryFetchIntervalSeconds();
            int expBackOffBound = clientConfig.getCacheRefreshExecutorExponentialBackOffBound();
            cacheRefreshTask = new TimedSupervisorTask(
                    "cacheRefresh",
                    scheduler,
                    cacheRefreshExecutor,
                    registryFetchIntervalSeconds,
                    TimeUnit.SECONDS,
                    expBackOffBound,
                    new CacheRefreshThread()
            );
            scheduler.schedule(
                    cacheRefreshTask,
                    registryFetchIntervalSeconds, TimeUnit.SECONDS);
        }

        if (clientConfig.shouldRegisterWithEureka()) {
            int renewalIntervalInSecs = instanceInfo.getLeaseInfo().getRenewalIntervalInSecs();
            int expBackOffBound = clientConfig.getHeartbeatExecutorExponentialBackOffBound();
            logger.info("Starting heartbeat executor: " + "renew interval is: {}", renewalIntervalInSecs);

            // Heartbeat timer
            heartbeatTask = new TimedSupervisorTask(
                    "heartbeat",
                    scheduler,
                    heartbeatExecutor,
                    renewalIntervalInSecs,
                    TimeUnit.SECONDS,
                    expBackOffBound,
                    new HeartbeatThread()
            );
            scheduler.schedule(
                    heartbeatTask,
                    renewalIntervalInSecs, TimeUnit.SECONDS);

            // InstanceInfo replicator
            instanceInfoReplicator = new InstanceInfoReplicator(
                    this,
                    instanceInfo,
                    clientConfig.getInstanceInfoReplicationIntervalSeconds(),
                    2); // burstSize
	......
}
可以看到initScheduledTasks方法会初始化两个线程 CacheRefreshThread 和 HeartbeatThread , 默认每 30 秒调用一次
CacheRefreshThread会发布HeartbeatEventHeartbeatThread更新lastSuccessfulHeartbeatTimestamp时间戳
initScheduledTasks方法是在初始化 DiscoveryClient的时候调用的
到这里,我们就很清楚了,HeartbeatEvent时间是如何被发布的,以及发布的频率是多少
路由自动刷新流程
spring cloud gateway 自动刷新路由,这篇文章总结的很好,大家可以看看,这里把它部分内容搬运下来。
刷新路由流程:
- 初始化
DiscoveryClient- 调用
initScheduledTasks()方法,初始化两个线程 CacheRefreshThread 和 HeartbeatThread , 默认每 30 秒调用 - CacheRefreshThread 会发布 HeartbeatEvent
- HeartbeatThread 更新 lastSuccessfulHeartbeatTimestamp 时间戳
- 调用
- CacheRefreshThread
- 调用
refreshRegistry()方法- 调用
fetchRegistry()方法- 调用
onCacheRefreshed()方法, 在子类CloudEurekaClient重载后发布HeartbeatEvent事件
- 调用
- 调用
- 调用
RouteRefreshListener: 监听HeartbeatEvent ,并且发布RefreshRoutesEvent事件RefreshRoutesEvent促发本地拉取最新的路由信息CachingRouteLocator: 自动装配默认的 路由更新器,CachingRouteLocator监听RefreshRoutesEvent事件- 如果是 RefreshRoutesEvent 事件, 调用
fetch()方法更新 routes
- 如果是 RefreshRoutesEvent 事件, 调用
Routes 更新过程
- CachingRouteLocator.fetch() 总入口 ,使用装饰器模式,代理
CompositeRouteLocator,而CompositeRouteLocator中 代理最终使用RouteDefinitionRouteLocator的getRoutes()方法 - 在 RouteDefinitionRouteLocator 中, 调用 RouteDefinitionLocator 的
getRouteDefinitions()实现 route 刷新 - RouteDefinitionLocator 也使用了装饰器和组合模式:
- InMemoryRouteDefinitionRepository, 基于内存
- PropertiesRouteDefinitionLocator, 基于 properties 文件,如果使用了 properties 文件
- RedisRouteDefinitionRepository ,基于Redis
- DiscoveryClientRouteDefinitionLocator,基于注册中心
动态路由
如果路由的自动刷新流程搞清楚了之后,动态路由就很好理解了
每次Routes更新的过程,都会从各个渠道去拿到RouteDefinition,然后再转换成Route,缓存起来
目前SpringCloudGateway提供了方式有两种
DiscoveryClientRouteDefinitionLocator
基于注册中心,每次路由更新的时候,从注册中心拉取路由信息,并转换成RouteDefinition返回
RouteDefinitionRepository
SpringCloudGateway提供的接口RouteDefinitionRepository,目前有两种实现类,分别是InMemoryRouteDefinitionRepository(基于内存)和RedisRouteDefinitionRepository(基于Redis)
默认是InMemoryRouteDefinitionRepository
我们同样可以实现RouteDefinitionRepository接口,重写save方法和delete方法,通过getRouteDefinitions方法返回RouteDefinition
两种不同的方法,有兴趣的同学可以去实现下,这里写的很粗糙,只是提供大致的方向,还有很多细节没有涉及。


 2876
2876


 被折叠的 条评论
为什么被折叠?
被折叠的 条评论
为什么被折叠?
 到【灌水乐园】发言


