


| 资料 |
|---|
| 资料地址 |
| 后台管理系统目录 | 前台展示系统目录 |
|---|---|
| 1 - 构建工程篇 | 7 - 渲染前台篇 |
| 2 - 前后交互篇 | 8 - 前台登录篇 |
| 3 - 文件上传篇 | 9 - 前台课程篇 |
| 4 - 课程管理篇 | 10 - 前台支付篇 |
| 5 - 章节管理篇 | 11 - 统计分析篇 |
| 6 - 微服务治理 | 12 - 项目完结篇 |
一、课程章节增删改查
1.1、后端接口
@Api(tags = "章节模块")
@CrossOrigin
@RestController
@RequestMapping("/eduservice/chapter")
public class EduChapterController {

    @Autowired
    private EduChapterService eduChapterService;

    @Autowired
    EduCourseService eduCourseService;

    // 添加章节
    @PostMapping("addChapter")
    public R addChapter(@RequestBody EduChapter eduChapter) {
        eduChapterService.save(eduChapter);
        return R.ok();
    }

    // 根据章节id查询
    @GetMapping("getChapter/{chapterId}")
    public R getChapter(@PathVariable String chapterId) {
        EduChapter eduChapter = eduChapterService.getById(chapterId);
        return R.ok().data("chapter", eduChapter);
    }

    // 修改章节
    @PostMapping("updateChapter")
    public R updateChapter(@RequestBody EduChapter eduChapter) {
        eduChapterService.updateById(eduChapter);
        return R.ok();
    }

    // 删除章节 若存在小节则不可删除
    @DeleteMapping("deleteById/{chapterId}")
    public R deleteById(@PathVariable String chapterId) {
        boolean flag = eduChapterService.deleteChapter(chapterId);
        if (flag) {
            return R.ok();
        } else {
            return R.error();
        }
    }

}
@Override
public boolean deleteChapter(String chapterId) {
    QueryWrapper<EduVideo> wrapper = new QueryWrapper<>();
    wrapper.eq("chapter_id", chapterId);
    int count = eduVideoService.count(wrapper);

    if (count > 0) {
        throw new LaptoyException(20001, "还有小节数据,不能删除");
    } else {
        return this.removeById(chapterId);
    }
}
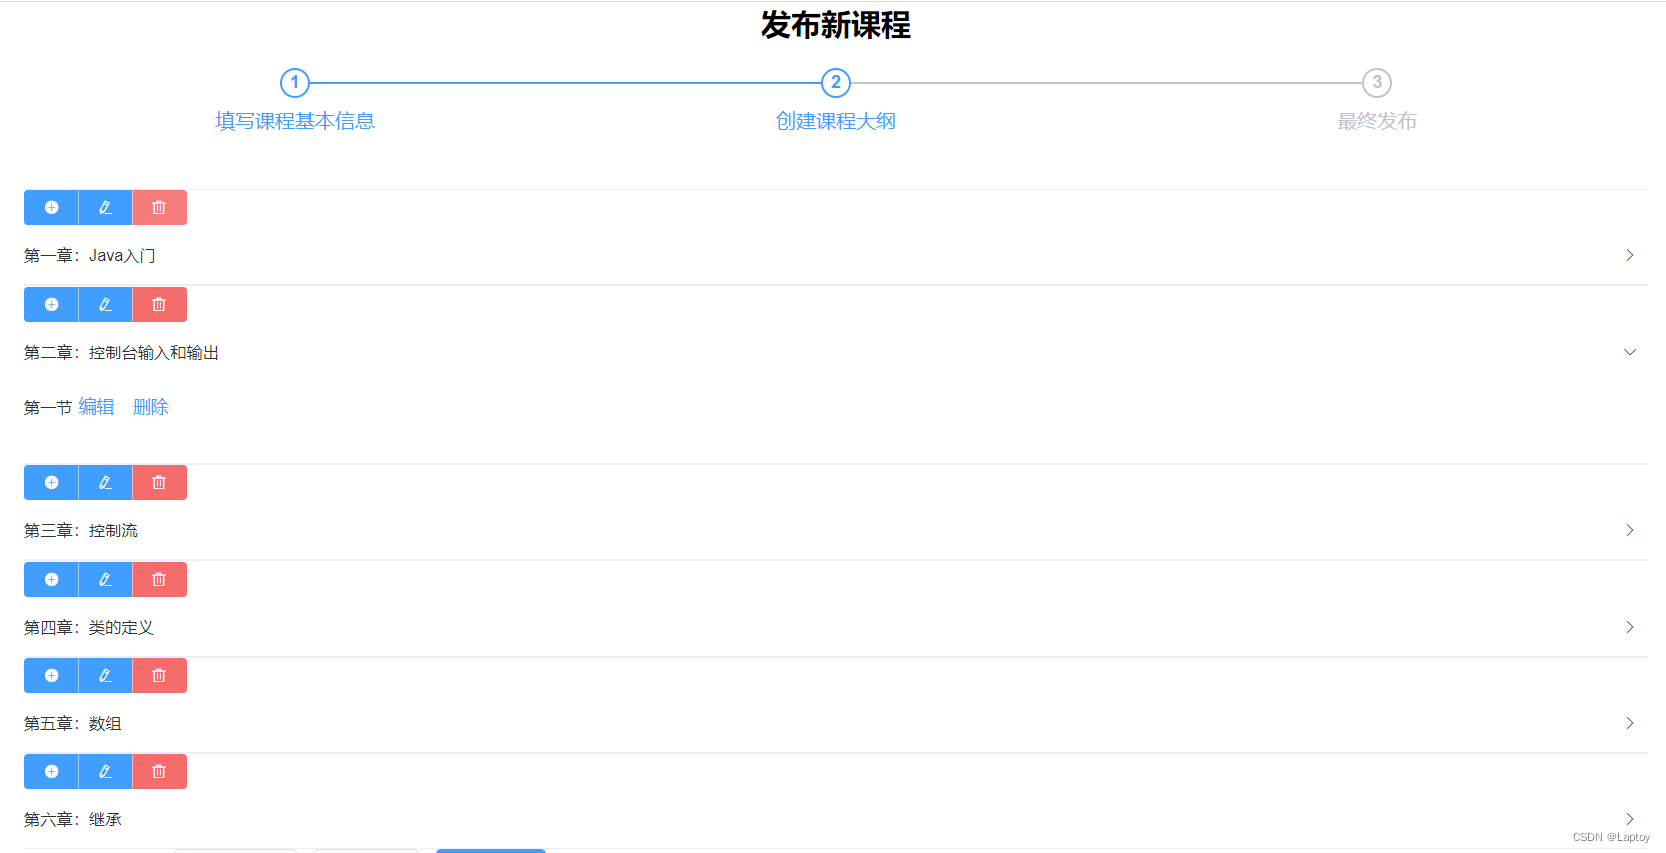
1.2、前端实现
1、页面代码
<template>
  <div class="app-container">
    <h2 style="text-align: center">发布新课程</h2>
    <!-- 步骤条 -->
    <el-steps :active="2" process-status="wait" align-center style="margin-bottom: 40px;">
      <el-step title="填写课程基本信息" />
      <el-step title="创建课程大纲" />
      <el-step title="最终发布" />
    </el-steps>

    <!-- 章节数据折叠面板 -->
    <el-collapse accordion v-for="chapter in chapterVideoList" :key="chapter.id">
      <!-- 按钮组 -->
      <el-button-group>
        <el-button type="primary" size="mini" icon="el-icon-circle-plus">添加小节</el-button>
        <el-button type="primary" size="mini" icon="el-icon-edit" @click="openEditChapter(chapter.id)"></el-button>
        <el-button type="danger" size="mini" icon="el-icon-delete" @click="removeById(chapter.id)"></el-button>
      </el-button-group>
      <!-- 小节数据 -->
      <el-collapse-item :title=chapter.title>
        <div v-for="video in chapter.children" :key="video.id">
          {{ video.title }}
          <span class="acts">
            <el-button type="text">编辑</el-button>
            <el-button type="text">删除</el-button>
          </span>
        </div>
      </el-collapse-item>
    </el-collapse>

    <!-- 底部按钮 -->
    <el-form label-width="120px">
      <el-form-item>
        <el-button @click="dialogChapterFormVisible=true">添加章节</el-button>
        <el-button @click="previous">上一步</el-button>
        <el-button :disabled="saveBtnDisabled" type="primary" @click="next">下 一步</el-button>
      </el-form-item>
    </el-form>

    <!-- 添加或修改章节弹框 -->
    <el-dialog :visible.sync="dialogChapterFormVisible" title="添加章节">
      <el-form :model="chapter" label-width="120px">
        <el-form-item label="章节标题">
          <el-input v-model="chapter.title" />
        </el-form-item>
        <el-form-item label="章节排序">
          <el-input-number v-model="chapter.sort" :min="0" controls-position="right" />
        </el-form-item>
      </el-form>
      <div slot="footer" class="dialog-footer">
        <el-button @click="dialogChapterFormVisible = false">取 消</el-button>
        <el-button type="primary" @click="saveOrUpdate">确 定</el-button>
      </div>
    </el-dialog>
  </div>
</template>
data() {
  return {
    dialogChapterFormVisible: false,
    chapter: {
      title: "",
      sort: 0
    },
  };
},
稍微优化了页面
2、创建api - chapter.js
//添加章节
addChapter(chapter) {
    return request({
        url: `/eduservice/chapter/addChapter`,
        method: `post`,
        data: chapter
    })
},
//根据id查询章节
updateChapterById(chapterId) {
    return request({
        url: `/eduservice/chapter/getChapter/${chapterId}`,
        method: `get`,
    })
},
//修改章节
updateChapter(chapter) {
    return request({
        url: `/eduservice/chapter/updateChapter`,
        method: `post`,
        data: chapter
    })
},
//删除章节
deleteById(chapterId) {
    return request({
        url: `/eduservice/chapter/deleteById/${chapterId}`,
        method: `delete`,
    })
}
1.3、添加章节
saveChapter() {
  //设置课程id到chapter对象中,不指定课程id无法正常保存,因为数据库字段为非空
  this.chapter.courseId = this.courseId
  chapter.addChapter(this.chapter).then((resp) => {
    this.dialogChapterFormVisible = false;
    this.$message({
      message: "添加章节成功",
      type: "success",
    });
    this.chapter = {}
    this.getChapterVideoByCourseId()
  });
},
saveOrUpdate() {
  this.saveChapter()
},
1.4、修改章节
1、点击修改章节按钮根据章节id回显数据
<el-button type="primary" size="mini" icon="el-icon-edit"
		   @click="openEditChapter(chapter.id)"></el-button>
2、修改方法
// 修改章节弹窗回显数据
openEditChapter(id) {
  this.dialogChapterFormVisible = true;
  chapter.updateChapterById(id).then((resp) => {
    this.chapter = resp.data.data
  })
},
// 修改章节
updateChapter(id) {
  //设置课程id到chapter对象中,不指定课程id无法正常保存,因为数据库字段为非空
  this.chapter.courseId = this.courseId
  chapter.updateChapter(this.chapter).then((resp) => {
    this.dialogChapterFormVisible = false;
    this.$message({
      message: "修改章节成功",
      type: "success",
    });
    this.getChapterVideoByCourseId();
  });
},
1.5、删除章节
<el-button type="danger" size="mini" icon="el-icon-delete"
		   @click="removeById(chapter.id)"></el-button>
// 删除章节
removeById(chapterId) {
  this.$confirm("此操作将永久删除章节信息, 是否继续?", "提示", {
    confirmButtonText: "确定",
    cancelButtonText: "取消",
    type: "warning",
  }).then(() => {
    chapter.deleteById(chapterId).then((resp) => {
      this.$message({
        type: "success",
        message: "删除成功!",
      });
      this.getChapterVideoByCourseId();
    });
  });
},
二、课程章节小节功能
2.1、后端接口
@Api(tags = "小节模块")
@RestController
@RequestMapping("/eduservice/video")
@CrossOrigin //解决跨域问题
public class EduVideoController {

    @Autowired
    private EduVideoService eduVideoService;

    //添加小节
    @PostMapping("/addVideo")
    public R addVideo(@RequestBody EduVideo eduVideo) {
        eduVideoService.save(eduVideo);
        return R.ok();
    }

    //删除小节
    // TODO 后面这个方法需要完善,删除小节的时候,同时也要把视频删除
    @DeleteMapping("/deleteVideo/{id}")
    public R deleteVideo(@PathVariable String id) {
        eduVideoService.removeById(id);
        return R.ok();
    }

    //修改小节
    @PostMapping("/updateVideo")
    public R updateVideo(@RequestBody EduVideo eduVideo) {
        eduVideoService.updateById(eduVideo);
        return R.ok();
    }

    //根据小节id查询
    @GetMapping("/getVideoById/{videoId}")
    public R getVideoById(@PathVariable String videoId) {
        EduVideo eduVideo = eduVideoService.getById(videoId);
        return R.ok().data("data", eduVideo);
    }
}
2.2、前端实现
1、页面
<!-- 章节数据折叠面板 -->
<el-collapse accordion v-for="chapter in chapterVideoList" :key="chapter.id">
  <!-- 按钮组 -->
  <el-button-group>
    <el-button type="primary" size="mini" icon="el-icon-circle-plus"
      		   @click="openSaveVideoForm(chapter.id)">添加小节</el-button>
  </el-button-group>
</el-collapse>

<!--添加小节表单-->
<el-dialog :visible.sync="dialogVideoFormVisible" title="添加小节">
  <el-form :model="video" label-width="120px">
    <el-form-item label="小节标题">
      <el-input v-model="video.title" />
    </el-form-item>
    <el-form-item label="小节排序">
      <el-input-number v-model="video.sort" :min="0" controls-position="right" />
    </el-form-item>
    <el-form-item label="是否免费">
      <el-radio-group v-model="video.free">
        <el-radio :label="true">免费</el-radio>
        <el-radio :label="false">默认</el-radio>
      </el-radio-group>
    </el-form-item>
    <el-form-item label="上传视频">
      <!-- TODO -->
    </el-form-item>
  </el-form>
  <div slot="footer" class="dialog-footer">
    <el-button @click="dialogVideoFormVisible = false">取 消</el-button>
    <el-button :disabled="saveVideoBtnDisabled" type="primary" @click="saveOrUpdateVideo">确 定</el-button>
  </div>
</el-dialog>
data() {
  return {
    saveVideoBtnDisabled: false,
    dialogVideoFormVisible: false,
    video: {
      sort: 0,
      title: "",
      free: ""
    }
  };
},
2、API - src\api\teacher\video.js
import request from '@/utils/request' //引入已经封装好的axios 和 拦截器

export default {
    //添加小节
    addVideo(video) {
        return request({
            url: `/eduservice/video/addVideo`,
            method: `post`,
            data: video
        })
    },
    //根据id查询小节
    getVideoById(videoId) {
        return request({
            url: `/eduservice/video/getVideoById/${videoId}`,
            method: `get`,
        })
    },
    //修改小节
    updateVideo(video) {
        return request({
            url: `/eduservice/video/updateVideo`,
            method: `post`,
            data: video
        })
    },
    //删除小节
    deleteById(videoId) {
        return request({
            url: `/eduservice/video/deleteVideo/${videoId}`,
            method: `delete`,
        })
    },
}
2.3、添加小节
openSaveVideoForm(id) {
  this.dialogVideoFormVisible = true
  this.video.courseId = this.courseId
  this.video.chapterId = id
},
saveOrUpdateVideo(){
  if (this.video.id) {
    //修改小节
  } else {
    //新增小节
    this.saveVideo();
  }
},
// 添加小节
saveVideo() {
  video.addVideo(this.video).then((resp) => {
    this.dialogVideoFormVisible = false;
    this.$message({
      message: "添加小节成功",
      type: "success",
    });
    this.video = {}
    this.getChapterVideoByCourseId();
  });
},
2.4、删除小节
<!-- 章节数据折叠面板 -->
<el-collapse accordion v-for="chapter in chapterVideoList" :key="chapter.id">
  <!-- 按钮组 -->

  <!-- 小节数据 -->
  <el-collapse-item :title=chapter.title>
    <div v-for="video in chapter.children" :key="video.id">
      {{ video.title }}
      <span class="acts">
        <el-button type="text">编辑</el-button>
        <el-button type="text" @click="removeVideo(video.id)">删除</el-button>
      </span>
    </div>
  </el-collapse-item>
</el-collapse>
// 删除小节
removeVideo(id) {
  this.$confirm("此操作将永久删除小节信息, 是否继续?", "提示", {
    confirmButtonText: "确定",
    cancelButtonText: "取消",
    type: "warning",
  }).then(() => {
    video.deleteById(id).then((resp) => {
      this.$message({
        type: "success",
        message: "删除成功!",
      });
      this.getChapterVideoByCourseId();
    });
  });
},
2.5、修改小节
<!-- 章节数据折叠面板 -->
<el-collapse accordion v-for="chapter in chapterVideoList" :key="chapter.id">
  <!-- 按钮组 -->

  <!-- 小节数据 -->
  <el-collapse-item :title=chapter.title>
    <div v-for="video in chapter.children" :key="video.id">
      {{ video.title }}
      <span class="acts">
        <el-button type="text" @click="openEditVideoForm(video.id)">编辑</el-button>
        <el-button type="text" @click="removeVideo(video.id)">删除</el-button>
      </span>
    </div>
  </el-collapse-item>
</el-collapse>
// 展开编辑表单
openEditVideoForm(id) {
  this.dialogVideoFormVisible = true;
  video.getVideoById(id).then((resp) => {
    this.video = resp.data.data;
  });
},

// 修改小节
updateVideo() {
  video.updateVideo(this.video).then((resp) => {
    this.dialogVideoFormVisible = false;
    this.$message({
      message: "修改小节成功",
      type: "success",
    });
    this.getChapterVideoByCourseId();
  });
},

// 添加或修改小节
saveOrUpdateVideo() {
  if (this.video.id) {
    //修改小节
    this.updateVideo();
  } else {
    //新增小节
    this.saveVideo();
  }
},
三、课程发布信息预览
3.1、后端接口
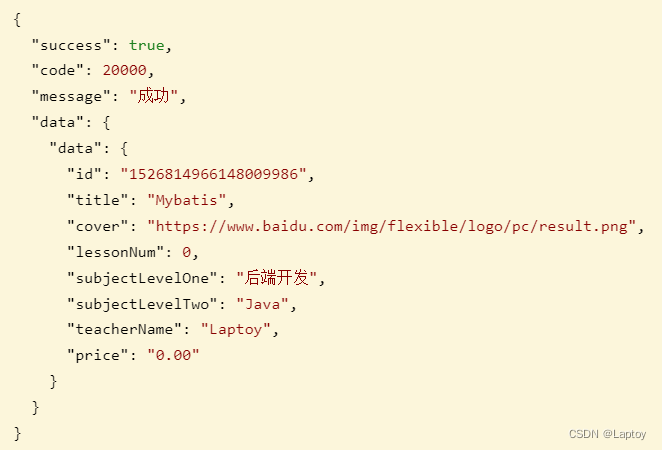
1、创建 VO
@Data
public class CoursePublishVo implements Serializable {

    private static final long serialVersionUID = 1L;

    private String id;//课程id

    private String title; //课程名称

    private String cover; //封面

    private Integer lessonNum;//课时数

    private String subjectLevelOne;//一级分类

    private String subjectLevelTwo;//二级分类

    private String teacherName;//讲师名称

    private String price;//价格 ,只用于显示

}
2、控制层
// 根据课程id查询课程确认信息
@GetMapping("/getPublishCourseInfo/{id}")
public R getPublishCourseInfo(@PathVariable String id) {
    CoursePublishVo publishCourseInfo = eduCourseService.getPublishCourseInfo(id);
    return R.ok().data("data", publishCourseInfo);
}
3、业务层
@Override
public CoursePublishVo getPublishCourseInfo(String id) {
    return eduCourseMapper.getPublishCourseInfo(id);
}
4、数据层
CoursePublishVo getPublishCourseInfo(String id);
<select id="getPublishCourseInfo" resultType="com.laptoy.eduservice.entity.vo.CoursePublishVo">
    SELECT ec.id,
           ec.title,
           ec.cover,
           ec.lesson_num AS lessonNum,
           ec.price,
           s1.title      AS subjectLevelOne,
           s2.title      AS subjectLevelTwo,
           t.name        AS teacherName
    FROM edu_course ec
             LEFT JOIN edu_teacher t ON ec.teacher_id = t.id
             LEFT JOIN edu_subject s1 ON ec.subject_parent_id = s1.id
             LEFT JOIN edu_subject s2 ON ec.subject_id = s2.id
    WHERE ec.id = #{id}
</select>
5、将xml文件放到 resources/xml 目录下,并再YML文件指定
mybatis-plus:
  mapper-locations: /mapper/*.xml
3.3、前端实现
1、定义API - course.js
//课程确认信息显示
getPublishCourseInfo(courseId){
    return request({
        url:"/eduservice/course/getpublishCourseInfo/"+courseId,
        method: 'get',
    })
}
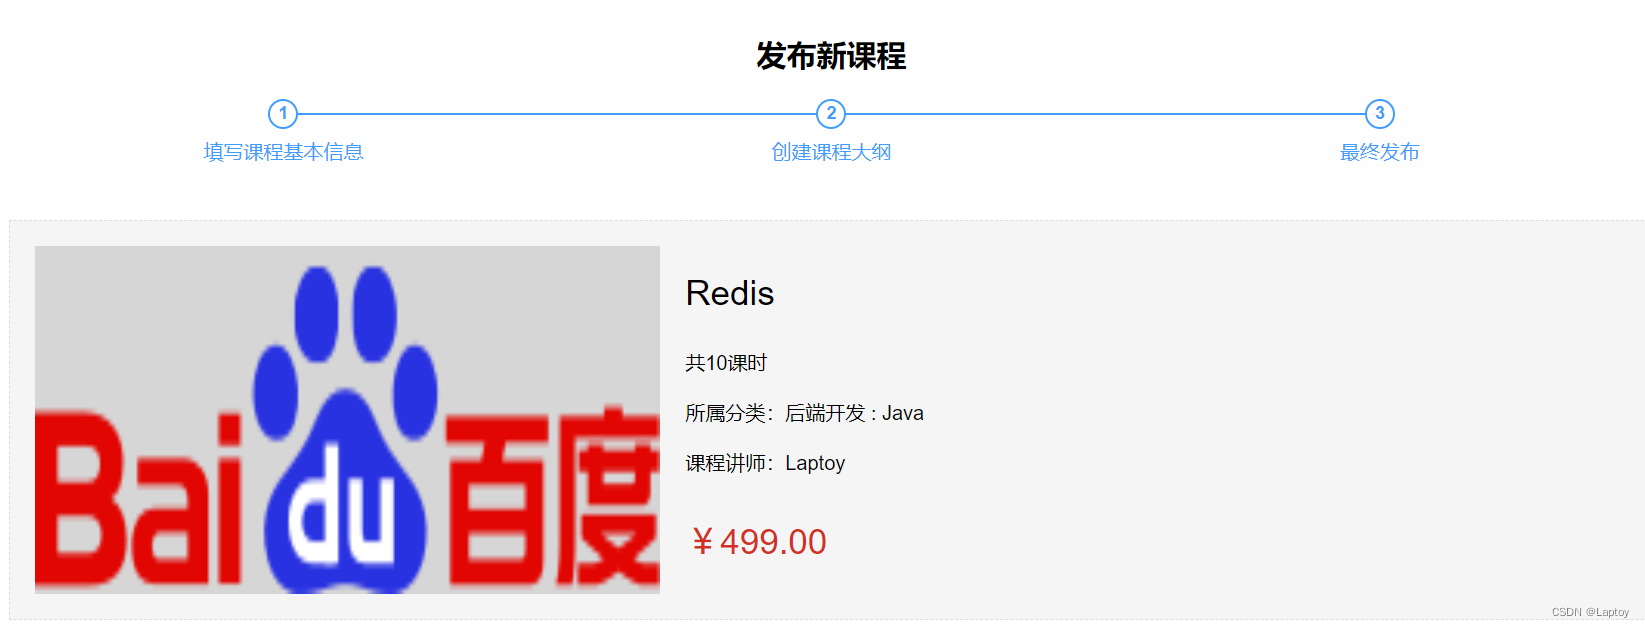
2、页面
<div class="ccInfo">
  <img :src="publishCourseInfo.cover" />
  <div class="main">
    <h2>{{ publishCourseInfo.title }}</h2>
    <p class="gray">
      <span>共{{ publishCourseInfo.lessonNum }}课时</span>
    </p>
    <p>
      <span>所属分类:{{ publishCourseInfo.subjectLevelOne }} : {{ publishCourseInfo.subjectLevelTwo }}</span>
    </p>
    <p>课程讲师:{{ publishCourseInfo.teacherName }}</p>
    <h3 class="red">¥{{ publishCourseInfo.price }}</h3>
  </div>
</div>
3、方法
export default {
  data() {
    return {
      saveBtnDisabled: false,
      courseId: '',
      publishCourseInfo: {},
    };
  },
  methods: {
    //根据课程id查询
    getPublishCourseInfo() {
      course.getPublishCourseInfo(this.courseId)
        .then(resp => {
          this.publishCourseInfo = resp.data.data
          console.log(this.publishCourseInfo)
        })
    },
    // 跳转到上一步
    previous() {
      this.$router.push("/course/chapter/" + this.courseId);
    },
    publish() {
      this.$router.push("/course/list");
    }
  },
  created() {
    //获取路由中的id值
    if (this.$route.params && this.$route.params.id) {
      this.courseId = this.$route.params.id
      //调用接口方法根据课程id查询课程信息
      this.getPublishCourseInfo()
    }
  },
};
4、css
<style scoped>
.ccInfo {
  background: #f5f5f5;
  padding: 20px;
  overflow: hidden;
  border: 1px dashed #ddd;
  margin-bottom: 40px;
  position: relative;
}
.ccInfo img {
  background: #d6d6d6;
  width: 500px;
  height: 278px;
  display: block;
  float: left;
  border: none;
}
.ccInfo .main {
  margin-left: 520px;
}
.ccInfo .main h2 {
  font-size: 28px;
  margin-bottom: 30px;
  line-height: 1;
  font-weight: normal;
}
.ccInfo .main p {
  margin-bottom: 10px;
  word-wrap: break-word;
  line-height: 24px;
  max-height: 48px;
  overflow: hidden;
}
.ccInfo .main p {
  margin-bottom: 10px;
  word-wrap: break-word;
  line-height: 24px;
  max-height: 48px;
  overflow: hidden;
}
.ccInfo .main h3 {
  left: 540px;
  bottom: 20px;
  line-height: 1;
  font-size: 28px;
  color: #d32f24;
  font-weight: normal;
  position: absolute;
}
</style>
5、测试
四、课程发布
4.1、后端接口
1、控制层
//课程最终发布
//修改课程状态
@PostMapping("publishCourse/{id}")
public R publishCourse(@PathVariable String id){
    EduCourse eduCourse = new EduCourse();
    eduCourse.setStatus("Normal"); //设置课程发布状态
    eduCourse.setId(id);
    boolean flag = eduCourseService.updateById(eduCourse);
    if (flag){
        return R.ok();
    }else {
        return R.error();
    }
}
4.2、前端页面
1、API
//课程最终发布
publishCourse(courseId) {
    return request({
        url: "/eduservice/course/publishCourse/" + courseId,
        method: 'post',
    })
}
2、方法
//发布课程
publish() {
  this.$confirm("你确定要发布此课程, 是否继续?", "提示", {
    confirmButtonText: "确定",
    cancelButtonText: "取消",
    type: "warning",
  }).then(() => {
    course.publishCourse(this.courseId).then((resp) => {
      this.$message({
        message: "课程发布成功",
        type: "success",
      });
      //跳转课程列表页面
      this.$router.push({ path: "/course/list" });
    });
  });
}
五、课程列表
5.1、后端接口
1、实体类作为模糊查询条件
@ApiModel(value = "Course查询对象", description = "课程查询对象封装")
@Data
public class CourseQuery implements Serializable {

    private static final long serialVersionUID = 1L;

    @ApiModelProperty(value = "课程名称,模糊查询")
    private String title;

    @ApiModelProperty(value = "发布状态 Normal已发布 Draft未发布")
    private String status;
}
2、控制层
//多条件查询课程带分页
@ApiOperation(value = "多条件查询课程带分页")
@PostMapping("/pageCourseCondition/{page}/{limit}")
public R pageCourseCondition(@ApiParam(name = "page", value = "当前页码", required = true) @PathVariable Long page,
                             @ApiParam(name = "limit", value = "每页记录数", required = true) @PathVariable Long limit,
                             @RequestBody(required = false) CourseQuery courseQuery) {//通过封装courseQuery对象来直接传递查询条件
    //创建分页page对象
    Page<EduCourse> pageParam = new Page<>(page, limit);

    //调用方法实现多条件分页查询
    eduCourseService.pageQuery(pageParam, courseQuery);

    //获取查询到的数据
    List<EduCourse> records = pageParam.getRecords();

    //获取总记录数
    long total = pageParam.getTotal();
    return R.ok().data("total", total).data("data", records);
}
3、业务层
@Override
public void pageQuery(Page<EduCourse> pageParam, CourseQuery courseQuery) {
    QueryWrapper<EduCourse> wrapper = new QueryWrapper<>();

    String title = courseQuery.getTitle();
    String status = courseQuery.getStatus();

    if (!StringUtils.isEmpty(title)) {
        wrapper.like("title", title);//参数1:数据库字段名; 参数2:模糊查询的值
    }
    if (!StringUtils.isEmpty(status)) {
        wrapper.eq("status", status);
    }
    wrapper.orderByDesc("gmt_create");
    baseMapper.selectPage(pageParam, wrapper);
}
5.2、前端实现
1、页面
<template>
  <div>
	<!--多条件查询表单-->
	<el-form :inline="true" class="demo-form-inline" style="margin-left: 20px; margin-top: 12px">
	  <el-form-item label="课程名称">
	    <el-input v-model="courseQuery.title" placeholder="请输入名称"></el-input>
	  </el-form-item>
	  <el-form-item label="发布状态">
	    <el-select v-model="courseQuery.status" placeholder="课程状态">
	      <el-option label="已发布" :value="'Normal'"></el-option>
	      <el-option label="未发布" :value="'Draft'"></el-option>
	    </el-select>
	  </el-form-item>
	  <el-form-item>
	    <el-button type="primary" icon="el-icon-search" @click="getList()">查询</el-button>
	    <el-button type="default" @click="resetData()">清空</el-button>
	  </el-form-item>
	</el-form>

	<!-- 展示表格 -->
    <el-table :data="list" style="width: 100%" height="620" border fit highlight-current-row element-loading-text="数据加载中">
      <el-table-column prop="date" label="序号" width="70" align="center">
        <template slot-scope="scope">
          {{ (page - 1) * limit + scope.$index + 1 }}
        </template>
      </el-table-column>
      <el-table-column prop="title" label="课程名称" width="400">
      </el-table-column>
      <el-table-column label="发布状态" width="80">
        <template slot-scope="scope">
          {{ scope.row.status === "Normal" ? "已发布" : "未发布" }}
        </template>
      </el-table-column>
      <el-table-column prop="lessonNum" label="课时数" width="100" />
      <el-table-column prop="gmtCreate" label="添加时间" width="300" />
      <el-table-column prop="viewCount" label="浏览数量" width="200" />
      <el-table-column label="操作" align="center">
        <template slot-scope="scope">
          <router-link :to="'/teacher/edit/' + scope.row.id">
            <el-button type="primary" size="mini" icon="el-icon-edit" plain>编辑基本信息</el-button>
          </router-link>
          <router-link :to="'/teacher/edit/' + scope.row.id">
            <el-button type="info" size="mini" icon="el-icon-edit" plain>编辑课程大纲</el-button>
          </router-link>
          <el-button type="danger" size="mini" icon="el-icon-delete" @click="removeById(scope.row.id)" plain>点击删除课程</el-button>
        </template>
      </el-table-column>
    </el-table>

    <!--分页组件-->
    <el-pagination background layout="prev, pager, next,total,jumper" :total="total" :page-size="limit" style="padding: 30px 0; text-align: center" :current-page="page" @current-change="getList">
    </el-pagination>
  </div>
</template>
2、API - course.js
//课程列表多条件分页查询
//page:当前页,limit:每页记录数,teacherQuery:条件对象
getCourseListPage(page, limit, courseQuery) {
    return request({
        url: `/eduservice/course/pageCourseCondition/${page}/${limit}`,
        method: 'post',
        data: courseQuery
    })
},
3、js
import course from "@/api/teacher/course.js";

export default {
  data() {
    return {
      list: null, //查询之后给接口返回的数据装的集合
      page: 1, //当前页
      limit: 10, //每页显示记录数
      courseQuery: {}, //条件封装对象
      total: 0, //总记录数
    };
  },
  created() {
    this.getList();
  },
  methods: {
    getList(page = 1) {
      this.page = page;
      course
        .getCourseListPage(this.page, this.limit, this.courseQuery)
        .then((resp) => {
          this.list = resp.data.data;
          this.total = resp.data.total;
        }) //请求成功
        .catch((err) => {
          console.log(err);
        }); //请求失败
    },
    //清空方法
    resetData() {
      //表单输入项数据清空
      this.courseQuery = {};
      //查询所有课程数据
      this.getList();
    },
  },
};

六、课程删除
6.1、后端接口
1、控制层
//课程列表中删除课程方法
@DeleteMapping("/removeCourseById/{id}")
public R removeCourseById(@PathVariable String id) {
    boolean flag = eduCourseService.removeCourse(id);
    if (flag) {
        return R.ok();
    } else {
        return R.error();
    }
}
2、业务层
//删除课程
@Transactional
@Override
public boolean removeCourse(String id) {
    //1、根据课程id删除小节
    eduVideoService.removeVideoByCourseId(id);

    //2、根据课程id删除章节部分
    eduChapterService.removeChapterByCourseId(id);

    //3、根据课程id删除课程描述
    descriptionService.removeById(id);

    //4、根据课程id删除课程本身
	boolean flag = this.removeById(id);

    if (flag) {
        return true;
    } else {
        throw new LaptoyException(20001, "删除失败");
    }
}
3、删除小节
//根据课程id删除小节
// TODO 删除小节,要删除对应的视频文件
@Override
public void removeVideoByCourseId(String id) {
    QueryWrapper<EduVideo> wrapper = new QueryWrapper<>();
    wrapper.eq("course_id", id);
    baseMapper.delete(wrapper);
}
4、删除章节
@Override
public void removeChapterByCourseId(String id) {
    QueryWrapper<EduChapter> wrapper = new QueryWrapper<>();
    wrapper.eq("course_id",id);
    baseMapper.delete(wrapper);
}
6.2、前端实现
1、API - course.js
//删除课程
removeCourseById(courseId) {
    return request({
        url: "/eduservice/course/removeCourseById/" + courseId,
        method: 'delete',
    })
}
2、方法
<el-button type="danger" size="mini" icon="el-icon-delete"
		   @click="removeById(scope.row.id)" plain>点击删除课程</el-button>

<script>
// 删除课程
removeById(id) {
  this.$confirm("此操作将永久删除该课程记录, 是否继续?", "提示", {
    confirmButtonText: "确定",
    cancelButtonText: "取消",
    type: "warning",
  }).then(() => {
    course.removeCourseById(id).then((resp) => {
      this.$message({
        type: "success",
        message: "删除成功!",
      });
      this.getList();
    });
  });
},
</script>
七、编辑基本信息及大纲
1、页面
<el-table-column label="操作" align="center">
  <template slot-scope="scope">
    <router-link :to="'/course/info/' + scope.row.id">
      <el-button type="primary" size="mini" icon="el-icon-edit" plain>编辑基本信息</el-button>
    </router-link>
    <router-link :to="'/course/chapter/' + scope.row.id">
      <el-button type="info" size="mini" icon="el-icon-edit" plain>编辑课程大纲</el-button>
    </router-link>
    <el-button type="danger" size="mini" icon="el-icon-delete" @click="removeById(scope.row.id)" plain>点击删除课程</el-button>
  </template>
</el-table-column>
2、添加路由
{
  path: 'info/:id',
  name: 'EduCourseInfoEdit',
  component: () => import('@/views/edu/course/info.vue'),
  meta: { title: '编辑课程基本信息', noCache: true },
  hidden: true
},
{
  path: 'chapter/:id',
  name: 'EduCourseChapterEdit',
  component: () => import('@/views/edu/course/chapter.vue'),
  meta: { title: '编辑课程大纲', noCache: true },
  hidden: true
},
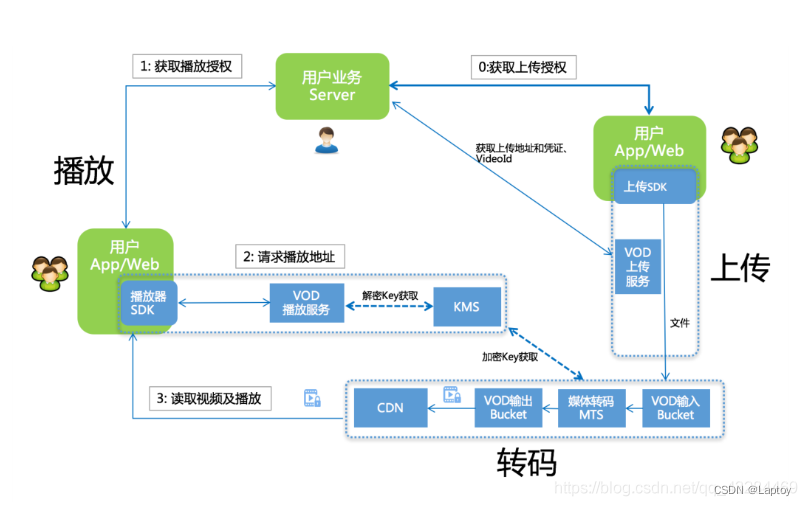
八、阿里云视频点播
8.1、简介
视频点播( ApsaraVideo for VoD )是集音视频采集、编辑、上传、自动化转码处理、媒体资源管理、分发加速于一体的一站式音视频点播解决方案。
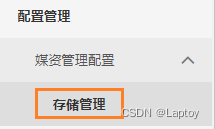
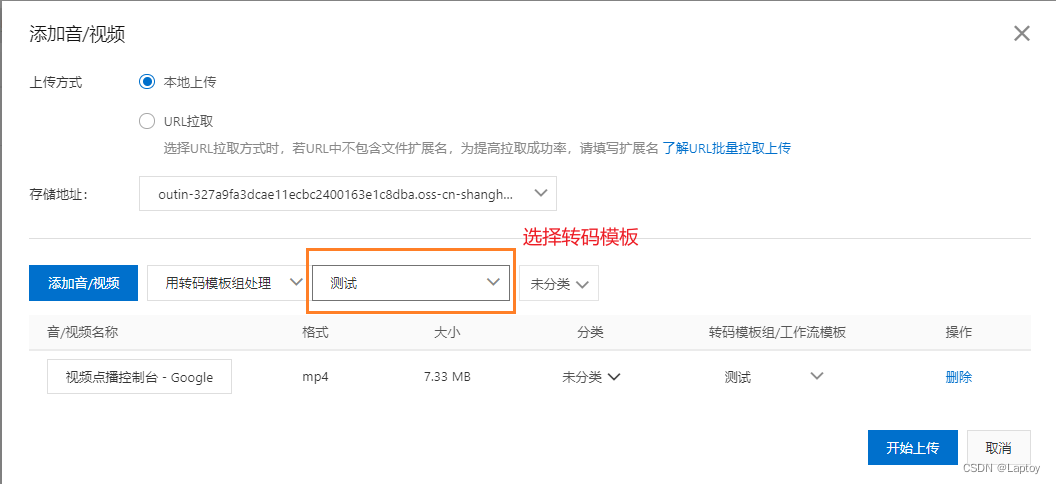
8.2、使用
1、开启 存储管理
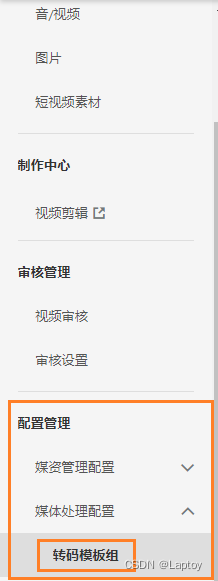
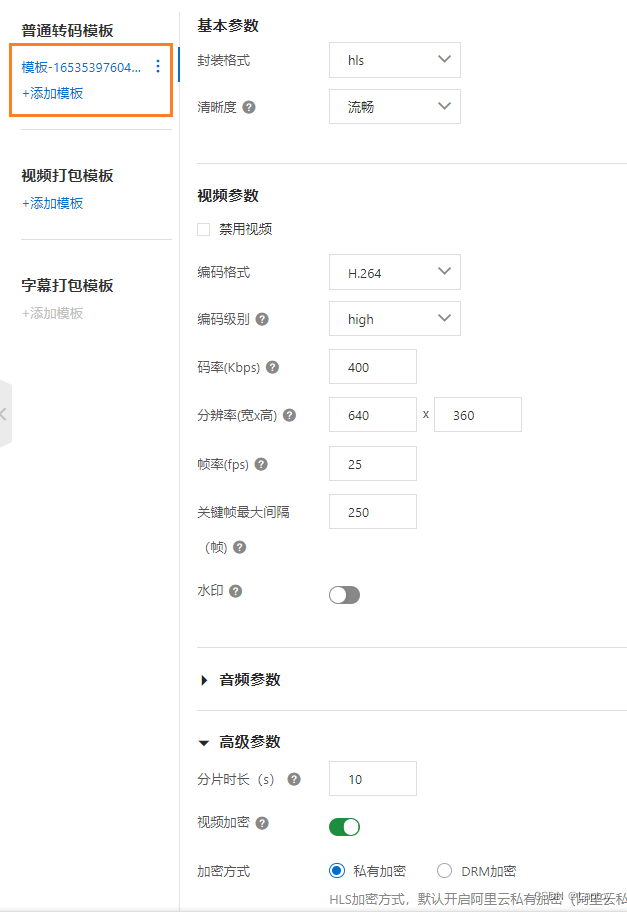
2、添加 转码模板组
3、上传视频
九、使用服务端SDK
9.1、简介
1、简介
- sdk的方式将api进行了进一步的封装,不用自己创建工具类。
- 我们可以基于服务端SDK编写代码来调用点播API,实现对点播产品和服务的快速操作
2、功能介绍
- SDK封装了对API的调用请求和响应,避免自行计算较为繁琐的 API签名。
- 支持所有点播服务的API,并提供了相应的示例代码。
- 支持7种开发语言,包括:Java、Python、PHP、.NET、Node.js、Go、C/C++。
- 通常在发布新的API后,我们会及时同步更新SDK,所以即便您没有找到对应API的示例代码,也可以参考旧的示例自行实现调用。
9.2、获取视频
1、在 service模块 新建微服务模块 service_vod
2、POM
<dependency>
    <groupId>com.aliyun</groupId>
    <artifactId>aliyun-java-sdk-core</artifactId>
</dependency>
<dependency>
    <groupId>com.aliyun.oss</groupId>
    <artifactId>aliyun-sdk-oss</artifactId>
</dependency>
<dependency>
    <groupId>com.aliyun</groupId>
    <artifactId>aliyun-java-sdk-vod</artifactId>
</dependency>
<dependency>
    <groupId>com.alibaba</groupId>
    <artifactId>fastjson</artifactId>
</dependency>
<dependency>
    <groupId>org.json</groupId>
    <artifactId>json</artifactId>
</dependency>
<dependency>
    <groupId>joda-time</groupId>
    <artifactId>joda-time</artifactId>
</dependency>
3、测试获取视频播放地
//初始化类
public class InitObject {

    public static DefaultAcsClient initVodClient(String accessKeyId, String accessKeySecret) throws ClientException {
        String regionId = "cn-shanghai";  // 点播服务接入区域
        DefaultProfile profile = DefaultProfile.getProfile(regionId, accessKeyId, accessKeySecret);
        DefaultAcsClient client = new DefaultAcsClient(profile);
        return client;
    }

    public static void main(String[] args) throws ClientException {
        //1、根据视频id获取视频播放地址
        //创建初始化对象
        DefaultAcsClient cl = InitObject.initVodClient("LTAI5tL5FrVJBuQadij4KRvJ", "Xs7dHUvxCdHLd0K5iFK7NWEbdUN7GG");
        //创建获取视频地址request对象和response对象
        GetPlayInfoResponse response = new GetPlayInfoResponse();
        GetPlayInfoRequest request = new GetPlayInfoRequest();
        //向request对象设置视频id值
        request.setVideoId("1a383ac7aa7f4b8197714ca6f886e5be");


        //调用初始化对象里面的方法传递request,获取数据
        response = cl.getAcsResponse(request);
        List<GetPlayInfoResponse.PlayInfo> playInfoList = response.getPlayInfoList();
        //播放地址
        for (GetPlayInfoResponse.PlayInfo playInfo : playInfoList) {
            System.out.print("PlayInfo.PlayURL = " + playInfo.getPlayURL() + "\n");
        }
        //Base信息
        System.out.print("VideoBase.Title = " + response.getVideoBase().getTitle() + "\n");//VideoBase.Title = 6 - What If I Want to Move Faster.mp4
    }
}
PlayInfo.PlayURL = https://outin-327a9fa3dcae11ecbc2400163e1c8dba.oss-cn-shanghai.aliyuncs.com/sv/60fc3bbf-180ff24e597/60fc3bbf-180ff24e597.mp4?Expires=1653551691&OSSAccessKeyId=LTAIrkwb21KyGjJl&Signature=h0s4mbCbwFd8797gs1KXWxJAUpU%3D
VideoBase.Title = 视频点播控制台 - Google Chrome 2022-05-25 21-26-51.mp4
3、测试获取视频播放凭证(加密视频)
public static void main(String[] args) throws ClientException {
    //创建初始化对象
    DefaultAcsClient cl = InitObject.initVodClient("LTAI5tL5FrVJBuQadij4KRvJ", "Xs7dHUvxCdHLd0K5iFK7NWEbdUN7GG");
    //创建获取视频地址request对象和response对象
    GetVideoPlayAuthRequest request = new GetVideoPlayAuthRequest();
    //向request对象设置视频id值
    request.setVideoId("1a383ac7aa7f4b8197714ca6f886e5be");

    GetVideoPlayAuthResponse response = cl.getAcsResponse(request);

    //播放凭证
    System.out.print("PlayAuth = " + response.getPlayAuth() + "\n");
    //VideoMeta信息
    System.out.print("VideoMeta.Title = " + response.getVideoMeta().getTitle() + "\n");
}
PlayAuth = eyJTZWN1cml0eVRva2VuIjoiQ0FJU2h3TjFxNkZ0NUIyeWZTaklyNWJESGZqVG40eHA0cUM1ZWw3WTFuay9kZUZHdWJmOW1qejJJSDlJZEhWb0FPOGZ2dlUwbTJ0WTdQc1psck1xR3NFZUhoZWJONUlwdDg0T29GMzlKcExGc3QySjZyOEpqc1VZcDVBQTdFYXBzdlhKYXNEVkVmbDJFNVhFTWlJUi8wMGU2TC8rY2lyWXBUWEhWYlNDbFo5Z2FQa09Rd0M4ZGtBb0xkeEtKd3hrMnQxNFVtWFdPYVNDUHdMU2htUEJMVXhtdldnR2wyUnp1NHV5M3ZPZDVoZlpwMXI4eE80YXhlTDBQb1AyVjgxbExacGxlc3FwM0k0U2M3YmFnaFpVNGdscjhxbHg3c3BCNVN5Vmt0eVdHVWhKL3phTElvaXQ3TnBqZmlCMGVvUUFQb3BGcC9YNmp2QWF3UExVbTliWXhncGhCOFIrWGo3RFpZYXV4N0d6ZW9XVE84MCthS3p3TmxuVXo5bUxMZU9WaVE0L1ptOEJQdzQ0RUxoSWFGMElVRTF5R21DQ2QvWDRvZ3VSUDF6N0VwTG9pdjltamNCSHFIeno1c2VQS2xTMVJMR1U3RDBWSUpkVWJUbHphRUpHZ1RTNExmWldJbGNUS0FNOVd1MlBNYXgzYlFGRHI1M3ZzVGJiWHpaYjBtcHR1UG56ZDE0Sk9CS2cxMUtVR29BQlUrY0Q3SXpmeDIvSHJmNXA2cWdSa2UvdDNaMjFPUXF1NkRsSkV3VnpPL2poWngva3JNNitGNWlEK25kT1JHQitZbDJtcTN6SlBnclQxNVdveE5QdXJndy9xbWNib1BWR3dtV01qa3RKOXo0YS90TnA0SWNLRGxKQStvOWFvOWdLbUpPZWJFMnZXT1FicE1LbGFmOER6Q1JCMTl5NmZDUi9qWDFObndub3RTQT0iLCJBdXRoSW5mbyI6IntcIkNJXCI6XCJLenVKNUlCVmRIc0E2eTNlTXFDbS9vYXVOMFZwVFBmYkU0L1VaUUt5c0dhVzc3MjRTWEZQejVyUHlyOGRSN0VaZXVFenpEdndDcDRIY2NoZFlkMjdMVy8yK0R2S1lySXRsVGxlTCtUa0lsZz1cIixcIkNhbGxlclwiOlwiNldQZVY4MkttMDlUbGNGUzVWeDB0SjUxY2pCWEVYb2FuZEk4dEU4OENjWT1cIixcIkV4cGlyZVRpbWVcIjpcIjIwMjItMDUtMjZUMDc6MDQ6NTZaXCIsXCJNZWRpYUlkXCI6XCIxYTM4M2FjN2FhN2Y0YjgxOTc3MTRjYTZmODg2ZTViZVwiLFwiU2lnbmF0dXJlXCI6XCI3Vjhza3RPTnRIK1NBZGV0bVFWRk9CU29vRmc9XCJ9IiwiVmlkZW9NZXRhIjp7IlN0YXR1cyI6Ik5vcm1hbCIsIlZpZGVvSWQiOiIxYTM4M2FjN2FhN2Y0YjgxOTc3MTRjYTZmODg2ZTViZSIsIlRpdGxlIjoi6KeG6aKR54K55pKt5o6n5Yi25Y+wIC0gR29vZ2xlIENocm9tZSAyMDIyLTA1LTI1IDIxLTI2LTUxLm1wNCIsIkNvdmVyVVJMIjoiaHR0cDovL291dGluLTMyN2E5ZmEzZGNhZTExZWNiYzI0MDAxNjNlMWM4ZGJhLm9zcy1jbi1zaGFuZ2hhaS5hbGl5dW5jcy5jb20vMWEzODNhYzdhYTdmNGI4MTk3NzE0Y2E2Zjg4NmU1YmUvc25hcHNob3RzLzNmOTg0ZTE0YjU5OTQxNTM5ODhmNDdiMGI1MDQxMDZhLTAwMDAxLmpwZz9FeHBpcmVzPTE2NTM1NTIxOTYmT1NTQWNjZXNzS2V5SWQ9TFRBSXJrd2IyMUt5R2pKbCZTaWduYXR1cmU9c040UEljem9UbUFPSFJzaHhRTXhMd3pxc09vJTNEIiwiRHVyYXRpb24iOjUuMzE3N30sIkFjY2Vzc0tleUlkIjoiU1RTLk5VdlZCZ3JTSFViUnh4aTJ5anlualZyVngiLCJBY2Nlc3NLZXlTZWNyZXQiOiI3dzRnaWtuSEFlbndCTVYxN2hqbXNqekw4cUZIdlRmZ0tHNjFtWDJ1cVdKcCIsIlJlZ2lvbiI6ImNuLXNoYW5naGFpIiwiQ3VzdG9tZXJJZCI6MTk2MzMzNzIxMTEyMTk2NH0=
VideoMeta.Title = 视频点播控制台 - Google Chrome 2022-05-25 21-26-51.mp4
9.3、上传视频
1、POM - 默认找不到该依赖
<dependency>
    <groupId>com.aliyun</groupId>
    <artifactId>aliyun-sdk-vod-upload</artifactId>
</dependency>
2、将资料的 5-lib/aliyun-java-vod-upload-1.4.11.jar 放到maven仓库bin目录下并执行如下命令安装上述依赖
mvn install:install-file -DgroupId=com.aliyun -DartifactId=aliyun-sdk-vod-upload -Dversion=1.4.11 -Dpackaging=jar -Dfile=aliyun-java-vod-upload-1.4.11.jar
3、测试
@Test
public void testFileUpload() {
    String accessKeyId = "LTAI5tL5FrVJBuQadij4KRvJ";
    String accessKeySecret = "Xs7dHUvxCdHLd0K5iFK7NWEbdUN7GG";
    String title = "My Upload Video"; //上传之后文件的名称
    String fileName = "C:\\Users\\lapto\\Desktop\\myVideo.mp4"; //本地文件的路径和名称
    UploadVideoRequest request = new UploadVideoRequest(accessKeyId, accessKeySecret, title, fileName);

    /* 可指定分片上传时每个分片的大小,默认为2M字节 */
    request.setPartSize(2 * 1024 * 1024L);
    /* 可指定分片上传时的并发线程数,默认为1,(注:该配置会占用服务器CPU资源,需根据服务器情况指定)*/
    request.setTaskNum(1);
    UploadVideoImpl uploader = new UploadVideoImpl();
    UploadVideoResponse response = uploader.uploadVideo(request);
    if (response.isSuccess()) {
        System.out.print("VideoId=" + response.getVideoId() + "\n"); //获取到上传视频的id
    } else {
        /* 如果设置回调URL无效,不影响视频上传,可以返回VideoId同时会返回错误码。其他情况上传失败时,VideoId为空,此时需要根据返回错误码分析具体错误原因 */
        System.out.print("VideoId=" + response.getVideoId() + "\n");
        System.out.print("ErrorCode=" + response.getCode() + "\n");
        System.out.print("ErrorMessage=" + response.getMessage() + "\n");
    }
}

十、视频点播微服务
10.1、后端接口
1、service_vod微服务 主启动类
@SpringBootApplication(exclude = DataSourceAutoConfiguration.class)
@ComponentScan(basePackages = {"com.laptoy"}) //用于扫描swagger
public class Service_vod_Main8003 {
    public static void main(String[] args) {
        SpringApplication.run(Service_vod_Main8003.class, args);
    }
}
2、YML
# 服务端口号
server.port=8003
# 服务名
spring.application.name=service-vod
# nacos注册中心
spring.cloud.nacos.discovery.server-addr=120.76.55.55:8848
# 环境设置 dev test prod
spring.profiles.active=dev
# 最大上传单个文件大小:默认1M
spring.servlet.multipart.max-file-size=1024MB
# 最大置总上传的数据大小 :默认10M
spring.servlet.multipart.max-request-size=1024MB
# 阿里云 vod
aliyun.vod.file.keyid=LTAI5tL5FrVJBuQadij4KRvJ
aliyun.vod.file.keysecret=Xs7dHUvxCdHLd0K5iFK7NWEbdUN7GG
3、控制层
@RestController
@CrossOrigin
@RequestMapping("/eduvod/video")
public class VodController {
@Autowired
private VodService vodService;
//上传视频到阿里云
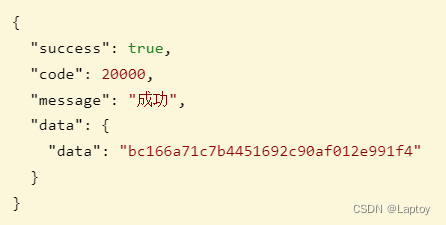
@PostMapping("/uploadAliyunVideo")
public R uploadAliyunVideo(MultipartFile file) {
//返回上传视频的id
String videoId = vodService.uploadVideoAliyun(file);
return R.ok().data("data", videoId);
}
}
4、业务层
@Service
public class VodServiceImpl implements VodService {

    @Value("${aliyun.vod.file.keyid}")
    private String accessKeyId;

    @Value("${aliyun.vod.file.keysecret}")
    private String accessKeySecret;

    @Override
    public String uploadVideoAliyun(MultipartFile file) {

        try {
            //fileName:上传文件原始名称
            String fileName = file.getOriginalFilename();
            //title:上传之后显示名称
            String title = fileName.substring(0, fileName.lastIndexOf("."));
            //inputStream:上传文件的输入流
            InputStream inputStream = file.getInputStream();

            UploadStreamRequest request = new UploadStreamRequest(accessKeyId, accessKeySecret, title, fileName, inputStream);

            UploadVideoImpl uploader = new UploadVideoImpl();
            UploadStreamResponse response = uploader.uploadStream(request);
            System.out.print("RequestId=" + response.getRequestId() + "\n");  //请求视频点播服务的请求ID

            String videoId = null;

            if (response.isSuccess()) {
                videoId = response.getVideoId();
            } else { //如果设置回调URL无效,不影响视频上传,可以返回VideoId同时会返回错误码。其他情况上传失败时,VideoId为空,此时需要根据返回错误码分析具体错误原因
                videoId = response.getVideoId();
            }
            return videoId;

        } catch (Exception e) {
            e.printStackTrace();
            return null;
        }
    }

}
5、测试
10.2、前端实现
1、nginx.conf 添加配置并重启 nginx
http {
	<--文件上传最大大小 -->
	client_max_body_size 1024m;

	server {
		listen       9001;
		server_name  localhost;

		...

		location ~ /eduvod/ {
			proxy_pass http://localhost:8003;
		}
	}
}
2、页面
<el-form-item label="上传视频">
  <el-upload class="upload-demo" :on-success="handleVodUploadSuccess" :before-remove="beforeVodRemove"
  			 :file-list="fileList" :action="BASE_API + '/eduvod/video/uploadAliyunVideo'" :limit="1" >
    <el-button size="small" type="primary">上传视频</el-button>
    <el-tooltip placement="right-end">
      <!-- 隐藏提示信息 -->
      <div slot="content">
        最大支持1G,<br />
        支持3GP、ASF、AVI、DAT、DV、FLV、F4V、<br />
        GIF、M2T、M4V、MJ2、MJPEG、MKV、MOV、MP4、<br />
        MPE、MPG、MPEG、MTS、OGG、QT、RM、RMVB、<br />
        SWF、TS、VOB、WMV、WEBM 等视频格式上传
      </div>
      <i class="el-icon-question" />
    </el-tooltip>
  </el-upload>
</el-form-item>
3、js
data() {
  return {
    video: {
      sort: 0,
      title: "",
      free: "",
      videoSourceId: ""
    },
    fileList: [], //上传文件列表
    BASE_API: process.env.BASE_API, // 接口API地址
  };
},
methods: {
  // 上传成功执行方法
  handleVodUploadSuccess(response, file, fileList) {
    this.video.videoSourceId = response.data.data
  },
  beforeVodRemove(file, fileList) {
    return this.$confirm(`确定移除 ${file.name}?`);
  },
}
10.3、视频删除
1、控制层
// 根据视频id删除阿里云视频
@DeleteMapping("/removeAliyunVideoById/{id}")
public R removeAliyunVideoById(@PathVariable String id) {
    vodService.removeAliyunVideoById(id);
    return R.ok();
}
2、业务层
// 根据id删除阿里云视频
@Override
public void removeAliyunVideoById(String id) {
    try {
        DefaultAcsClient client = initVodClient(accessKeyId, accessKeySecret);
        DeleteVideoRequest request = new DeleteVideoRequest();
        request.setVideoIds(id);
        DeleteVideoResponse response = client.getAcsResponse(request);
        System.out.println("RequestId = " + response.getRequestId() + "\n");
    } catch (ClientException e) {
        throw new LaptoyException(20001, "视频删除失败");
    }
}

public static DefaultAcsClient initVodClient(String accessKeyId, String accessKeySecret) throws ClientException {
    String regionId = "cn-shanghai";  // 点播服务接入区域
    DefaultProfile profile = DefaultProfile.getProfile(regionId, accessKeyId, accessKeySecret);
    DefaultAcsClient client = new DefaultAcsClient(profile);
    return client;
}


 283
283


 被折叠的 条评论
为什么被折叠?
被折叠的 条评论
为什么被折叠?
 到【灌水乐园】发言


