


 本文详细介绍了FIDO2标准及其组件CTAP和WebAuthn,阐述了FIDO2在不同浏览器的支持情况,并逐步讲解了利用WebAuthn进行注册和认证的流程。此外,还提供了服务器端使用docker-ce搭建的详细步骤,包括Docker容器的构建和配置,以及最终的访问测试和登录演示。
目录
一、FIDO2基本介绍
FIDO标准允许用户使用各种身份验证方法(如生物识别、PIN码等)来进行强身份验证,而不再依赖传统的用户名和密码。FIDO支持的主要协议是FIDO U2F(Universal 2nd Factor)和FIDO2。
FIDO2包括两个主要组件:CTAP(Client to Authenticator Protocol)和WebAuthn。CTAP是在设备(例如USB密钥或手机)和客户端应用程序之间建立通信的协议。WebAuthn是在Web浏览器和认证器设备之间建立通信的协议。Chromium浏览器在版本67及以后开始支持FIDO2,使用户能够使用FIDO2安全密钥进行身份验证。
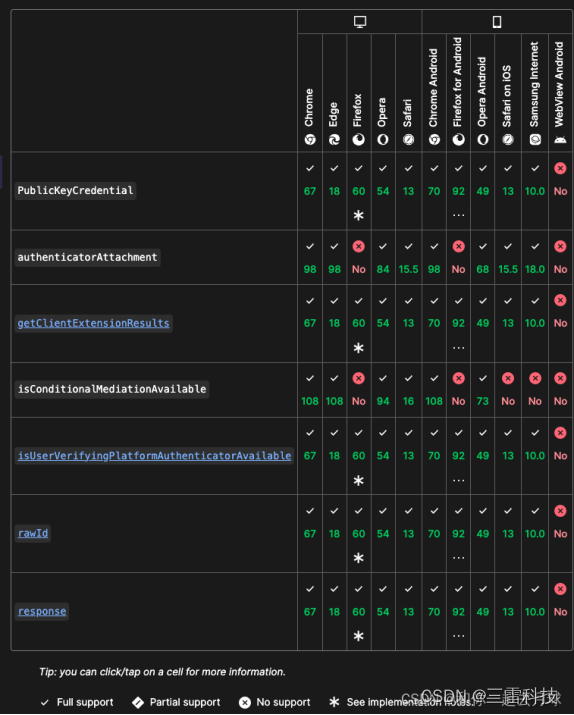
二、FIDO2对于浏览器支持版本
三、认证预校验流程
3.1 认证流程
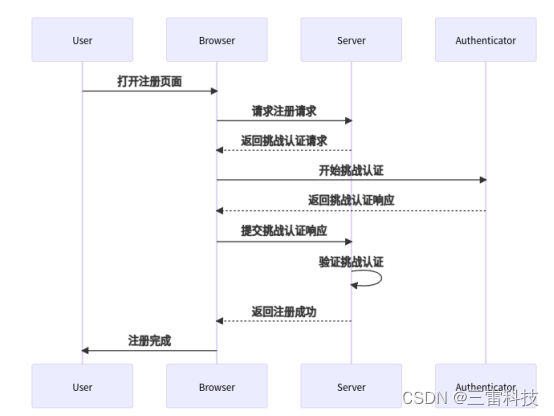
- 用户通过浏览器打开WebAuthn注册页面。
- 浏览器向服务器发送注册请求。
- 服务器返回挑战认证请求给浏览器。
- 浏览器启动Authenticator(例如指纹传感器、USB安全密钥等)进行挑战认证。
- Authenticator返回挑战认证响应给浏览器。
- 浏览器将挑战认证响应提交给服务器。
- 服务器验证挑战认证响应的有效性。
- 如果验证通过,服务器返回注册成功消息给浏览器。
- 浏览器向用户显示注册完成。
3.2 注册流程
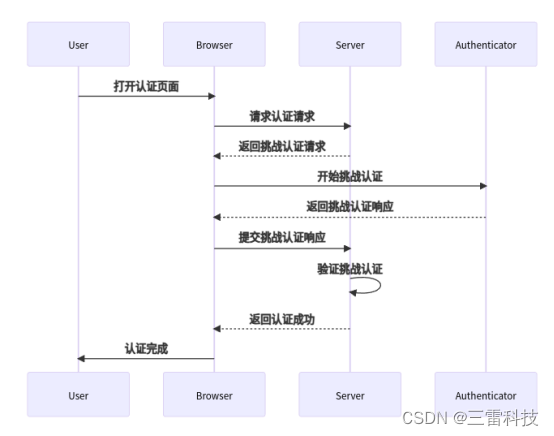
- 用户通过浏览器打开WebAuthn认证页面。
- 浏览器向服务器发送认证请求。
- 服务器返回挑战认证请求给浏览器。
- 浏览器启动Authenticator(例如指纹传感器、USB安全密钥等)进行挑战认证。
- Authenticator返回挑战认证响应给浏览器。
- 浏览器将挑战认证响应提交给服务器。
- 服务器验证挑战认证响应的有效性。
- 如果验证通过,服务器返回认证成功消息给浏览器。
- 浏览器向用户显示认证完成。
四、FIDO2浏览器接口说明
4.1 注册请求navigator.credentials.create()
语法
navigator.credentials.create(options)
options(必需): 一个包含用于创建凭证的信息的对象。该对象包含两个可能的属性:password 和 publicKey。你可以选择只传递其中一个属性。
4.1.1 options.password(密码凭证)略
参数说明
| { password: { id: "example-id", password: "user-password", type: "password" } } |
id: 凭证的唯一标识符。
password: 用户的密码。
type: 凭证的类型,这里为 "password"。
使用实例
| navigator.credentials.create({ password: { id: "example-id", password: "user-password", type: "password" } }).then(function(credential) { console.log("Password credential created:", credential); }).catch(function(err) { console.error("Error creating password credential:", err); }); |
4.1.2 options.publicKey(公钥凭证)
参数说明
| { publicKey: { challenge: new Uint8Array(/* 随机生成的挑战值、至少需要16个字节 */), rp: { name: "Example Inc"/* Relying party 的名称 */, id: "Example Inc" }, user: { id: new Uint8Array(/* 用户的唯一标识符 */), name: "user@example.com" /* 前端用户输入的名称 */, displayName: "User Name" }, pubKeyCredParams: [ { type: "public-key", alg: -7 } ........ ], authenticatorSelection:{ authenticatorAttachment: "platform", requirResidentKey: false, userVerification: "preferred", }, timeout:6000, attestation: "direct" } } |
使用实例
challenge: 一个随机生成的挑战值,用于证明用户的身份。
rp: 包含 Relying Party(RP)的信息,比如 name 表示 RP 的名称。
user: 包含用户的信息,包括 id(用户的唯一标识符)、name(用户名)、displayName(显示的用户名)。
pubKeyCredParams: 指定可用的公钥凭证参数,包括 type("public-key" 表示使用公钥凭证)、alg(指定签名算法的数字值,例如 -7 表示 ECDSA with SHA-256)。
完整实例:
| const res = await navigator.credentials.create({ publicKey: { // 在服务器后台中生成随机的、加密安全的、至少 16 个字节的数据 challenge: base64url.decode("<%= challenge %>"), // relying party 的信息 // 依赖方的id,是浏览器当前域名的子集 rp: { id: "csdn.net", name: "csdn", // Relying party 的名称 }, user: { id: base64url.decode("<%= id %>"), name: "<%= name %>", displayName: "<%= displayName %>", }, authenticatorSelection: { userVerification: "preferred" }, // 服务器希望从认证器接收证明数据(direct) attestation: "direct", pubKeyCredParams: [ { type: "public-key", alg: -7, // "ES256" IANA COSE Algorithms registry }, ], }, }); // 由于 res 并不是一个 JSON object,需要将 res 转换为 JSON object const json = publicKeyCredentialToJSON(res); // 将 json 发送给服务器 await post("/webauthn/register", { state: "<%= state %>", provider: "<%= provider %>", res: JSON.stringify(json), }); |
navigator.credentials.create()返回类型
| { // 新生成的凭证的ID;它将用于在认证用户时标识凭证。ID是一个base64编码的字符串 “id”:””, // 属性返回包含内部槽中的标识符 “rawid”:””, “type”:”public-key”, “response”:{ // 这表示从浏览器传递到身份验证器的数据,以便将新凭据与服务器和浏览器相关联。 // 验证器将其作为UTF-8字节数组提供。 “attestationObject”:”” // 此对象包含凭证公钥、可选的证明证书和其他用于验证注册事件的元数据。 // 它是以CBOR编码的二进制数据。 “clientDataJson”:””, } } |
4.2 登录请求navigator.credentials.get()
| const res = await navigator.credentials.get({ publicKey: { // 随机的、加密安全的、至少 16 个字节的数据 challenge: base64url.decode("<%= challenge %>"), // 这个数组告诉浏览器服务器希望用户使用哪些凭据进行身份验证 allowCredentials: [ { id: base64url.decode("<%= id %>"), type: "public-key", transports: ['usb', 'ble', 'nfc'], // 传输方式 USB、蓝牙,NFC }, ], timeout: 15000, // 超过 15 秒未完成认证,则认为认证失败 authenticatorSelection: { userVerification: "preferred" }, }, }); // 由于 res 并不是一个 JSON object,需要将 res 转换为 JSON object const json = publicKeyCredentialToJSON(res); // 将 json 发送给服务器 post("/webauthn/authenticate", { state: "<%= state %>", provider: "<%= provider %>", res: JSON.stringify(json), }); |
navigator.credentials.get返回类型
| { “id”:””, “rawid”:””, “type”:”public-key”, “response”:{ “authenticatorData”:”” “clientDataJson”:””, “signatrue”:””, “userHandle”:”” } } |
五、服务器搭建
操作系统使用centos7.下载地址为:
| 链接: https://pan.baidu.com/s/12_V7bHmgxE7Dnt8Z_GQTCg 提取码: uub7 --来自百度网盘超级会员v4的分享 |
5.1 docker-ce 安装
5.1.1 获取docker-ce源地址命令如下:
| sudo su cd /etc/yum.repo.d/ wget https://download.docker.com/linux/centos/docker-ce.repo yum update |
5.1.2 安装docker-ce
| yum remove docker yum remove docker* yum install docker-ce -y |
5.1.3 启动docker并且编译项目
| systemctl start docker systemctl enable docker docker -v systemctl stop firewalld systemctl disable firewalld |
5.2 构建docker容器
5.2.1 下载webauthn源码
下载代码如下:
| apt install git git clone https://github.com/duo-labs/webauthn.io.git |
5.2.2 修改编译配置文件以及内容
修改Dockfile文件,由于源文件代码中使用pip自动安装的方式,他需要对应的源下载压缩包进行安装。我们访问pypithon.org比较慢因此修改国内的源会比较方便下载。并且需要将其依赖关系都安装上。
修改内容如下:
删除Pipfile的拷贝,添加安装依赖django 、django-sass-processor 、 django-compressor
等
| # Tweak the base image by installing pipenv FROM docker.io/python:3.10 RUN pip install --upgrade pip -i https://pypi.tuna.tsinghua.edu.cn/simple RUN pip install pipenv -i https://pypi.tuna.tsinghua.edu.cn/simple # Begin our actual build # FROM base as base1 # collectstatic needs the secret key to be set. We store that in this environment variable. # Set this value in this project's .env file ARG DJANGO_SECRET_KEY RUN mkdir -p /usr/src/app COPY ./_app /usr/src/app #COPY Pipfile /usr/src/app/ #COPY Pipfile.lock /usr/src/app/ WORKDIR /usr/src/app RUN pipenv install RUN pip config set global.index-url https://pypi.tuna.tsinghua.edu.cn/simple RUN pip config set install.trusted-host pypi.tuna.tsinghua.edu.cn RUN pip install django RUN pip install django-sass-processor RUN pip install django-compressor RUN pip install redis RUN pip install psycopg2 RUN pip install libsass RUN pip install gunicorn RUN pip install webauthn RUN python manage.py compilescss RUN python manage.py collectstatic --no-input --ignore=*.scss |
5.2.3 修改docker-compose.yml代码
1. 添加 POSTGRES_USER环境变量的值.
2. 添加POSTGRES_PASSWORD环境变量的值.
3. 给django容器添加8000映射端口,8000端口的值需要和gunicorn.cfg.py文件中的bind = ":8000"保持一致.
修改内容如下:
| [root@localhost webauthn.io]# git diff docker-compose.yml diff --git a/docker-compose.yml b/docker-compose.yml index 30f9ffb..6ef57be 100644 --- a/docker-compose.yml +++ b/docker-compose.yml @@ -8,8 +8,8 @@ services: networks: - database_network environment: - - POSTGRES_USER - - POSTGRES_PASSWORD + - POSTGRES_USER=myuser + - POSTGRES_PASSWORD=mypassword redis: image: redis:6.2.6 @@ -38,11 +38,14 @@ services: context: . dockerfile: Dockerfile args: - - DJANGO_SECRET_KEY + - DJANGO_SECRET_KEY=x123456 + - SECRET_KEY=x123456 depends_on: - db - redis command: gunicorn webauthnio.wsgi -c gunicorn.cfg.py + ports: + - "8000:8000" volumes: - ./_app:/usr/src/app # Django static files will go here so Caddy can access them |
- 执行命令开始编译
| bash start-dev.sh |
5.2.4 修改django运行文件
文件路径 webauthn.io/_app/webauthnio/settings.py,修改所有ip地址都可以访问.
原内容:
| ALLOWED_HOSTS = ["localhost"] |
修改后内容:
| ALLOWED_HOSTS = ["*"] |
文件路径 webauthn.io/_app/webauthnio/urls.py
修改内容如下:
| diff --git a/_app/webauthnio/urls.py b/_app/webauthnio/urls.py index 0db7c4d..f4fdf4b 100644 --- a/_app/webauthnio/urls.py +++ b/_app/webauthnio/urls.py @@ -15,5 +15,6 @@ Including another URLconf """ from django.contrib import admin from django.urls import path, include - -urlpatterns = [path("admin/", admin.site.urls), path("", include("homepage.urls"))] +from django.conf import settings +from django.conf.urls.static import static +urlpatterns = [path("admin/", admin.site.urls), path("", include("homepage.urls"))] + static(settings.STATIC_URL, document_root=settings.STATIC_ROOT) |
如果出现static静态文件找不到,就需要手动设置静态文件地址.
问题参考:https://docs.djangoproject.com/en/4.0/howto/static-files/修改.
5.2.5 构建docker
| bash start-dev.sh |
构建成功后会自动启动.

docker ps -a查看容器状态
5.3 访问测试
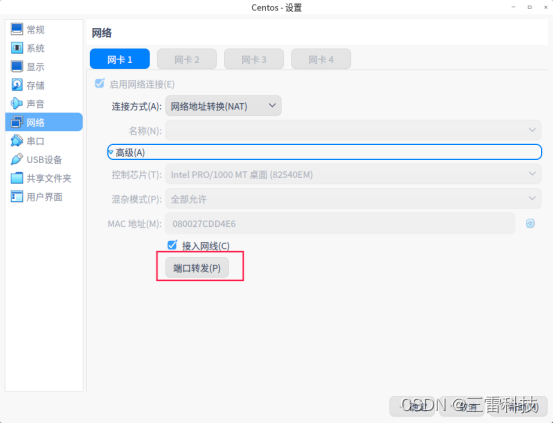
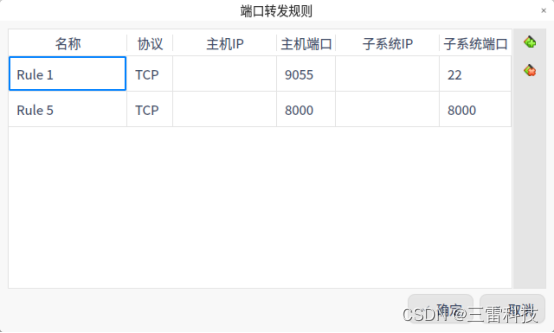
5.3.1 设置端口映射
由于使用的是虚拟机搭建因此需要将虚拟机中的端口映射到本地.
映射方法如下:
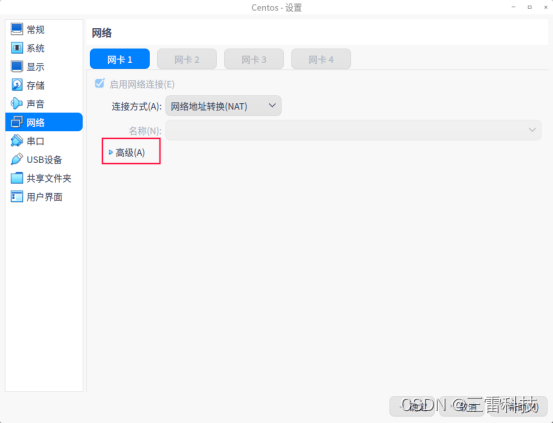
将8000端口映射到主系统的8000端口.
5.3.2 访问测试
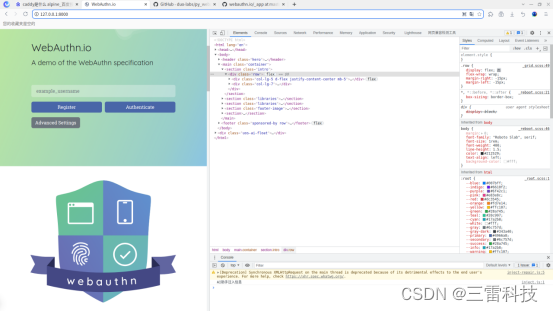
在主机中输入网址:http://127.0.0.1:8000/
显示效果如下:
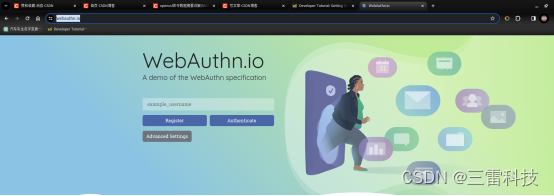
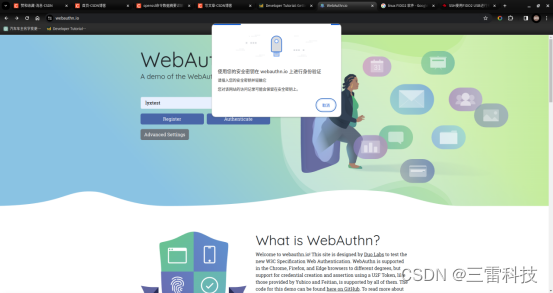
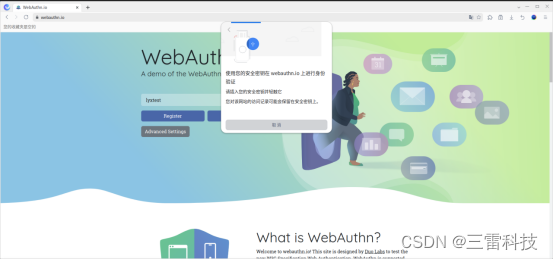
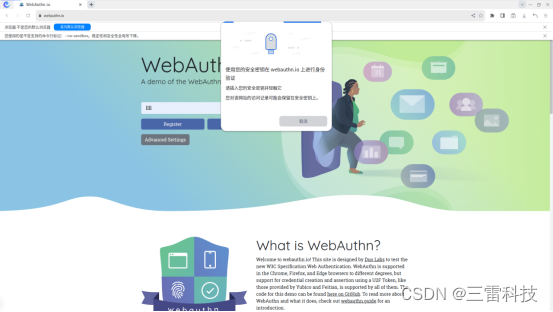
六、登录演示
七、测试网站
网址:https://webauthn.io/
浏览器:chrome.硬件:台式电脑
浏览器:UOS 93:台式电脑
浏览器:UOS 114:台式电脑


 被折叠的 条评论
为什么被折叠?
被折叠的 条评论
为什么被折叠?
 到【灌水乐园】发言


