


一、Spring Boot整合JPA
(一)创建Spring Boot项目JPADemo
设置项目元数据


设置项目名称与保存位置

完成项目初始化工作

(二)创建ORM实体类
ORM: Object Relation Mapping 对象关系映射 (Object: Java Bean; Relation: Table)
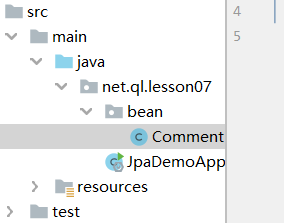
1、创建评论实体类 - Comment
package net.ql.lesson07.bean;

import javax.persistence.*;


@Entity(name = "t_comment")
public class Comment {
    @Id
    @GeneratedValue(strategy = GenerationType.IDENTITY)
    @Column(name = "id")
    private Integer id;
    @Column(name = "content")
    private String content;
    @Column(name = "author")
    private String author;
    @Column(name = "a_id")
    private Integer aId;

    public Integer getId() {
        return id;
    }

    public void setId(Integer id) {
        this.id = id;
    }

    public String getContent() {
        return content;
    }

    public void setContent(String content) {
        this.content = content;
    }

    public String getAuthor() {
        return author;
    }

    public void setAuthor(String author) {
        this.author = author;
    }

    public Integer getaId() {
        return aId;
    }

    public void setaId(Integer aId) {
        this.aId = aId;
    }

    @Override
    public String toString() {
        return "Comment{" +
                "id=" + id +
                ", content='" + content + '\'' +
                ", author='" + author + '\'' +
                ", aId=" + aId +
                '}';
    }
}
2、创建文章实体类 - Article

package net.ql.lesson07.bean;

import javax.persistence.*;
import java.util.List;


@Entity(name = "t_article")
public class Article {
    @Id
    @GeneratedValue(strategy = GenerationType.IDENTITY)
    @Column(name = "id")
    private Integer id;
    @Column(name = "title")
    private String title;
    @Column(name = "content")
    private String content;
    // 查询时将子表一并查询出来
    @OneToMany(fetch = FetchType.EAGER) // FetchType.LAZY 懒加载
    @JoinTable(name = "t_comment", joinColumns = {@JoinColumn(name = "a_id")},
            inverseJoinColumns = {@JoinColumn(name = "id")})
    private List<Comment> commentList;

    public Integer getId() {
        return id;
    }

    public void setId(Integer id) {
        this.id = id;
    }

    public String getTitle() {
        return title;
    }

    public void setTitle(String title) {
        this.title = title;
    }

    public String getContent() {
        return content;
    }

    public void setContent(String content) {
        this.content = content;
    }

    public List<Comment> getCommentList() {
        return commentList;
    }

    public void setCommentList(List<Comment> commentList) {
        this.commentList = commentList;
    }

    @Override
    public String toString() {
        return "Article{" +
                "id=" + id +
                ", title='" + title + '\'' +
                ", content='" + content + '\'' +
                ", commentList=" + commentList +
                '}';
    }
}
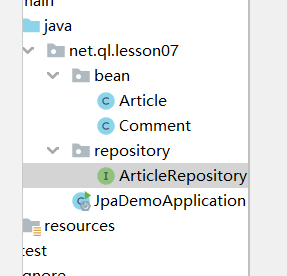
(三)创建自定义JpaRepository接口 - ArticleRepository
创建文章仓库接口ArticleRepository
package net.ql.lesson07.repository;

import net.ql.lesson07.bean.Article;
import org.springframework.data.jpa.repository.JpaRepository;


public interface ArticleRepository extends JpaRepository<Article, Integer> {
}
(四)添加数据源依赖,配置数据源属性
1、在pom.xml里添加阿里巴巴数据源依赖
<dependency>
    <groupId>com.alibaba</groupId>
    <artifactId>druid-spring-boot-starter</artifactId>
    <version>1.2.6</version>
</dependency>

2、在全局配置文件里配置数据源
# 配置数据源
spring.datasource.url=jdbc:mysql://localhost:3306/blog?serverTimezone=UTC
spring.datasource.username=root
spring.datasource.password=p@ssw0rd
spring.datasource.druid.max-active=100
spring.datasource.druid.min-idle=10
spring.datasource.druid.initial-size=20

3、在测试类里编写测试方法
点开项目测试类

(1)注入文章仓库 - ArticleRepository

(2)创建测试方法testFindAll()

运行测试方法,查看结果


 308
308


 被折叠的 条评论
为什么被折叠?
被折叠的 条评论
为什么被折叠?
 到【灌水乐园】发言


