uni-app底部导航栏tabBar的显示和使用步骤

一,看官网,了解tabBar

tabBar

如果应用是一个多 tab 应用,可以通过 tabBar 配置项指定 tab 栏的表现,以及 tab 切换时显示的对应页。

Tips

  • 当设置 position 为 top 时,将不会显示 icon
  • tabBar 中的 list 是一个数组,只能配置最少2个、最多5个 tab,tab 按数组的顺序排序。
  • tabbar 切换第一次加载时可能渲染不及时,可以在每个tabbar页面的onLoad生命周期里先弹出一个等待雪花(hello uni-app使用了此方式)
  • tabbar 的页面展现过一次后就保留在内存中,再次切换 tabbar 页面,只会触发每个页面的onShow,不会再触发onLoad。
  • 顶部的 tabbar 目前仅微信小程序上支持。需要用到顶部选项卡的话,建议不使用 tabbar 的顶部设置,而是自己做顶部选项卡,可参考 hello uni-app->模板->顶部选项卡。

二,在page.js文件里面配置

{
	"pages": [ //pages数组中第一项表示应用启动页,参考:https://uniapp.dcloud.io/collocation/pages
		{
			"path": "pages/index/index",
			"style": {
				"navigationBarTitleText": "uni-app"
			}
		}
	    ,{
            "path" : "pages/show/show",
            "style" : {
				"navigationBarTitleText": "show"
			}
        }
        ,{
            "path" : "pages/component/component",
            "style" : {
				"navigationBarTitleText": "component"
			}
        }
    ],
	"globalStyle": {
		"navigationBarTextStyle": "black",
		"navigationBarTitleText": "uni-app",
		"navigationBarBackgroundColor": "#F8F8F8",
		"backgroundColor": "#F8F8F8"
	},
	"tabBar": {
	    "color": "#F0AD4E",
	    "selectedColor": "#3cc51f",
	    "borderStyle": "black",
	    "backgroundColor": "#F8F8F8",
	    "list": [{
	        "pagePath": "pages/index/index",
	        "iconPath": "static/logo.png",
	        "selectedIconPath": "static/logo.png",
	        "text": "首页"
	    },{
	        "pagePath": "pages/component/component",
	        "iconPath": "static/logo.png",
	        "selectedIconPath": "static/logo.png",
	        "text": "组件"
	    }, {
	        "pagePath": "pages/show/show",
	      "iconPath": "static/logo.png",
	      "selectedIconPath": "static/logo.png",
	        "text": "展示"
	    }]
	}

	    
}

 刚开始不知道为什么我在"tabBar"里面配置两个页面的时候一直不显示,配置三个页面就成功了,不知道你们有没有遇到这个问题
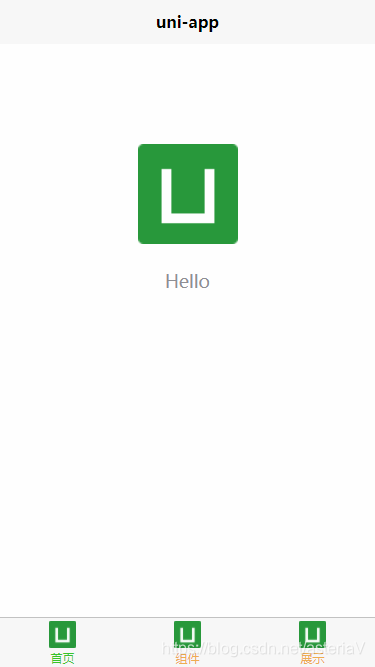
好了,配置成功,效果图如下

  • 4
    点赞
  • 11
    收藏
    觉得还不错? 一键收藏
  • 1
    评论
uni-app是一个跨平台的开发框架,可以用于开发多个平台的应用程序。在uni-app中,可以通过自定义底部导航栏来实现个性化的界面设计和功能需求。 以下是一种实现自定义底部导航栏的方法: 1. 首先,创建一个自定义组件,用于显示底部导航栏的每个按钮。可以使用`uni-icons`组件来显示图标,并添加相应的点击事件。 ```vue <template> <view> <view class="tabbar"> <view class="tabbar-item" @click="navigateTo('home')"> <uni-icons type="home"></uni-icons> <text>首页</text> </view> <view class="tabbar-item" @click="navigateTo('discover')"> <uni-icons type="discover"></uni-icons> <text>发现</text> </view> <view class="tabbar-item" @click="navigateTo('mine')"> <uni-icons type="mine"></uni-icons> <text>我的</text> </view> </view> </view> </template> <script> export default { methods: { navigateTo(page) { uni.navigateTo({ url: `/pages/${page}/${page}` }); } } } </script> <style> .tabbar { display: flex; justify-content: space-around; align-items: center; height: 100px; background-color: #f5f5f5; } .tabbar-item { display: flex; flex-direction: column; align-items: center; } </style> ``` 2. 在需要显示底部导航栏的页面中,引入自定义组件,并在页面的底部位置使用该组件。 ```vue <template> <view> <!-- 页面内容 --> </view> <custom-tabbar></custom-tabbar> </template> <script> import CustomTabbar from '@/components/CustomTabbar.vue'; export default { components: { CustomTabbar } } </script> ``` 通过以上步骤,你可以实现一个自定义的底部导航栏,并在不同的页面之间进行切换。

“相关推荐”对你有帮助么?

  • 非常没帮助
  • 没帮助
  • 一般
  • 有帮助
  • 非常有帮助
提交
评论 1
添加红包

请填写红包祝福语或标题

红包个数最小为10个

红包金额最低5元

当前余额3.43前往充值 >
需支付:10.00
成就一亿技术人!
领取后你会自动成为博主和红包主的粉丝 规则
hope_wisdom
发出的红包
实付
使用余额支付
点击重新获取
扫码支付
钱包余额 0

抵扣说明:

1.余额是钱包充值的虚拟货币,按照1:1的比例进行支付金额的抵扣。
2.余额无法直接购买下载,可以购买VIP、付费专栏及课程。

余额充值