


装http3一直有这样那样的问题,所以干脆从一个干净的ubuntu上开始装,主要是configure的参数的问题,我试了下面的configure参数是可以装上的
还有一些依赖包,直接apt install 也能解决
如果安装过程中遇到什么问题也欢迎留言讨论
-
download ubuntu server Get Ubuntu Server | Download | Ubuntu,download ubuntu 20.04 server; 我是直接了装到了VM Exsi上面了
-
安装完后可以使能root账号,也可以直接用安装时使用的账号,只是需要sudo
使能root账号命令 (sudo passwd root)然后输入两次密码即可,su root,切换到root账号
3. 安装http3 server 需要先安装ssl ,这里参照上面两个链接,我们可以安装quictls (GitHub - quictls/openssl: TLS/SSL and crypto library with QUIC APIs)
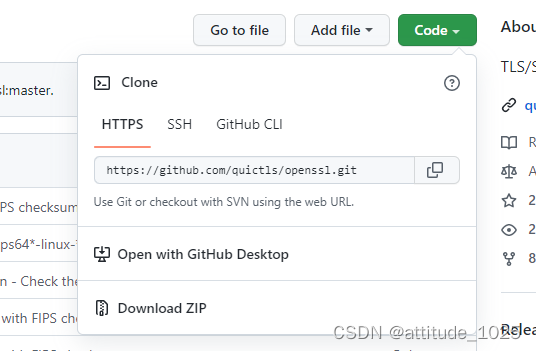
git clone https://github.com/quictls/openssl.git
4. download hg-nginx 最新的版本
apt install mercurial - (在hi用hg之前需要安装hg, Mercurial 是一种轻量级分布式版本控制系统)
hg clone -b quic https://hg.nginx.org/nginx-quic
-
编译安装openssl
./Configure --prefix=/opt/openssl
make && make install (这里需要安装一段时间)
然后/opt/openssl/bin 目录下面执行./openssl 查看openssl 是否可以工作

ps. 如果执行出现问题 (error while loading shared librries:libs1.so.81.3)
![]()
是因为linux当前的安装目录没有被加到库文件查找目录,可以通过以下方式解决
![]()
或者直接创建软连接:
ln -s libssl.so.81.3 /usr/lib/libssl.so.81.3
cd /usr/lib/
ln -s /opt/openssl/lib64/libcrypto.so.81.3 libcrypto.so.81.3
5.接下来编译安装quic http3
*** 在编译安装之前需要安装一些依赖包:apt install zlib1g-dev -y;apt install libpcre3 libpcre3-dev; apt-get install libgeoip-dev
root@nginx-client:/opt/nginx/sbin# ./auto/configure --prefix=/opt/nginx --with-debug --with-http_slice_module --with-http_realip_module --with-http_geoip_module --without-poll_module --without-select_module --without-mail_pop3_module --without-mail_imap_module --without-mail_smtp_module --with-threads --with-http_stub_status_module --with-http_sub_module --with-http_gzip_static_module --with-http_gunzip_module --with-file-aio --with-stream --with-stream_ssl_module --with-stream_ssl_preread_module --with-openssl-opt=enable-tls1_3 --with-stream_realip_module --with-stream_geoip_module --with-http_ssl_module --with-http_v2_module --with-pcre-jit --with-stream_quic_module --with-http_v3_module --with-cc-opt="-I /opt/openssl/include" --with-ld-opt="-L /opt/openssl/lib64"
-
然后make && make install, 查看nginx 安装目录,测试

然后配置quic使能443 端口即可:
listen 443 http3 reuseport;
listen 443 ssl http2;
server_name localhost;
ssl_protocols TLSv1.3;
quic_retry on;
ssl_early_data on;
quic_gso on;
add_header Alt-Svc 'quic=":443"; ma=86400, h3-27=":443"; ma=86400, h3-28=":443"; ma=86400, h3-29=":443"; ma=86400, h3-30=":443"; ma=86400, h3-31=":443"; ma=86400, h3-32=":443"; ma=86400';
ssl_prefer_server_ciphers on;
关于cert 和可以 可以生成,使用下面命令行,cert和key 的CN,一定与访问的域名匹配,可以配置本地named server, 这样就不会针对某个ip做证书了,修改域名到证书CN相对方便一些
制作证书:
openssl genrsa -aes256 -passout pass:123456 -out ca.pem 2048

openssl req -new -x509 -days 365 -key ca.pem -passin pass:123456 -out ca.crt -subj "/C=CN/ST=JS/L=NJ/O=COM/OU=NSP/CN=CA/emailAddress=937266236@qq.com"

openssl genrsa -aes256 -passout pass:server -out traffic.pem 2048

openssl req -new -key traffic.pem -passin pass:server -out traffic.csr -subj "/C=CN/ST=JS/L=NJ/O=COM/OU=NSP/CN=10.10.0.101/emailAddress=937266236@qq.com"

openssl x509 -req -days 365 -in traffic.csr -CA ca.crt -CAkey ca.pem -passin pass:123456 -CAcreateserial -out traffic.crt

openssl rsa -in traffic.pem -out traffic.pem.unsecure
发request 验证:(我装了两个,上面那个是为了写安装步骤重新试了一遍,第一遍用的boringssl,后来发现quictls更方便,boringssl用cmake的方式,具体可以参看下面参考文献的链接)
root@nginx-http3:/opt/key-http3# curl --http3 https://10.10.0.101/ -v --cacert ca.crt
*   Trying 10.10.0.101:443...
* Connect socket 5 over QUIC to 10.10.0.101:443
*  CAfile: ca.crt
*  CApath: none
*  common name: 10.10.0.101 (matched)
* Verified certificate just fine
* Connected to 10.10.0.101 (10.10.0.101) port 443 (#0)
* h2h3 [:method: GET]
* h2h3 [:path: /]
* h2h3 [:scheme: https]
* h2h3 [:authority: 10.10.0.101]
* h2h3 [user-agent: curl/7.86.1-DEV]
* h2h3 [accept: */*]
* Using HTTP/3 Stream ID: 0 (easy handle 0x55773f6c0f40)
> GET / HTTP/3
> Host: 10.10.0.101
> user-agent: curl/7.86.1-DEV
> accept: */*
>
* ngh3_stream_recv returns 0 bytes and EAGAIN
< HTTP/3 200
< server: nginx/1.23.2
< date: Tue, 08 Nov 2022 01:41:40 GMT
< content-type: text/html
< content-length: 615
< last-modified: Fri, 28 Oct 2022 06:11:30 GMT
< etag: "635b7292-267"
< alt-svc: h3=":443"; ma=86400
< accept-ranges: bytes
<
<!DOCTYPE html>
<html>
<head>
<title>Welcome to nginx!</title>
<style>
html { color-scheme: light dark; }
body { width: 35em; margin: 0 auto;
font-family: Tahoma, Verdana, Arial, sans-serif; }
</style>
</head>
<body>
<h1>Welcome to nginx!</h1>
<p>If you see this page, the nginx web server is successfully installed and
working. Further configuration is required.</p>

<p>For online documentation and support please refer to
<a href="http://nginx.org/">nginx.org</a>.<br/>
Commercial support is available at
<a href="http://nginx.com/">nginx.com</a>.</p>

<p><em>Thank you for using nginx.</em></p>
</body>
</html>
* Connection #0 to host 10.10.0.101 left intact
参考文献:
http3 nginx quic 安装与配置_李炜伦的博客-CSDN博客_http3 nginx
https://hg.nginx.org/nginx-quic/file/tip/README
openssl生成证书_一只揪°的博客-CSDN博客_openssl生成证书
还有一些问题基本靠百度了一般都是一些依赖包的问题


 3012
3012


 被折叠的 条评论
为什么被折叠?
被折叠的 条评论
为什么被折叠?
 到【灌水乐园】发言


