一、效果演示
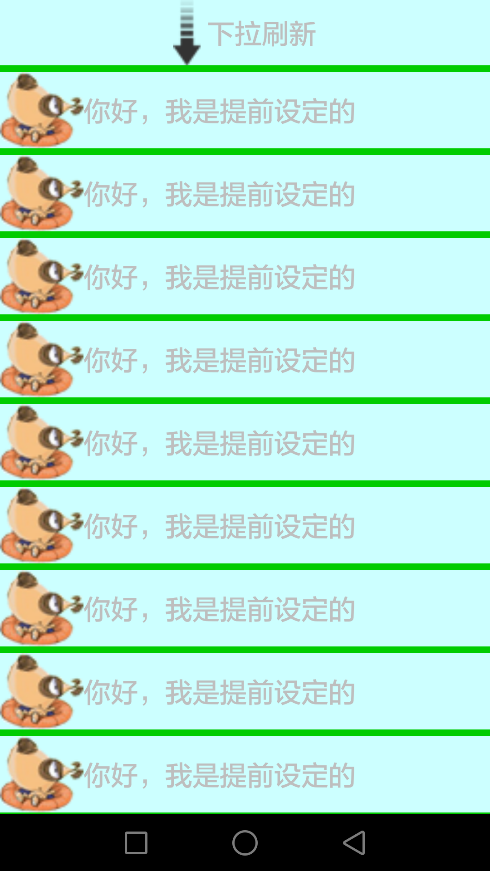
ListView实现下拉刷新,是很常见的功能。下面是一个模拟的效果,如下图:


效果说明:当往下拉ListView的时候,顶部就会有一个“下拉刷新”的标识被拉 出来,再往下拉的时候,标识就会变成”松开刷新“,期间还伴随一个箭头的变化。此时松开手指,则会变成进度条提示正在刷新,刷新完成后,则加载进来刷新的数据。如此反复,就是下拉刷新的功能。
二、准备Demo
其实本质上,ListView实现下拉刷新和实现分页加载都是一样的,都是一个自定义的ListView而已。甚至可以说,原理基本相同,只不过下拉刷新头布局变化相对分页加载复杂一点。
因此,我们仍旧使用《listView实现分页加载》里面的Demo,即首先搭建一个正常下的ListView,准备点模拟的数据。可以点击下面的链接,查看Demo的编写:
http://www.cnblogs.com/fuly550871915/p/4866929.html
三、实现头布局
好了,模拟的东西都准备完成了。下面我们首先编写头布局。比较简单,就是一个箭头,进度条好文本而已。命名为header.xml。代码如下:
 1 <?xml version="1.0" encoding="utf-8"?>
 2 <LinearLayout xmlns:android="http://schemas.android.com/apk/res/android"
 3     android:layout_width="match_parent"
 4     android:layout_height="match_parent"
 5     android:orientation="horizontal"
 6     android:gravity="center">
 7
 8     <ProgressBar
 9         android:id="@+id/progress_bar"
10         android:layout_width="wrap_content"
11         android:layout_height="wrap_content"
12         android:visibility="gone"
13         style="?android:attr/progressBarStyleSmall"/>
14     <ImageView
15          android:id="@+id/img_arrow"
16         android:layout_width="wrap_content"
17         android:layout_height="wrap_content"
18         android:src="@drawable/down_arrow"/>
19     <TextView
20         android:id="@+id/textinfo"
21         android:layout_width="wrap_content"
22         android:layout_height="wrap_content"
23         android:paddingLeft="5dp"
24         android:textSize="20dp"
25         android:text="下拉刷新"/>
26
27
28 </LinearLayout>
然后,我们就开始自定义ListView吧。新建类MyListView,继承自ListView。在这里加上头布局即可。代码如下:
 1 package com.fuly.load;
 2
 3 import android.content.Context;
 4 import android.util.AttributeSet;
 5 import android.view.LayoutInflater;
 6 import android.view.View;
 7 import android.widget.ListView;
 8
 9 public class MyListView extends ListView{
10
11     private View header;//头布局
12
13     //三个构造方法都要重写
14     public MyListView(Context context) {
15         super(context);
16         initView( context);
17
18     }
19     public MyListView(Context context, AttributeSet attrs) {
20         super(context, attrs);
21         initView( context);
22
23     }
24     public MyListView(Context context, AttributeSet attrs, int defStyle) {
25         super(context, attrs, defStyle);
26         initView( context);
27
28     }
29
30     public void initView(Context context){
31
32         header = LayoutInflater.from(context).inflate(R.layout.header, null);
33
34         //将头布局加进去
35         this.addHeaderView(header);
36     }
37
38 }
自定义的ListView已经准备好了,下面就替换吧。修改activity_main.xml里的代码即可,如下:
 1 <LinearLayout xmlns:android="http://schemas.android.com/apk/res/android"
 2     xmlns:tools="http://schemas.android.com/tools"
 3     android:layout_width="match_parent"
 4     android:layout_height="match_parent"
 5      android:background="#ccffff">
 6
 7     <com.fuly.load.MyListView
 8         android:id= "@+id/list_view"
 9         android:layout_width="match_parent"
10         android:layout_height="match_parent"
11         android:dividerHeight="5dp"
12         android:divider="#00cc00"></com.fuly.load.MyListView>
13 </LinearLayout>
至此,我们已经把带头布局的ListView做好了。运行一下程序,会发现就是效果图的第一张。
那么,怎么来隐藏头布局呢?这并不简单,是下一节要详细说的内容。


 1294
1294


 被折叠的 条评论
为什么被折叠?


