


响应模型如何使用
在fastapi中可以在任意的路径修饰器中使用response_model参数来声明响应模型。
响应模型的作用
- 将输出数据转换为其声明的类型
- 校验数据
- 在交互文档中为响应添加一个JSON Schema
- 将输出数据限制在该模型定义内。
使用过程示例
# 演示响应模型的使用过程
# 第一步:引入fastapi中FastAPI类,用于创建应用实例对象
from lib2to3.pytree import Base
from string import hexdigits
from fastapi import FastAPI

# 第二步:创建FastAPI类的实例对象
app = FastAPI(title="演示响应模型的API")

# 第三步:导入pydantic中BaseModel类用于创建数据模型
# EmailStr一个满足email格式的字符串
from pydantic import BaseModel,EmailStr

# 第四步:创建数据模型
# InUser类用来表示用户输入数据模型
class InUser(BaseModel):
    name:str
    pwd:str
    email:EmailStr

# DBUser类用来表示数据在数据库中的数据模型
class DBUser(BaseModel):
    name:str
    hash_pwd:str
    email:EmailStr

# OutUser类用来表示输出数据模型(响应模型)
class OutUser(BaseModel):
    name:str
    email:EmailStr

# 导入hashlib用于进行md5加密pwd
import hashlib
# 定义hash_pwd模型加密密码
def hash_pwd(pwd:str):
    h1 = hashlib.md5()
    h1.update(pwd.encode(encoding='utf-8'))
    return h1.hexdigest()

# 定义save_user用来模拟将数据存储到数据库中
def save_user(user:InUser):
    pwd = hash_pwd(user.pwd)
    # user.dict()表示数据模型的dict方式
    # **表示将dict表示成key=value,...方式
    dbuser = DBUser(**user.dict(),hash_pwd=pwd)
    print("user create in db")
    return dbuser

# 第五步:创建路径装饰器和路径操作函数,
# 并在路径装饰器中使用response_model指定相应模型
@app.post("/user",response_model=OutUser)
async def create_user(user:InUser):
    dbuser = save_user(user=user)
    return dbuser

# 第六步:运行服务器
if __name__ == "__main__":
    import uvicorn
    uvicorn.run(app="main:app",host="127.0.0.1",port=8080,reload=True)
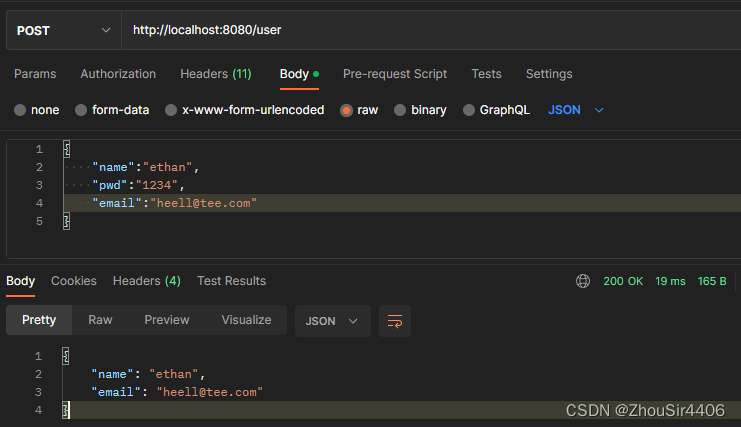
由于pydantic中BaseModel的子类具有数据验证的作用,使用响应模型后,fastapi只会以满足相应模型的字段,而忽略输入模型中多余的数据。
示例结果:
响应模型不仅可以使用BaseModel的子类,也可以用Dict[keytype,valuetype]返回任意字典形式。
响应模型中参数说明
当数据模型中存在None或者默认值的情况下,有时候,响应时需要不包括这些默认值或None值。或者在响应模型中,定义使用哪些字段回复。或者在响应模型中,排除使用哪些字段回复。这些情况下就需要使用路径装饰器中的参数了。
| 参数名称 | 参数含义 |
|---|---|
| response_model_exclude_unset | 为True时表示不回复响应模型中默认值 |
| response_model_exclude_defaults | 为True时表示不回复响应模型中默认值 |
| response_model_exclude_none | True时表示不回复响应模型中的空值 |
| response_model_include | 为str或str组成的集合,表示只回复响应模型中这些字段 |
| response_model_exclude | 为str或str组成的集合,表示不回复响应模型中这些字段 |
后端代码示例:
# 演示路径修饰器中响应模型相关参数的使用
from typing import Union
class Item(BaseModel):
    name:str
    description : Union[str,None] = None
    price:float = 1.0
# 演示不使用响应模型相关参数的返回结果
@app.post("/item",response_model=Item)
async def create_item(item:Item):
    return item
默认回复测试结果:

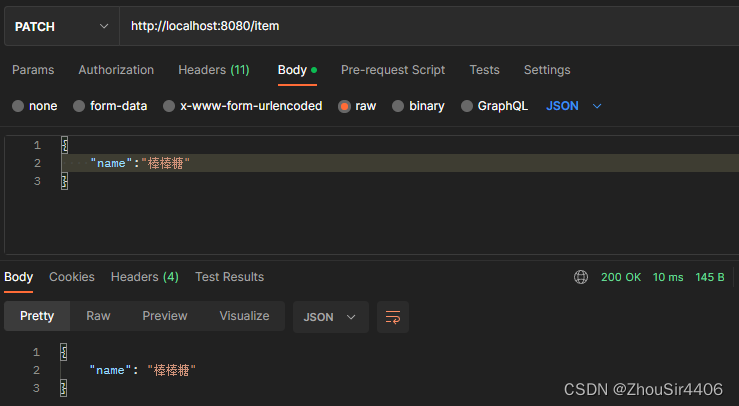
# 演示使用response_model_exclude_unset参数
@app.patch("/item",response_model=Item,response_model_exclude_unset=True)
async def update_item(item:Item):
    return item
response_model_exclude_unset参数测试结果
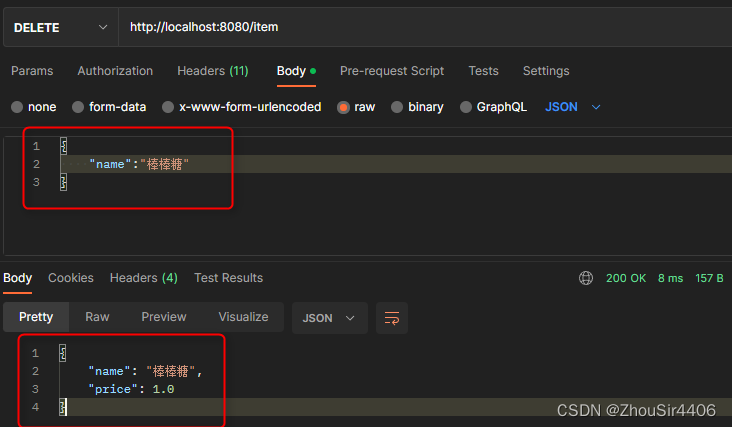
# 演示使用response_model_include参数
@app.delete("/item",response_model=Item,response_model_include={"name","price"})
async def delete_item(item:Item):
    return item
response_model_include参数测试结果


 449
449


 被折叠的 条评论
为什么被折叠?
被折叠的 条评论
为什么被折叠?
 到【灌水乐园】发言


