


只需三步
第一步:添加依赖
        <dependency>
            <groupId>io.springfox</groupId>
            <artifactId>springfox-boot-starter</artifactId>
            <version>3.0.0</version>
        </dependency>
第二步:编写Swagger的配置类
package com.felix.firstdemo.config; // 换成你自己的路径

import org.springframework.beans.factory.annotation.Value;
import org.springframework.context.annotation.Bean;
import org.springframework.context.annotation.Configuration;
import org.springframework.web.servlet.config.annotation.EnableWebMvc;
import springfox.documentation.builders.RequestHandlerSelectors;
import springfox.documentation.oas.annotations.EnableOpenApi;
import springfox.documentation.spi.DocumentationType;
import springfox.documentation.spring.web.plugins.Docket;

@Configuration
@EnableOpenApi
@EnableWebMvc
public class SwaggerConfig {
    /**
     * 用于读取配置文件 application.properties 中 swagger 属性是否开启
     */
    @Value("${swagger.enabled}")
    Boolean swaggerEnabled;

    @Bean
    public Docket docket() {
        return new Docket(DocumentationType.OAS_30)
                //.apiInfo(apiInfo())
                // 是否开启swagger
                .enable(swaggerEnabled)
                .select()
                // 过滤条件,扫描指定路径下的文件,这里要换成你自己的controller的路径
.apis(RequestHandlerSelectors.basePackage("com.felix.firstdemo.controller"))
                // 指定路径处理,PathSelectors.any()代表不过滤任何路径
                //.paths(PathSelectors.any())
                .build();
    }
}
第三步:在application.yml文件中开启swagger
swagger:
  enabled: true
集成完毕,下面就可以使用了
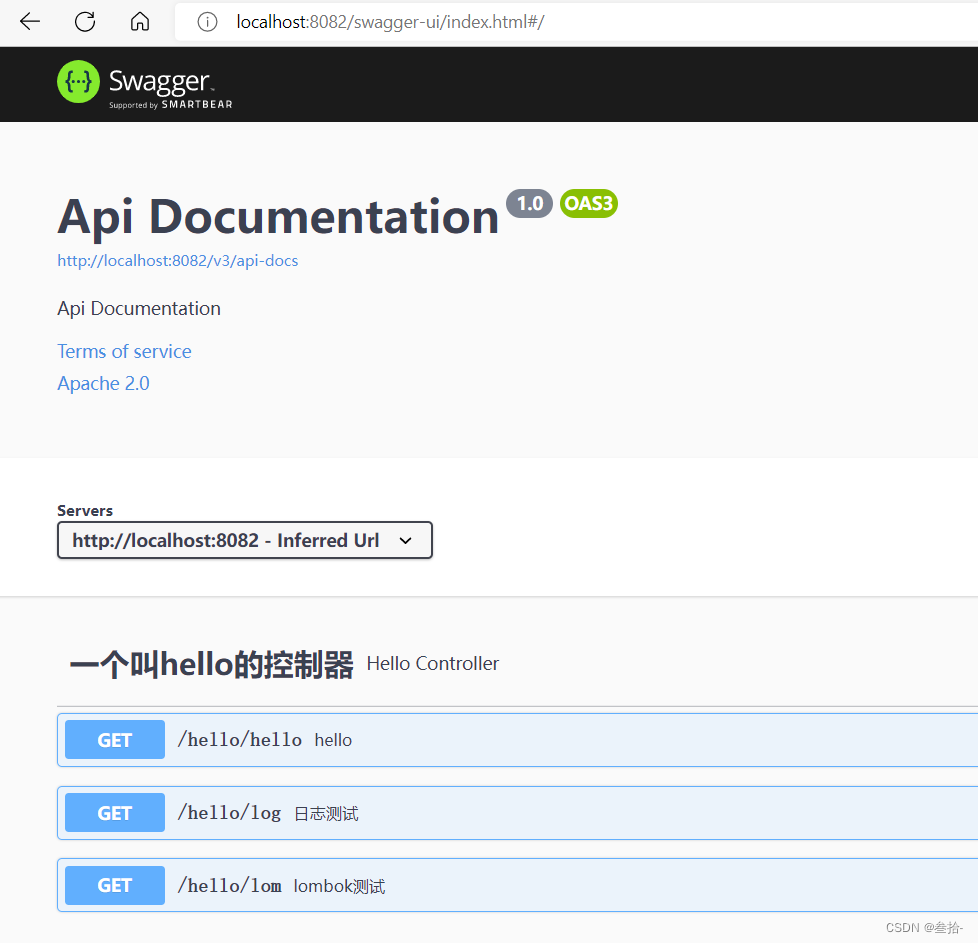
控制器上面用 @Api(tags = "控制器描述")
接口上面用 @ApiOperation(value = "日志测试")
其他的注解的使用看看这篇文章:
https://blog.csdn.net/JokerLJG/article/details/123544934
package com.felix.firstdemo.controller;

import com.felix.firstdemo.pojo.School;
import com.felix.firstdemo.pojo.SchoolDto;
//import com.felix.firstdemo.utils.LogUtil;
import io.swagger.annotations.Api;
import io.swagger.annotations.ApiOperation;
import org.springframework.web.bind.annotation.GetMapping;
import org.springframework.web.bind.annotation.RequestMapping;
import org.springframework.web.bind.annotation.RequestParam;
import org.springframework.web.bind.annotation.RestController;

@RestController
@RequestMapping("/hello")
@Api(tags = "一个叫hello的控制器")
public class HelloController {

    @ApiOperation(value = "hello")
    @GetMapping("/hello")
    public String hello() {
        return "hello felix";
    }

    @ApiOperation(value = "日志测试")
    @GetMapping("/log")
    public String log(@RequestParam(name = "logType", required = false) String logType) {
        String result = "debug";
        if (!logType.isEmpty()) {
            result = logType;
        }
        String message = "response is ; " + result;
        return result;
    }

    @ApiOperation(value = "lombok测试")
    @GetMapping("/lom")
    public String lombok(SchoolDto school) {
        if (school == null)
            return "null";

        School result = new School();
        result.setSchoolId(school.getSchoolId());
        result.setSchoolName(school.getSchoolName());
        result.setEnglishName(school.getEnglishName());
        result.setAddress(school.getAddress());
        result.setBeef(school.isBeef());
        result.setLevel(school.getLevel());

        return result.toString();
    }

}
启动项目访问 。。。/swagger-ui/index.html


 590
590


 被折叠的 条评论
为什么被折叠?
被折叠的 条评论
为什么被折叠?
 到【灌水乐园】发言


