


地图APP开发日志 Day 3
- 联想输入
- 地点展示
距离上个文章的发布已经过了5个月,我终于把它重写成Java的项目,后续更新将以Java为基础
联想输入
从接口文档中找到InputtipsQuery类,在调用时如果不传入城市信息将搜索全国地址,可能和实际想要搜索的地址有很大的出入
// 根据地图加载时地址信息获取当前定位城市,在搜索地址时传入
    /**
     * 设置当前定位点信息
     * @param location 定位点
     */
    public void setLocation(Location location) {
        mRepo.setLocation(location);

        if (TextUtils.isEmpty(mRepo.getCity())) {
            mRepo.setCity("init");
            getResultFromLatlng(new LatLng(location.getLatitude(), location.getLongitude()), new Async<RegeocodeResult>() {
                @Override
                public void success(RegeocodeResult regeocodeResult) {
                    String city = regeocodeResult.getRegeocodeAddress().getCity();
                    mRepo.setCity(city);
                }

                @Override
                public void error(String reason) {
                    mRepo.setCity("");
                }
            });
        }
    }
同样在输入时需要对内容添加防抖,避免执行多次不必要的搜索请求,在TextWatcher.onTextChanged接口实现中添加200毫秒的请求等待,如果200毫秒后文本没有改变则展示搜索结果
// 200毫秒防抖
@Override
public void onTextChanged(CharSequence s, int start, int before, int count) {
    if (TextUtils.isEmpty(s)) {
        mLiveSearch.setValue("");
        mResultAdapter.submitList(new ArrayList<>());
        return ;
    }
    old = s.toString();
    String str = s.toString();
    Message message = new Message();
    message.what = 1;
    message.obj = str;
    mHandler.sendMessageDelayed(message, 200);
    mLiveSearch.setValue(s.toString());
}

// 获取搜索结果
/**
 * 搜索提示
 * @param str   文本
 * @param async 异步回调
 */
public void getInputtipsQuery(String str, Async<List<SearchResultListAdapter.SearchResult>> async, Async<List<SearchResultInfoListAdapter.SearchResultInfo>> listAsync) {
    if (TextUtils.isEmpty(str)) {
        async.error("搜索内容为空");
        return ;
    }
    // 根据地图加载时获取的城市信息传入
    InputtipsQuery query = new InputtipsQuery(str, getCity());
    // 设置仅搜索当前城市
    query.setCityLimit(true);
    Inputtips inputtips = new Inputtips(getApplication(), query);
    inputtips.setInputtipsListener((list, i) -> {
        List<SearchResultListAdapter.SearchResult> results = new ArrayList<>();
        for (Tip tip : list) {
            try {
                // 对结果进行加工,提供adapter可用的对象
                results.add(new SearchResultListAdapter.SearchResult(tip.getPoiID(), tip.getName(), tip.getAddress(), tip.getTypeCode(), new LatLng(tip.getPoint().getLatitude(), tip.getPoint().getLongitude()), str));
            } catch (Exception e) {
                e.printStackTrace();
            }
        }
        async.success(results);
        // 显示地点对应的地址信息等
        listAsync.success(getSearchResultInfo(results));
    });
    inputtips.requestInputtipsAsyn();
}
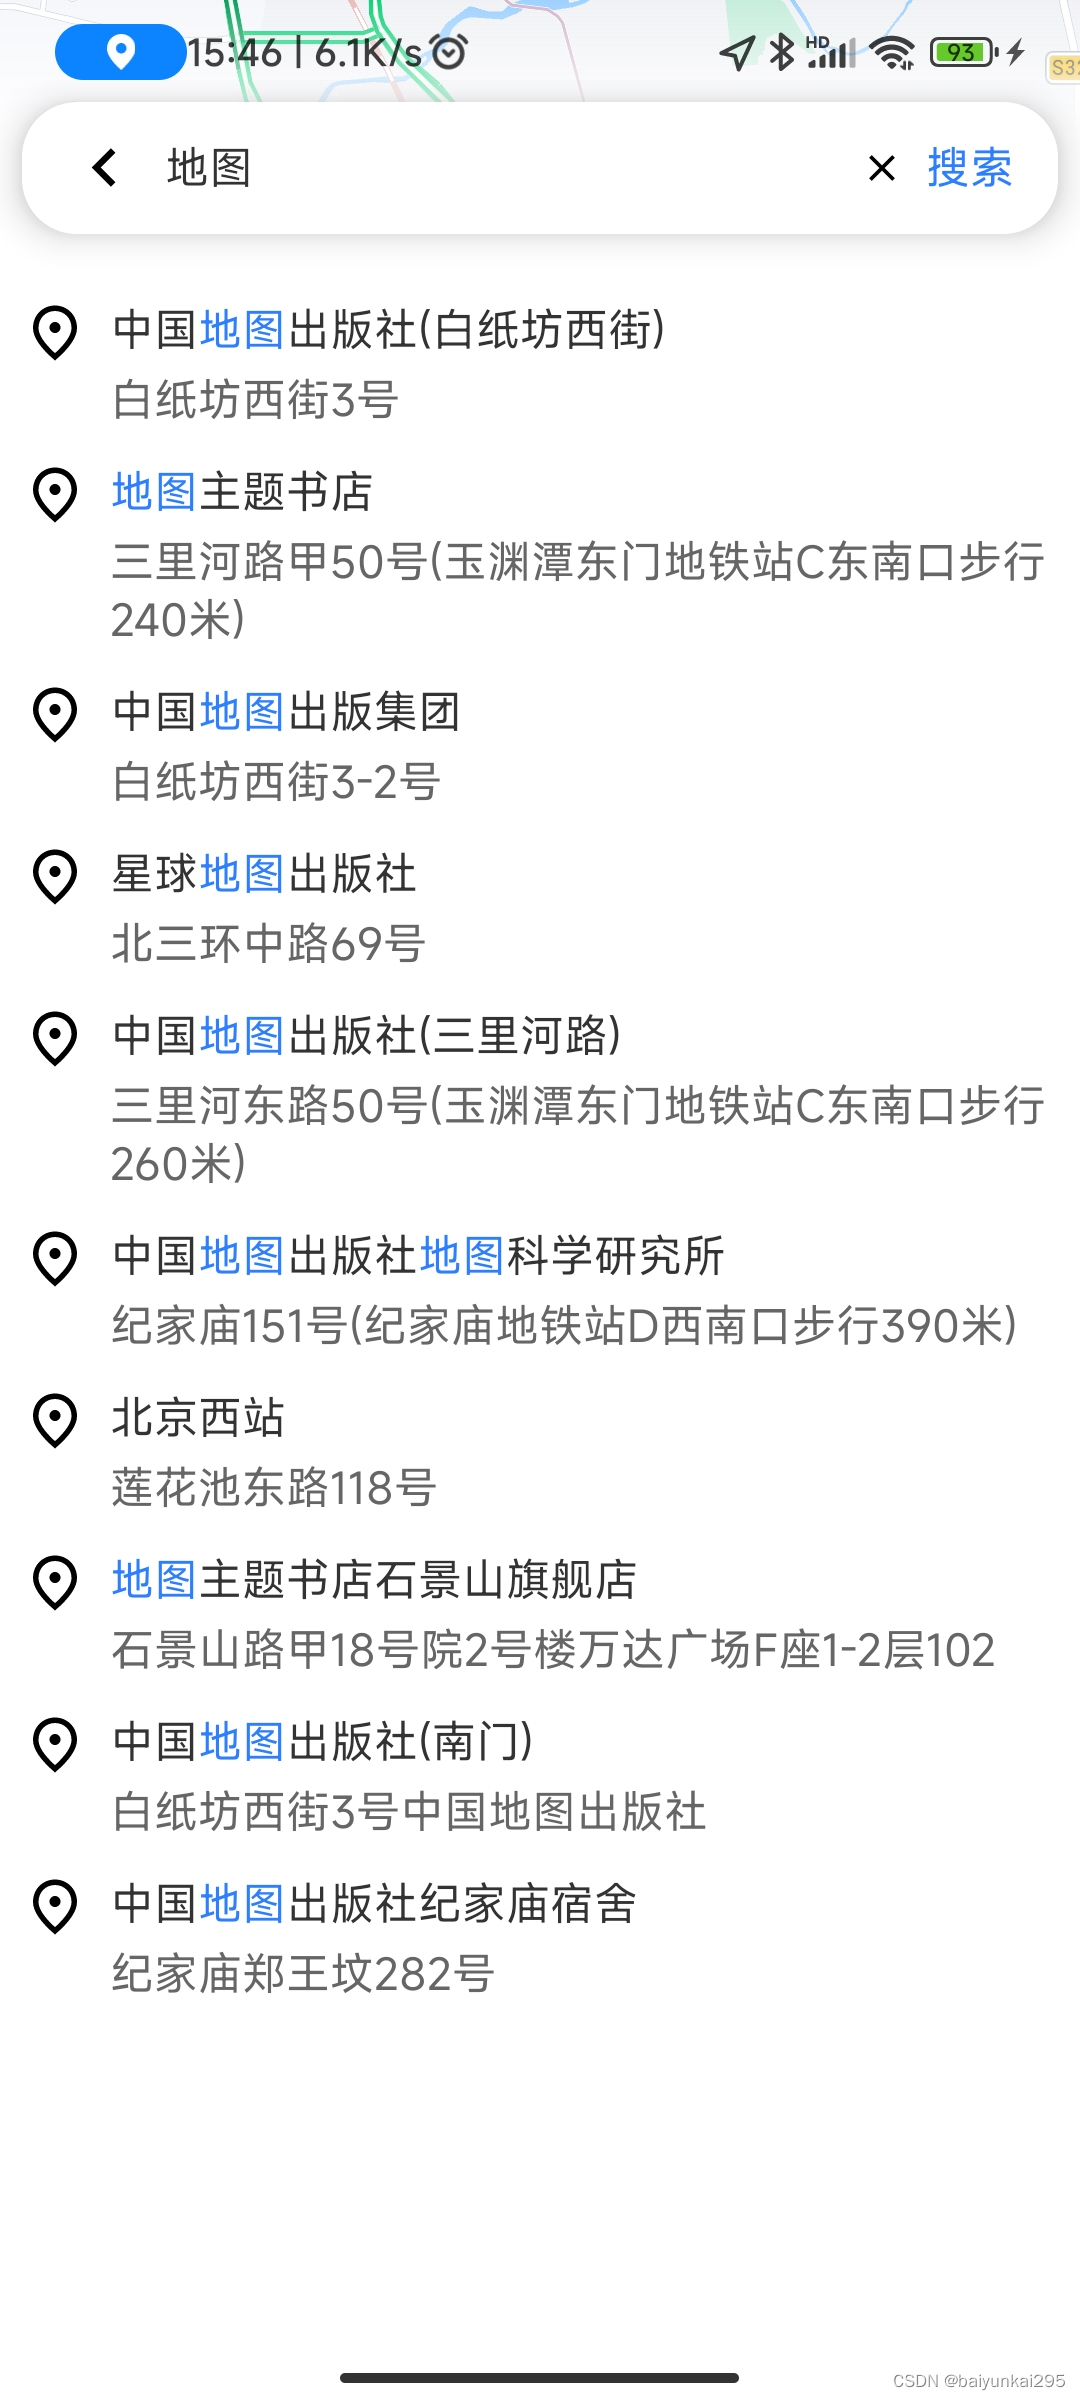
实现效果如下,在adapter中将搜索文本转换为了主题色
地点展示
实现效果如下,将所有Marker全加载到了可视区域
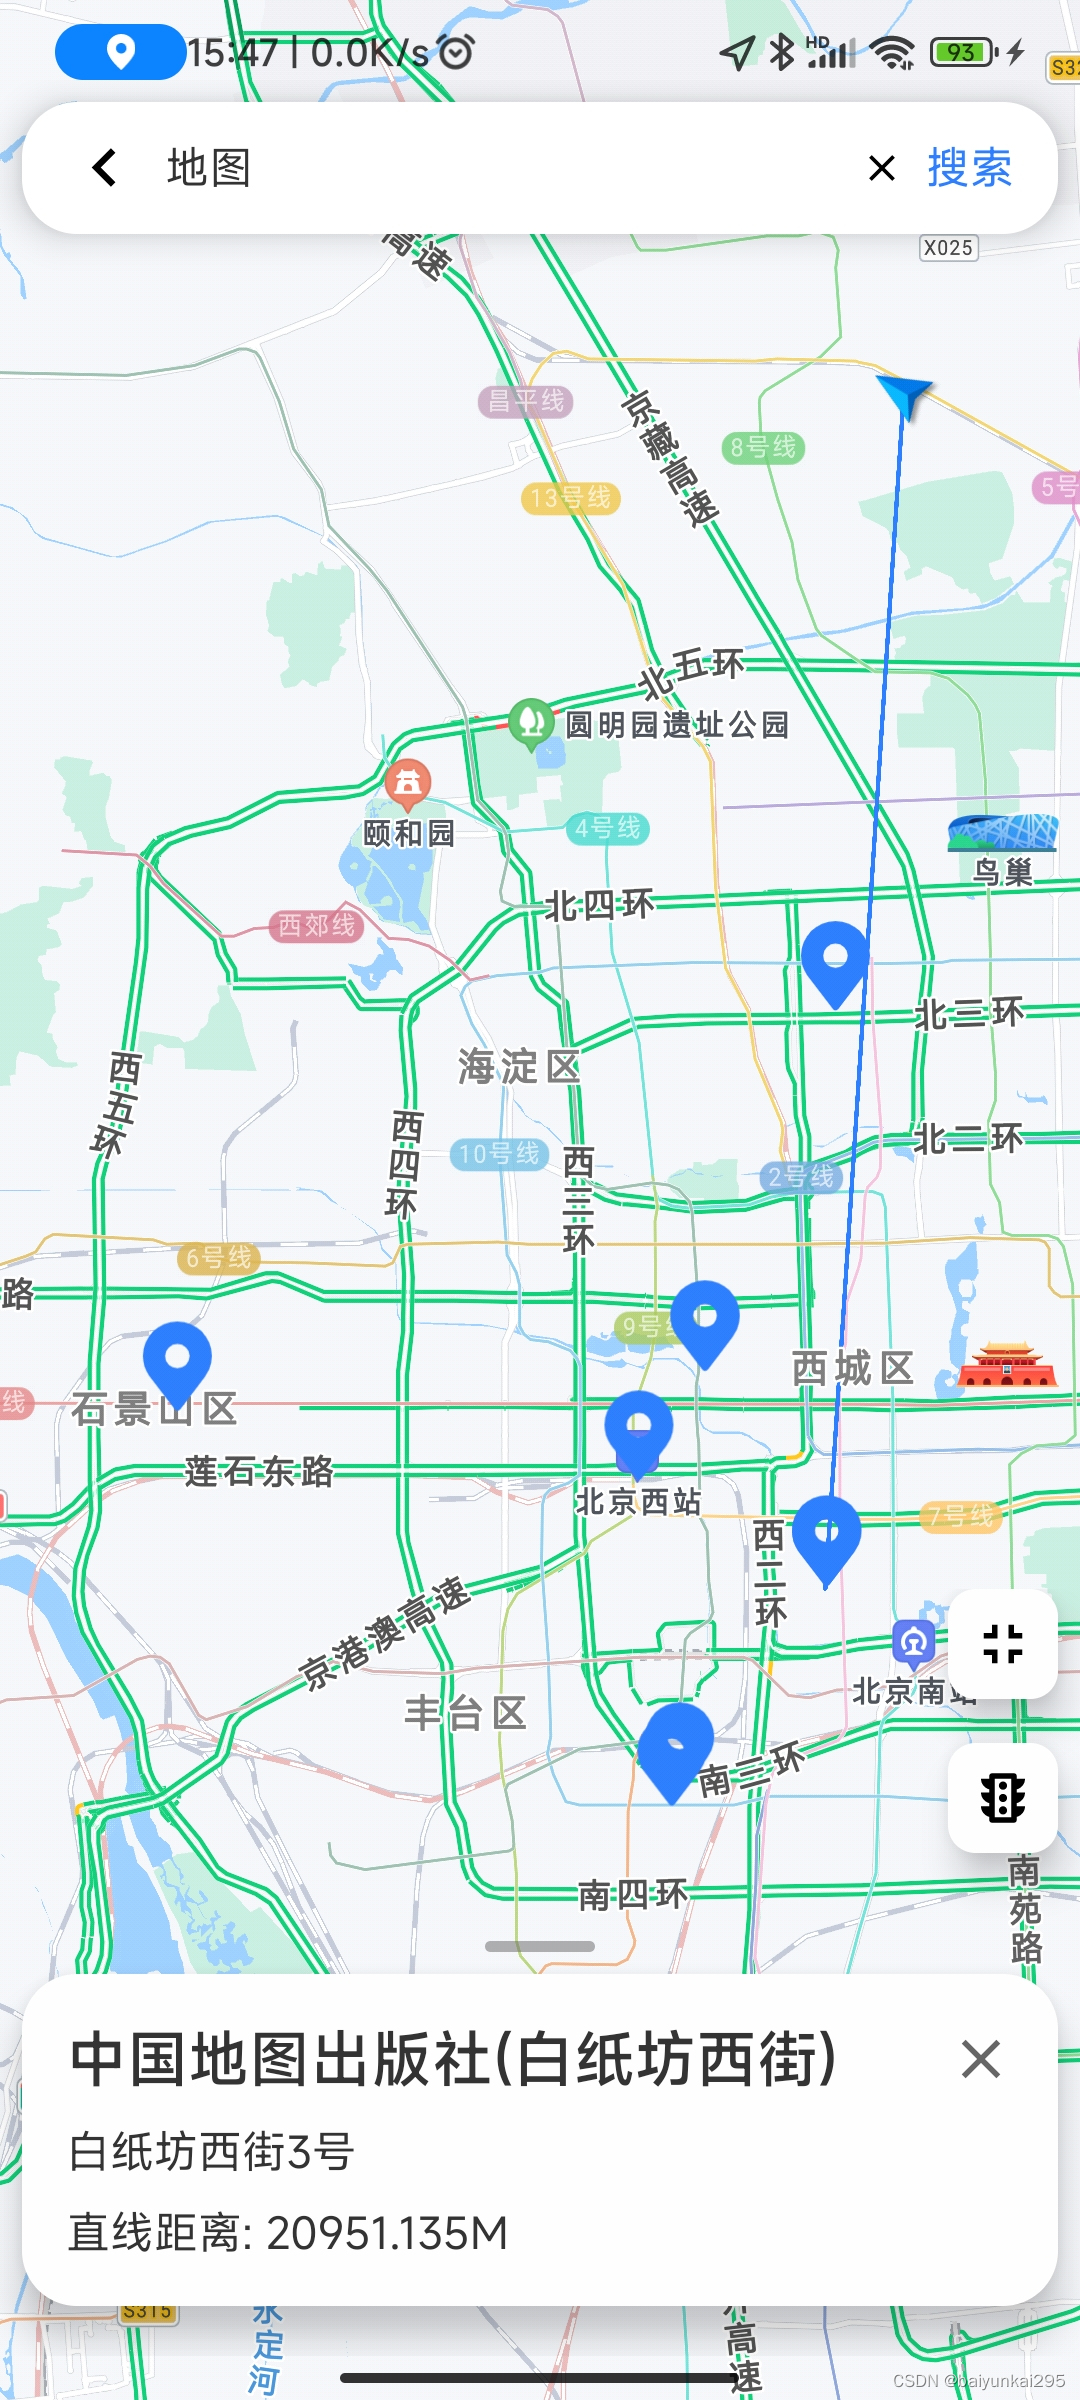
这里展示效果与Day1中的地点信息展示逻辑基本一致,添加了地图加载多个Marker到可视区域的方法,结果选择可以添加一个ViewPager滑动切换结果信息
/**
 * 更新地图标记
 * 如果原有存在则移除  仅保留一个
 * @param results   定位点
 */
public void updateMarkersFromResult(List<SearchResultListAdapter.SearchResult> results) {
    List<MarkerOptions> list = new ArrayList<>();
    // 显示所有结果marker
    for (SearchResultListAdapter.SearchResult result : results) {
        MarkerOptions options = new MarkerOptions()
        		// 配置基本信息,允许通过接口回调获取该marker内容
                .position(result.getPoint())
                .title(result.getName())
                .snippet(result.getAddress())
                .icon(BitmapDescriptorFactory.fromResource(top.coolcha.map.util.R.drawable.ic_button_place))
                .setFlat(true);
        list.add(options);
    }
    updateMarkersFromOptions(list);
}

/**
 * 根据所有marker列表  将地图显示在中央
 */
public void mapToCenterFromMarkers() {
    LatLngBounds.Builder boundsBuilder = new LatLngBounds.Builder();
    List<Marker> markerList = getMarkers();
    for (int i=0; i < markerList.size(); i++) {
        boundsBuilder.include(markerList.get(i).getPosition());
    }
    // 将当前定位点加入进去
    boundsBuilder.include(getLocationToLatLng());
    // 50 50 400 600为距离地图边界的距离  保证都能显示出来
    getMap().animateCamera(CameraUpdateFactory.newLatLngBoundsRect(boundsBuilder.build(), 50, 50, 400, 600));
}
更新日志
Github仓库地址:https://github.com/baiyunkai295/CoMap
Mon Nov 21 23:32:16
1、搜索结果marker显示在地图中央
2、搜索结果可滑动切换
3、地图交通控制、夜间控制


 1628
1628


 被折叠的 条评论
为什么被折叠?
被折叠的 条评论
为什么被折叠?
 到【灌水乐园】发言


