


 该教程介绍了如何使用ArduinoIDE在ESP32和ESP8266上为Web服务器添加HTTP身份验证,通过用户名和密码保护网络安全性。用户需要输入正确的凭据才能访问Web服务器,登出后需重新输入才能再次访问。
ESP32/ESP8266 HTTP Authentication with Web Server (Username and Password Protected)
This tutorial is about how to add HTTP authentication with username and password to your ESP32 and Wemos D1 ESP8266 web server projects using Arduino IDE. The objective of this project is to handle network security concern by authenticating webserver access using login username and password. You can only access your web server if you type the correct username and password. If you logout, you can only access again if you enter the right credentials again.
Installing Libraries – ESP Async Web Server
Visit GitHub website to download the respective libraries and then place them in the library folder of our Arduino IDE. Click ESPAsyncWebServer library and AsyncTCP library to open the respective GitHub pages for the libraries.(vscode platform io里面可以直接添加到工程里面)
Webserver Code with Authentication
Copy the following code to your Arduino IDE. In below code, change your network credentials (SSID and password) to access webserver with webserver using web browser. This code is also compatible with both the ESP32 and ESP8266 boards. In this example code, we are going to control ESP32 GPIO2 using webserver… You can use the HTTP authentication with any web server built with the ESPAsyncWebServer library.
// Import required libraries
#ifdef ESP32
#include <WiFi.h>
#include <AsyncTCP.h>
#else
#include <ESP8266WiFi.h>
#include <ESPAsyncTCP.h>
#endif
#include <ESPAsyncWebServer.h>
// Replace with your network credentials
const char* ssid = "REPLACE_WITH_YOUR_SSID";
const char* password = "REPLACE_WITH_YOUR_PASSWORD";
const char* http_username = "microdigisoft";
const char* http_password = "microdigisoft";
const char* PARAM_INPUT_1 = "state";
const int output = 2;
// Create AsyncWebServer object on port 80
AsyncWebServer server(80);
const char index_html[] PROGMEM = R"rawliteral(
<!DOCTYPE HTML><html>
<head>
<title>ESP Web Server</title>
<meta name="viewport" content="width=device-width, initial-scale=1">
<style>
html {font-family: Arial; display: inline-block; text-align: center;}
h2 {font-size: 2.6rem;}
body {max-width: 600px; margin:0px auto; padding-bottom: 10px;}
.switch {position: relative; display: inline-block; width: 120px; height: 68px}
.switch input {display: none}
.slider {position: absolute; top: 0; left: 0; right: 0; bottom: 0; background-color: #ccc; border-radius: 34px}
.slider:before {position: absolute; content: ""; height: 52px; width: 52px; left: 8px; bottom: 8px; background-color: #fff; -webkit-transition: .4s; transition: .4s; border-radius: 68px}
input:checked+.slider {background-color: #2196F3}
input:checked+.slider:before {-webkit-transform: translateX(52px); -ms-transform: translateX(52px); transform: translateX(52px)}
</style>
</head>
<body>
<h2>ESP Web Server</h2>
<button onclick="logoutButton()">Logout</button>
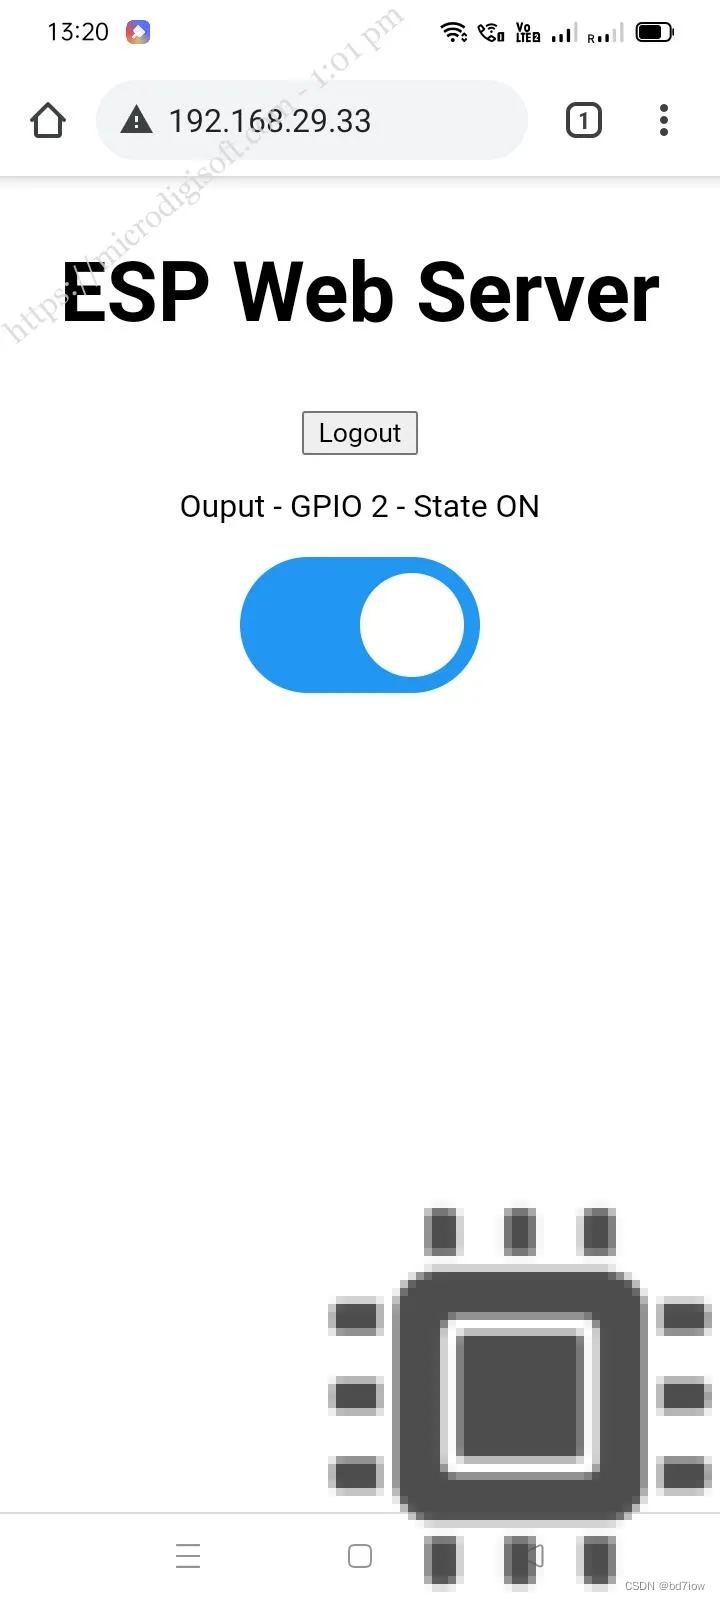
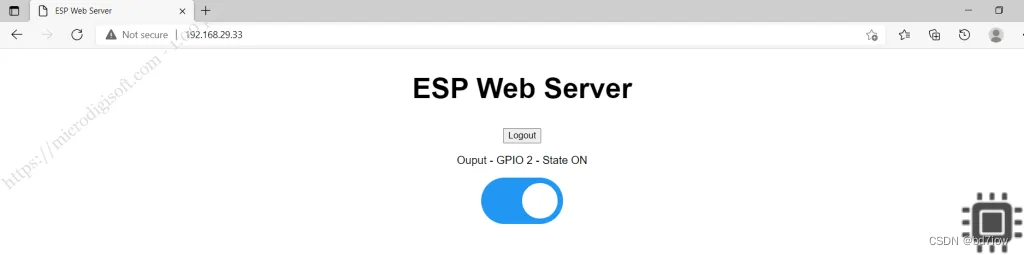
<p>Ouput - GPIO 2 - State <span id="state">%STATE%</span></p>
%BUTTONPLACEHOLDER%
<script>function toggleCheckbox(element) {
var xhr = new XMLHttpRequest();
if(element.checked){
xhr.open("GET", "/update?state=1", true);
document.getElementById("state").innerHTML = "ON";
}
else {
xhr.open("GET", "/update?state=0", true);
document.getElementById("state").innerHTML = "OFF";
}
xhr.send();
}
function logoutButton() {
var xhr = new XMLHttpRequest();
xhr.open("GET", "/logout", true);
xhr.send();
setTimeout(function(){ window.open("/logged-out","_self"); }, 1000);
}
</script>
</body>
</html>
)rawliteral";
const char logout_html[] PROGMEM = R"rawliteral(
<!DOCTYPE HTML><html>
<head>
<meta name="viewport" content="width=device-width, initial-scale=1">
</head>
<body>
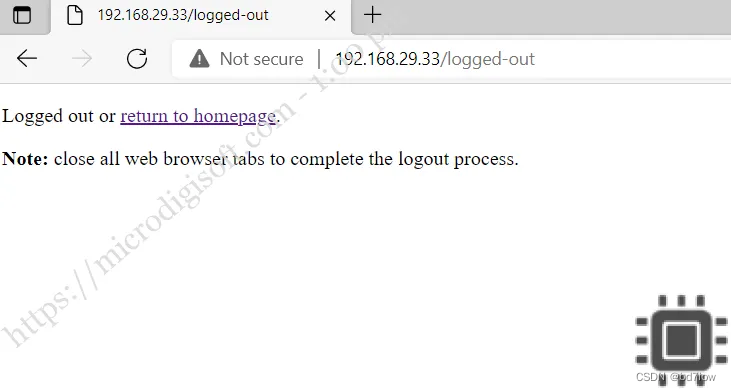
<p>Logged out or <a href="/">return to homepage</a>.</p>
<p><strong>Note:</strong> close all web browser tabs to complete the logout process.</p>
</body>
</html>
)rawliteral";
// Replaces placeholder with button section in your web page
String processor(const String& var){
//Serial.println(var);
if(var == "BUTTONPLACEHOLDER"){
String buttons ="";
String outputStateValue = outputState();
buttons+= "<p><label class=\"switch\"><input type=\"checkbox\" onchange=\"toggleCheckbox(this)\" id=\"output\" " + outputStateValue + "><span class=\"slider\"></span></label></p>";
return buttons;
}
if (var == "STATE"){
if(digitalRead(output)){
return "ON";
}
else {
return "OFF";
}
}
return String();
}
String outputState(){
if(digitalRead(output)){
return "checked";
}
else {
return "";
}
return "";
}
void setup(){
// Serial port for debugging purposes
Serial.begin(115200);
pinMode(output, OUTPUT);
digitalWrite(output, LOW);
// Connect to Wi-Fi
WiFi.begin(ssid, password);
while (WiFi.status() != WL_CONNECTED) {
delay(1000);
Serial.println("Connecting to WiFi..");
}
// Print ESP Local IP Address
Serial.println(WiFi.localIP());
// Route for root / web page
server.on("/", HTTP_GET, [](AsyncWebServerRequest *request){
if(!request->authenticate(http_username, http_password))
return request->requestAuthentication();
request->send_P(200, "text/html", index_html, processor);
});
server.on("/logout", HTTP_GET, [](AsyncWebServerRequest *request){
request->send(401);
});
server.on("/logged-out", HTTP_GET, [](AsyncWebServerRequest *request){
request->send_P(200, "text/html", logout_html, processor);
});
// Send a GET request to <ESP_IP>/update?state=<inputMessage>
server.on("/update", HTTP_GET, [] (AsyncWebServerRequest *request) {
if(!request->authenticate(http_username, http_password))
return request->requestAuthentication();
String inputMessage;
String inputParam;
// GET input1 value on <ESP_IP>/update?state=<inputMessage>
if (request->hasParam(PARAM_INPUT_1)) {
inputMessage = request->getParam(PARAM_INPUT_1)->value();
inputParam = PARAM_INPUT_1;
digitalWrite(output, inputMessage.toInt());
}
else {
inputMessage = "No message sent";
inputParam = "none";
}
Serial.println(inputMessage);
request->send(200, "text/plain", "OK");
});
// Start server
server.begin();
}
void loop() {
}
How the Code Works?
Setting Your Username and Password
To have control over werbserver access with http authentication, in below variables we need to set the username and password for your web server. By default, the username is microdigisoft and the password is also microdigisoft . You can change the username and password as per your choice.
const char* http_username = "microdigisoft";
const char* http_password = "microdigisoft";
Logout Button
After getting access over html page using username and password , let have logout button to close the login session with simple html button tag.`
<button onclick="logoutButton()">Logout</button>
When clicked, the button calls the logoutButton() JavaScript function. This function makes an HTTP GET request to your ESP32/ESP8266 on the /logout URL. Then, in the ESP code, you should handle what happens after receiving this request.
function logoutButton() {
  var xhr = new XMLHttpRequest();
  xhr.open("GET", "logout", true);
  xhr.send();
After making a logout action, you will be redirected to the logout page on the /logged-out URL.
setTimeout(function(){ window.open("/logged-out","_self"); }, 1000);
Handle Requests with Authentication
To handle the http authentication, on every attempt for connecting with webserver below code will check the user and password is correctly entered.
if(!request->authenticate(http_username, http_password))
    return request->requestAuthentication();
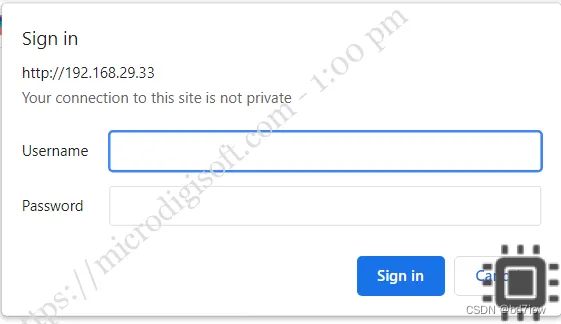
These lines continuously pop up the authentication window until you insert the right credentials. You need to do this for all requests. This way, you ensure that you’ll only get responses if you are logged in. For example, when you try to access the root URL (ESP IP address), you add the previous two lines before sending the page. If you enter the wrong credentials, the browser will keep asking for them.
server.on("/", HTTP_GET, [](AsyncWebServerRequest *request){
  if(!request->authenticate(http_username, http_password))
    return request->requestAuthentication();
  request->send_P(200, "text/html", index_html, processor);
});
Here’s another example for when the ESP receives a request on the /state URL.
server.on("/state", HTTP_GET, [] (AsyncWebServerRequest *request) {
  if(!request->authenticate(http_username, http_password))
    return request->requestAuthentication();
  request->send(200, "text/plain", String(digitalRead(output)).c_str());
});
Handle Logout Button
When you click the logout button, the ESP receives a request on the /logout URL. When that happens send the response code 401.
server.on("/logout", HTTP_GET, [](AsyncWebServerRequest *request){
  request->send(401);
});
The response code 401 is an unauthorized error HTTP response status code indicating that the request sent by the client could not be authenticated. So, it will have the same effect as a logout – it will ask for the username and password and won’t let you access the web server again until you login.
When you click the web server logout button, after one second, the ESP receives another request on the /logged-out URL. When that happens, send the HTML text to build the logout page (logout_html variable).
server.on("/logged-out", HTTP_GET, [](AsyncWebServerRequest *request){
  request->send_P(200, "text/html", logout_html, processor);
});
Result:
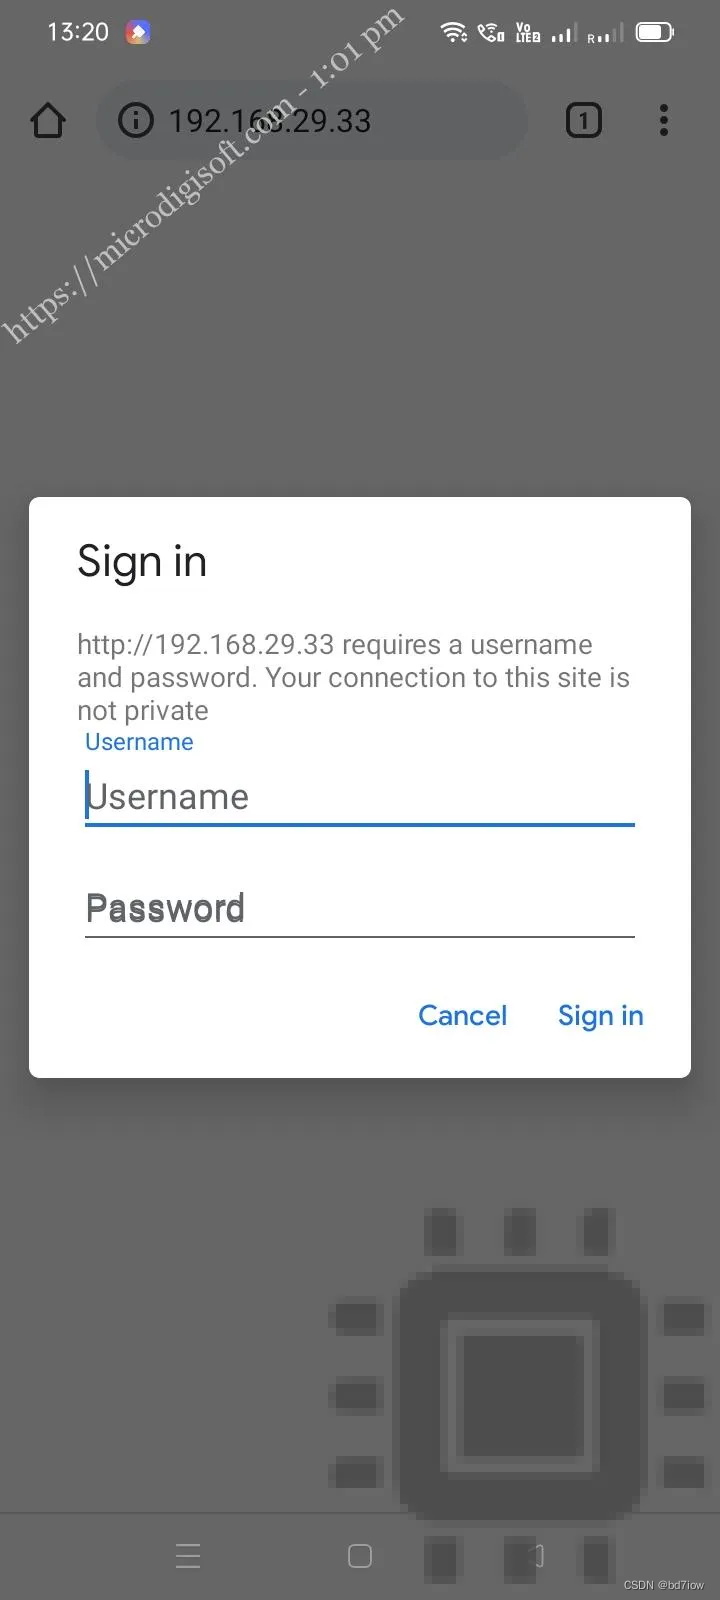
Upload the code to your ESP32 or ESP8266 board. Then, open the Serial Monitor and press the on-board RST/EN button to get is IP address. Open a browser in your local network and type the ESP IP address.
The following page should load asking for the username and password. Enter the username and password and you should get access to the web server. If you haven’t modified the code, the username is admin and the password is admin.
下面看看把它放到esp32idf下:


 277
277

 被折叠的 条评论
为什么被折叠?
被折叠的 条评论
为什么被折叠?
 到【灌水乐园】发言


