


Latex安装步骤:
2) 安装GsView4.9(浏览图片eps,ps软件),并注册 (建议去公司主页下载,安装在C盘还是D盘均可)
3) 安装Ghost Script9.07 (建议去公司主页下载,安装在C盘还是D盘均可)
4)安装Adobe Acrobat7.0
6)安装中文插件(可选)
测试:
1)打开WinEdt7.0,新建一个text.tex文件
\documentclass{article}
\begin{document}
Hello, latex world!
\end{document}
运行,即可查看结果。
2)或者在MikTeX2.8中进行测试。
制作PPT文档:
说明:用Latex制作ppt,需要借助于beamer。由于latex的实现版本太多了,不同的tex ppt模板会有冲突,提示找不到这样的文件(路径不对),或者没有那样的文件(需要下载)。最好在google上查找,百度没搜到解决的经验。所以就是
1)下载beamer,pgf,xcolor,
2)latex目录:D:\Program Files\MiKTeX 2.9\tex\latex\beamer。把beamer文件夹放在latex文件下面。
3)D:\Program Files\MiKTeX 2.9\tex\latex\pgf。把下载的pgf文件夹下里面tex\latex\pgf里边的内容拷贝到latex下面。
4)D:\Program Files\MiKTeX 2.9\tex\latex\xcolor。把xcolor文件夹放在latex下面。
5)D:\Program Files\MiKTeX 2.9\tex\latex\ms。把ms文件下放在latex下面。ms文件夹下面主要文件是everyshi.sty
6)测试。给一个测试文档。
\documentclass[hyperref={pdfpagelabels=false}]{beamer}
% By using hyperref={pdfpagelabels=false} you get rid off:
% Package hyperref Warning: Option `pdfpagelabels' is turned off
% (hyperref) because \thepage is undefined.
% Hyperref stopped early
%
\usepackage{lmodern}
% Using lmondern and you get rid off this:
% LaTeX Font Warning: Font shape `OT1/cmss/m/n' in size <4> not available
% (Font) size <5> substituted on input line 22.
% LaTeX Font Warning: Size substitutions with differences
% (Font) up to 1.0pt have occurred.
%
% If \titel{$B!D(B} \author{$B!D(B} come after \begin{document}
% you get the following warnig:
% Package hyperref Warning: Option `pdfauthor' has already been used,
% (hyperref) ...
% So it is here before \begin{document}
\title{Beamer Class a little nicer 2}
\author{Sascha Frank}
\date{\today}
% additional usepackage{beamerthemeshadow} is used
\usepackage{beamerthemeshadow}
\begin{document}
\begin{frame}
\titlepage
\end{frame}
\begin{frame}
\frametitle{Table of contents}
\tableofcontents
\end{frame}
\section{Section no.1}
\begin{frame}
\frametitle{frame title}
Each frame should have a title.
\end{frame}
\subsection{Subsection no.1.1 }
\begin{frame}
Without title somethink is missing.
\end{frame}
\section{Section no. 2}
\subsection{Lists I}
\begin{frame}
\frametitle{unnumbered lists}
\begin{itemize}
\item keyword
\item still another keyword
\end{itemize}
\end{frame}
\begin{frame}
\frametitle{lists with single pause}
\begin{itemize}
\item keyword \pause
\item still another keyword
\end{itemize}
\end{frame}
\begin{frame}
\frametitle{lists with pause}
\begin{itemize}[<+->]
\item keyword
\item still another keyword
\item a third one
\end{itemize}
\end{frame}
\subsection{Lists II}
\begin{frame}
\frametitle{numbered lists}
\begin{enumerate}
\item keyword
\item still another keyword
\end{enumerate}
\end{frame}
\begin{frame}
\frametitle{numbered lists with single pause}
\begin{enumerate}
\item keyword \pause
\item still another keyword
\end{enumerate}
\end{frame}
\begin{frame}
\frametitle{numbered lists with pause}
\begin{itemize}[<+->]
\item keyword
\item still another keyword
\item a third one
\end{itemize}
\end{frame}
\section{Section no.3}
\subsection{Tables}
\begin{frame}
\frametitle{Tables}
\begin{tabular}{|l|c|r|p{1.5 cm }|}
\hline
left & centers & right & width \\
l & C & r & p \\
\hline
\end{tabular}
\end{frame}
\begin{frame}
\frametitle{Tables with pause}
\begin{tabular}{c c c}
A & B & C \\
\pause
1 & 2 & 3 \\
\pause
A & B & C \\
\end{tabular}
\end{frame}
\section{Section no. 4}
\subsection{blocs}
\begin{frame}
\frametitle{blocs}
\begin{block}{title of the bloc}
bloc text
\end{block}
\begin{exampleblock}{title of the bloc}
bloc text
\end{exampleblock}
\begin{alertblock}{title of the bloc}
bloc text
\end{alertblock}
\end{frame}
\end{document}
根据测试的错误提示,下载缺失的文件放在相应的目录下面。
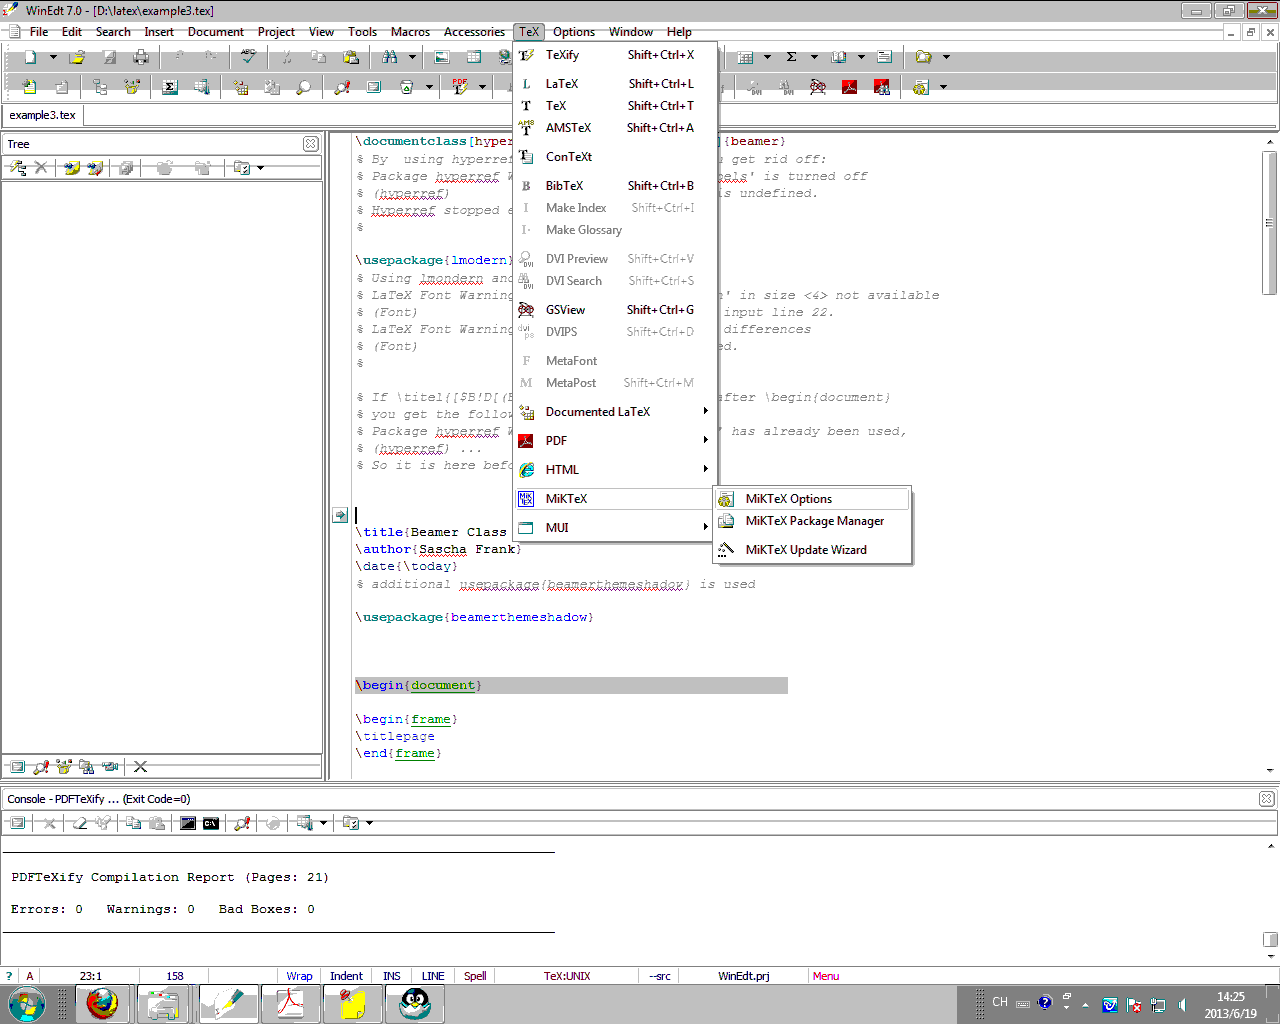
测试之前需要在WinEdt中刷新一下,命令如下图。(有时候很奇怪,刷新完了需要重启一下WinEdt)
图片转换小软件:
1) All2EPS_Batch_V1.0.exe
2) wmf2eps.exe
与Latex兼容的小软件
1) JabRef-2.3.1-Setup (文献管理工具,类似Word中的Endnote)2) jxpiinstall(安装java环境)
3)Excel2Latex宏,将excel中的表格转化为LaTex的格式。(在excel中运行宏“Excel2Latex”可以轻易的将excel中的表格转化为tex的格式。注意,一般需要先将“工具-宏-安全性”中的级别调低才能运行这个宏)。
(上面两段摘自http://blog.sina.com.cn/s/blog_5b29caf70100jnzo.html)


 2857
2857

 被折叠的 条评论
为什么被折叠?
被折叠的 条评论
为什么被折叠?
 到【灌水乐园】发言


