


1.回顾前端
1.1 HTML
简介
html:超文本标记语言
<标签></标签>
tab:退格
shift+tab:返回退格
alt+shift+数字:分屏
标题标签
n取1-6,数字越大字体越小
字体自动加粗
注意:每个html中h1建议使用一次
段落标签
自动换行,段落前不会自动空两格
实体字符
专门用于表示网页中不能直接显示的字符
空格
< <
> >
& &
<p>大家好,我是臭 <弟弟></p>
<p>大家好,我是臭&nJbsp;<弟弟></p>
&lt;大家好

字体标签 font
size: 设置字体大小范围
取值范围1-7
数字越大,字体越大
color设置字体的颜色
		1,英文设置:red blue cyon purple white
		2,HEX  #六位的十六进制 0-9 a-f
			#00 	00     00
			红色 	绿色	   蓝色

			#000
			#ccc
			#fc1 ffcc01
		3,RGB red green blue 0-255
		4,RGBA red green blue alpha透明度
		 透明度取值范围:0-1 越接近1越不透明,越接近0越透明
		5,HSL 色调(0-360) 饱和度(刺眼 0%-100%) 亮度(明暗 0%-100%)一般都取50%
		6,HSLA
常见实体字符:百度查

			href超链接的链接地址
				绝对地址:域名 /
				相对地址: ./ 当前路径  ../上一级
			target 超链接打开方式
				_self在本窗口打开(默认)
				_blank在新窗口打开

				_top在顶层窗口打开
				_parent在父窗口打开
图片
src图片路径
width宽度
height高度
title图片的描述
alt图片失效显示
列表
无序列表
	<ul>
		<li></li>
	</ul>
有序列表
<ol>
	<li></li>
</ol>
自义定列表
<dl>
	<dt></dt>
</dl>
表单 form
				属性
					action表单的提交地址
					method表单的提交方式
						get
						post安全
					enctype="multipart/form-data"文件上传时需要
				<input type="" name="" id="" value="" />
				属性:
					type设置输入框的类型
						text文本
						password密码
						radio单选框 name值必须相同
						checkbox复选框 name的值是数组
						file文件 enctype="multipart/form-data"
						number数值
						email邮箱
						submit提交
						reset重置
						button按钮
						color颜色
						range滑块
					name
					value

					下拉框
						<select name="">
							<option value=""></option>
						</select>

					文本域
						<textarea rows="" cols=""></textarea>
					表单属性
						disabled禁用 可以适用于所有标签,但是不能提交数据
						readonly只读	 可以支持数据提交,但是只适用于input为text,password以及文本域
						placeholder 默认提示信息
表格标签table
tr行
td列
th表头
caption表格标题
属性:
border表格的边框
cellspacing
cellpadding
合并单元格
rowspan合并行
colspan合并列
				<div></div>块级元素
				<span></span>行级元素
				行级元素默认横向排列,不能直接设置宽高
				块级元素默认纵向排列,可以直接设置宽高
其他标签
			<b>加粗</b>
			<strong>加粗</strong>
			<i>斜体</i>
			<em>斜体</em>
			<sub>上标</sub>
			<sup>下标</sup>
			<br>
			<hr >分割线
			<u>下划线</u>
			<del>删除线</del>
1.2 CSS
简介
层叠样式表,级联样式表,css遵循就近原则
引入方式
1.行内样式 style=""
通用属性:style class id name
2.内嵌式
3.外部引入
css的选择符
元素选择符
*:通配符,选择所有标签
类型选择符 标签名{}
class选择符 class=“myClass” .myClass{}
id选择符 id=“myId” #myId{}
关系选择符
包含选择符 空格
子选择符 >
相邻选择符 +
兄弟选择符 ~
伪类选择符
link设置超链接未访问前样式
visited设置超链接访问后样式
hover设置鼠标悬停时样式
active设置点击时样式
			first-child第一个子元素
			last-child最后一个子元素
			nth-child(n)选择指定的某个元素
			nth-last-child(n)
			only-child选择只有一个子元素

			first-of-type
			last-of-type
			nth-of-type
			nth-last-of-type
			only-of-type
伪对象选择符
::first-letter
::first-line
::before在指定的元素前添加内容 必须配合content使用
::after在指定的元素后添加内容 必须配合content使用
最好的清楚浮动
	::after{
			content:'';
			clear:both;
			display:block;
			visivility:hidden;
			height:0;
		}
字体font
font-style 设置字体的样式 normal正常 italic斜体
font-weight 设置字体的粗细 100-900的整数
bold加粗(700) bolder特粗体(800) lighter细体(400)
font-size设置字体的大小 px rpx rem
line-height设置行高
注意:当line-height和height相等时,文本上下居中
font-family设置字体 楷体
			font:20px 微软雅黑;
			font:bolder 20px/30px 微软雅黑;
			font:bolder 20px/1.5 微软雅黑;
text-algin文本对齐方式
left right center文本居中
vertical-algin:middle;垂直方向居中
letter-spacing:字间距
text-indent:缩进 text-indent:2em;(em看父级像素)
文本装饰 text-decoration
线的种类
none无文本装饰
underline下划线
overline上划线
line-through贯穿线
装饰线样式
solid实线
dashed虚线
dotted点线状
wavy波浪线
double双实线
去除列表样式list-style:none;
边框border
border:1rpx solid red;
背景background
background-color
background-image url()
background-repeat
repeat
repeat-x
repeat-y
no-repeat
background-postion设置背景图像的位置
background-size设置被禁个图片的大小
background:url(1.jpg) no-repeat center center/100% 100%;
盒子模型
content padding border margin
分为四个方向 left right top bottom
padding 內补白
一个参数:同时作用于四个方向
两个参数:上下 左右
四个参数:上右下左
margin 外补白
一个参数:同时作用于四个方向
两个参数:上下 左右 margin:0 auto;盒子居中
四个参数:上右下左
div,sapn,a,ul,li,img{
					margin:0;
					padding:0;
				}
box-sizing
content-box
border-box
雪碧图:cssstyles
布局属性
				浮动float
						left
						right
					clear:清除浮动
				display显示隐藏
					none隐藏 (不占位)
					block显示
				display切换行与块
					inline将块级元素转换为行内元素
					block将行级元素转换为块级元素
					inline-block将行级元素转换为行间块级元素
				display flex弹性盒子

				visibility:hidden;占位置隐藏

				overflow
					hidden超出隐藏
					scroll超出内容出现滚动条显示
					auto自动适配
				text-shadow文字阴影
				box-shadow盒子阴影
				圆角border-radius
					一个参数:同时作用于四个角
					两个参数:左上角和右下角  右上角和左下角
					三个参数:左上角 右上角和左下角 右下角
					四个参数:左上角 右上角 右下角 左下角

					x轴比例/y轴比例(/只能出现一次)
定位:position
relative相对定位
absolute绝对定位

fixed固定定位
static静态定位

定位的步骤:
	1.给出定位的属性
	2.设置位移 left right top bottom

	相对定位参考点为当前元素的坐标(0,0)参考自己
	绝对定位参考点为具有定位属性的父级坐标(0,0)点
eg:
<!DOCTYPE html>
<html>
	<head>
		<meta charset="utf-8">
		<title></title>
		<style>
		div.png{
			width:500px;
							height:320px;
							padding:10px;
							border:10px dotted black;
							font:bolder 300px/320px 微软雅黑;
							text-align:center;
							background:url(2.png) no-repeat 0 0/100%;
							margin:0 auto;
							background-origin:border-box;
							-webkit-text-fill-color:transparent;
							-webkit-background-clip:text;
		}

		</style>
	</head>
	<body>


				  <div class="png">
				  	陈
				  </div>

	</body>
</html>

1.3 JS
简介
js->JavaScript ECMAScript
js的常见引入方式
		1.直接引入 <script></script>
		2.间接引入 <script src=""></script>
		建议在body之后引入
js的变量 var let const
var a,b,c=1,2,3; 存在变量提升,可以重复声明,没有块级作用域的概念
	let 不存在变量提升,不可以重复声明,块级作用域的特点
	const 不存在变量提升,不可以重复声明,块级作用域的特点,一般用于声明常量,只读不可以修改,
	必须在定义的时候进行赋值
		注意:js中严格区分大小写,除了进制转换
js常见的输出方式
1.文档流输出 document.wirte()
2.控制台输出 console.log()
3.弹窗输出 alert() confirm()
js常见的数据类型
数值类型number
字符串类型string
布尔类型boolean
未定义类型undefined
空类型null
对象类型object
undefined
变量声明后未进行赋值
函数中形参未传入实参
函数未定义返回值,则运行的结果为undefined
访问对象未定义的属性
null
boolean
true
false
string
js中不区分单双引号,建议使用单引号,单双引号局部解析变量
+作为字符串的连接符
<script>
		//模板字面量 es6语法
			var name=cdd;
			var age=18;
			var str=`${name}+说:我今年${age}岁了`
			console.log(str)
</script>
number
整型
浮点型
浮点型所占字节为整型的两倍
当浮点型小数点后没有确定的值,则自动转换为整型
当整数超过整型的范围,则自动变成浮点型
学计数法 e
进制转换 八进制 十六进制
无穷 Infinity
NaN 不是一个数的数值类型 not a number
只要有NaN参与运算,其结果也为NaN
			var num = 3.14e-3;  //3.14*0.001
			var num = 026;//22  八进制
			var num = 028;//28  十进制
			var num = 0xA;//10
			var num = 10/0;//Infinity
			console.log(num)
			console.log(NaN == NaN)
object
数组 (js里面是索引数组:默认下标0,1,2,3)
关联数组:可以不以0,1,2为下标,以字母,文字等类似于字典。
var arr=new Array[]/var arr=[]
通过length获取数组的长度
arr [1]=‘cdd’,获取、添加、删除
显示,隐式迭代
<script>
// 显示迭代
			let student = ['左婷','盛成成','薛本周','张莉','刘俊'];
			for(let i=0;i<student.length;i++){
				console.log(student[i])
			}

// 隐式迭代
			student.forEach(function(val,index){
				console.log(`index:${index},value:${val}`)
			})
</script>
对象
				var obj=new Object()
					var person={
						//定义属性
						name:'cdd'
						sex:'male'
						//定义方法
						paly:function(){
							console.log('hello,world')
							console.log(`${this.name}性别为:${this.sex}`)
						}
					}
					console.log(person)
					console.log(person.name)
					person.play()

					//apply() call() bind()切换对象
对象的遍历
					//for...in
						for(let key in person){
									 console.log(key)
									 console.log(person[key])
						}
函数
			var fun=function(){

					}
					function fun(形参1,形参2){
						consol.log(arguments)//arguments为数组,接收所有的实参

						return 返回值;
					}
					函数的调用 fun(实参1,实参2)
					接收返回值 var res=fun() // res拿到返回值
运算符
算术运算符:+ - * / % ++ –
赋值运算符 = += -= *= /= %=
比较运算符 > < >= <= != ==(恒等) ===(全等)
恒等:判断值是否相等
全等:判断值和类型是否相等
注意:通过typeof判断类型
逻辑运算符
与 && 两者为真则为真,只要有假则为假
或 || 两者为假则为假,只要有真则为真
非 !取反
流程控制
			if(){

				}else{

				}

				switch(){
					case 1:
						break;
					case 2:
						break;
					default:
					break
				}

				for   while   do...while
系统内置函数
数学函数 Math.   max(),min(),avg(),ceil()向上取整,floor()向下取整,round()四舍五入,
		random()随机数,pow(),sqrt()
字符串函数  charAt() charCodeAt() indexOf() lastIndexOf()
		substr(start,num) slice(start,end) substring(index1,index2)
数组函数		push()后面压入 pop()后面弹出 unshift()前面弹插入shift()前面弹出
		reverse() 反转 splice(start,num,content) 删除,添加
强制转换函数		parseInt() parseFloat() Number() toString()

定时器函数 setTimeout()一次性定时器,过多久执行一次  clearTimeout()
		setInterval()循环定时器,过多久进行一次循环 clearInterval()
事件
鼠标事件:
				onclick ondbclick onmouseover onmouserout onmousermove
				onmouseenter onmouseleave
		取消事件冒泡
					e.stopPropagation() W3C
					e.cancelBubble=true IE
键盘事件
				onkeydown onkeyup onkeypress
页面事件
				onload onunload onscroll onresize
表单事件
				onsubmit onreset onfocus onblur onchange
<script>
		  //系统函数
		  var res=Math.max(2,5,6,4,8)
		  console.log(res)
		  //es6
		  var arr=[1,2,5,6]
		  console.log(Math.max(...arr))
 </script>
2.搭建vue项目
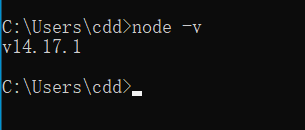
2.1,安装node.js
https://nodejs.org/en/

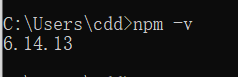
在cmd中输入‘node -v,npm -v’查看是否安装成功
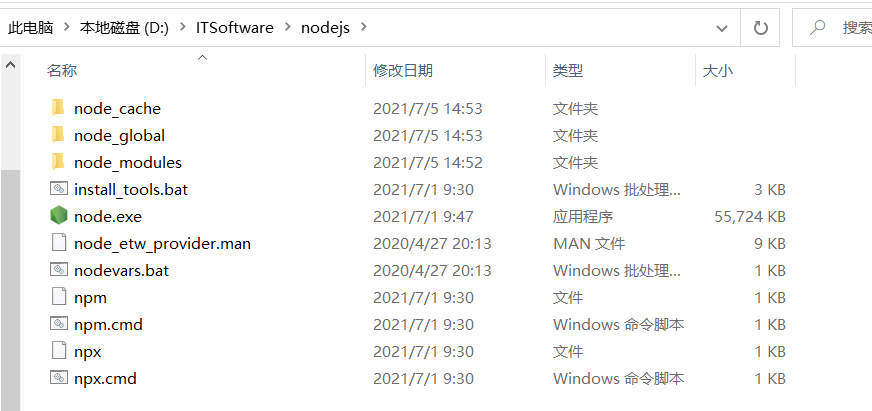
在node.js安装路径新建两个文件夹
node_cache,node_global
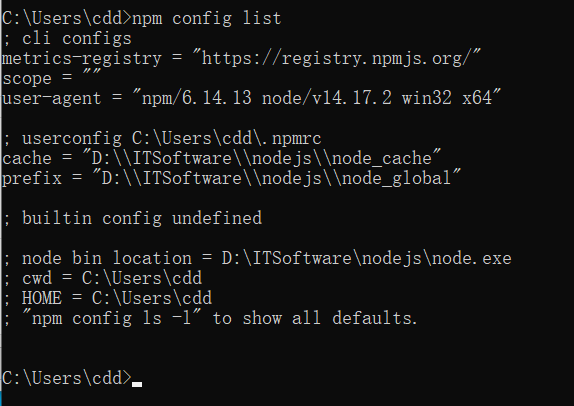
输入下图指令

npm config list查看是否配置成功
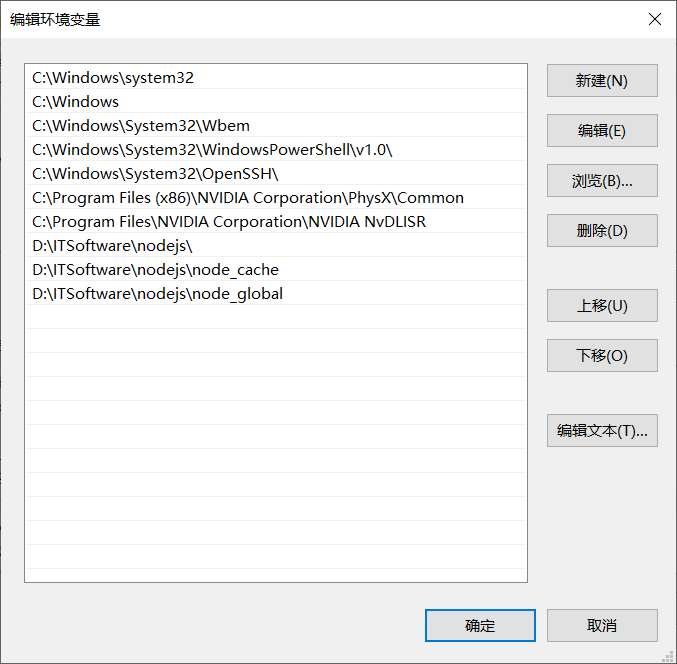
配置环境变量
path里面添加刚才添加的文件夹的路径
2.2 安装vue环境
npm是一个强大的包管理工具
安装: npm install -g vue 或者 npm isntall vue -g
-g global全局安装
--save局部安装 --save-dev
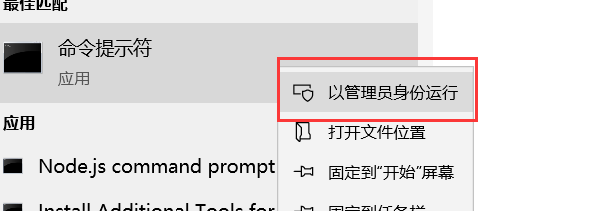
管理员运行cmd
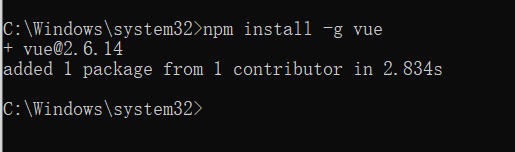
安装vue环境
语法:npm install -g vue
安装脚手架工具(安装较慢)
语法:npm install -g @vue/cli
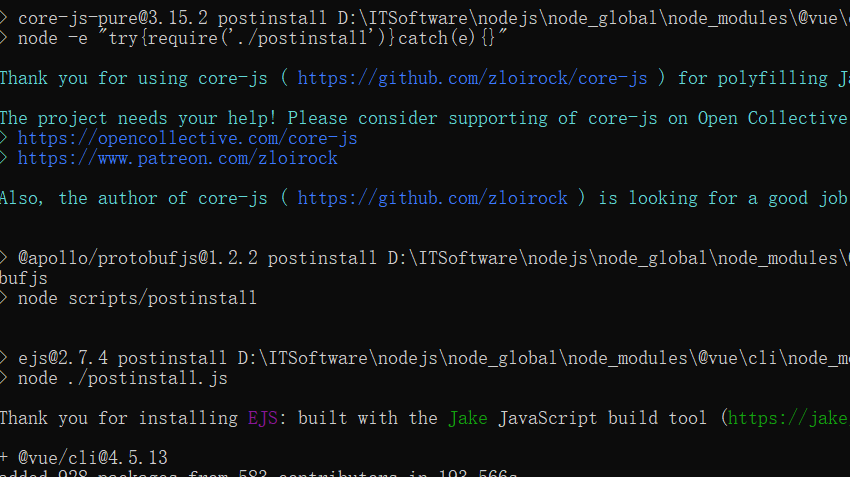
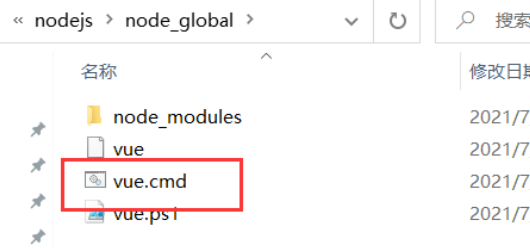
查看global目录出现vue.cmd则安装成功
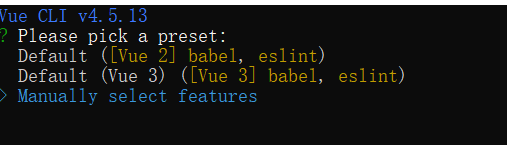
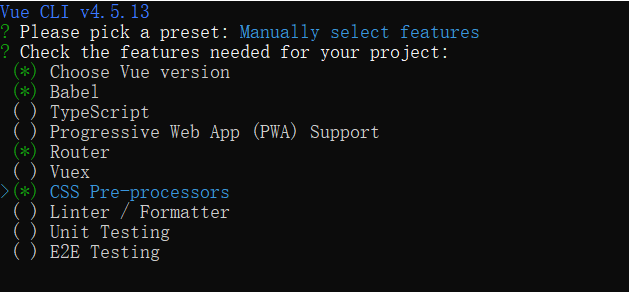
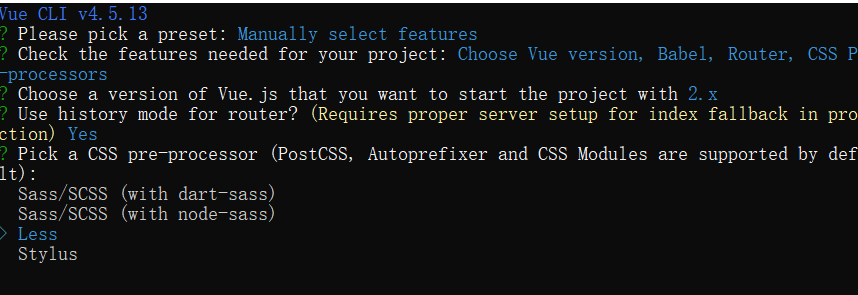
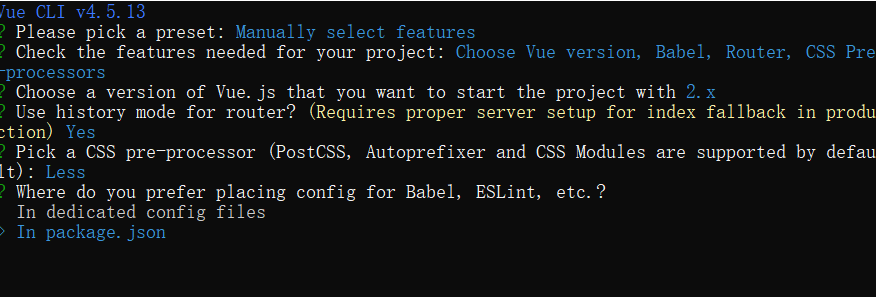
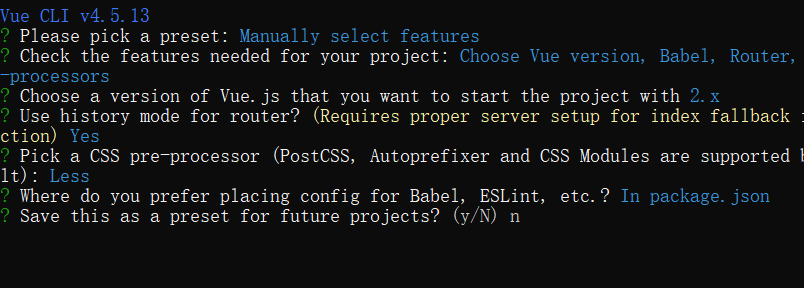
2.3 创建第一个vue项目

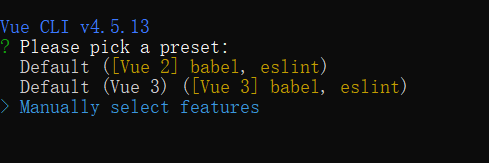
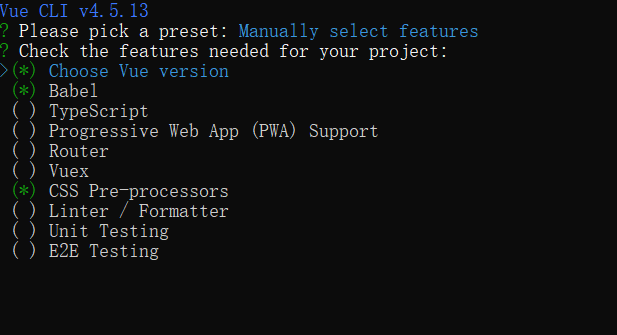
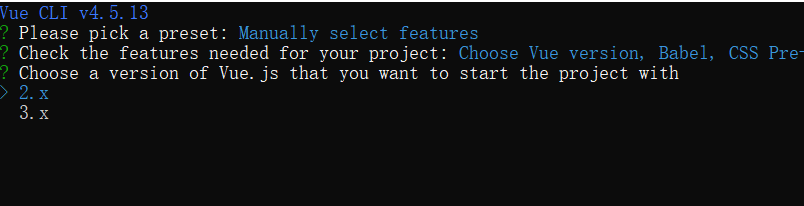
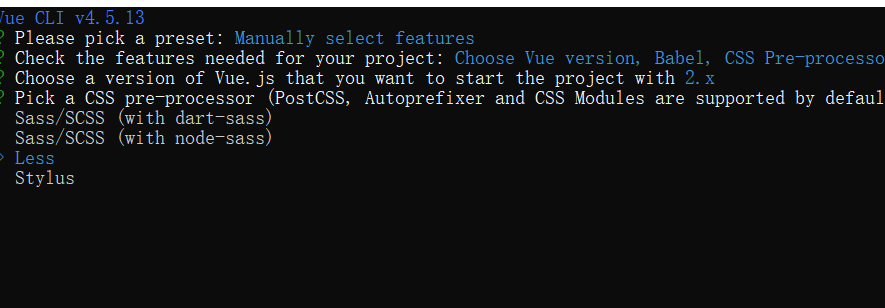
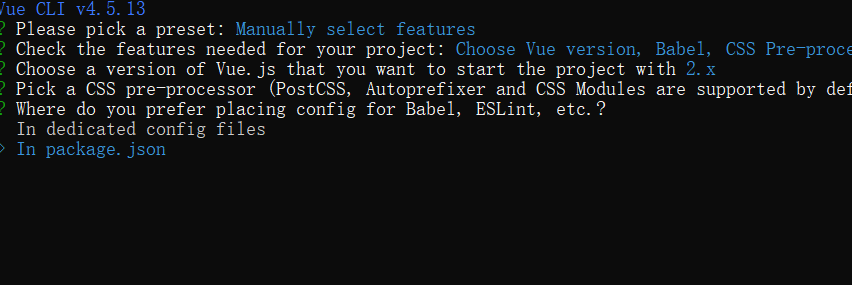
最后选择no

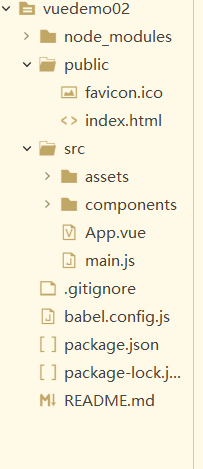
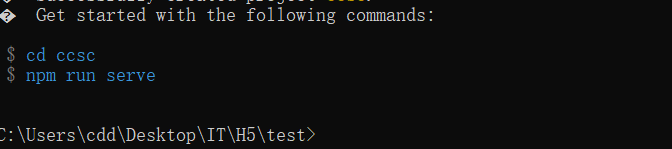
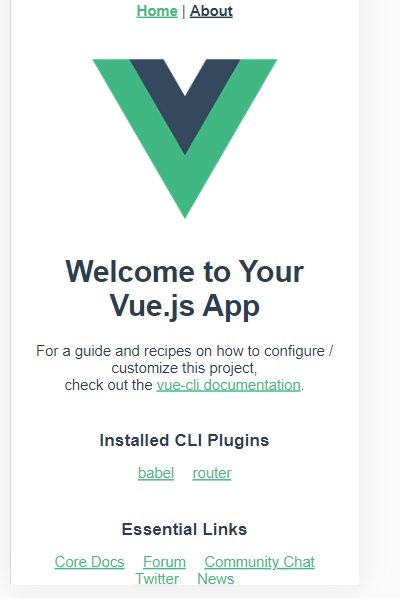
创建成功
Hbuilderx打开创建好的目录
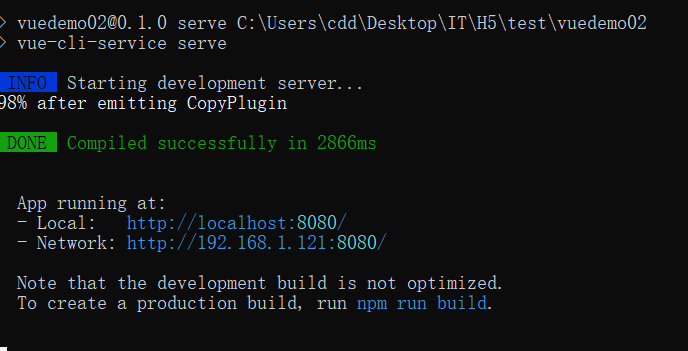
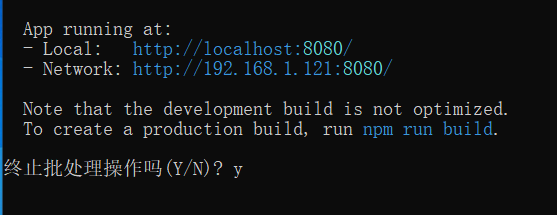
启动项目

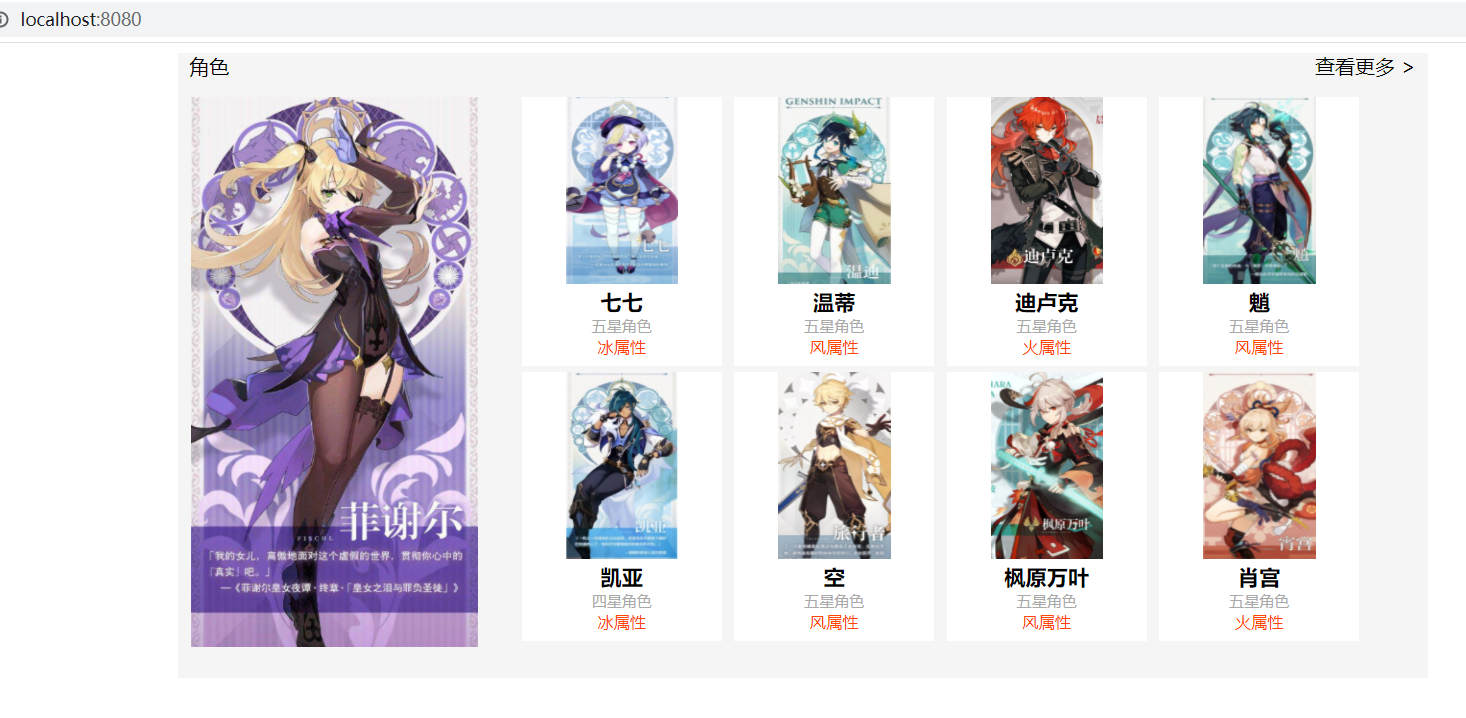
将前面的html作业改为vue项目:
app.vue
<template>
<div id="app">
<div class="pageAll">
<div class="pageTop">
<div class="navLeft">
角色
</div>
<div class="navRight">
查看更多 >
</div>
</div>
<div class="pageDown">
<div class="downLeft" v-for="(h,index) in huang" v-bind:key='index'>
/** v-bind:key='index':当我们在使用v-for进行渲染时,尽可能使用渲染元素自身属性的id给渲染的元素绑定一个key值,这样在当前渲染元素的DOM结构发生变化时,能够单独响应该元素而不触发所有元素的渲染。*/
<img :src="h.img" alt=""/>
</div>
<div class="downRight">
<div class="liTop">
<ul>
<li v-for="(ro1,index) in roles" v-bind:key='index'>
<img :src="ro1.img" />
<div class="txt1"> {{ro1.name}}</div>
<div class="txt2"> {{ro1.stars}}</div>
<div class="txt3">{{ro1.element}}</div>
</li>
</ul>
</div>
<div class="liDown">
<ul>
<li v-for="(ro2,index) in roles2" v-bind:key='index'>
<img :src="ro2.img" />
<div class="txt1"> {{ro2.name}}</div>
<div class="txt2"> {{ro2.stars}}</div>
<div class="txt3">{{ro2.element}}</div>
</li>
</ul>
</div>
</div>
</div>
</div>
</div>
</template>
<script>
export default {
name: 'App',
data(){
return{
huang:[
{
name:'皇女',
img:require('@/assets/ch1.png')
}
],
roles:[
{
name:'七七',
stars:'五星角色',
element:'冰属性',
img:require('@/assets/ch2.png')
},{
name:'温蒂',
stars:'五星角色',
element:'风属性',
img:require('@/assets/ch3.png')
},{
name:'迪卢克',
stars:'五星角色',
element:'火属性',
img:require('@/assets/ch4.png')
},{
name:'魈',
stars:'五星角色',
element:'风属性',
img:require('@/assets/ch5.png')
}
],roles2:[
{
name:'凯亚',
stars:'四星角色',
element:'冰属性',
img:require('@/assets/ch6.png')
},{
name:'空',
stars:'五星角色',
element:'风属性',
img:require('@/assets/ch7.png')
},{
name:'枫原万叶',
stars:'五星角色',
element:'风属性',
img:require('@/assets/ch8.png')
},{
name:'肖宫',
stars:'五星角色',
element:'火属性',
img:require('@/assets/ch9.png')
}
]
}
}
}
</script>
<style lang="less">
div.pageAll{
width: 1000px;
height: 500px;
margin: 0 auto;
background-color: #f5f5f5;
}
div.pageAll .pageTop{
height: 35px;
}
div.pageAll .pageTop .navLeft{
float: left;
text-align: center;
width: 50px;
height: 35px;
font-size: 16px;
}
div.pageAll .pageTop .navRight{
float: right;
width: 100px;
text-align: center;
height: 35px;
font-size: 16px;
}
div.pageAll .pageDown{
height: 460px;
}
div.pageAll .pageDown .downLeft{
float: left;
width: 230px;
height: 440px;
margin-left: 10px;
}
div.pageAll .pageDown .downLeft img{
width: 230px;
height: 440px;
}
div.pageAll .pageDown .downRight{
float: left;
width: 730px;
height: 440px;
margin-right: 10px;
margin-left: -15px;
}
div.pageAll .pageDown .downRight ul{
list-style: none;
height: 200px;
margin-top: 0;
}
div.pageAll .pageDown .downRight ul li{
text-align: center;
background-color: #ffffff;
float: left;
margin-left: 10px;
width: 160px;
font-size: 13px;
height: 215px;
margin-bottom: 5px;
}
div.pageAll .pageDown .downRight ul li img{
width: 90px;
height: 150px;
}
.txt1{
font-weight: 600;
font-size: 17px;
}
.txt2{
color: darkgrey;
font-size: 10px;
}
.txt3{
color: orangered;
}
</style>
2.4 vue指令
概念
指令是带有 v- 前缀的特殊属性。
指令用于在表达式的值改变时,将某些行为应用到 DOM 上
v-html
使用 v-html 指令用于输出 html
<div id="app">
    <div v-html="message"></div>
</div>

<script>
new Vue({
  el: '#app',
  data: {
    message: '<h1>异世相遇</h1>'
  }
})
</script>
v-bind
v-bind 指令被用来响应地更新 HTML 属性
<div id="app">
    <pre><a v-bind:href="url">百度</a></pre>
</div>

<script>
new Vue({
  el: '#app',
  data: {
    url: 'http://www.baidu.com'
  }
})
</script>
<!-- 完整语法 -->
<a v-bind:href="url"></a>
<!-- 缩写 -->
<a :href="url"></a>

v-on
它用于监听 DOM 事件
<a v-on:click="doSomething">
<!-- 完整语法 -->
<a v-on:click="doSomething"></a>
<!-- 缩写 -->
<a @click="doSomething"></a>
事件修饰符:stop,once,prevent…
按键修饰符:enter,up,down,left…
v-model
在 input 输入框中我们可以使用 v-model 指令来实现双向数据绑定
<div id="app">
    <p>{{ message }}</p>
    <input v-model="message">
</div>

<script>
new Vue({
  el: '#app',
  data: {
    message: 'cdd'
  }
})
</script>
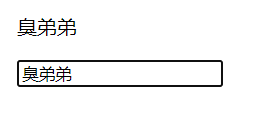
v-model 指令用来在 input、select、textarea、checkbox、radio 等表单控件元素上创建双向数据绑定,根据表单上的值,自动更新绑定的元素的值。
v-if、v-else
<div id="app">
    <p v-if="seen">v-if现在你看到我了</p>
    <p v-else>v-else现在你看到我了</p>
</div>
<script>
new Vue({
  el: '#app',
  data: {
    seen: true,
  }
})
</script>
v-else-if
<div id="app">
    <div v-if="type === 'A'">
      A
    </div>
    <div v-else-if="type === 'B'">
      B
    </div>
    <div v-else-if="type === 'C'">
      C
    </div>
    <div v-else>
      Not A/B/C
    </div>
</div>

<script>
new Vue({
  el: '#app',
  data: {
    type: 'C'
  }
})
</script>
v-else 、v-else-if 必须跟在 v-if 或者 v-else-if之后。
v-show
可以使用 v-show 指令来根据条件展示元素
<h1 v-show="ok">Hello!</h1>
v-for
v-for 指令需要以 site in sites 形式的特殊语法, sites 是源数据数组并且 site 是数组元素迭代的别名
<div id="app">
  <ol>
    <li v-for="site in sites">
      {{ site.name }}
    </li>
  </ol>
</div>

<script>
new Vue({
  el: '#app',
  data: {
    sites: [
      { name: 'cqwu' },
      { name: 'Google' },
      { name: 'Taobao' }
    ]
  }
})
</script>
三个参数
<div id="app">
  <ul>
    <li v-for="(value, key, index) in object">
     {{ index }}. {{ key }} : {{ value }}
    </li>
  </ul>
</div>
循环整数
<div id="app">
  <ul>
    <li v-for="n in 10">
     {{ n }}
    </li>
  </ul>
</div>
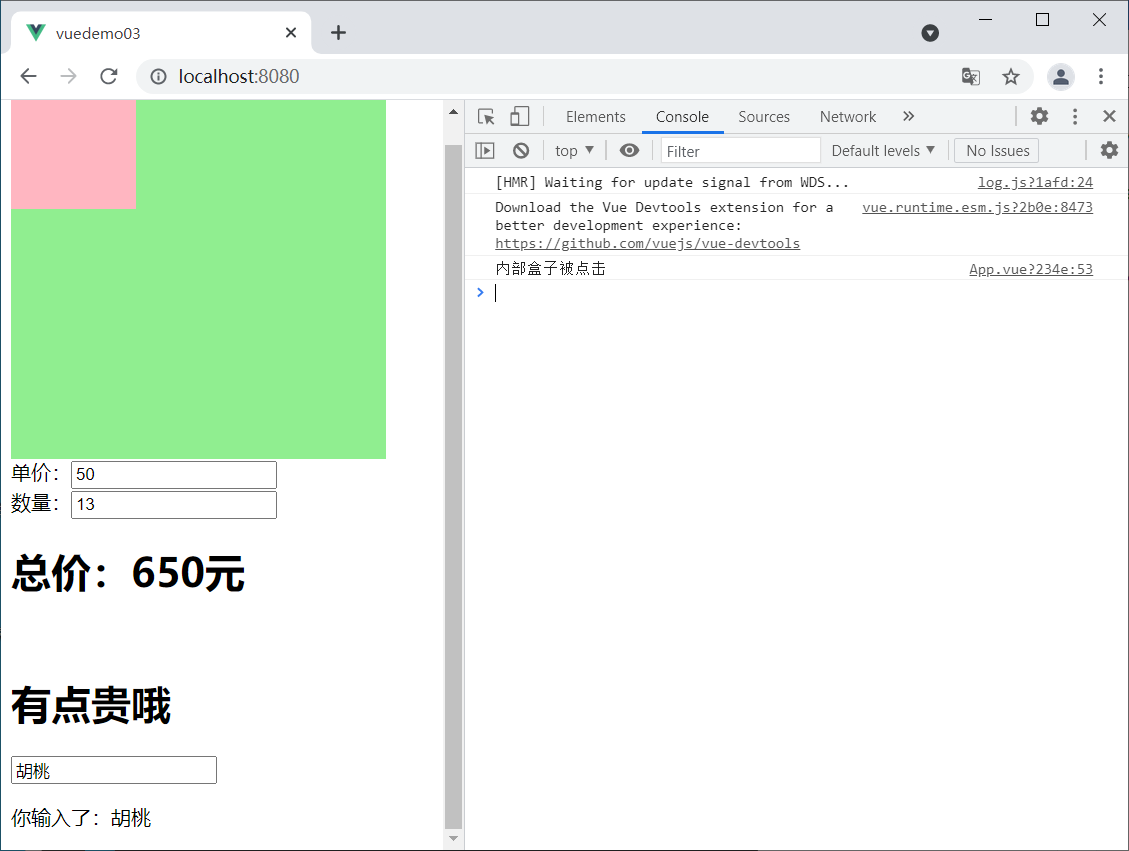
练习1:
<template>
  <div id="app">
	  <!-- 事件绑定 v-on 简写@
		.stop阻止事件冒泡
	  -->
   <div class="outBox" v-on:click.left="outClick">
		<div class="inBox" @click.left.stop="inClick">
		</div>
   </div>
   <!-- v-model数据双向绑定,可在做购物车时使用 -->
   单价:<input type="text" v-model="price" /><br>
   数量:<input type="number" v-model="num" /> <br>
   <h1>总价:{{price*num}}元</h1><br>
   <h1>{{price*num>=50? '有点贵哦':'价格还行'}}</h1>

	<!-- 键盘事件数据双向绑定 -->
	<input type="text" @keyup.enter="getData" v-model="username"/>
	<p>你输入了:{{username}}</p>
  </div>
</template>

<script>


export default {
  name: 'App',
  data(){
	  return{
		  price:50,
		  num:1,
		  username:''

	  }
  },
  methods:{
	  outClick(){
		  console.log('外部盒子被点击')
	  },
	  inClick(){
		  console.log('内部盒子被点击')
	  },
	  getData(){
		  console.log('enter被按下了')

	  }
  }
}
</script>
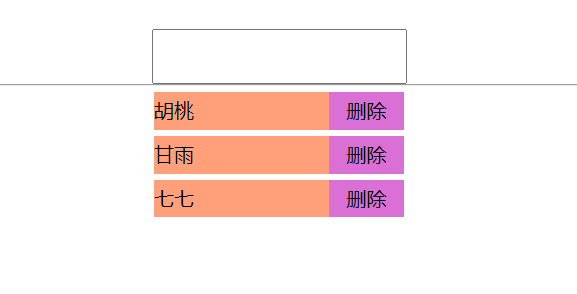
练习2:
<template>
<div id="app">
<div class="pageAll">
<div class="pageInput">
<input @keyup.enter="add" v-model.lazy="role" />
</div>
</div>
<hr/>
<ul >
<li v-for="(n,index) in roles" :key="index" :class="{active:n.isActive}"
@click="changeColor(n)" >{{n.name}}
<span @click.stop="del(index)">删除</span></li>
</ul>
</div>
</template>
<script>
export default {
name: 'App',
data(){
return{
role:'',
roles:[
{
name:'胡桃',
isActive:false
},
{
name:'甘雨',
isActive:false
}
]
}
},
methods:{
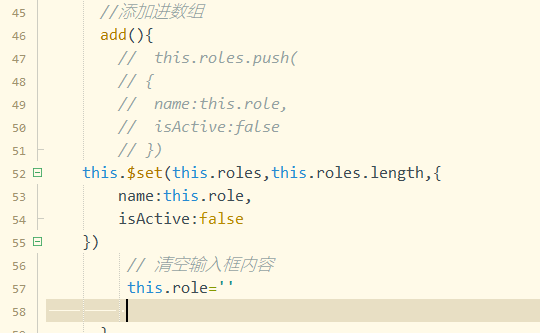
//添加进数组
add(){
this.roles.push(
{
name:this.role,
isActive:false
})
// 清空输入框内容
this.role=''
},
//改变颜色
changeColor(obj){
obj.isActive=!obj.isActive;
},
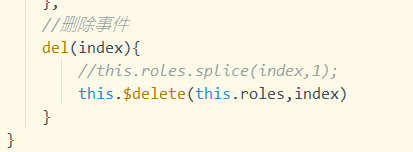
//删除事件
del(index){
this.roles.splice(index,1);
}
}
}
</script>
<style lang="less">
*{
margin:0;
padding: 0;
}
.pageAll{
margin-top: 30px;
}
input{
display: block;
margin-top: 30px;
width: 200px;
height: 40px;
margin: 0 auto;
}
ul{list-style: none;}
ul>li{
width: 200px;
height: 30px;
background-color: lightsalmon;
margin: 0px auto;
margin-top: 5px;
line-height: 30px;
}
ul>li.active{
background-color:lightblue;
text-decoration:line-through;
}
ul >li span{
display: block;
width: 60px;
height: 30px;
background-color: orchid;
float: right;
text-align: center;
}
</style>
增加和删除使用vue自带的方法:
2.5 监听
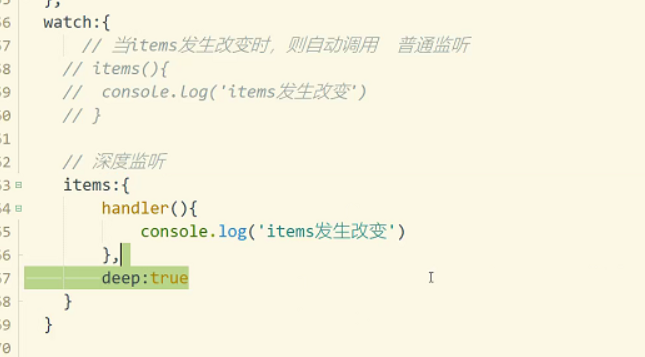
深度监听:可以监听到数组里面的属性值得改变
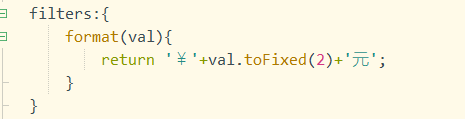
2.6 过滤
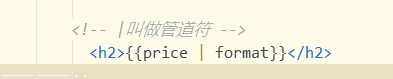
data里面写一个price:996

过滤price返回固定的输出格式常用在app中显示价格的地方(因为js会自动将数字转换为整数)
运行结果
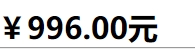
除了过滤价格,还可以过滤时间,只要是想要改变其格式,都可以使用过滤。
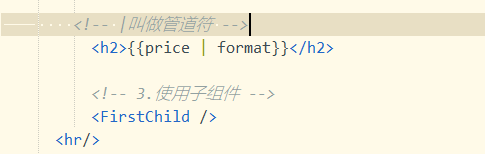
2.7 组件
2.7.1 组件创建
1.在components里面创建一个新的组件FirstChild.vue
<template>
	<div class="firstChild">
		<h2>子组件</h2>
	</div>
</template>

<script>
	export default{
		name:'FirstChild',
		data(){
			return{

			}
		}
	}
</script>

<style>
</style>
2.在app.vue中引入组件
<script>
//2.引入
import FirstChild from '@/components/FirstChild.vue'

export default {


  name: 'App',
//注册组件
  components:{
	  FirstChild
  }
</script>
3.使用组件
2.7.2 组件传值
2.7.2.1 父组件传递给子组件
注意:
dadSay里面的内容是字符串不用加冒号,如果其中为变量则需要加冒号
比如:
<FirstChild  :dadSay='cont'/>
...
<script>
data(){
    return{
        cont:'臭弟弟'
    }
}
</script>
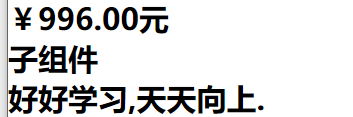
<FirstChild dadSay='好好学习,天天向上.'/>
<template>
	<div class="firstChild">
		<h2>子组件</h2>
		<h2>{{dadSay}}</h2>
	</div>
</template>

<script>
	export default{
		name:'FirstChild',
		data(){
			return{
			}
		},
		//接收父组件的传递数据
		props:['dadSay']
	}
</script>

<style>
</style>
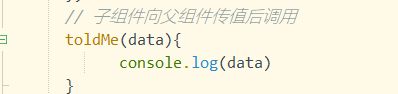
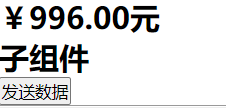
2.7.2.2 子组件传递给父组件
<template>
	<div class="firstChild">
		<h2>子组件</h2>
		<h2>{{dadSay}}</h2>
		<button type="button" @click="send">发送数据</button>
	</div>
</template>

<script>
	export default{
		name:'FirstChild',
		data(){
			return{	}
		},
		//接收父组件的传递数据
		props:['dadSay'],
		methods:{
			send(){
			// emit为触发自定义的函数  emit(eventName,arg)
			this.$emit('sonSay','异世相遇,静享美味!')
			}
		}
	}
</script>

<style>
</style>

测试:
2.8 生命周期函数
总共有8个:
四个阶段:
创建前后 beforeCreate created
挂载前后 beforeMount mounted
更新前后 beforeUpdate updated
销毁前后 beforeDestroy destroyed
2.9 路由router
2.9.1 起步
简单的实例:
App.vue
<template>
  <div id="app">
    <div id="nav">
		<!-- 相当于超链接 -->
      <router-link to="/">Home</router-link> |
      <router-link to="/about">About</router-link>|
      <router-link to="/login">Login</router-link>
    </div>

	<!-- 视图出口 -->
    <router-view/>
  </div>
</template>

<style lang="less">
#app {
  font-family: Avenir, Helvetica, Arial, sans-serif;
  -webkit-font-smoothing: antialiased;
  -moz-osx-font-smoothing: grayscale;
  text-align: center;
  color: #2c3e50;
}

#nav {
  padding: 30px;

  a {
    font-weight: bold;
    color: #2c3e50;

    &.router-link-exact-active {
      color: #42b983;
    }
  }
}
</style>
index.js
import Vue from 'vue'
//1.安装路由 npm install vue-router --save
//2.引入路由文件
import VueRouter from 'vue-router'

//引入组件
import Home from '../views/Home.vue'

//3.安装插件
Vue.use(VueRouter)

//5.配置路由
const routes = [
  {
    path: '/',//首页
    name: 'Home',
    component: Home
  },
  {
    path: '/about',
    name: 'About',
    // route level code-splitting
    // this generates a separate chunk (about.[hash].js) for this route
    // which is lazy-loaded when the route is visited.
    component: () => import(/* webpackChunkName: "about" */ '../views/About.vue')
  },
  {
	path:'/login',
	name:'Login',
	component:()=>import('../views/Login.vue')
  }
]
//4.实例化vue
const router = new VueRouter({
  mode: 'history',
  base: process.env.BASE_URL,
  routes
})

export default router
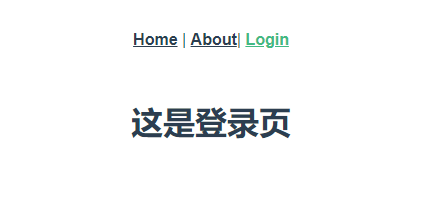
Login.vue
<template>
	<div class="about">
	  <h1>这是登录页</h1>
	</div>
</template>

<script>
</script>

<style>
</style>
2.9.2 动态路由
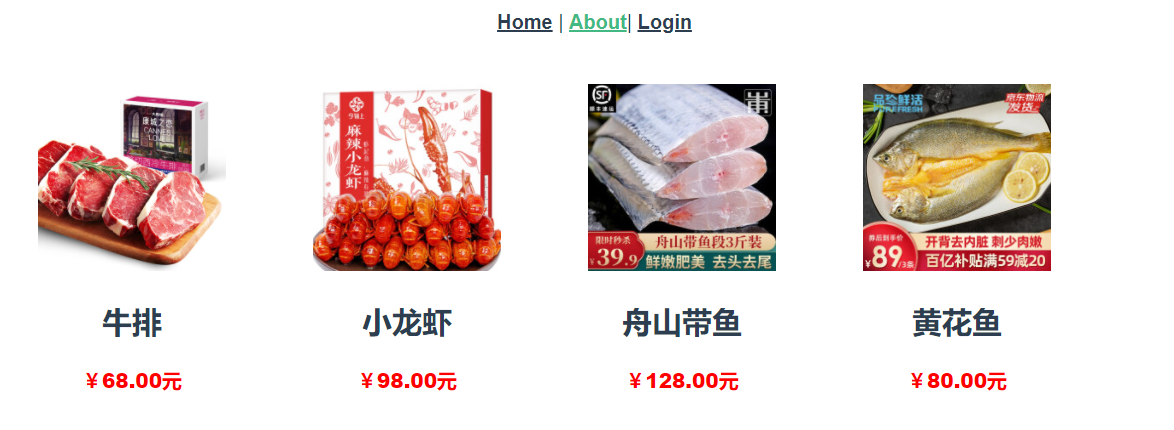
1.布局商品页
About.vue
<template>
  <div class="about">
    <ul>
    	<li v-for="(good,index) in goods" >
			<img :src="good.img" >
			<h2>{{good.name}}</h2>
			<p>{{good.price | money}}</p>
		</li>

    </ul>
  </div>
</template>
<script>
export default{
	name:'about',
	data(){
		return{
			goods:[
				{
					img:require('@/assets/1.jpg'),
					name:'牛排',
					price:68
				},
				{
					img:require('@/assets/2.jpg'),
					name:'小龙虾',
					price:98
				},
				{
					img:require('@/assets/3.jpg'),
					name:'舟山带鱼',
					price:128
				},
				{
					img:require('@/assets/4.jpg'),
					name:'黄花鱼',
					price:80
				}
			]
		}
	}
}


</script>
<style scoped lang="less">

ul{
	width: 1000px;
	margin: 0 auto;
	height: 300px;


}
ul>li{

	width: 200px;
	height: 300px;
	margin: 10px;

	float: left;

}
ul>li img{
	width: 180;
	height: 150px;
}
ul>li >p{
	color: red;
	font-weight: 800;
}
</style>
全局price过滤写在main.js里面,注意要写在new Vue()之前
import Vue from 'vue'
import App from './App.vue'
//6.引入路由文件
import router from './router'

Vue.config.productionTip = false

//全局过滤器
Vue.filter('money',function(price){
	return '¥'+price.toFixed(2)+'元'
})

new Vue({
  router,//7.挂载路由
  render: h => h(App)
}).$mount('#app')
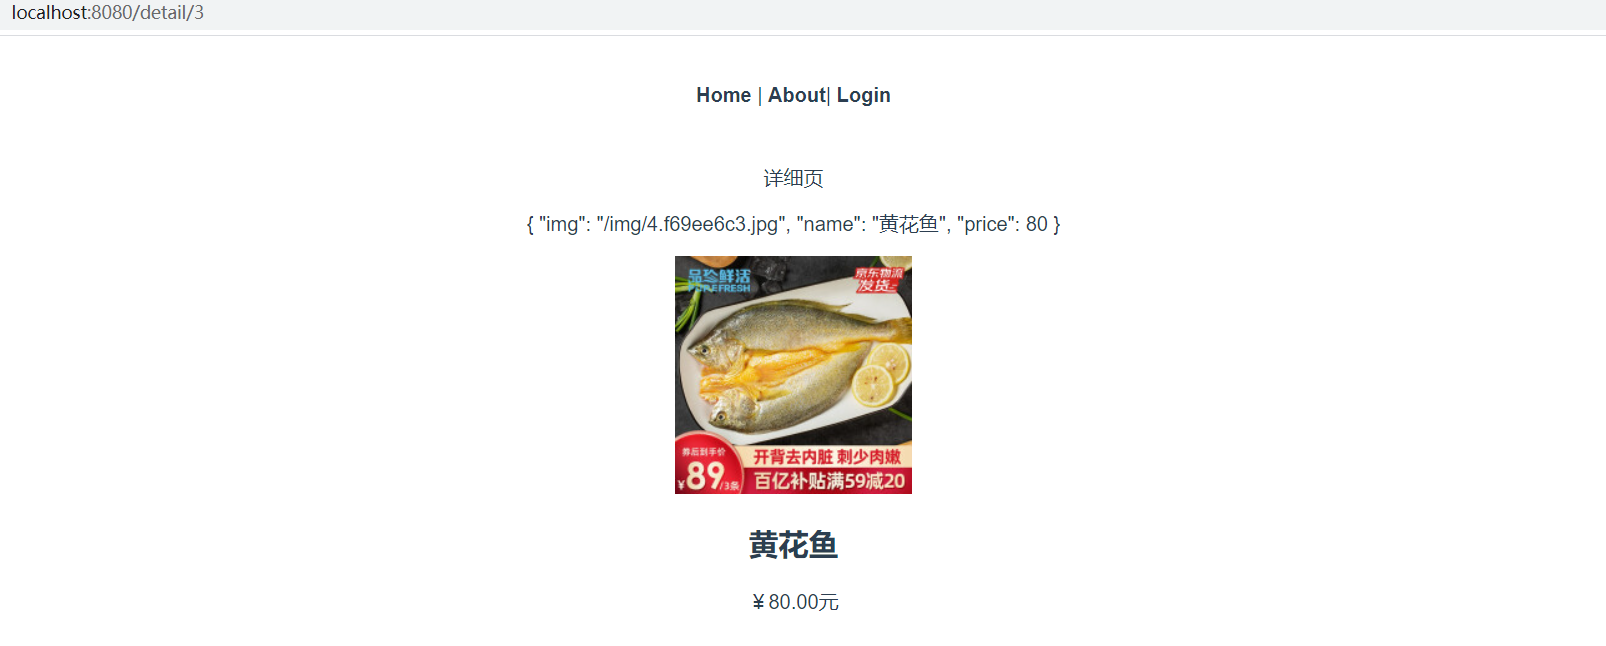
2.编写详细页
Detail.vue
<template>
	<div class="detail">
		<div class="">
			<p>详细页</p>
			<p>{{goods[id]}}</p>
			<img :src="goods[id].img" >
			<h2>{{goods[id].name}}</h2>
			<p>{{goods[id].price |money}}</p>
		</div>
	</div>
</template>

<script>
	export default{
		name:'detail',
		data(){
			return{
				id:this.$route.params.id,
				goods:[
					{
						img:require('@/assets/1.jpg'),
						name:'牛排',
						price:68
					},
					{
						img:require('@/assets/2.jpg'),
						name:'小龙虾',
						price:98
					},
					{
						img:require('@/assets/3.jpg'),
						name:'舟山带鱼',
						price:128
					},
					{
						img:require('@/assets/4.jpg'),
						name:'黄花鱼',
						price:80
					}
				]
			}

		}
	}
</script>

<style>

</style>
在router/index.js里面添加新的路由配置
 {
	  //设置动态参数
	  path:'/detail/:id',
	  name:'Detail',
	  component:()=>import('../views/Detail.vue')
  }
在商品列表页做如下更改
<template>
  <div class="about">
    <ul>
    	<li v-for="(good,index) in goods" :key="index" >
            <!-- 点击li跳转到对应的详细界面 -->
			<router-link :to="{name:'Detail',params:{id:index}}">
			<img :src="good.img" >
			<h2>{{good.name}}</h2>
			<p>{{good.price | money}}</p>
			</router-link>
		</li>

    </ul>
  </div>
</template>
因为增加了一个router-link标签,相当于一个标签,所以样式要做相应调整
ul>li> a >p{
	color: red;
	font-weight: 800;
}
还应在全局样式App.vue里面做如下更改
ul{
	list-style: none;

}
a{
	text-decoration: none;
    color: black;
}
测试:

2.9.3 嵌套路由
编写两个界面 QQ.vue、WeChat.vue
<template>
	<div class="qq">
		<h1>qq登录</h1>
	</div>
</template>

<script>
	export default{
		name:'qq',
		data(){
			return{
			}
		}
	}
</script>

<style>
</style>
<template>
	<div class="weChat">
		<h1>微信登录</h1>
	</div>
</template>

<script>
	export default{
		name:'weChat',
		data(){
			return{
			}
		}
	}
</script>

<style>
</style>
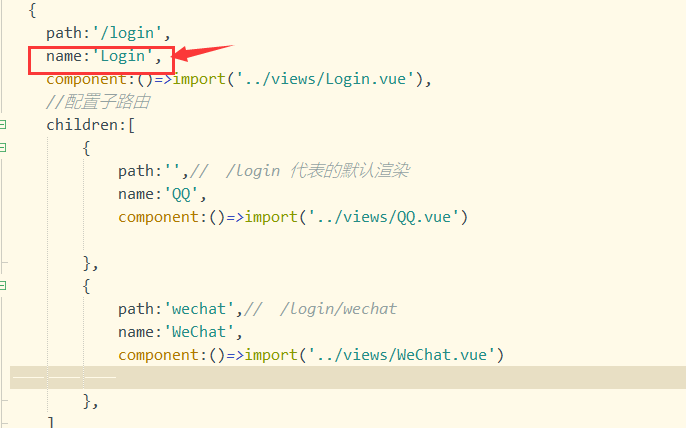
配置路由信息
{
	path:'/login',
	name:'Login',
	component:()=>import('../views/Login.vue'),
	//配置子路由
	children:[
		{
			path:'',//  /login 代表的默认渲染
			name:'QQ',
			component:()=>import('../views/QQ.vue')
		},
		{
			path:'wechat',//  /login/wechat
			name:'WeChat',
			component:()=>import('../views/WeChat.vue')

		},
	]
  }
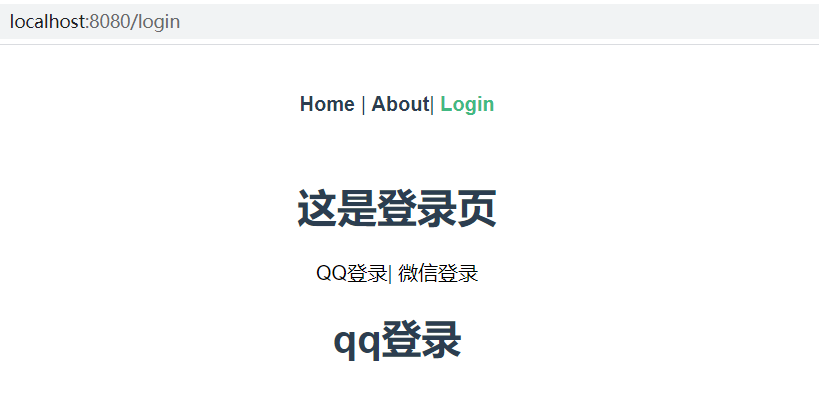
Login.vue
<template>
	<div class="login">
	  <h1>这是登录页</h1>
	  <router-link to="/login">QQ登录</router-link>|
	  		<router-link to="/login/wechat">微信登录</router-link>
			<!-- 视图出口 -->
	  		<router-view/>
	</div>
</template>

<script>
	export default{
		name:'login',
		data(){
			return{
			}
		}
	}
</script>

<style>
</style>
测试:

这时有个警告:
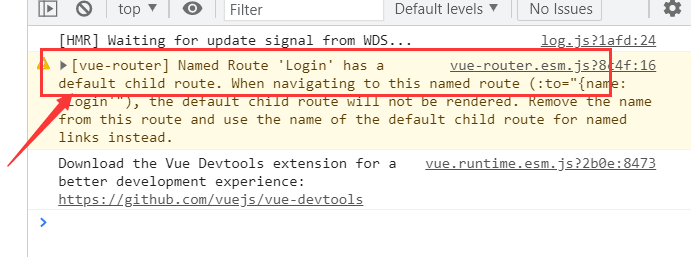
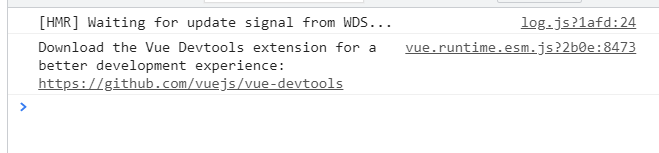
把路由配置里面的name:‘login’,删掉就没有了
改进:将Login.vue中的链接改为v-bind使用属性name跳转界面
<template>
	<div class="login">
	  <h1>这是登录页</h1>
	  <!-- <router-link to="/login">QQ登录</router-link>|
	  		<router-link to="/login/wechat">微信登录</router-link>
	  		 -->
	  		<router-link :to="{name:'QQ'}">QQ登录</router-link>|
	  		<router-link :to="{name:'WeChat'}">微信登录</router-link>
			<!-- 视图出口 -->
	  		<router-view/>
	</div>
</template>

<script>
	export default{
		name:'login',
		data(){
			return{
			}
		}
	}
</script>

<style>
</style>
2.9.4 编程式导航
除了使用 <router-link> 创建 a 标签来定义导航链接,我们还可以借助 router 的实例方法,通过编写代码来实现。
// 字符串
router.push('home')

// 对象
router.push({ path: 'home' })

// 命名的路由
router.push({ name: 'user', params: { userId: '123' }})
注意:在 Vue 实例内部,你可以通过 $router 访问路由实例。因此你可以调用 this.$router.push。
<template>
	<div class="login">
		<h1>登录页</h1>
		<!-- <router-link to="/login">QQ登录</router-link>|
		<router-link to="/login/wechat">微信登录</router-link> -->

		<!-- <router-link :to="{name:'QQ'}">QQ登录</router-link>|
		<router-link :to="{name:'WeChat'}">微信登录</router-link> -->
		<button @click="QQLogin">QQ登录</button>
		<button @click="WeChatLogin">微信登录</button>
		<router-view></router-view>
	</div>
</template>

<script>
export default{
	name:'login',
	data(){
		return{

		}
	},
	methods:{
		QQLogin(){
			// push()跳转页面
			// this.$router.push({name:'QQ'})
			this.$router.replace({name:'QQ'})
		},
		WeChatLogin(){
			// this.$router.push({name:'WeChat'})
			this.$router.replace({name:'WeChat'})
		}
	}
}
</script>

<style>
</style>
push:有历史记录,返回上一个界面的时候一页一页的返回,
replace:无历史记录,返回上一个界面的时候直接跳过当前页,
常见应用场景:挑选商品时需要登录注册返回界面
router.go(n)
这个方法的参数是一个整数,意思是在 history 记录中向前或者后退多少步,类似 window.history.go(n)。
// 在浏览器记录中前进一步,等同于 history.forward()
router.go(1)

// 后退一步记录,等同于 history.back()
router.go(-1)

// 前进 3 步记录
router.go(3)

// 如果 history 记录不够用,那就默默地失败呗
router.go(-100)
router.go(100)
3.乡村基项目搭建
3.1搭建vue项目


创建成功
3.2 搭建vant框架
vant官方手册:
https://youzan.github.io/vant/#/zh-CN/
确认项目可以运行了之后中止当前项目
3.2.1 vant框架搭建
安装vant
npm i vant --save

自动按需引入组件
babel-plugin-import 是一款 babel 插件,它会在编译过程中将 import 的写法自动转换为按需引入的方式。
安装插件
npm i babel-plugin-import -D

安装完成后,打开项目新建一个babel.config.js文件并写入以下代码
module.exports = {
  plugins: [
    ['import', {
      libraryName: 'vant',
      libraryDirectory: 'es',
      style: true
    }, 'vant']
  ]
};
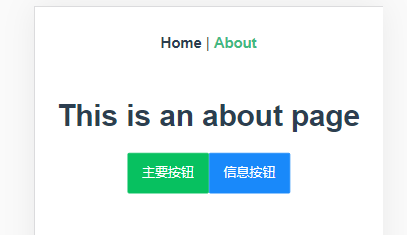
在About.vue中引入vant官网的button组件
<template>
  <div class="about">
    <h1>This is an about page</h1>
	<van-button type="primary">主要按钮</van-button>
	<van-button type="info">信息按钮</van-button>
  </div>
</template>
<script>
import Vue from 'vue';
import { Button } from 'vant';
Vue.use(Button);


 export default{
	  name:'about',
	 data(){
		 return{

		 }
	 }
 }
</script>
启动项目

测试
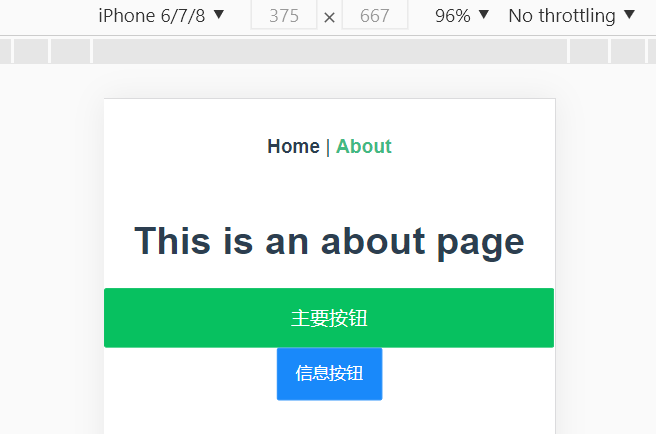
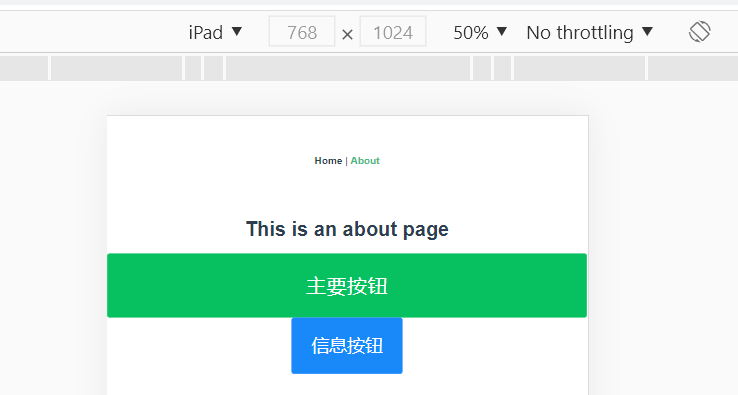
3.2.2 游览器适配
Viewport 布局
Vant 默认使用 px 作为样式单位,如果需要使用 viewport 单位 (vw, vh, vmin, vmax),推荐使用 postcss-px-to-viewport 进行转换。
postcss-px-to-viewport 是一款 PostCSS 插件,用于将 px 单位转化为 vw/vh 单位。
中止前面的项目

npm安装插件
npm install postcss-px-to-viewport --save-dev

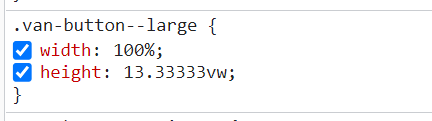
在项目中创建postcss.config.js文件并写入以下代码
module.exports = {
  plugins: {
    'postcss-px-to-viewport': {
      viewportWidth: 375,
    },
  },
};
再次启动项目

现在就可以根据设备尺寸自动更改组件尺寸了
3.3 搭建Vue框架
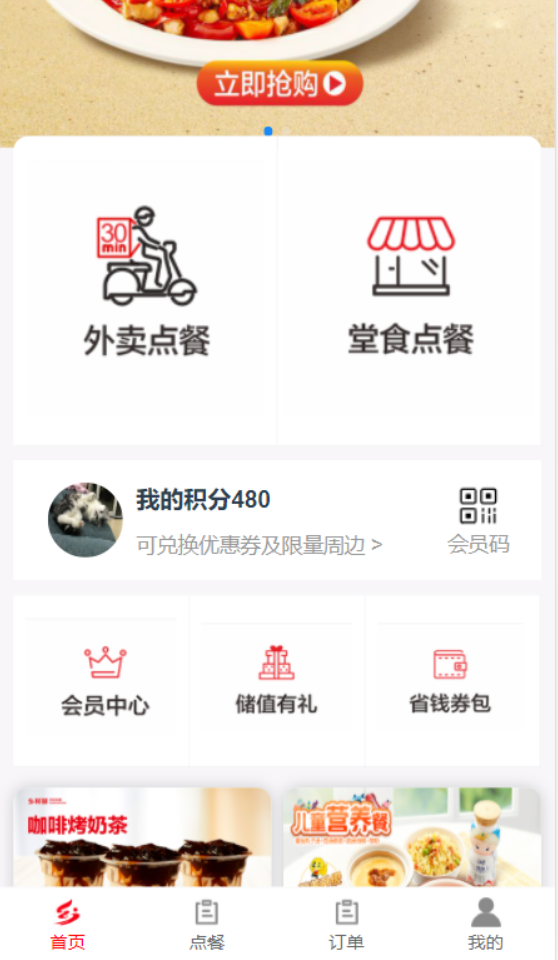
3.3.1 小程序基本跳转搭建
1,TabBar界面配置
在views目录下创建下列几个文件
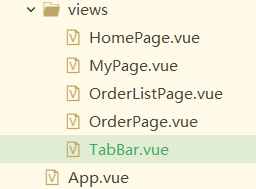
在vant官网拷贝TabBar的代码,并将icon改为本地图片
TabBar.vue
<template>
  <div class="tabBar">
	<van-tabbar v-model="active" active-color="#f00">
	  <van-tabbar-item >
	    <span>首页</span>
	    <template #icon="props">
	      <img src="../assets/tabicons/home.png" />
	    </template>
	  </van-tabbar-item>
	  <van-tabbar-item >
	    <span>点餐</span>
	    <template #icon="props">
	      <img :src="props.active ? iconorder.active : iconorder.inactive" />
	    </template>
	  </van-tabbar-item>
	  <van-tabbar-item >
	    <span>订单</span>
	    <template #icon="props">
	      <img :src="props.active ? iconorderlist.active : iconorderlist.inactive"/>
	    </template>
	  </van-tabbar-item>
	  <van-tabbar-item >
	    <span>我的</span>
	    <template #icon="props">
	      <img :src="props.active ? iconmy.active : iconmy.inactive"/>
	    </template>
	  </van-tabbar-item>


	</van-tabbar>

  </div>
</template>
<script>
import Vue from 'vue';
import { Tabbar, TabbarItem } from 'vant';

Vue.use(Tabbar);
Vue.use(TabbarItem);


 export default{
	  name:'tabBar',
	 data(){
		 return{
			  active: 0,
			  iconorder: {
				 active:require('@/assets/tabicons/order-o.png') ,
				 inactive: require('@/assets/tabicons/order.png'),
			   },
			   iconorderlist: {
				 active:require('@/assets/tabicons/orderlist-o.png') ,
				 inactive: require('@/assets/tabicons/orderlist.png'),
			   },
			   iconmy: {
				 active:require('@/assets/tabicons/my-o.png') ,
				 inactive: require('@/assets/tabicons/my.png'),
			   },

		 }
	 }
 }
</script>
router/index.js
import Vue from 'vue'
import VueRouter from 'vue-router'
import TabBar from '../views/TabBar.vue'

Vue.use(VueRouter)

const routes = [
  {
    path: '/',
    name: 'TabBar',
    component: TabBar
  }

]

const router = new VueRouter({
  mode: 'history',
  base: process.env.BASE_URL,
  routes
})

export default router
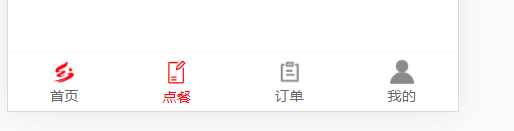
目前的运行效果:

2,路由跳转配置
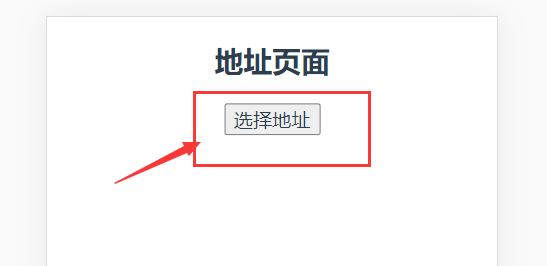
新建一个AddressPage.vue
<template>
	<div class="addressPage">
		<h2>地址页面</h2>
		<button @click="Selected">选择地址</button>
	</div>
</template>

<script>
	export default{
		name:'AddressPage',
		methods:{
			Selected(){
				this.$router.replace({name:'orderPage'})
			}
		}
	}
</script>

<style>
</style>
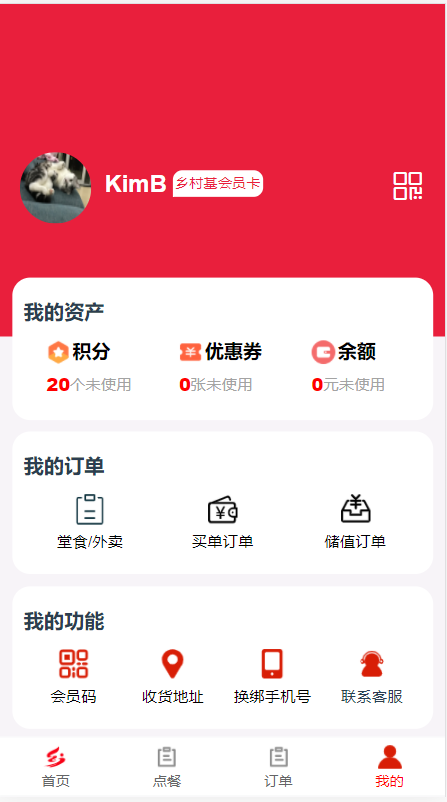
刚才新写的那几个界面随便写上一些界面例如:MyPage.vue
<template>
	<div class="myPage">
		<h2>这是我的页</h2>

	</div>
</template>

<script>
export default{
	name:'myPage',
	data(){
		return{
		}
	}
}
</script>

<style>
</style>
在index.js界面配置子路由
const routes = [
  {
    path: '/',
    component: TabBar,
	//配置子路由
	children:[
		{
			path:'',
			name:'homePage',
			component:()=>import('../views/HomePage.vue')

		},
		{
			path:'orderPage',
			name:'orderPage',
			component:()=>import('../views/OrderPage.vue')

		},{
			path:'orderListPage',
			name:'orderListPage',
			component:()=>import('../views/OrderListPage.vue')

		},{
			path:'myPage',
			name:'myPage',
			component:()=>import('../views/MyPage.vue')

		},
	]
  },
  {
  	path:'/addressPage',
  	name:'addressPage',
  	component:()=>import('../views/AddressPage.vue')

  }

]
TabBar.vue做如下更改
<template>
  <div class="tabBar">
	  <!-- 视图出口 -->
	  <router-view></router-view>
	  <!-- 底部tabbar -->
	<van-tabbar v-model="active" active-color="#f00" :route="true">
	  <van-tabbar-item  :to="{name:'homePage'}">
	    <span>首页</span>
		 <template #icon="props">
	      <img src="@/assets/tabicons/home.png" />
	    </template>
	  </van-tabbar-item>

	  <van-tabbar-item  icon="records"  :to="{name:'addressPage'}"
	  :class="{'van-tabbar-item--active':this.$route.name=='orderPage','color':this.$route.name=='orderPage'}">
	    <span>点餐</span>

	  </van-tabbar-item>

	  <van-tabbar-item  :to="{name:'orderListPage'}">
	    <span>订单</span>
	    <template #icon="props">
	      <img :src="props.active ? iconorderlist.active : iconorderlist.inactive"/>
	    </template>
	  </van-tabbar-item>

	  <van-tabbar-item :to="{name:'myPage'}" >
	    <span>我的</span>
	    <template #icon="props">
	      <img :src="props.active ? iconmy.active : iconmy.inactive"/>
	    </template>
	  </van-tabbar-item>


	</van-tabbar>

  </div>
</template>
<script>
import Vue from 'vue';
import { Tabbar, TabbarItem } from 'vant';

Vue.use(Tabbar);
Vue.use(TabbarItem);


 export default{
	  name:'tabBar',
	 data(){
		 return{
			  active: 0,
			  iconorder: {
				 active:require('@/assets/tabicons/order-o.png') ,
				 inactive: require('@/assets/tabicons/order.png'),
			   },
			   iconorderlist: {
				 active:require('@/assets/tabicons/orderlist-o.png') ,
				 inactive: require('@/assets/tabicons/orderlist.png'),
			   },
			   iconmy: {
				 active:require('@/assets/tabicons/my-o.png') ,
				 inactive: require('@/assets/tabicons/my.png'),
			   },

		 }
	 }
 }
</script>
<style scoped >

	.van-tabbar-item__icon img{
		width: 20px;
		height: 20px;
	}

.color{color:red;}

</style>
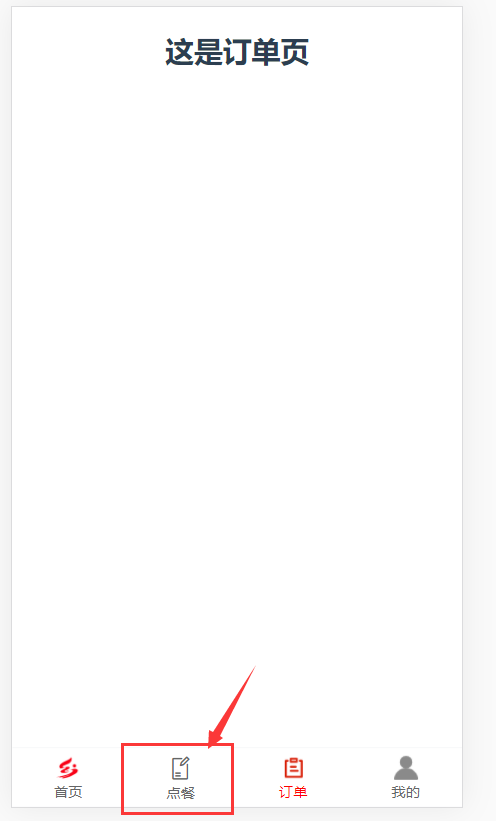
测试:
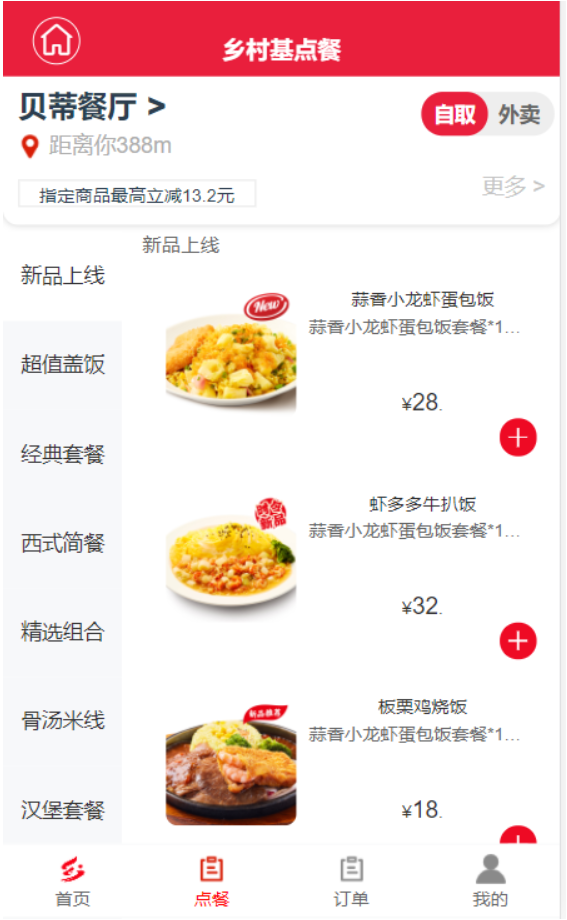
点击点餐跳转到地址页
点击’选择地址’跳回点餐页,并且点餐选项卡是被选中的
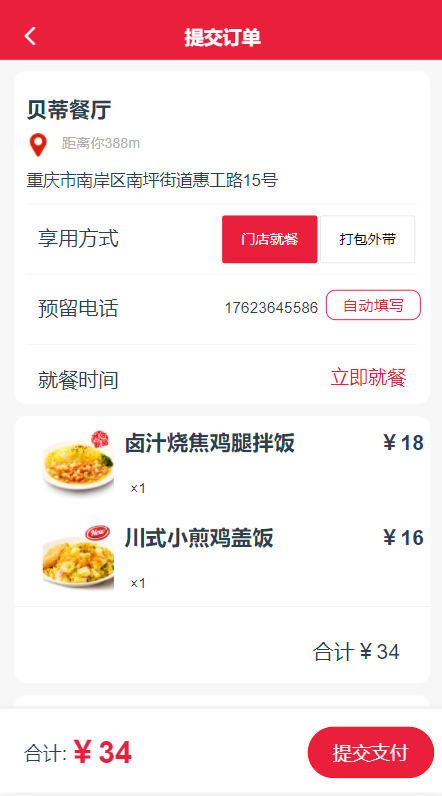
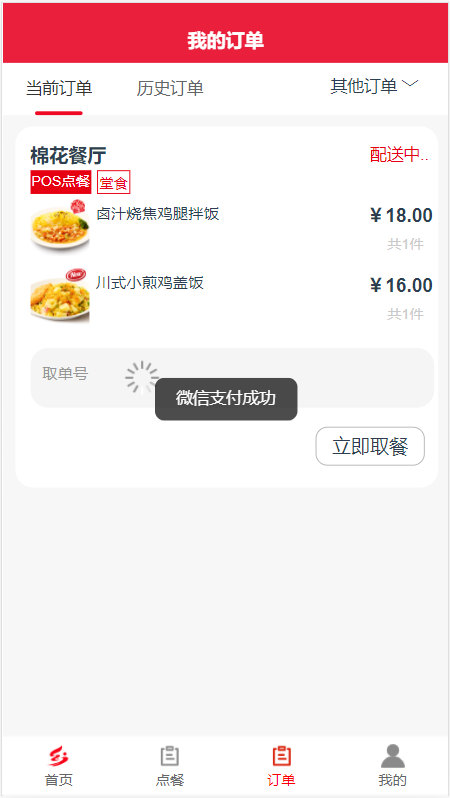
3.3.2 各界面页面布局

4.项目源码
https://gitee.com/beekim/vue-ccscapp/tree/master/CCSCproject/ccsc


 2659
2659


 被折叠的 条评论
为什么被折叠?
被折叠的 条评论
为什么被折叠?
 到【灌水乐园】发言


