


每个iOS开发人员都知道tableview,因为它是我们开发中最常用的Contrller了.下面就简单介绍Swift中tableview的一些简单的使用:
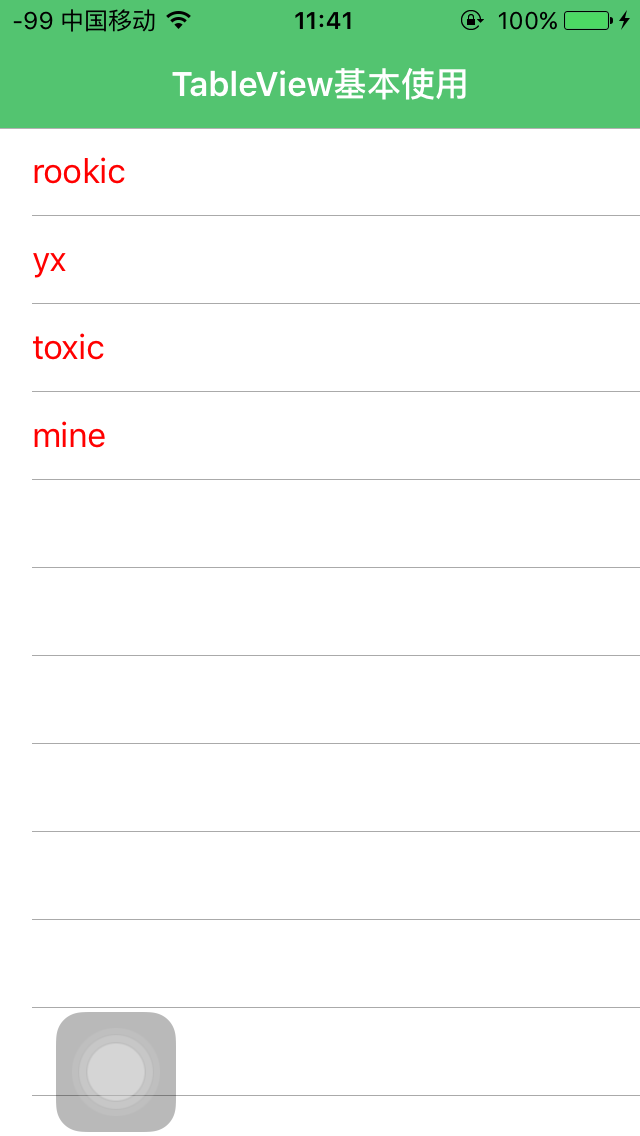
(先看效果图)
下面直接贴代码
class ViewController: UIViewController{

    override func loadView() {
        let tv = UITableView()
        tv.frame = UIScreen.mainScreen().bounds
        tv.dataSource = self
        tv.delegate = self
        tv.separatorColor = UIColor.lightGrayColor()
        view = tv
    }

    override func viewDidLoad() {
        //修改导航栏背景色
        navigationController?.navigationBar.barTintColor =
            UIColor(red: 55/255, green: 186/255, blue: 89/255, alpha: 1)
        //修改导航栏文字颜色
        navigationController?.navigationBar.titleTextAttributes =
            [NSForegroundColorAttributeName: UIColor.whiteColor()]
        //修改导航栏按钮颜色
        navigationController?.navigationBar.tintColor = UIColor.whiteColor()
        //添加标题
        navigationItem.title = "TableView基本使用"
        //修改导航栏背景图片
//        navigationController?.navigationBar.setBackgroundImage(UIImage(named: "bg5"), forBarMetrics: .Default)
    }

    // MARK:-
    // MARK:-懒加载数据
    lazy var dataList:[String] = {
        return ["rookic","yx","toxic","mine"]
    }()
}
// MARK:-
// MARK:- 苹果官方建议, 可以将数据源代理方法单独写到一个扩展中,以便提高代码的可读性
// extension 相当于OC中的 catogory
extension ViewController:UITableViewDelegate,UITableViewDataSource
{
    // MARK:-
    // MARK:-UITableViewDataSource
    //  共多少行
    func tableView(tableView: UITableView, numberOfRowsInSection section: Int) -> Int {
        return dataList.count
    }
    // 每行显示什么内容
    func tableView(tableView: UITableView, cellForRowAtIndexPath indexPath: NSIndexPath) -> UITableViewCell {
        let str = "cellID"
        // 1 取出cell
        var cell = tableView.dequeueReusableCellWithIdentifier(str)
        if cell == nil {
            cell = UITableViewCell(style: UITableViewCellStyle.Default, reuseIdentifier: str)
        }
        // 2 设置数据
        cell?.textLabel?.text = dataList[indexPath.row]
        cell?.textLabel?.textColor = UIColor.redColor()
        // 3 返回cell
        return cell!
    }
}


 2941
2941

 被折叠的 条评论
为什么被折叠?
被折叠的 条评论
为什么被折叠?
 到【灌水乐园】发言


