


nexus私服安装
下载后解包
下载地址:https://www.sonatype.com/download-oss-sonatype(官网)
tar xvfz nexus-3.13.0-01-unix.tar.gz
建立软连接
ln -s /home/source/nexus-3.13.0-01 /usr/local/nexus
启动nexus命令
/usr/local/nexus/bin/nexus start
启动后稍等一会,可通过8081端口访问nexus管理界面。
http://192.168.0.140:8081/
登录账户:admin,密码:admin123
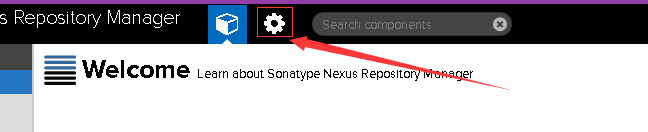
登录后顶部出现一个小齿轮图标,点击可进入设置界面。
左侧菜单,按如下图选择点击。

进入设置界面,首先修改远程的原地址为阿里云的地址。

在这个界面中有一个url是需要用到的,即maven要访问的私服地址。

私服地址
http://192.168.0.140:8081/repository/maven-public/
然后要回到maven修改settings.xml文件。修改前请先备份。
第一个部分是nexus认证信息,如下
<server>
<id>my-neuse-releases</id>
<username>admin</username>
<password>admin123</password>
</server>
<server>
<id>my-neuse-snapshot</id>
<username>admin</username>
<password>admin123</password>
</server>
以上放在maven的settings.xml文件中servers标签范围内
第二部分是打包需要访问的源地址
<mirror>
<id>nexus</id>
<mirrorOf>*</mirrorOf>
<url>http://192.168.0.140:8081/repository/maven-central/</url>
</mirror>
以上放置mirrors标签范围内
第三个部分是profile
<profile>
<id>nexus</id>
<repositories>
<repository>
<id>central</id>
<url>http://192.168.0.140:8081/repository/maven-central/</url>
<releases><enabled>true</enabled></releases>
<snapshots><enabled>true</enabled></snapshots>
</repository>
</repositories>
<pluginRepositories>
<pluginRepository>
<id>central</id>
<url>http://192.168.0.140:8081/repository/maven-central/</url>
<releases><enabled>true</enabled></releases>
<snapshots><enabled>true</enabled></snapshots>
</pluginRepository>
</pluginRepositories>
</profile>
以上放置在profiles标签范围内
最后就是以下这三行
<actieProfiles>
<actieProfile>nexus</actieProfile>
</actieProfiles>
</settings>
以上放置在activeProfiles标签范围内。
保存退出,可以试试自己的私服了。
如果配置文件中有书写错误,在mvn package时会报错。错误提示中会提示settings.xml文件配置行号,按提示在对应行附近核对即可。


 2万+
2万+


 被折叠的 条评论
为什么被折叠?
被折叠的 条评论
为什么被折叠?
 到【灌水乐园】发言


