


Spring MVC在任何应用程序中提供了对文件上传功能的支持。本教程使用org.springframework.web.multipart.commons.CommonsMultipartResolver并要求apache commons fileupload和apache commons io依赖关系。
Spring的MultipartFile界面
上传到Spring MVC应用程序的文件将被包装在一个MultipartFile对象中。所有你需要做的就是编写一个类型属性的域类MultipartFile。该接口具有获取名称和上传文件例如内容的方法getBytes(),getInputStream(),getOriginalFilename(), getSize(),isEmpty()和tranferTo()。
例如,要将上传的文件保存到文件系统,可以使用transferTo方法:
File file =
new
File(...);
multipartFile.transferTo(file);
|
编写文件上传的域类
您需要创建一个具有必要属性的简单域类,另一个用于存储类型的文件List<MultipartFile>。
为了建立这个例子,我写了这个域的clas:
public
class
Product
implements
Serializable
{
private
static
final
long
serialVersionUID = 74458L;
@NotNull
@Size
(min=
1
, max=
10
)
private
String name;
private
String description;
private
List<MultipartFile> images;
public
String getName() {
return
name;
}
public
void
setName(String name) {
this
.name = name;
}
public
String getDescription() {
return
description;
}
public
void
setDescription(String description) {
this
.description = description;
}
public
List<MultipartFile> getImages() {
return
images;
}
public
void
setImages(List<MultipartFile> images) {
this
.images = images;
}
}
|
编写文件上传控制器
在控制器类中,您将获得域类中上传文件的预填充详细信息。只需获取详细信息并按照应用程序设计将文件存储在文件系统或数据库中即可。
@Controller
public
class
DemoProductController
{
@RequestMapping
(
"/save-product"
)
public
String uploadResources( HttpServletRequest servletRequest,
@ModelAttribute
Product product,
Model model)
{
//Get the uploaded files and store them
List<MultipartFile> files = product.getImages();
List<String> fileNames =
new
ArrayList<String>();
if
(
null
!= files && files.size() >
0
)
{
for
(MultipartFile multipartFile : files) {
String fileName = multipartFile.getOriginalFilename();
fileNames.add(fileName);
File imageFile =
new
File(servletRequest.getServletContext().getRealPath(
"/image"
), fileName);
try
{
multipartFile.transferTo(imageFile);
}
catch
(IOException e)
{
e.printStackTrace();
}
}
}
// Here, you can save the product details in database
model.addAttribute(
"product"
, product);
return
"viewProductDetail"
;
}
@RequestMapping
(value =
"/product-input-form"
)
public
String inputProduct(Model model) {
model.addAttribute(
"product"
,
new
Product());
return
"productForm"
;
}
}
|
Spring MVC配置文件的变化
为了支持多部分的请求,你需要在配置文件中声明下面的bean。
<bean id=
"multipartResolver"
class
=
"org.springframework.web.multipart.commons.CommonsMultipartResolver"
>
<property name=
"maxUploadSize"
value=
"20848820"
/>
</bean>
|
另外,您可能希望将服务器上的文件存储路径映射为资源。
<mvc:resources mapping=
"/image/**"
location=
"/image/"
/>
|
用于这个例子的完整配置文件是:
<beans xmlns=
"http://www.springframework.org/schema/beans"
xsi:schemaLocation="http:
//www.springframework.org/schema/beans
http:
//www.springframework.org/schema/beans/spring-beans-3.0.xsd
http:
//www.springframework.org/schema/context/
http:
//www.springframework.org/schema/context/spring-context-3.0.xsd
http:
//www.springframework.org/schema/mvc
http:
//www.springframework.org/schema/mvc/spring-mvc-3.0.xsd">
<context:component-scan base-
package
=
"com.howtodoinjava.demo"
/>
<mvc:resources mapping=
"/image/**"
location=
"/image/"
/>
<bean
class
=
"org.springframework.web.servlet.mvc.annotation.AnnotationMethodHandlerAdapter"
/>
<bean
class
=
"org.springframework.web.servlet.mvc.annotation.DefaultAnnotationHandlerMapping"
/>
<bean
class
=
"org.springframework.web.servlet.view.InternalResourceViewResolver"
>
<property name=
"prefix"
value=
"/WEB-INF/views/"
/>
<property name=
"suffix"
value=
".jsp"
/>
</bean>
<bean id=
"messageSource"
class
=
"org.springframework.context.support.ResourceBundleMessageSource"
>
<property name=
"basename"
value=
"messages"
/>
</bean>
<bean id=
"multipartResolver"
class
=
"org.springframework.web.multipart.commons.CommonsMultipartResolver"
>
<property name=
"maxUploadSize"
value=
"20848820"
/>
</bean>
</beans>
|
建立文件上传的客户端代码
我写了两个JSP文件。一个用于显示文件上传表单,其中用户将填写其他细节并选择要上传的文件。其次,我们将显示其他细节的上传文件。
productForm.jsp
<!DOCTYPE html>
<html>
<head>
<title>Add Product Form</title>
</head>
<body>
<div id=
"global"
>
<form:form commandName=
"product"
action=
"save-product"
method=
"post"
enctype=
"multipart/form-data"
>
<fieldset>
<legend>Add a product</legend>
<p>
<label
for
=
"name"
>Product Name: </label>
<form:input id=
"name"
path=
"name"
cssErrorClass=
"error"
/>
<form:errors path=
"name"
cssClass=
"error"
/>
</p>
<p>
<label
for
=
"description"
>Description: </label>
<form:input id=
"description"
path=
"description"
/>
</p>
<p>
<label
for
=
"image"
>Product Images: </label>
<input type=
"file"
name=
"images"
multiple=
"multiple"
/>
</p>
<p id=
"buttons"
>
<input id=
"reset"
type=
"reset"
tabindex=
"4"
>
<input id=
"submit"
type=
"submit"
tabindex=
"5"
value=
"Add Product"
>
</p>
</fieldset>
</form:form>
</div>
</body>
</html>
|
viewProductDetail.jsp
<!DOCTYPE html>
<html>
<head>
<title>Save Product</title>
</head>
<body>
<div id=
"global"
>
<h4>The product has been saved.</h4>
<h5>Details:</h5>
Product Name: ${product.name}<br/>
Description: ${product.description}<br/>
<p>Following files are uploaded successfully.</p>
<ol>
<c:forEach items=
"${product.images}"
var=
"image"
>
<li>${image.originalFilename}
<img width=
"100"
src=
"<c:url value="
/image/
"/>${image.originalFilename}"
/>
</li>
</c:forEach>
</ol>
</div>
</body>
</html>
|
运行应用程序
当你点击浏览器时http://localhost:8080/springmvcexample/product-input-form,你会看到以下屏幕:
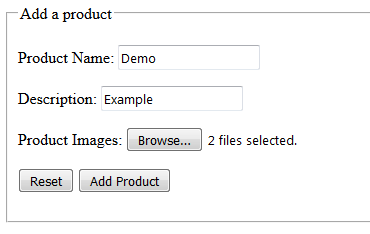 Spring MVC文件上传的形式
您填写详细信息并提交表格,您将在其他页面中获取提交的详细信息和所有上传的文件:
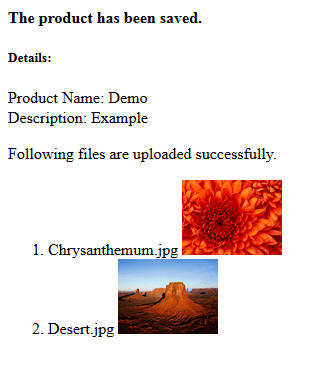 文件上传成功
在评论部分给我提问你的问题和建议。
快乐学习!


 446
446

 被折叠的 条评论
为什么被折叠?
被折叠的 条评论
为什么被折叠?
 到【灌水乐园】发言


