


前言
大家好,距离上周发布的配置中心基础使用已过去差不多一周啦,趁着周末继续完善后续SpringCloud组件的集成,本次代码基于配置中心代码的基础上进行集成。
SpringCloud Config 文章
SpringCloud Config demo01
项目版本
spring-boot-version:2.2.5.RELEASE
spring-cloud.version:Hoxton.SR3
Eureka服务端
首先构建Eureka服务端项目,最近阿里云开放了自己的项目快速构建平台,那这次就使用下吧。Alibaba initializr 操作基本上和Spirng官方提供的一模一样。搜索并选择eureka server即可。
pom主要信息
<dependency>
	<groupId>org.springframework.cloud</groupId>
	<artifactId>spring-cloud-starter-netflix-eureka-server</artifactId>
</dependency>
application.properties
# 服务应用名
spring.application.name=eureka-server
# 服务端口
server.port=9003
# 禁止将本服务注册至eureka
eureka.client.register-with-eureka=false
# 屏蔽注册信息
eureka.client.fetch-registry=false
# eureka服务地址
eureka.client.serviceUrl.defaultZone=http://localhost:9003/eureka/
EurekaServerApplication.java
@SpringBootApplication
@EnableEurekaServer
public class EurekaServerApplication {

    public static void main(String[] args) {
        SpringApplication.run(EurekaServerApplication.class, args);
    }

}
@EnableEurekaServer 申明注解此应用为eureka服务端
项目启动成功后访问 http://localhost:9003/,即可看到Eureka服务后台

Eureka客户端
客户端代码基于上篇SpringCloud配置中心(Config)使用说明,文章地址及代码见本文开头,这边主要说明一些调整的地方。
先调整spring-cloud-config-server项目,我们需要将其注册至Eureka服务上,调整如下
1.pom文件
增加eureka客户端相关依赖
<!--eureka客户端-->
<dependency>
	<groupId>org.springframework.cloud</groupId>
	<artifactId>spring-cloud-starter-netflix-eureka-client</artifactId>
</dependency>
2.application.properties
配置文件增加以下配置项
# eureka服务端地址
eureka.client.serviceUrl.defaultZone=http://localhost:9003/eureka/
3.ConfigServerApplication.java
增加@EnableDiscoveryClient注解标签
@EnableConfigServer
@SpringBootApplication
@EnableDiscoveryClient
public class ConfigServerApplication
调整完后,我们再启动Config服务端,这时可以在Eureka服务后台看到config-server已经注册上了,如下图。

接着调整spring-cloud-config-client项目
1.pom文件
增加eureka客户端相关依赖
        <!--eureka客户端-->
        <dependency>
            <groupId>org.springframework.cloud</groupId>
            <artifactId>spring-cloud-starter-netflix-eureka-client</artifactId>
        </dependency>
2.bootstrap.properties
将原先直接通过Config服务端地址调整为基于服务发现的配置,调整如下
# 配置服务端请求地址
#spring.cloud.config.uri=http://localhost:9001/
# 开启服务发现
spring.cloud.config.discovery.enabled=true
# 配置Config服务应用名称
spring.cloud.config.discovery.service-id=config-server
3.ConfigClientApplication.java
增加@EnableDiscoveryClient注解标签
@SpringBootApplication
@EnableDiscoveryClient
public class ConfigClientApplication
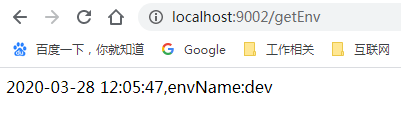
启动Config客户端后,即可在Eureka服务后台看到服务已注册进来。再访问下Config 客户端暴露的接口,http://localhost:9002/getEnv,成功获取到配置信息。
服务访问
前面是基于SprongCloud Config配置中心集成的Eureka,接下来将介绍下如何使用Eureka中已注册的服务。
这边先构建一个System模块,用于访问Config client提供的接口服务。
部分pom信息
        <!--eureka客户端-->
        <dependency>
            <groupId>org.springframework.cloud</groupId>
            <artifactId>spring-cloud-starter-netflix-eureka-client</artifactId>
        </dependency>
        <!--服务访问-->
        <dependency>
            <groupId>org.springframework.cloud</groupId>
            <artifactId>spring-cloud-starter-openfeign</artifactId>
        </dependency>
application.properties
# 服务应用名称
spring.application.name=system-server
# 服务端口
server.port=9004
# eureka服务端地址
eureka.client.serviceUrl.defaultZone=http://localhost:9003/eureka/
SystemServerApplication.java
@EnableFeignClients开启Feign的支持
@SpringBootApplication
@EnableDiscoveryClient
@EnableFeignClients
public class SystemServerApplication {

    public static void main(String[] args) {
        SpringApplication.run(SystemServerApplication.class, args);
    }

}
ConfigService.java
@FeignClient 申明Feign客户端信息,其中name对应应用服务提供方的应用服务名称
@GetMapping(path = “/getEnv”) 对应应用服务提供方暴露的接口地址
@FeignClient(name = "config-client")
public interface ConfigService {

    @GetMapping(path = "/getEnv")
    String getEnvName();

}
SystemController.java
@RestController
@RequestMapping(value = "/web/system")
public class SystemController {

    @Autowired
    ConfigService configService;

    @RequestMapping(value = "/getEnvName", method = RequestMethod.GET)
    public String getEnvName() {
        return configService.getEnvName();
    }

}
启动系统服务模块后,访问 http://localhost:9004/web/system/getEnvName 即可访问到信息,如下图
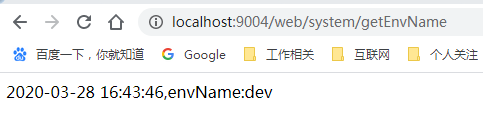
访问返回结果和访问 http://localhost:9002/getEnv 接口返回是一样的,仅仅只是通过Feign访问了下 http://localhost:9002/getEnv,内部是基于通过注册在Eureka上的config-client服务调用得到的结果,内部服务地址 http://config-client/getEnv。
项目代码结构如下


本次示例代码地址


 165
165


 被折叠的 条评论
为什么被折叠?
被折叠的 条评论
为什么被折叠?
 到【灌水乐园】发言


