


A while back I was working on a small C# WinForms application in Visual Studio 2008. For the sake of simplifying the deployment process of the application, having all of its components bundled up into one exe file would make it much easier to manage. But–documentation and tutorials on embedding dll files within an exe file were outdated, incomplete, or simply didn’t work.
The best example out of the lot was an excerpt from a book, posted on an MSDN blog by its author. Unfortunately, it didn’t work as presented and didn’t include clear instructions on how or where to implement it. However, it still offered a very good starting point. After some research, trial and error, and with the help of the Visual Studio debugger, here’s the solution.
Note: This method allows you to place dll files into any subfolder or series of subfolders within your project without needing to change any code after the fact. If you wish to forgo the use of a subfolder (placing the dll files in the project root), or use a hard-coded path to your subfolder(s) containing the dll files instead, there are alternative methods which would be more appropriate, but won’t be covered here.
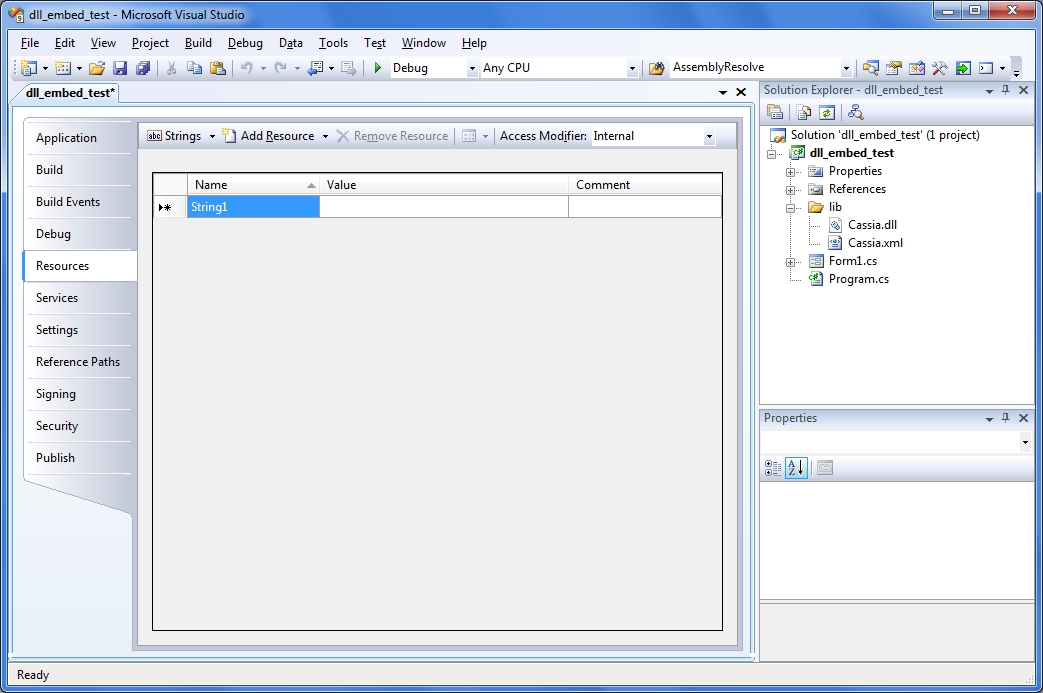
1) The dll files themselves need to be embedded in the Visual Studio project, rather than just referenced. In your project, create a folder in the project’s root to store the dll files (right click on the project name > add > new folder) . I named mine “lib”.
 2) Copy and paste your dll (and any accompanying support or definition files) into the lib folder. For purposes of this tutorial, the example dll used will be Cassia.
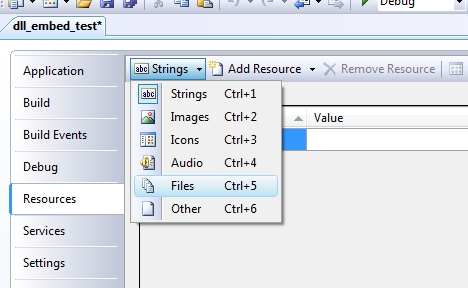
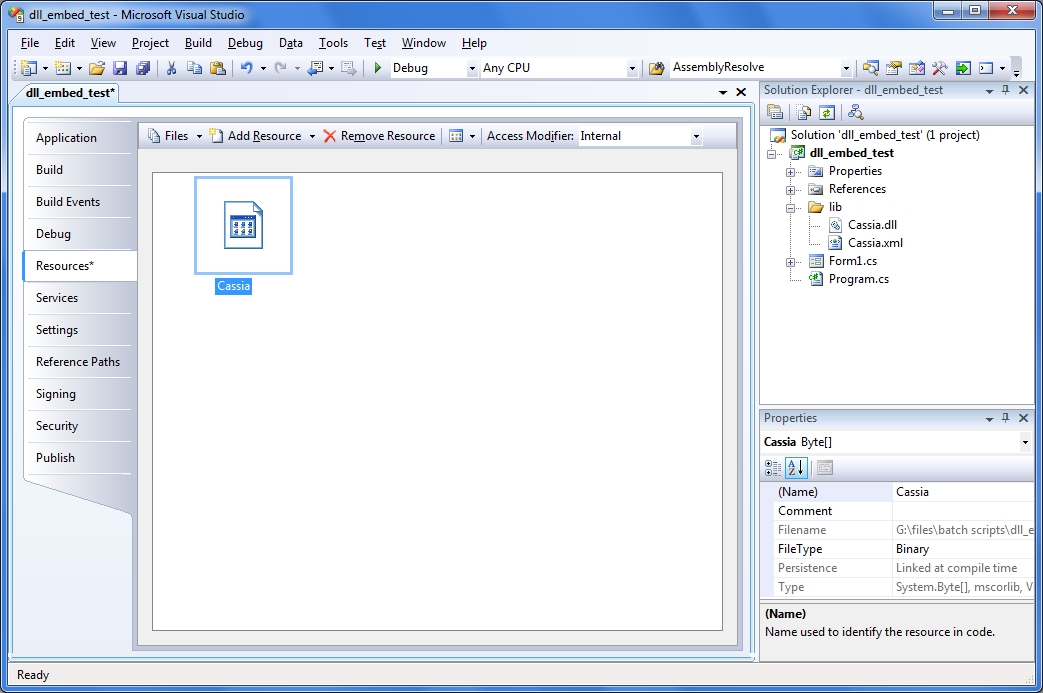
3) Next, include the dll as a project resource. Right click on the project name > properties (or Project menu > yourprojectname Properties). Go to the “Resources” tab.
 Select “Files”, as shown here:
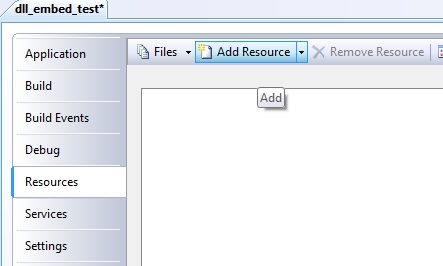
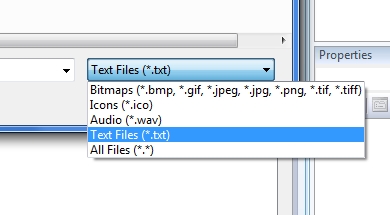
 Click “Add Resource”, change the file type to “all files”, and navigate to the “lib” file where your dll is located. Select it and click “Open”.
 The dll file should now be included as a project resource:
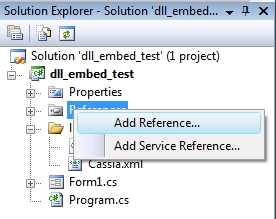
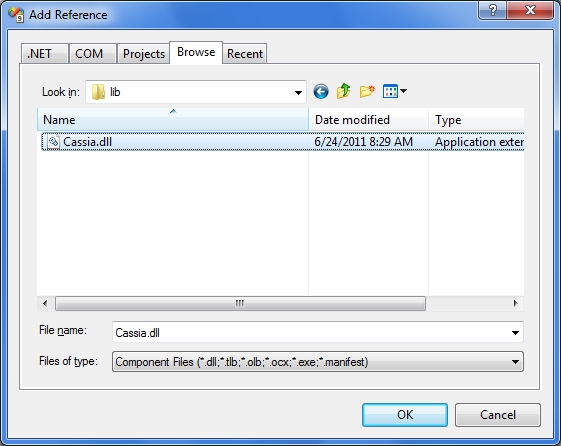
 4) Add a reference to the dll file in the project. In the Solution Explorer pane, right click on “References” > Add Reference (Or, Project menu > Add Reference). Click the Browse tab, navigate to the lib folder where the dll is located, select the dll file, and click “Ok”. A reference to your dll will then appear under the references folder in your project.
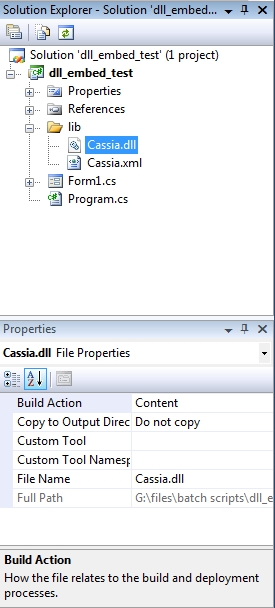
5) By default, compiled files and project references are copied to the bin folder when the project is built. This will need to be prevented. Under the “References” folder, select the reference to your dll file. In the properties pane (or right click > properties), look for the attribute named “Copy to output directory”, and set the value to false.
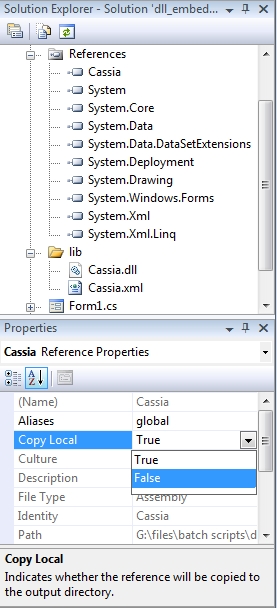 Next, select the dll file under the “lib” folder. In the properties pane, look for the attribute “copy to output directory” and set the value to “Do not copy”.
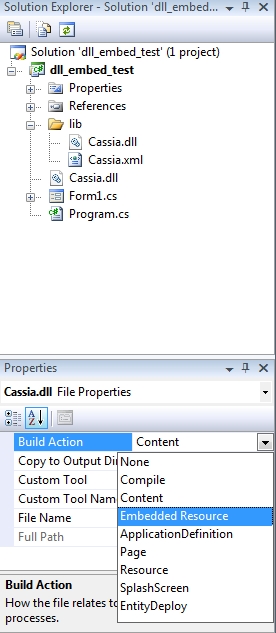
Also look for the attribute “Build Action” and set the value to “Embedded Resource”. This indicates how the file will be treated and accessed when the project is built.
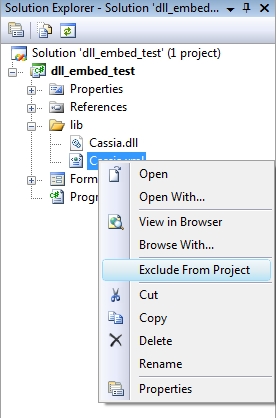
 Lastly, exclude extraneous files accompanying the dll file, such as help files and XML definitions files–they are not needed in the project when it is built. Right click on the file (such as the XML definitions file) and click “Exclude From Project”. Now it will not be copied to the bin folder when the project is built.
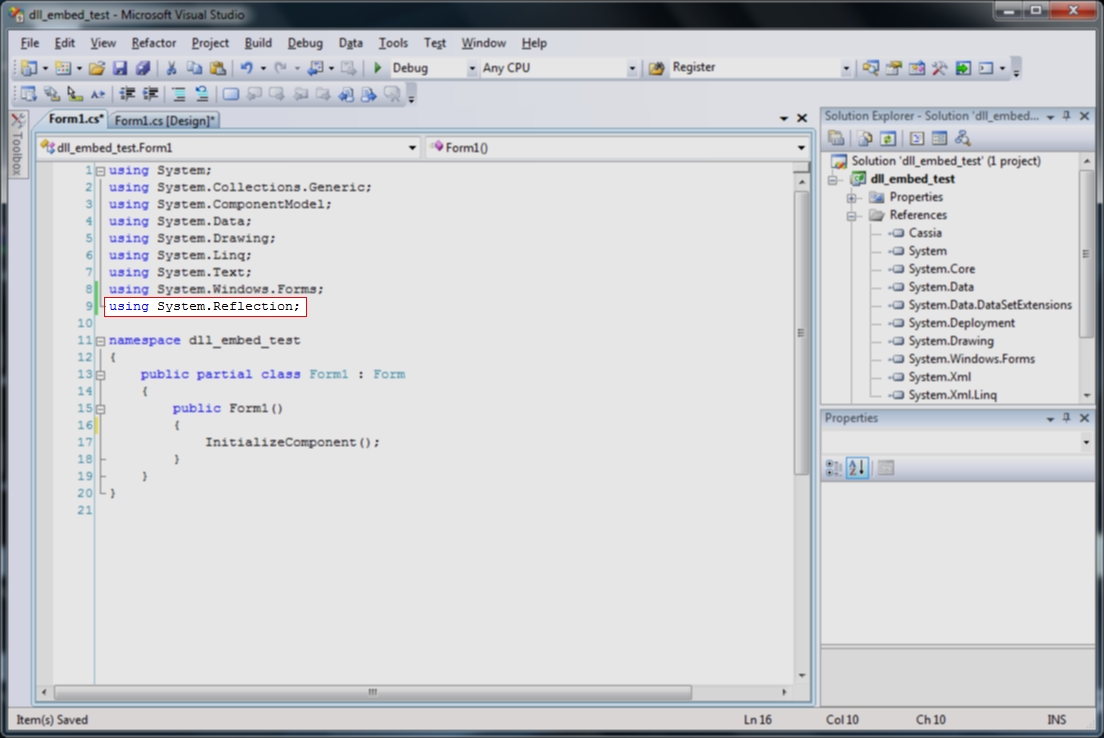
6) In the code view for your executing WinForm, include the namespaceSystem.Reflections. This is important for some of the code responsible for loading your embedded dll file(s).
7) In the code view for your executing WinForm, this code should be placed in the constructor method (usually named the same as the form). It needs to appear before theInitializeComponent() method:
|
1
2
3
4
5
6
7
8
9
10
11
12
|
AppDomain.CurrentDomain.AssemblyResolve += (sender, args) =>
{
string
resourceName =
new
AssemblyName(args.Name).Name +
".dll"
;
string
resource = Array.Find(
this
.GetType().Assembly.GetManifestResourceNames(), element => element.EndsWith(resourceName));
using
(var stream = Assembly.GetExecutingAssembly().GetManifestResourceStream(resource))
{
Byte[] assemblyData =
new
Byte[stream.Length];
stream.Read(assemblyData, 0, assemblyData.Length);
return
Assembly.Load(assemblyData);
}
};
|
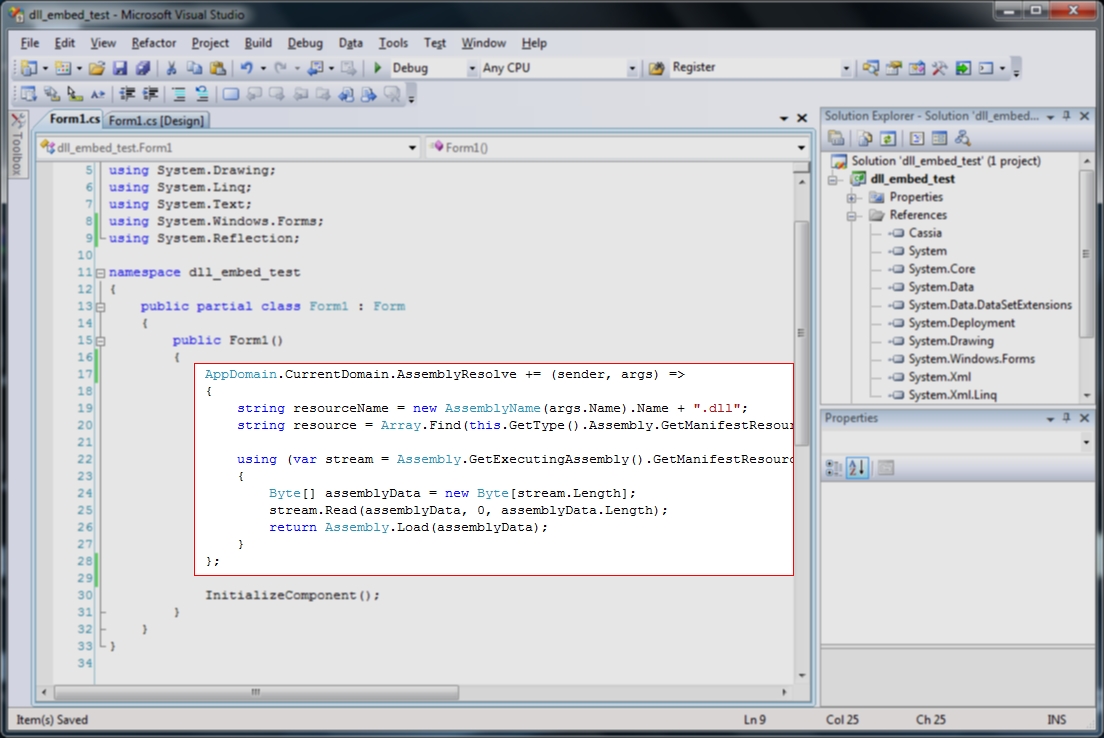
Upon launching the exe, this code is responsible for detecting what dll files are needed and are being referenced, and load them from their embedded location.
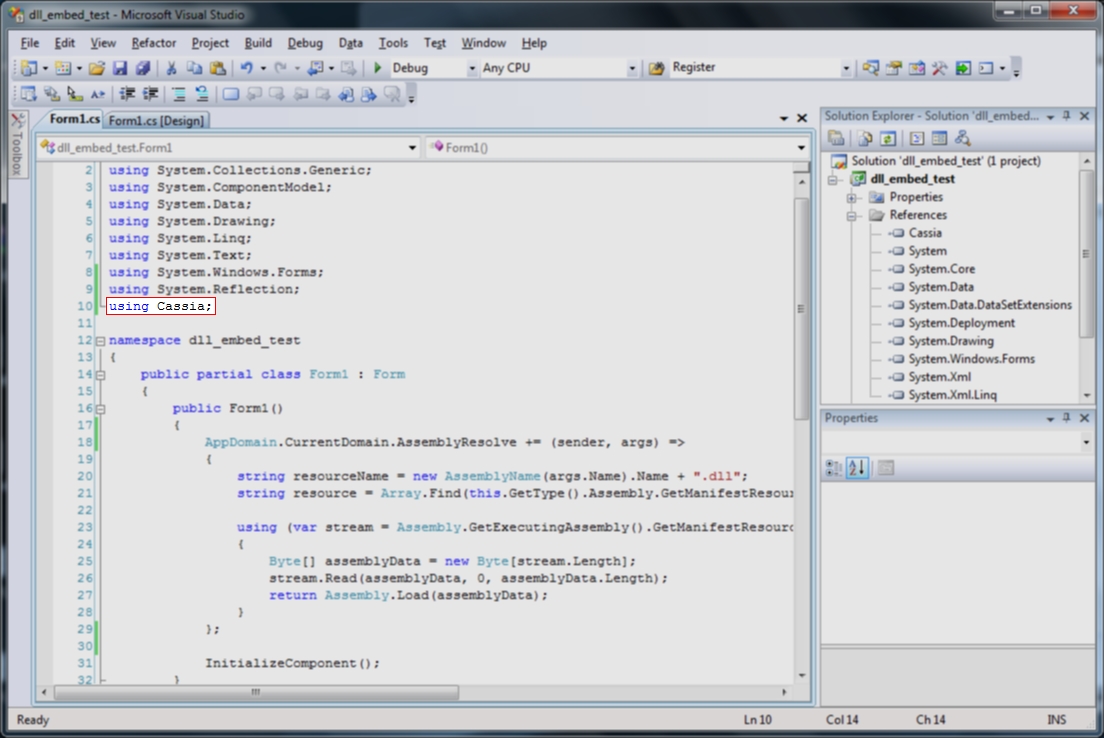
8) In the code view for your executing WinForms application, you can now include the dll file’s namespace(s) .
9) In order to test everything, you will need to implement code from the dll file’s namespace(s), so that the AssemblyResolve event is triggered. However, if you include code from the dll’s namespace(s) within the constructor, Application.Run() will throw a “file not found” error for your dll file when the WinForms application is built and executed.
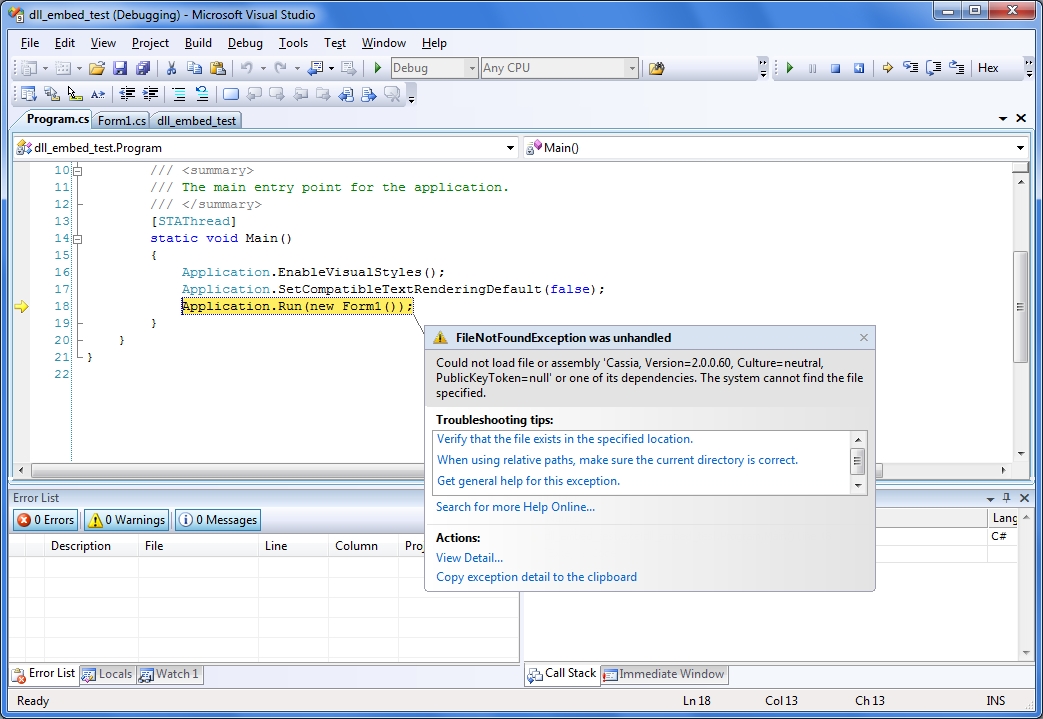 To correct this, you will need to place any code using the dll file namespace(s) in another method outside of constructor method. This is because the event handler for the assembler cannot be located within the same method that is calling it. It’s simple enough to do, but it’s just one caveat to be aware of.


 9445
9445

 被折叠的 条评论
为什么被折叠?
被折叠的 条评论
为什么被折叠?
 到【灌水乐园】发言


