


SpringBoot+Dubbo搭建一个简单的分布式服务
概念
搭建开始
环境准备
-
Zookeeper下载安装
下载地址:zookeeper
-
下载之后可以采用xshell上传到Linux服务器,或者直接在linux上用命令操作
wget https://archive.apache.org/dist/zookeeper/zookeeper-3.4.12/zookeeper-3.4.12.tar.gz如下图显示

-
下载完毕,解压、重命名文件夹、删除安装包
tar -zxvf zookeeper-3.4.12.tar.gz mv zookeeper-3.4.12 zookeeper rm -rf zookeeper-3.4.12.tar.gz -
进入zookeeper目录创建 data文件夹 ,记得pwd命令拷贝当前路径
[root@localhost zookeeper]# mkdir data -
进入zookeeper/conf目录下,复制zoo_sample.cfg命名为zoo.cfg
cp zoo_sample.cfg zoo.cfg -
编辑zoo.cfg文件,修改***dataDir***位置
[root@localhost conf]# vi zoo.cfg # The number of milliseconds of each tick tickTime=2000 # The number of ticks that the initial # synchronization phase can take initLimit=10 # The number of ticks that can pass between # sending a request and getting an acknowledgement syncLimit=5 # the directory where the snapshot is stored. # do not use /tmp for storage, /tmp here is just # example sakes. dataDir=/usr/local/zookeeper/data # the port at which the clients will connect clientPort=2181 # the maximum number of client connections. # increase this if you need to handle more clients #maxClientCnxns=60 # # Be sure to read the maintenance section of the # administrator guide before turning on autopurge. # # http://zookeeper.apache.org/doc/current/zookeeperAdmin.html#sc_maintenance # # The number of snapshots to retain in dataDir #autopurge.snapRetainCount=3 # Purge task interval in hours # Set to "0" to disable auto purge feature #autopurge.purgeInterval=1 -
启动测试zookeeper是否正常安装
进入/zookeeper/bin目录然后执行下面的命令 ./zkServer.sh start 执行 ./zkServer.sh status 查看当前zookeeper状态。 或者运行 netstat -lntup 命令查看网络状态. [root@localhost bin]# ./zkServer.sh status ZooKeeper JMX enabled by default Using config: /usr/local/zookeeper/bin/../conf/zoo.cfg Mode: standalone -
zookeeper安装启动成功、下面开始搭建SpringBoot简单整合Dubbo服务
-
开发环境:IDEA+JDK1.8
-
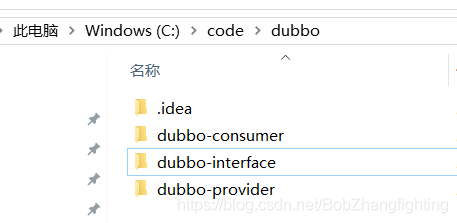
在开始搭建之前建议新建一个文件夹,然后后面接口项目,服务提供者以及服务消费者都放在这个文件夹。
-
实现服务接口 dubbo-interface
   主要分为下面几步:
   1)、创建maven项目
   2)、创建接口类
   3)、将项目打成jar包供其他项目使用,maven install
项目结构如下:
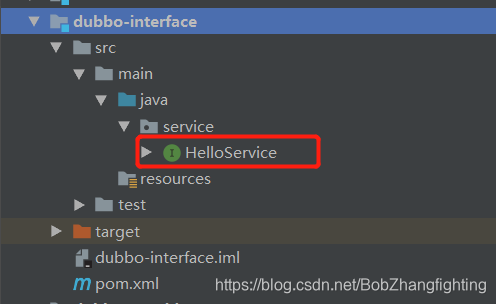
其中HelloService.javapackage service; public interface HelloService { public String sayHello(String name); }
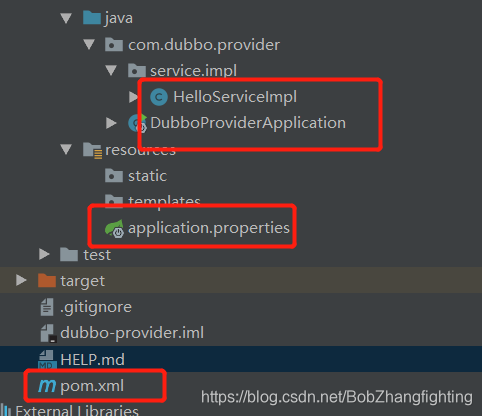
12.实现服务提供者 dubbo-provider
主要分为下面几步:
1)、创建springboot项目
2)、加入dubbo,zookeeper以及相关接口依赖jar包
3)、application.properties配置文件中配置dubbo相关信息
4)、实现接口类
5)、服务提供者启动类编写
项目结构如下:
pom.xml中配置
<dependencies>
   <dependency>
       <groupId>com.dubbo.interface</groupId>
       <artifactId>dubbo-interface</artifactId>
       <version>1.0-SNAPSHOT</version>
   </dependency>
   <dependency>
       <groupId>org.springframework.boot</groupId>
       <artifactId>spring-boot-starter-web</artifactId>
   </dependency>

   <dependency>
       <groupId>org.springframework.boot</groupId>
       <artifactId>spring-boot-starter-test</artifactId>
       <scope>test</scope>
   </dependency>
   <!--引入dubbo的依赖-->
   <dependency>
       <groupId>com.alibaba.spring.boot</groupId>
       <artifactId>dubbo-spring-boot-starter</artifactId>
       <version>2.0.0</version>
   </dependency>
   <!-- 引入zookeeper的依赖 -->
   <dependency>
       <groupId>com.101tec</groupId>
       <artifactId>zkclient</artifactId>
       <version>0.10</version>
   </dependency>
</dependencies>
启动类加上 @EnableDubboConfiguration,开启dubbo自动注解功能
@EnableDubboConfiguration
@SpringBootApplication
public class DubboProviderApplication {
   public static void main(String[] args) {
       SpringApplication.run(DubboProviderApplication.class, args);
   }
}
application.properties配置
# 配置端口
server.port=8333
spring.dubbo.application.name=dubbo-provider
spring.dubbo.application.registry=zookeeper://x.x.x.x:2181
实现接口HelloServiceImpl.java
@Component
@Service
public class HelloServiceImpl implements HelloService {
   @Override
   public String sayHello(String name) {
       return "Hello,"+name;
   }
}
-
实现消费者:dubbo-consumer
跟服务提供者一样,区别就在application.properties中的
server.port=8222
spring.dubbo.application.name=dubbo-consumer
同时新建一个controller请求
```java
@RestController
public class HelloController {
    @Reference
    private HelloService helloService;
    @RequestMapping("/hello")
    public String hello(){
        String str = helloService.sayHello("TT");
        System.out.println("测试结果:"+helloService.sayHello("zhangtao"));
        return str;
    }
}
```
启动类同时加上 @EnableDubboConfiguration
-
开启工程,测试
   先开启服务者,再开启消费者
   访问:localhost:8222/hello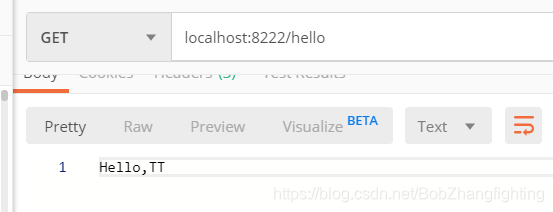


 2550
2550


 被折叠的 条评论
为什么被折叠?
被折叠的 条评论
为什么被折叠?
 到【灌水乐园】发言


