


面向对象本质:定义不同的类,让类的实例工作
面向对象优点:程序编写更清晰,代码结构更严密,使代码更健壮更利于维护
面向对象场合:需要封装和复用性的场合
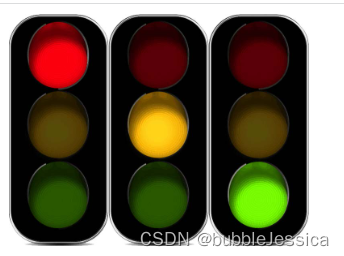
小案例:红绿灯
<!DOCTYPE html>
<html lang="en">
<head>
    <meta charset="UTF-8">
    <title>面向对象</title>
    <style>
        #box img {
            width: 80px;
        }
    </style>
</head>
<body>
<div id="box"></div>

<script>
    // 得到盒子
    var box = document.getElementById('box');

    // 定义红绿灯类
    function TrafficLight() {
        // 颜色属性 一开始都是红色
        // 红色1 黄色2 绿色3
        this.color = 1;
        // 调用自己的初始化方法
        this.init();
        // 绑定监听
        this.bindEvent();
    }

    // 初始化方法
    TrafficLight.prototype.init = function () {
        // 创建自己的dom
        this.dom = document.createElement('img');
        // 设置src属性
        this.dom.src = 'images/color/' + this.color + '.jpg';
        // 上树
        box.appendChild(this.dom);
    }
    // 绑定监听
    TrafficLight.prototype.bindEvent = function () {
        // 备份上下文
        var self = this;
        // 当自己的dom被点击的时候
        this.dom.onclick = function () {
            // 当被点击的时候,调用自己的changeColor方法
            self.changeColor();
        };
    }
    // 改变颜色
    TrafficLight.prototype.changeColor = function () {
        // 改变自己的color属性 从而有一种自治的感觉
        // 自己管理自己,不干扰别的红绿灯
        this.color++;
        if (this.color == 4) {
            this.color = 1;
        }
        // 光color属性变化没用,还要更改自己dom的src属性
        this.dom.src = 'images/color/' + this.color + '.jpg';
    }
    // 实例化100个
    var count = 3;
    while (count--) {
        new TrafficLight();
    }

</script>
</body>
</html>
效果如下:
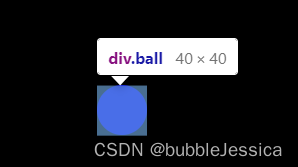
炫彩小球案例
这个圆的圆心坐标就是定义时位置坐标,而不是盒子左上角处
<!DOCTYPE html>
<html lang="en">
<head>
    <meta charset="UTF-8">
    <meta name="viewport" content="width=device-width, initial-scale=1.0">
    <title>Document</title>
    <style>
        body {
            background-color: black;
        }

        .ball {
            position: absolute;
            border-radius: 50%;
        }
    </style>
</head>

<body>
<script>
    // 小球类
    function Ball(x, y) {
        // 属性x、y表示的是圆心的坐标
        this.x = x;
        this.y = y;
        // 半径属性
        this.r = 20;
        // 透明度
        this.opacity = 1;
        // 小球背景颜色,从颜色数组中随机选择一个颜色
        this.color = colorArr[parseInt(Math.random() * colorArr.length)];
        // 这个小球的x增量和y的增量,使用do while语句,可以防止dX和dY都是零
        do {
            this.dX = parseInt(Math.random() * 20) - 10;
            this.dY = parseInt(Math.random() * 20) - 10;
        } while (this.dX == 0 && this.dY == 0)

        // 初始化
        this.init();
        // 把自己推入数组,注意,这里的this不是类本身,而是实例
        ballArr.push(this);
    }
    // 初始化方法
    Ball.prototype.init = function () {
        // 创建自己的dom
        this.dom = document.createElement('div');
        this.dom.className = 'ball';
        this.dom.style.width = this.r * 2 + 'px';
        this.dom.style.height = this.r * 2 + 'px';
        this.dom.style.left = this.x - this.r + 'px';
        this.dom.style.top = this.y - this.r + 'px';
        this.dom.style.backgroundColor = this.color;
        // 上树
        document.body.appendChild(this.dom);
    };
    // 更新
    Ball.prototype.update = function () {
        // 位置改变
        this.x += this.dX;
        this.y -= this.dY;
        // 半径改变
        this.r += 0.2;
        // 透明度改变
        this.opacity -= 0.01;
        this.dom.style.width = this.r * 2 + 'px';
        this.dom.style.height = this.r * 2 + 'px';
        this.dom.style.left = this.x - this.r + 'px';
        this.dom.style.top = this.y - this.r + 'px';
        this.dom.style.opacity = this.opacity;

        // 当透明度小于0的时候,就需要从数组中删除自己,DOM元素也要删掉自己
        if (this.opacity < 0) {
            // 从数组中删除自己
            for (var i = 0; i < ballArr.length; i++) {
                if (ballArr[i] == this) {
                    ballArr.splice(i, 1);
                }
            }
            // 还要删除自己的dom
            document.body.removeChild(this.dom);
        }
    };


    // 把所有的小球实例都放到一个数组中
    var ballArr = [];

    // 初始颜色数组
    var colorArr = ['#66CCCC', '#CCFF66', '#FF99CC', '#FF6666',
        '#CC3399', '#FF6600'];

    // 定时器,负责更新所有的小球实例
    setInterval(function () {
        // 遍历数组,调用调用的update方法
        for (var i = 0; i < ballArr.length; i++) {
            ballArr[i].update();
        }
    }, 20);

    // 鼠标指针的监听
    document.onmousemove = function (e) {
        // 得到鼠标指针的位置
        var x = e.clientX;
        var y = e.clientY;

        new Ball(x, y);
    };
</script>
</body>

</html>
效果如下:


 1301
1301


 被折叠的 条评论
为什么被折叠?
被折叠的 条评论
为什么被折叠?
 到【灌水乐园】发言


