


集成
创建springBoot项目,添加maven依赖
<dependency>
    <groupId>org.springframework.boot</groupId>
    <artifactId>spring-boot-starter-data-mongodb</artifactId>
</dependency>
application.properties文件配置:
spring.data.mongodb.uri=mongodb://127.0.0.1:27017/lgy
创建实体类
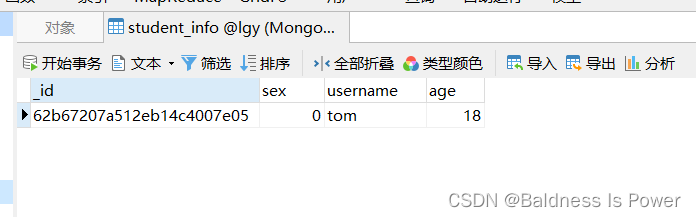
现在我们数据库有student_info这个表,如下图:
按照这个结构去创建实体类
package com.example.mongo.entity;

import org.springframework.data.annotation.Id;
import org.springframework.data.mongodb.core.mapping.Document;
import org.springframework.data.mongodb.core.mapping.Field;

@Document("student_info")
public class Student {
    @Id
    private String id;
    private Integer sex;
    @Field("username")
    private String name;
    private Integer age;

    public String getId() {
        return id;
    }

    public void setId(String id) {
        this.id = id;
    }

    public Integer getSex() {
        return sex;
    }

    public void setSex(Integer sex) {
        this.sex = sex;
    }

    public String getName() {
        return name;
    }

    public void setName(String name) {
        this.name = name;
    }

    public Integer getAge() {
        return age;
    }

    public void setAge(Integer age) {
        this.age = age;
    }
}
其中@Document(“student_info”)注解指定数据库中的表,@Field(“username”)可以映射其中的列
添加操作
    /**
     * 这里insert有两个方法
     * 1:insert(T entity)
     * 2:insert(T entity,String collectionName)
     * 如果实体类中 存在 @Document()注解已经制定了collectionName
     * 则无需再传入 第二个参数
     * 还有要注意的是 MongoDb中的主键列名是 _id
     * 我们实体类中加了@Id注解 所以可以自动对应
     */
    public void add() {
        Student student = new Student();
        student.setName("alis");
        student.setAge(25);
        student.setSex(1);
        mongoTemplate.insert(student);
    }
    /**
     * 试用Map实现添加操作
     * 注意如果使用这种方式
     * 要注意key值和数据库中的字段全部对应
     */
    public void add_two() {
        Map<String, Object> map = new HashMap<>();
        map.put("_id", "10086");
        map.put("username", "bob");
        map.put("age", 13);
        map.put("sex", 0);
        mongoTemplate.insert(map, "student_info");
    }
查询
首先是比较简单的查询
//查询全部
List<Student> all = mongoTemplate.findAll(Student.class);
//主键查询
Student student = mongoTemplate.findById("your id", Student.class);
条件查询、排序、分页
 //条件判断都放在Criteria里
 Criteria criteria = new Criteria();
 // in 操作
 criteria.and("sex").in(Arrays.asList(0, 1));
 // age 大于等于0 小于等于30
 criteria.and("age").gte(0).lte(30);
 //id 等于 10086
 criteria.and("_id").is("10086");
 //模糊查询
 String key = "匹配字段";
 Pattern pattern = Pattern.compile(String.format("%s%s%s", "^.*", key, ".*$"), Pattern.CASE_INSENSITIVE);
 criteria.and("username").regex(pattern);

 Query query = new Query(criteria);
 //排序 descending就是降序 不加默认升序
 query.with(Sort.by("age").descending());
 /**
  * 这里需要注意
  * size正常传递 代表每页记录数
  * page传值需要做 -1 操作
  * 如下参数代表 第(0+1)页的10条记录
  */
 query.with(PageRequest.of(0, 10));
 //第二种分页方式
 //query.skip((page - 1) * size).limit(size);

 List<Student> list = mongoTemplate.find(query, Student.class);
修改操作
//首先要根据id查询到要修改的数据
 String id = "10086";
 Query query = new Query(Criteria.where("_id").is(id));
 //要修改的字段
 Update update = Update.update("sex", 1)
         .set("username", "bob111")
         .set("age", 12);
 mongoTemplate.upsert(query,update,"student_info");
删除
String id = "10086";
Query query = new Query(Criteria.where("_id").is(id));
mongoTemplate.remove(query,"student_info");
高级查询 聚合操作
Criteria criteria = new Criteria();
criteria.and("age").gt(20);
Aggregation aggregation = Aggregation.newAggregation(
        //条件过滤
        Aggregation.match(criteria),
        /**
         * 此处等同于 mysql:
         * select sum(age) as total
         * from table group by sex
         * order by total desc
         * limit 0,10
         */
        Aggregation.group("sex")
                .sum("age")
                .as("total"),
        //排序
        Aggregation.sort(Sort.by("total").descending()),
        //查询的条数 可以理解为分页 limit 0,10
        Aggregation.skip(0),
        Aggregation.limit(10)
);
AggregationResults<Map> aggregationResults = mongoTemplate.aggregate(aggregation, "student_info", Map.class);
List<Map> list = aggregationResults.getMappedResults();
list.forEach(x -> System.out.println(x));


 5438
5438


 被折叠的 条评论
为什么被折叠?
被折叠的 条评论
为什么被折叠?
 到【灌水乐园】发言


