


这里写自定义目录标题
官方资料
效果展示
准备工作
这里按照 wangEditor 官网提供的 Vue3 Demo 操作就行,下面的内容可以直接跳过
安装
yarn add @wangeditor/editor
# 或者 npm install @wangeditor/editor --save

yarn add @wangeditor/editor-for-vue@next
# 或者 npm install @wangeditor/editor-for-vue@next --save
使用
模版
<template>
    <div style="border: 1px solid #ccc">
      <Toolbar
        style="border-bottom: 1px solid #ccc"
        :editor="editorRef"
        :defaultConfig="toolbarConfig"
        :mode="mode"
      />
      <Editor
        style="height: 500px; overflow-y: hidden;"
        v-model="valueHtml"
        :defaultConfig="editorConfig"
        :mode="mode"
        @onCreated="handleCreated"
      />
    </div>
</template>
script
<script>
import '@wangeditor/editor/dist/css/style.css' // 引入 css
import { onBeforeUnmount, ref, shallowRef, onMounted } from 'vue'
import { Editor, Toolbar } from '@wangeditor/editor-for-vue'
export default {
components: { Editor, Toolbar },
setup() {
// 编辑器实例,必须用 shallowRef
const editorRef = shallowRef()
// 内容 HTML
const valueHtml = ref('<p>hello</p>')
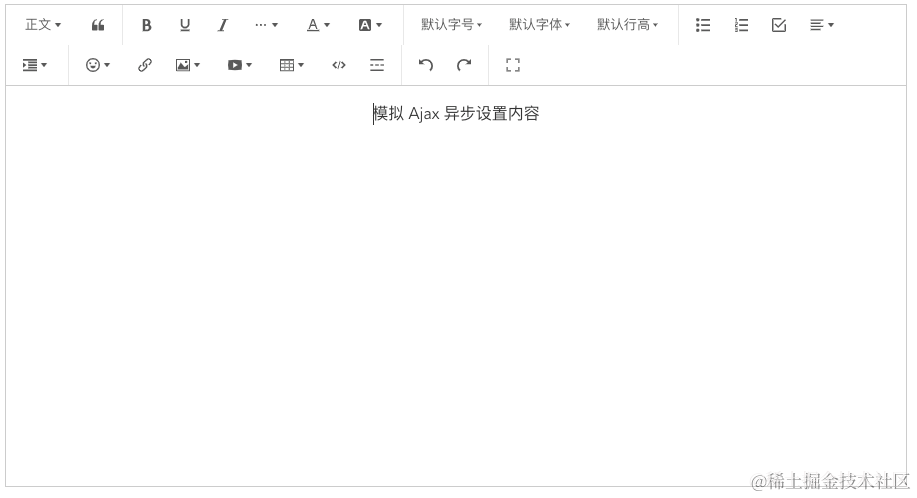
// 模拟 ajax 异步获取内容
onMounted(() => {
setTimeout(() => {
valueHtml.value = '<p>模拟 Ajax 异步设置内容</p>'
}, 1500)
})
const toolbarConfig = {}
const editorConfig = { placeholder: '请输入内容...' }
// 组件销毁时,也及时销毁编辑器
onBeforeUnmount(() => {
const editor = editorRef.value
if (editor == null) return
editor.destroy()
})
const handleCreated = (editor) => {
editorRef.value = editor // 记录 editor 实例,重要!
}
return {
editorRef,
valueHtml,
mode: 'default', // 或 'simple'
toolbarConfig,
editorConfig,
handleCreated
};
}
}
</script>
demo
到这里我们就有了一个默认的富文本编辑器
自定义扩展功能(下拉框)
主要是参考官网提供的 SelectMenu 这部分的文档
第一,定义菜单class
import { IDomEditor, ISelectMenu } from '@wangeditor/editor'

class MySelectMenu implements ISelectMenu {
  // 自带的字段
  title: string
  tag: string
  width: number
  // 自定义的字段
  defineTitle: object //下拉框显示的名字
  dataName: string //下拉框选项值对应editor实例中的字段名,通过editor[dataName]=[]设置值
  options: any
  // 使用类时需要接受一个参数 dataName
  constructor(dataName: any) {
    this.title = 'select'
    this.tag = 'select'
    this.width = 60
    this.dataName = dataName
    this.defineTitle = {
      value: 'title',
      text: '插入字段',
      styleForRenderMenuList: { display: 'none' }
    }
  }
  // 下拉框的选项
  getOptions(editor) {
    // 这里我将下拉框选项的值存在了 editor 实例中,以便可以动态改变选项值
    const displayOptions = editor[this.dataName].data || []
    this.options = [this.defineTitle, ...displayOptions]
    return this.options
  }
  // 菜单是否需要激活(如选中加粗文本,“加粗”菜单会激活),用不到则返回 false
  isActive(editor: IDomEditor): boolean {
    return false
  }
  // 获取菜单执行时的 value ,用不到则返回空 字符串或 false
  getValue(editor: IDomEditor): string | boolean {
    return 'title' // 为了不改变下拉框的标题,永远返回 'title'
  }
  // 菜单是否需要禁用(如选中 H1 ,“引用”菜单被禁用),用不到则返回 false
  isDisabled(editor: IDomEditor): boolean {
    return false
  }
  // 点击菜单时触发的函数
  exec(editor: IDomEditor, value: string | boolean) {
    // 向富文本中插入选中项
    editor.insertText(`value`)
  }
}
第二,注册菜单到 wangEditor
参考官网文档中的 注册菜单到 wangEditor
先根据菜单 class 来定义菜单配置
const menu1Conf = {
  key: 'mySelect1', // 定义 menu key :要保证唯一、不重复(重要)
  factory() {
    return new MySelectMenu() //就是上面我们定义的class
  },
}
然后,再把菜单注册到 wangEditor 。
import { Boot } from '@wangeditor/editor'

Boot.registerMenu(menu1Conf)
第三,插入菜单到工具栏
参考官网文档中的 插入菜单到工具栏
不过我是在初始化的时候就配置了,没有再另外插入。在 toolbarConfig 中可以配置自己想要的菜单。
const toolbarConfig = {
      toolbarKeys: [
        'fontSize',
        'lineHeight',
        '|',
        'bold',
        'italic',
        'underline',
        'color',
        '|',
        '|',
        'justifyLeft',
        'justifyCenter',
        'justifyRight',
        '|',
        'indent',
        'delIndent',
        'mySelect1' //自己扩展的下拉框,不过要注意一定要注册后才能写入
      ]
    }
最终代码
这里就自己定义的 MySelectMenu 这个类新建了一个 selectTest.ts 文件,其余的都一股脑的塞进 editorDemo.vue 文件中了。由于就增加一个自定义配置,所以很多地方就直接写死了…
selectTest.ts
import { IDomEditor, ISelectMenu } from '@wangeditor/editor'

class MySelectMenu implements ISelectMenu {
  // 自带的字段
  title: string
  tag: string
  width: number
  // 自定义的字段
  defineTitle: object
  dataName: string //下拉框选项值对应editor实例中的字段名,通过editor[dataName]=[]设置值
  options: any
  constructor(dataName: any) {
    this.title = 'select'
    this.tag = 'select'
    this.width = 60
    this.dataName = dataName
    this.defineTitle = {
      value: 'title',
      text: '插入字段',
      styleForRenderMenuList: { display: 'none' }
    }
  }
  // 下拉框的选项
    getOptions(editor: any) {
    // 这里我将下拉框选项的值存在了 editor 实例中,以便可以动态改变选项值
    const displayOptions = editor[this.dataName].data || []
    this.options = [this.defineTitle, ...displayOptions]
    return this.options // 这里返回的就是显示在下拉框选项上的值
  }
  // 菜单是否需要激活(如选中加粗文本,“加粗”菜单会激活),用不到则返回 false
  isActive(editor: IDomEditor): boolean {
    return false
  }
  // 获取菜单执行时的 value ,用不到则返回空 字符串或 false
  getValue(editor: IDomEditor): string | boolean {
    return 'title' // 为了不改变下拉框的标题,永远返回 'title'
  }
  // 菜单是否需要禁用(如选中 H1 ,“引用”菜单被禁用),用不到则返回 false
  isDisabled(editor: IDomEditor): boolean {
    return false
  }
  // 点击菜单时触发的函数
  exec(editor: IDomEditor, value: string | boolean) {
    // 向富文本中插入选中项
    editor.insertText(`${value}`)
  }
}

export default MySelectMenu
editorDemo.vue
<template>
  <div class="editorDemo">
    <div style="border: 1px solid #ccc; width: 800px">
      <Toolbar
        style="border-bottom: 1px solid #ccc"
        :editor="editorRef"
        :defaultConfig="toolbarConfig"
        :mode="mode"
      />
      <Editor
        style="height: 400px; overflow-y: hidden"
        v-model="valueHtml"
        :defaultConfig="editorConfig"
        :mode="mode"
        @onCreated="handleCreated"
      />
    </div>
  </div>

  <a-space wrap style="margin-top: 20px">
    <a-button type="primary" @click="updateSelectOptionData(0)">点我</a-button>
    <a-button type="primary" @click="updateSelectOptionData(1)"
      >点我!</a-button
    >
    <a-button type="primary" @click="updateSelectOptionData(2)"
      >点我啊!</a-button
    >
  </a-space>
</template>

<script>
import "@wangeditor/editor/dist/css/style.css"; // 引入 css
import { onBeforeUnmount, ref, shallowRef, onMounted } from "vue";
import { Editor, Toolbar } from "@wangeditor/editor-for-vue";
import { Boot } from "@wangeditor/editor";
import MySelectMenu from "@/editor/selectTest";

export default {
  components: { Editor, Toolbar },
  setup() {
    // 编辑器实例,必须用 shallowRef
    const editorRef = shallowRef();

    // 内容 HTML
    const valueHtml = ref("");

    // --------注册自定义扩展菜单,因为只有一个,我直接写死了---------------
    const selectOption = ref({
      key: "mySelect1",
      dataName: "selectData",
      data: [
        { value: "北京", text: "北京" },
        { value: "上海", text: "上海" },
        { value: "深圳", text: "深圳" },
      ],
    });
    const menu1Conf = {
      key: selectOption.value.key, // 定义 menu key :要保证唯一、不重复(重要)
      factory() {
        return new MySelectMenu(selectOption.value.dataName);
      },
    };
    Boot.registerMenu(menu1Conf);
    // ----------------------------------------------------------------

    //自定义工具栏的菜单配置
    const toolbarConfig = {
      toolbarKeys: [
        "fontSize",
        "lineHeight",
        "|",
        "bold",
        "italic",
        "underline",
        "color",
        "|",
        "|",
        "justifyLeft",
        "justifyCenter",
        "justifyRight",
        "|",
        "indent",
        "delIndent",
        "mySelect1",
      ],
    };
    const editorConfig = { placeholder: "请输入内容..." };

    // 组件销毁时,也及时销毁编辑器
    onBeforeUnmount(() => {
      const editor = editorRef.value;
      if (editor == null) return;
      editor.destroy();
    });

    const handleCreated = (editor) => {
      editorRef.value = editor; // 记录 editor 实例,重要!
      // 我将下拉框选项的值保存在了 editor实例 身上
      editorRef.value[selectOption.value.dataName] = {
        data: selectOption.value.data,
      };
    };

    const dataTest = [
      [
        { value: "北京", text: "北京" },
        { value: "上海", text: "上海" },
        { value: "深圳", text: "深圳" },
      ],
      [
        { value: "汽车", text: "汽车" },
        { value: "大汽车", text: "大汽车" },
        { value: "超级大汽车", text: "超级大汽车" },
      ],
      [
        { value: "火车", text: "火车" },
        { value: "上海", text: "上海" },
        { value: "飞机", text: "飞机" },
      ],
    ];

    const updateSelectOptionData = (index) => {
      selectOption.value.data = dataTest[index];
      if (editorRef.value == null) return;
      // 主要就是更新 实例 中存的值
      editorRef.value[selectOption.value.dataName] = {
        data: selectOption.value.data,
      };
    };

    return {
      editorRef,
      valueHtml,
      mode: "default", // 或 'simple'
      toolbarConfig,
      editorConfig,
      handleCreated,
      updateSelectOptionData,
    };
  },
};
</script>
<style scoped>
.editorDemo {
  display: flex;
  justify-content: center;
  align-items: center;
}
</style>


 1365
1365


 被折叠的 条评论
为什么被折叠?
被折叠的 条评论
为什么被折叠?
 到【灌水乐园】发言


