


框架链接:
https://github.com/vbenjs/vue-vben-admin
开发文档:
https://doc.vben.pro/
在线体验:
https://www.vben.pro/
克隆地址(任选):
git clone https://gitcode.com/gh_mirrors/vu/vue-vben-admin.git
git clone https://github.com/vbenjs/vue-vben-admin.git
git clone https://gitee.com/annsion/vue-vben-admin.git
参考学习视频资料:
【99.1番外篇·Vben5·路由初探】https://www.bilibili.com/video/BV1yn1CY7Ena?vd_source=7eb65dacd72aa848b373e76c5f6c572a
安装pnpm依赖进行管理
进入到文件所在目录下在控制台输入以下命令
pnpm install安装完依赖
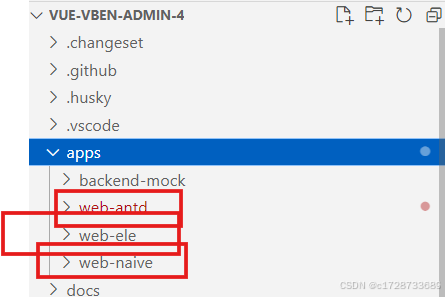
安装完可以查看项目结构

这里的三个
支持分别 Ant Design Vue、Element Plus、Naive的主流 UI 库的项目
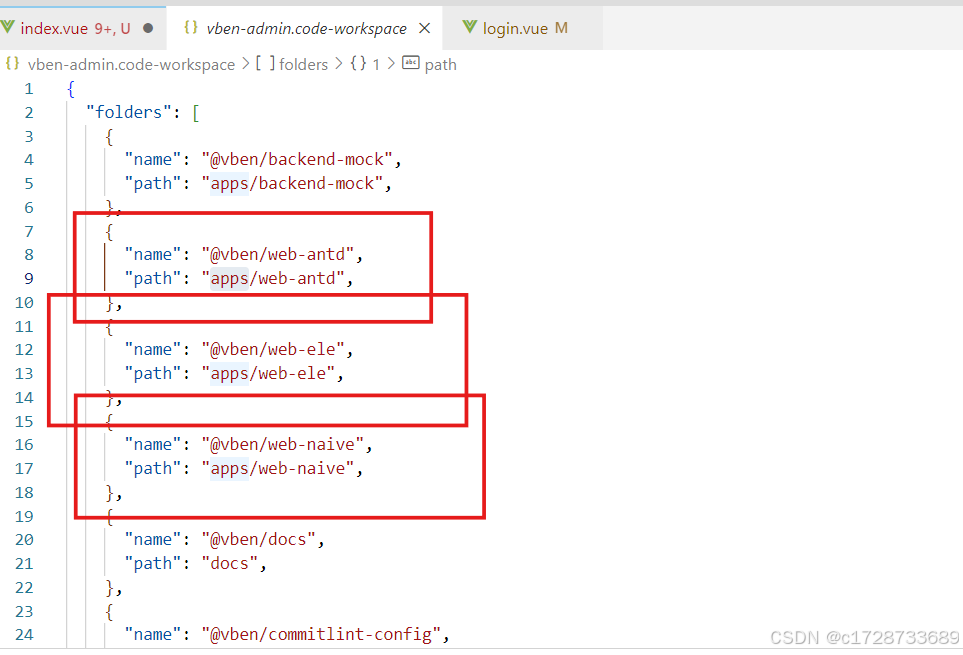
apps目录下的web-antd、web-ele、web-naive分别指向使用三个不同 UI 库的框架
启动项目
pnpm dev选择启动的框架,一直enter启动的就是web-antd的框架 可以通过上下调整需要启动的框架
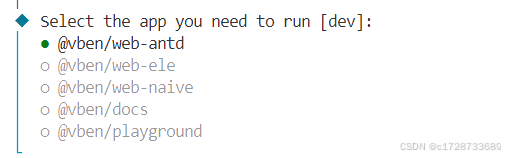
启动完成之后,开始学习我这里以web-antd的框架为例,各位按照各自的喜好启动喜欢的框架即可。
下面来探索路由:
每个的路由分别都在三个组件库框架的 src/router/routes/modules下
modules内的 .ts 文件会可视为一个路由模块。
我在modules下面添加了sys.ts
下面是是sys.ts的内容:
import type { RouteRecordRaw } from 'vue-router';

import { BasicLayout } from '#/layouts';

const routes: RouteRecordRaw[] = [
  {
    component: BasicLayout,
    meta: {
      icon: 'ant-design:setting-outlined',
      keepAlive: true,
      order: 1000,
      title: '系统设置',
    },
    name: 'sys:manager',
    path: '/sys/manager',
    children: [
      {
        meta: {
          icon: 'ant-design:user-outlined',
          title: '用户管理',
        },
        name: 'sys:user:index',
        path: '/sys/user/index',
        component: () => import('#/views/sys/user/index.vue'),
      },
      {
        meta: {
          icon: 'ant-design:team-outlined',
          title: '角色管理',
        },
        name: 'sys:role:index',
        path: '/sys/role/index',
        component: () => import('#/views/sys/role/index.vue'),
      },
    ],
  },
];

export default routes;
在src/router/routes/views下创建页面文件夹sys
在sys下创建role 和user两个文件夹
role下创建index.vue
下面是role下 index.vue的内容
<script setup lang="ts">
import { Page } from '@vben/common-ui';
</script>

<template>
  <Page>角色管理</Page>
</template>

<style lang="less" scoped></style>
user下创建index.vue
下面是user下 index.vue的内容
<script setup lang="ts">
import { Page } from '@vben/common-ui';
</script>

<template>
  <Page>用户管理</Page>
</template>

<style lang="less" scoped>

</style>
练习:
在modules创建test.ts,并添加两个测试页面test1,test2
答案
test.ts:
import type { RouteRecordRaw } from 'vue-router';

import { BasicLayout } from '#/layouts';

const routes: RouteRecordRaw[] = [
  {
    component: BasicLayout,
    meta: {
      icon: 'ion:grid-outline',
      keepAlive: true,
      order: 1000,
      title: '内容测试',
    },
    name: 'test:usetest',
    path: '/test/usetest',
    children: [
      {
        meta: {
          title: '一号测试',
        },
        name: 'test:test1:index',
        path: '/test/test1/index',
        component: () => import('#/views/test/test1/index.vue'),
      },
      {
        meta: {
          title: '二号测试',
        },
        name: 'test:test2:index',
        path: '/test/test2/index',
        component: () => import('#/views/test/test2/index.vue'),
      },
    ],
  },
];

export default routes;
在view下面建两个文件夹test1 test2
test1/index.vue:
<script setup lang="ts">
import { Page } from '@vben/common-ui';
</script>

<template>
  <Page>test1</Page>
</template>

<style lang="less" scoped></style>
test2/index.vue:
<script setup lang="ts">
import { Page } from '@vben/common-ui';
</script>

<template>
  <Page>test2</Page>
</template>

<style lang="less" scoped></style>
tips:后续想要在页面中添加内容,请使用相关组件库的组件,将内容添加到page中,用page包裹起来,否则会出现不同页面切换时页面内容不显示的问题,需要频繁刷新。


 353
353

 被折叠的 条评论
为什么被折叠?
被折叠的 条评论
为什么被折叠?
 到【灌水乐园】发言


